When you click on links to various merchants on this site and make a purchase, this can result in this site earning a commission. Affiliate programs and affiliations include, but are not limited to, the eBay Partner Network.
I saw a few threads on folks wondering if they could upgrade the 4.2” screen to the 8” touch MFT, but they all didn’t have follow up answers or said it couldn’t be done. I saw a thread in the 2015+ section about someone who did it on their 15’, and I’d also been following the thread on the Mustang6g forum where people upgraded their 15+ Mustangs, so I figured it could be done.
Pretty much all credit for ideas and research goes to the guys on the Mustang6g forum – they are really brilliant and deserve to be credited for just how much they know about these systems. I’m a geeky/techy guy, and I know how much work it takes to figure some of this stuff out from the ground up.
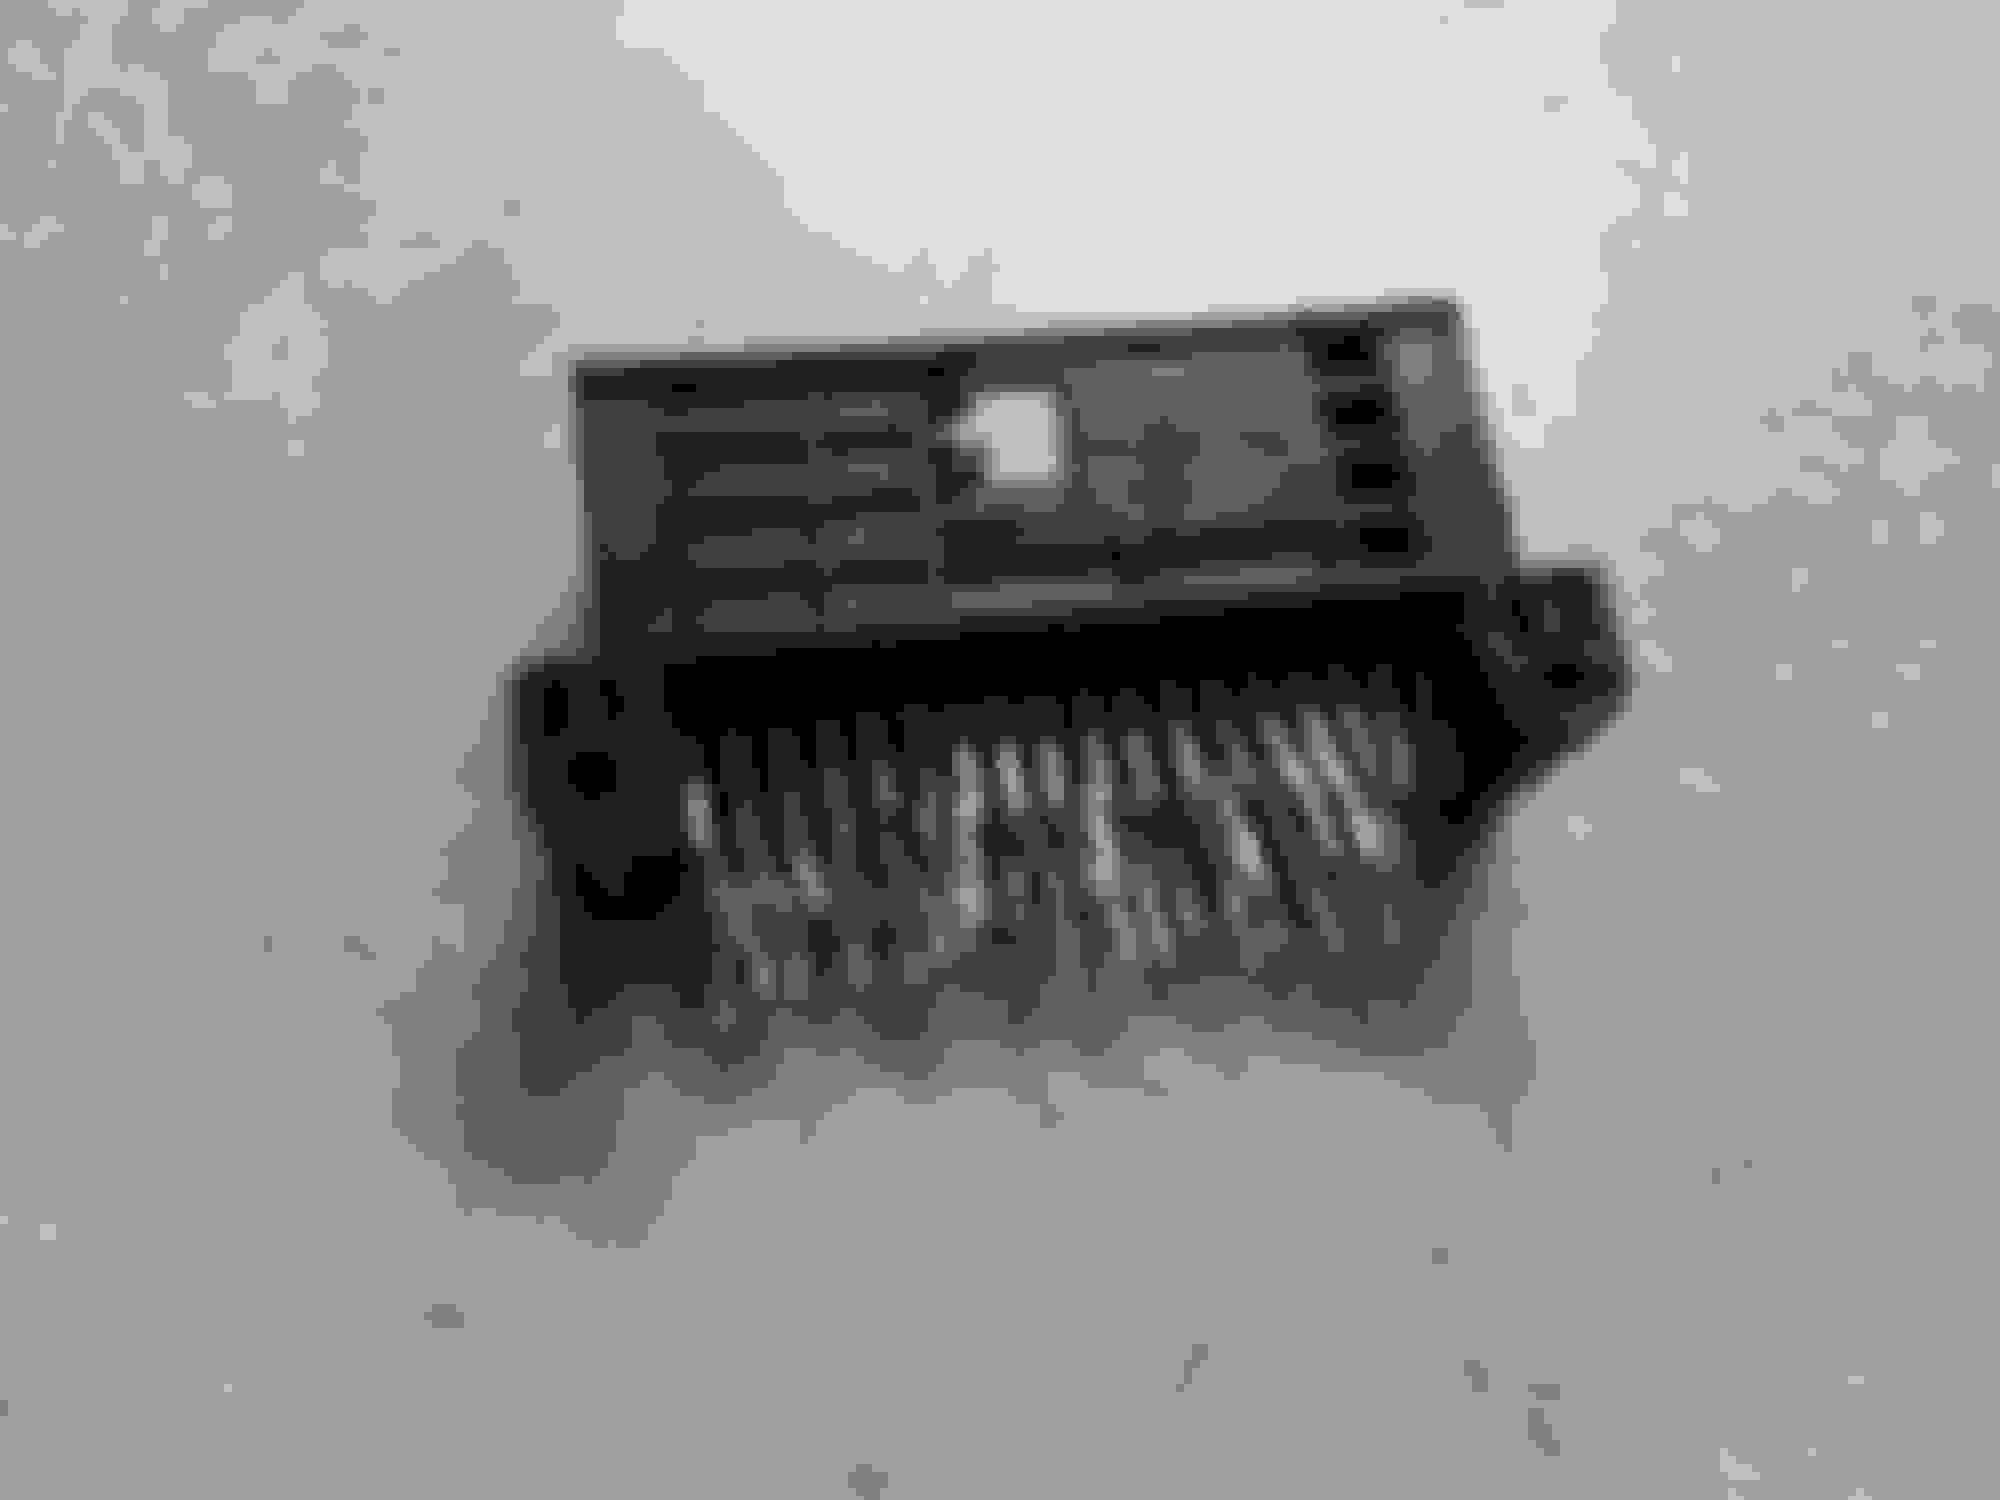
I took oemradio’s idea from the Mustang6g forum and decided to make my own “jumper harness” so that I wouldn’t have to mess with my OEM APIM plug, in case I broke anything (I am prone to being clumsy). To do this, I ordered a Sync Module/APIM off of eBay that had the connector plug still in it, like this one:
What I did, was take the casing off and use wire snips to remove the connector from the board. For this step, it really doesn’t matter what vehicle the APIM came out of, because you’re just after the connectors. Mine was out of a 2013 Focus.
I then figured out what pins from my existing connector/harness needed to be brought over, and removed the rest from the connector that was attached to the board. I soldered wires to the pins I kept and put them in the correct location to match up with what was on the existing connector. (eg., if pin 4 had a wire in it on the existing APIM male connector, I populated pin 4 on the female connector.)
I then ran the wire to the new location on the male plug, crimped on molex connectors (link at the end), and put it in the necessary location for the MFT APIM.
I used about a 16-18 inches of wire for my jumper harness. It was just enough to plug in the existing APIM plug underneath the dash tray, and then run the connector down to behind the radio. I would recommend using a little bit more to give yourself some slack. There is an opening in the left side of the dash behind the radio that gives you enough room to get the connector in and routed up to the existing plug.
This is a picture of my semi-completed harness. I tidied it up and taped it cleaner for final install, but that gives you an idea of what the process is. I also added the media hub (pictured), and used quick connectors on my harness for the wires going to that, in case I ever needed to remove those wires, but keep the main harness intact. Looking back now, I don’t think I would ever need to do that, and probably should have just wired them straight in.
Here are the pin changes and taps that you need to do for the conversion. Your plugs may differ depending on year/model, so I would recommend obtaining a wiring diagram for your year/model so that you can double check your connections. Your existing APIM connector may have more or less wires populated, depending on if you have XM, a backup camera, etc. Again, I would recommend a wiring diagram so that you can verify the connections.
Last edited by nerdh3rd; Oct 10, 2016 at 08:17 PM.
This should get you up and running with the 8" MFT (and media hub, if you choose). You'll need to use ForScan to enable/disable features such as Nav. The APIM I used was out of a 2015 F150, and I was able to find the AsBuilt data from a 2013 Lariat, and applied that to the APIM and ACM - that enabled everything, plus the HVAC controls and heated/cooled seat function, which I don't have. I found the AsBuilt bits to disable those two features, and now have a fully functional MFT where everything works.
Parts list:
Sync Module/Sync 2 APIM (to gather connectors for the jumper harness)
8" APIM
8" Display
Media Hub & harness pigtail
Radio bezel with 8" opening
For the molex pins that are used to populate the APIM connector, I was able to track down where to find them from an OEM supplier instead of paying Ford's outrageous prices for the "repair kit" that includes them. http://www.mouser.com/Search/Product...y571-1924955-4
I also found a cheaper USB cable for the connection from the media hub to the APIM, since the cable that was on my Sync 2 Module/APIM has different connectors. The ends on this cable are a little big, but I was able to trim them down and they fit nice and snug:
http://www.ebay.com/itm/390765439709?_trksid=p2057872.m2749.l2649&ssPageName=STRK%3AMEBIDX%3AITThis cable is also significantly cheaper than the Ford cables (although it doesn't have the OEM end, if you really wanted that)
The hardest part for me was finding a bezel that had the 8" opening, but not dual climate controls, since I have an XLT. The new bezel also has the button for hill descent, which my old one didn't.
I can post the AsBuilt data that I ended up using if anyone is interested. This may vary depending on what model truck you have, but there shouldn't be too many variations.
Last edited by nerdh3rd; Oct 10, 2016 at 08:10 PM.
Thanks for the write up! Is the media module the connector that went into the old 4" screen?
Glad you brought that up! I forgot to mention that part. The connector from the 4" display is not used for the swap, unless you have a backup camera that displays in your 4" screen. On my truck, my rear view mirror shows the camera, so I simply tucked the 4" display connector in the dash so it was out of the way.
If you do have the backup cam showing on the smaller display, you could tap into pins 6 and 12 on the 4" display connector, and add those to 14/15 on the APIM connector to have it show on the 8" display. I believe there is also some AsBuilt data that needs to be modified to activate that feature on the 8" display.
This is the media module/hub that I referred to in my instructions. I was able to find one on eBay that still had the pigtail harness in it, so I was able to solder wires and connect it to the APIM fairly easily. It fit directly into the opening where my old media hub was located below the stereo bezel. This part can be from any Ford that uses the hub (Focus, etc.); they all use the same harness.
Last edited by nerdh3rd; Oct 13, 2016 at 03:47 PM.
Trying to figure out which one I have .. ultimately I am trying to add a back up camera to my system and I need to know which one do I have to have to do that I have the sync system touchscreen displace
Trying to figure out which one I have .. ultimately I am trying to add a back up camera to my system and I need to know which one do I have to have to do that I have the sync system touchscreen displace
Could you clarify what you're trying to do? You have the 8" touchscreen and you're trying to add a backup camera? Or you have the basic Sync system and you want to upgrade to the 8" MFT and have the backup cam displayed?