
Leather floor shifter wrap

Thread Starter
Senior Member
iTrader: (1)
Joined: Feb 2012
Posts: 454
Likes: 23
From: Bullville, New York
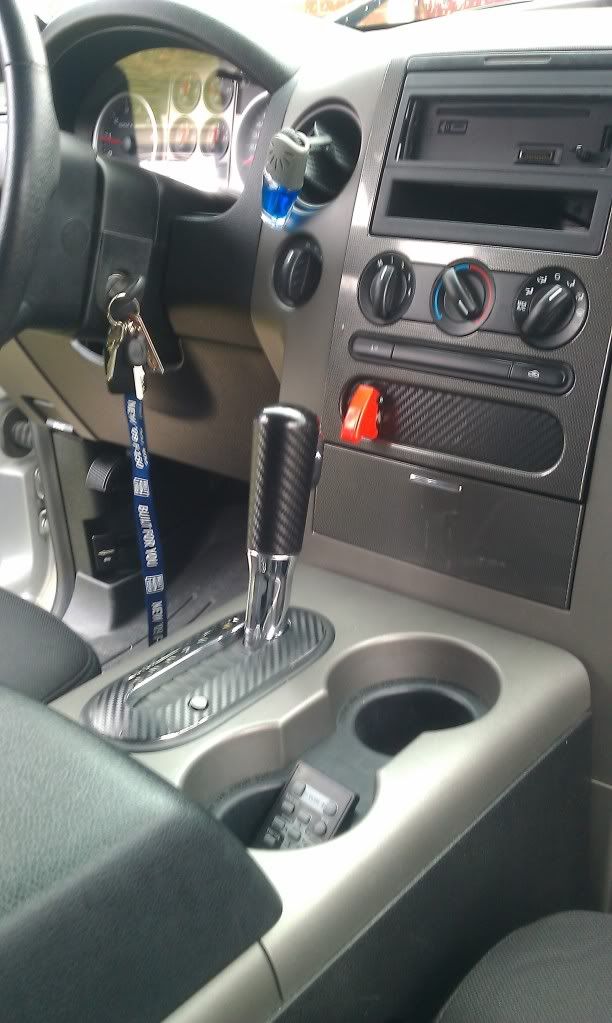
Bear in mind this is my first try working with leather, but here is my prototype for a leather floor shifter wrap. There was a guy a while back who made these amongst other leather accessories, but he's since fallen of the map. I was in contact with him a little over a year ago, but he never got back to me for the final ordering stage. And since then his Ebay store has been empty. I've wanted one of these since even before I installed a flow through console and floor shifter in my truck, and was pretty bummed when he was no longer available. I put a lot of thought into this and yesterday I finally bought all the supplies and a few tools to make it happen. I'm super happy with the way it turned out, although it's not perfect and that will be taken care of by the time I make #2. The imperfections are the holes for the stiching are by no means straight and aren't close enough to the seam, but I did them freehand and today I fashioned a jig for this....problem solved. The top of the wrap curls up a bit towards the stiching, and also today I've re-drawn my template.....no more curl. Please let me know what you think!


Thread Starter
Senior Member
iTrader: (1)
Joined: Feb 2012
Posts: 454
Likes: 23
From: Bullville, New York
This one took me a total of about 3 hours. Most of the time was spent making the template, which is curved due to the slow taper of the shifter. Waiting on the seam glue to dry really can't be rushed, just like cutting the hole for the push button.....a nice clean cut is a must! I'll guess that #2 should take me an hour or so now that I have the templates for the outline and the hole spacing all done and ready to go.
Thread Starter
Senior Member
iTrader: (1)
Joined: Feb 2012
Posts: 454
Likes: 23
From: Bullville, New York

Trending Topics
Thread Starter
Senior Member
iTrader: (1)
Joined: Feb 2012
Posts: 454
Likes: 23
From: Bullville, New York
Thanks, and I definitely appreciate the criticism. The stitching is out of whack for sure, all because I used my leather punch freehand. I now have a template made up that my punch will ride in so the holes and the stitching will be straight and uniform And the holes needed to be closer to the seam so less of the stitching is visable, which it now will be. I'll be making my second wrap real soon here....this one should have all of the bugs worked out.
Built FORD Tough!
Joined: Jul 2012
Posts: 457
Likes: 21
From: Garden City, Michigan
Thanks man. I need to paint the chrome on the handle black like the cap, but that has to wait until spring. only reason i did the cap when i did was because it fell off so i painted it and gorilla glued it back on lol stuff works great