

Camera Source Backup Camera Kit Install

Thread Starter
Don't Touch the Trim
Joined: Feb 2013
Posts: 253
Likes: 29
From: Covington Wa
Hope this helps other members.
Took about five hours total, but it can be done faster if you're less **** than I am.
Got my backup camera kit. First thing I did was ignore the instructions. OK, not all of them, but I started with the tailgate and worked my way forward.
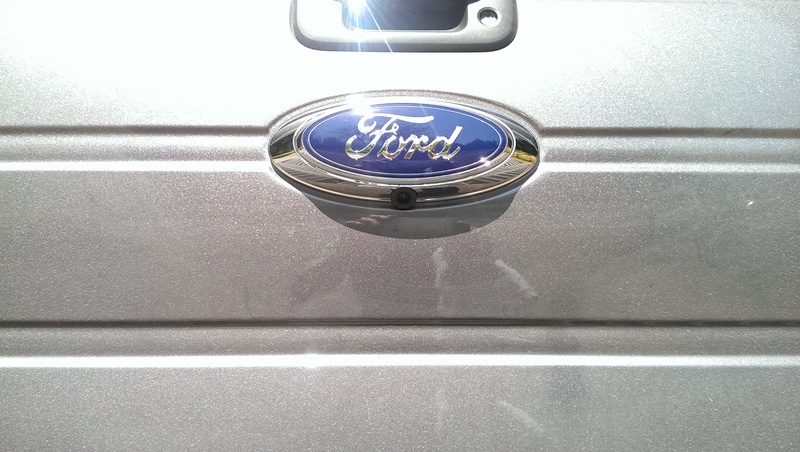
Removing the emblem was easy, but I had to use some heavier line I had laying around and some sticks to make it easy to pull.
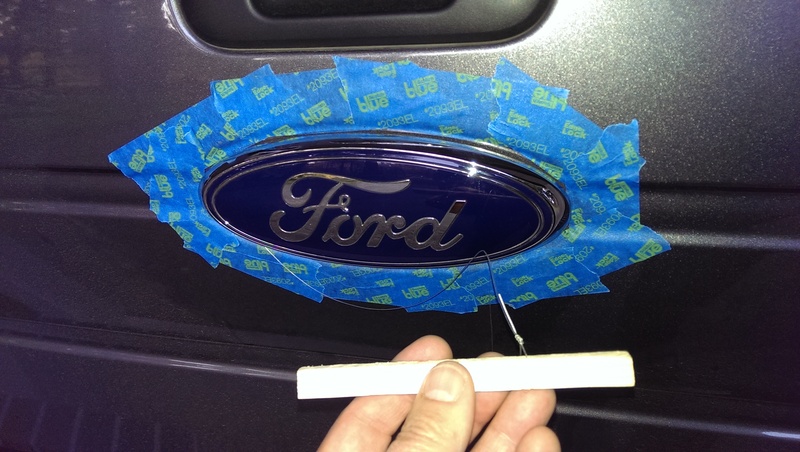
You can�t just start at one end and work your way across. The locating pins keep that from happening, you need to work your way round the emblem.

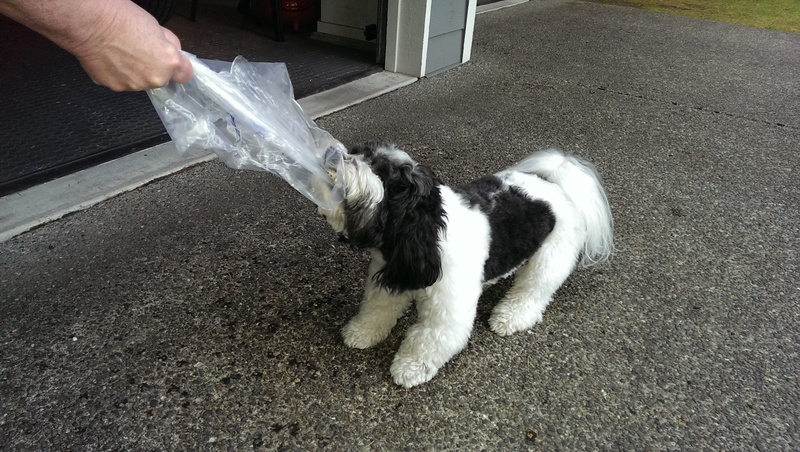
Then I had to fight the dog
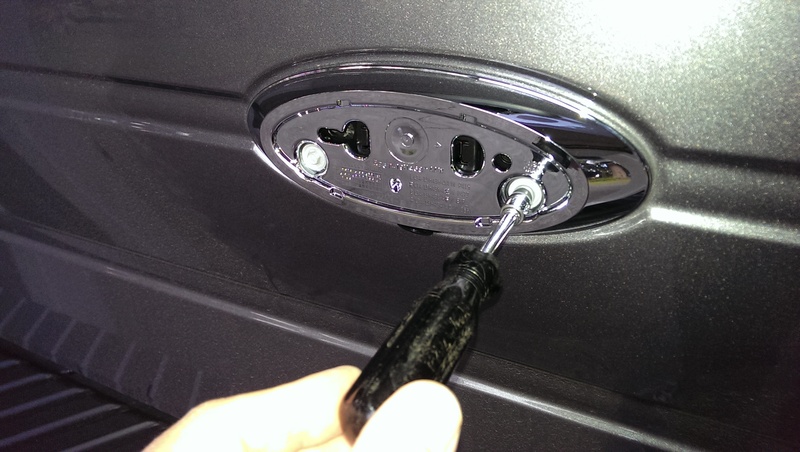
The instructions say to be careful bolting the camera plate on. I used the two finger torque wrench.
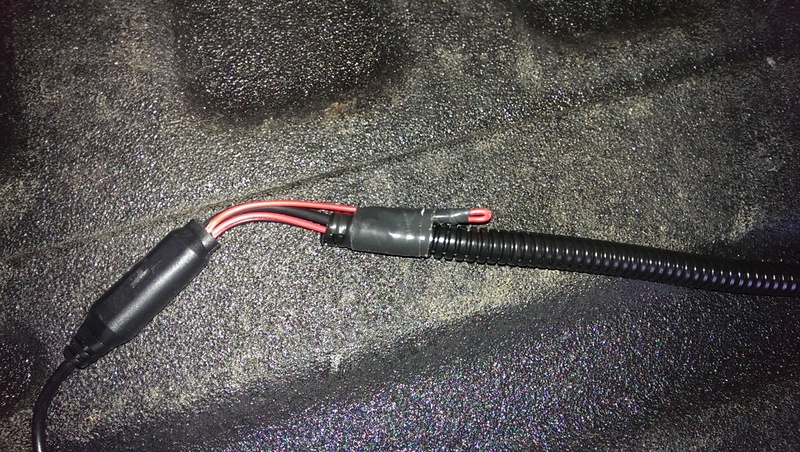
The instructions weren�t real specific about routing the wire so I fished it to the opening on the driver side of the tailgate through the hole closed to the existing wire bundle.
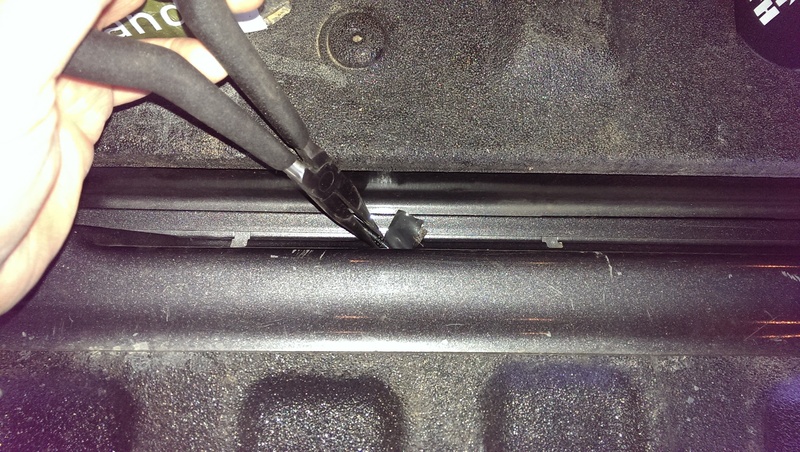
Since the red wire isn�t used, I clipped it and secured it with electrical tape.
Time for refreshments.

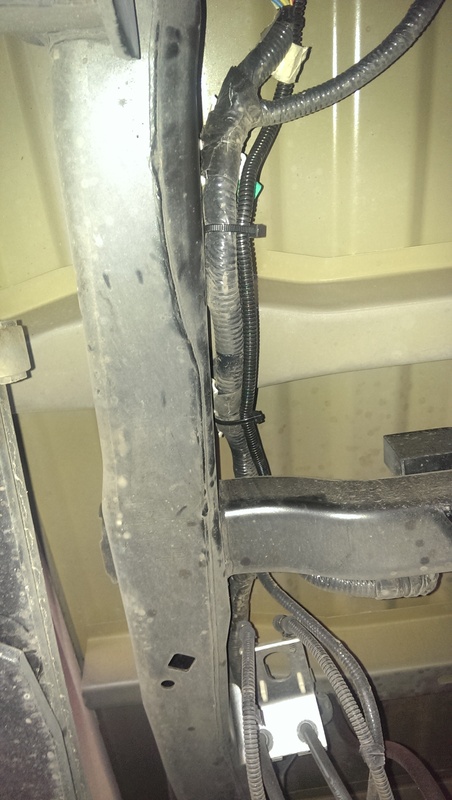
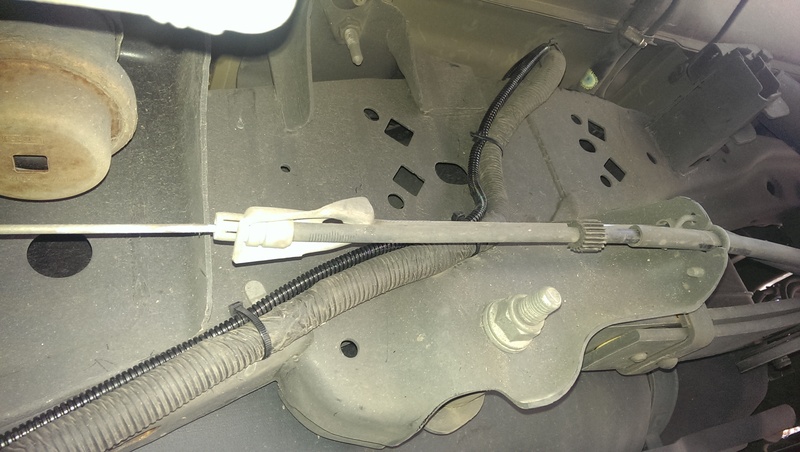
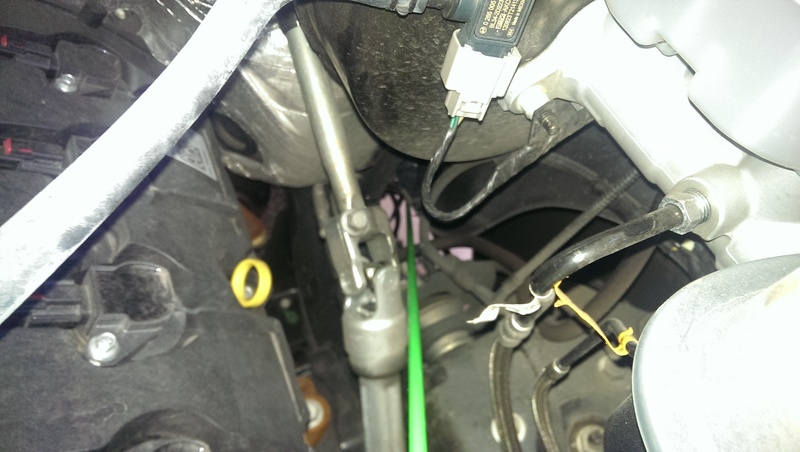
Then it was a matter of crawling under the truck and routing the cable to the firewall. I followed the existing wire bundle and used a zip tie every place it was secured to the frame. You should buy more zip ties if you use as many as I did.
Took about five hours total, but it can be done faster if you're less **** than I am.
Got my backup camera kit. First thing I did was ignore the instructions. OK, not all of them, but I started with the tailgate and worked my way forward.
Removing the emblem was easy, but I had to use some heavier line I had laying around and some sticks to make it easy to pull.
You can�t just start at one end and work your way across. The locating pins keep that from happening, you need to work your way round the emblem.
Then I had to fight the dog
The instructions say to be careful bolting the camera plate on. I used the two finger torque wrench.
The instructions weren�t real specific about routing the wire so I fished it to the opening on the driver side of the tailgate through the hole closed to the existing wire bundle.
Since the red wire isn�t used, I clipped it and secured it with electrical tape.
Time for refreshments.
Then it was a matter of crawling under the truck and routing the cable to the firewall. I followed the existing wire bundle and used a zip tie every place it was secured to the frame. You should buy more zip ties if you use as many as I did.
Thread Starter
Don't Touch the Trim
Joined: Feb 2013
Posts: 253
Likes: 29
From: Covington Wa
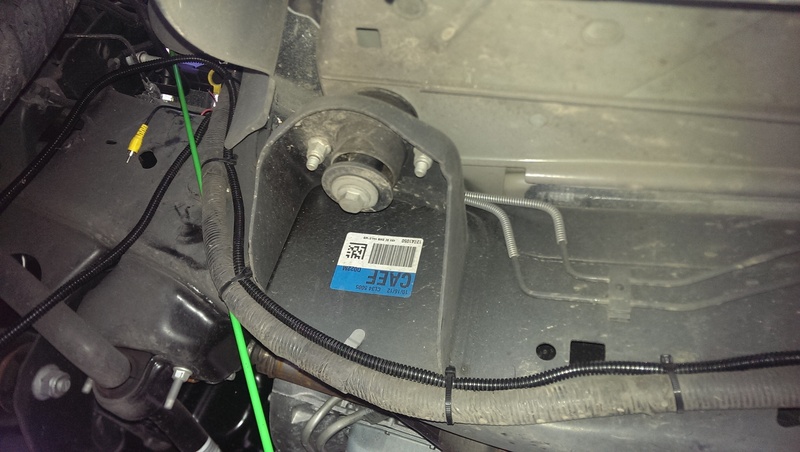
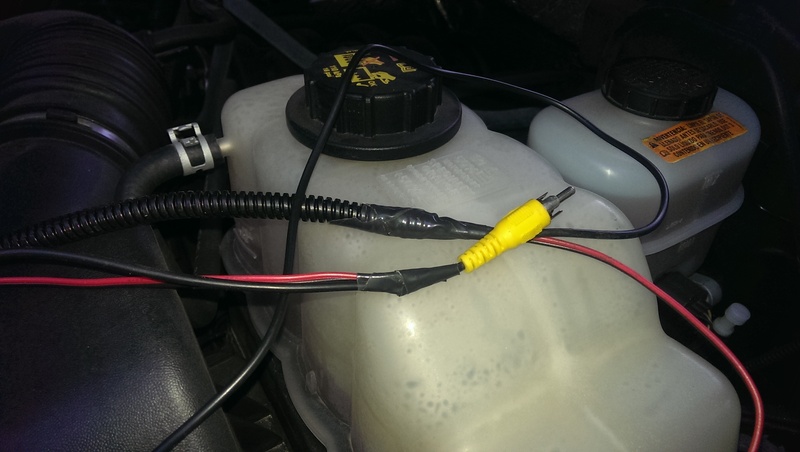
I used a fish stick to pull it up into the engine compartment.
Then taped the wires together to make it easy to slide them through the grommet.
I installed the full Kicker upgrade kit earlier and found it uses the same hole in the firewall grommet that the backup camera uses. There wasn�t enough room for all the cables. If you're considering the Kicker upgrade kit, it would save lots of time to do both at the same time.
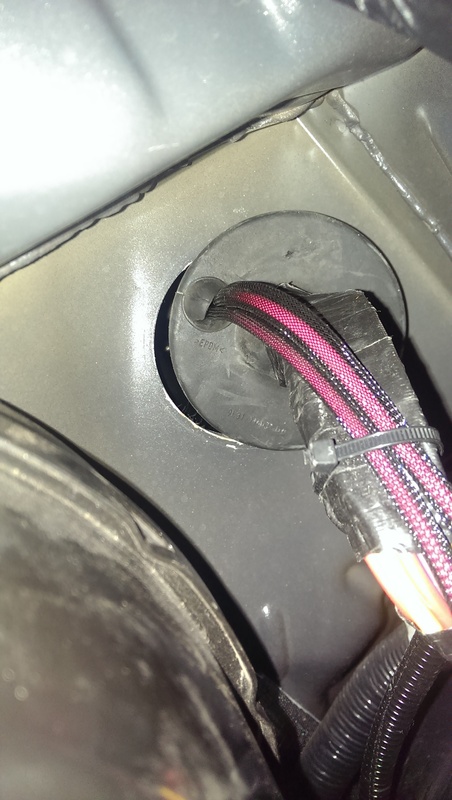
By slicing up from the existing hole and removing the plastic sheath from the camera cable, I was able to fit everything through the grommet hole.
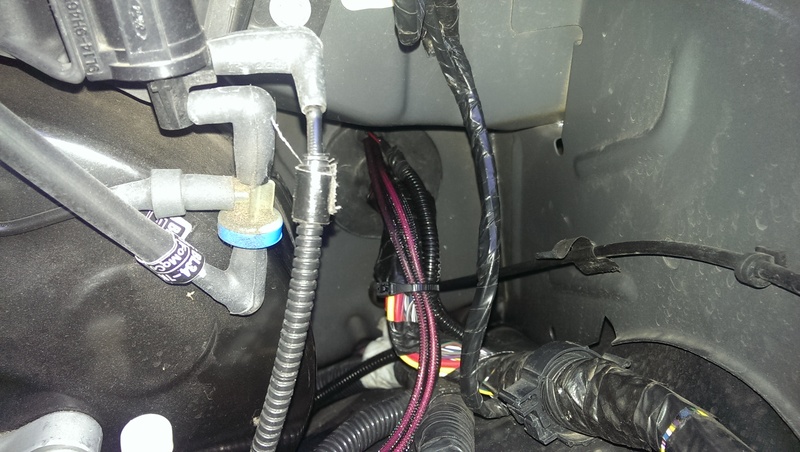
From the inside you can see the amp from the Kicker kit and the sheathless camera wires.
Now that the camera cable was mostly routed, time for refreshments.
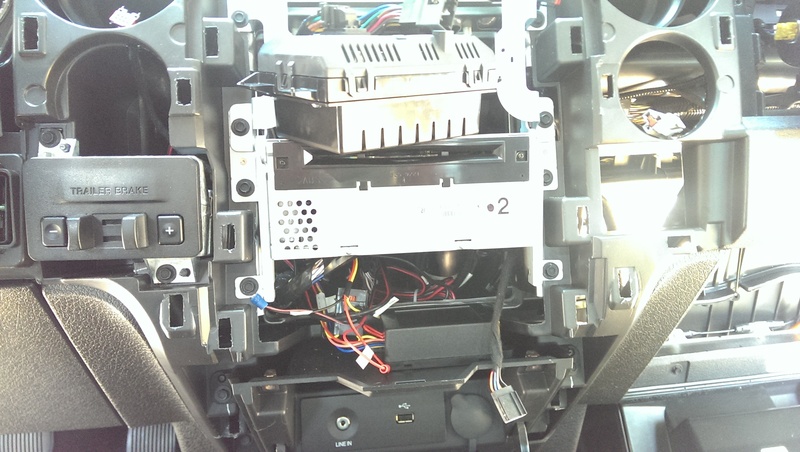
Now it�s time to remove the dash panels. This was easy since I had to do all of this when I did the stereo upgrade. The instructions are good, just follow them.

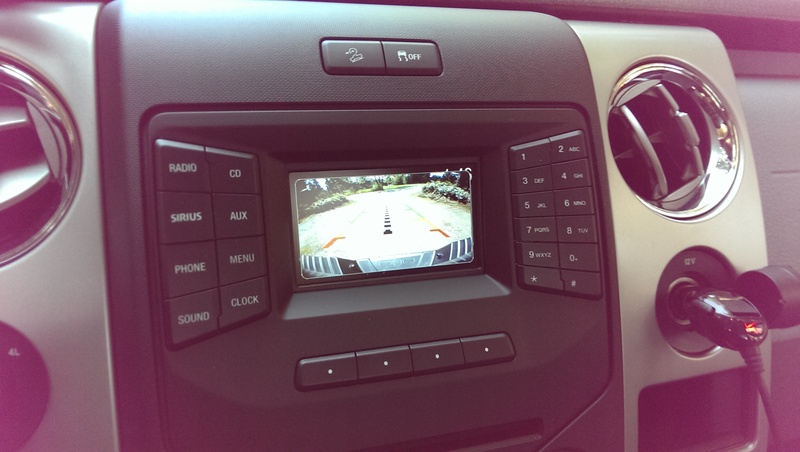
The moment of truth. Since I did the cable first, I took a chance that the display was compatible and it was.
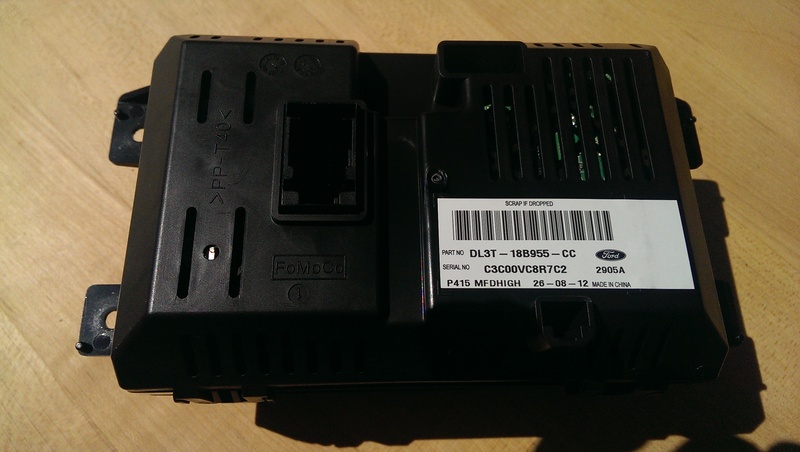
The board in the upgrade module had come unglued and was rattling around in the housing. A little JB Weld and 15 minutes fixed that.

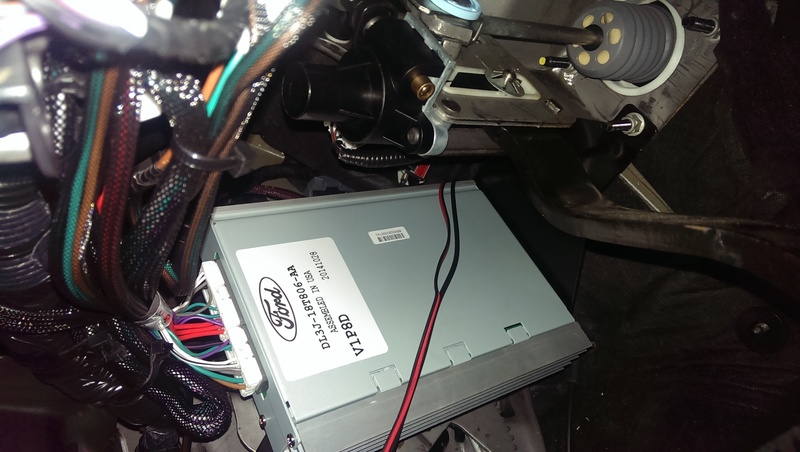
You�re on your own when it comes to routing the wires and locating the camera module. I used plenty of zip ties and tried a couple of location before I JB Welded the module in the opening above the line in/usb port. Ground wires attached to the metal bracket that was holding the cd player.
Then taped the wires together to make it easy to slide them through the grommet.
I installed the full Kicker upgrade kit earlier and found it uses the same hole in the firewall grommet that the backup camera uses. There wasn�t enough room for all the cables. If you're considering the Kicker upgrade kit, it would save lots of time to do both at the same time.
By slicing up from the existing hole and removing the plastic sheath from the camera cable, I was able to fit everything through the grommet hole.
From the inside you can see the amp from the Kicker kit and the sheathless camera wires.
Now that the camera cable was mostly routed, time for refreshments.
Now it�s time to remove the dash panels. This was easy since I had to do all of this when I did the stereo upgrade. The instructions are good, just follow them.
The moment of truth. Since I did the cable first, I took a chance that the display was compatible and it was.
The board in the upgrade module had come unglued and was rattling around in the housing. A little JB Weld and 15 minutes fixed that.
You�re on your own when it comes to routing the wires and locating the camera module. I used plenty of zip ties and tried a couple of location before I JB Welded the module in the opening above the line in/usb port. Ground wires attached to the metal bracket that was holding the cd player.
Thread Starter
Don't Touch the Trim
Joined: Feb 2013
Posts: 253
Likes: 29
From: Covington Wa
Crossed my fingers and plugged the display into the vehicle harness for the auto flash. I waited about three minutes just in case. Started the truck, put it in reverse and ITS ALIVE!!!
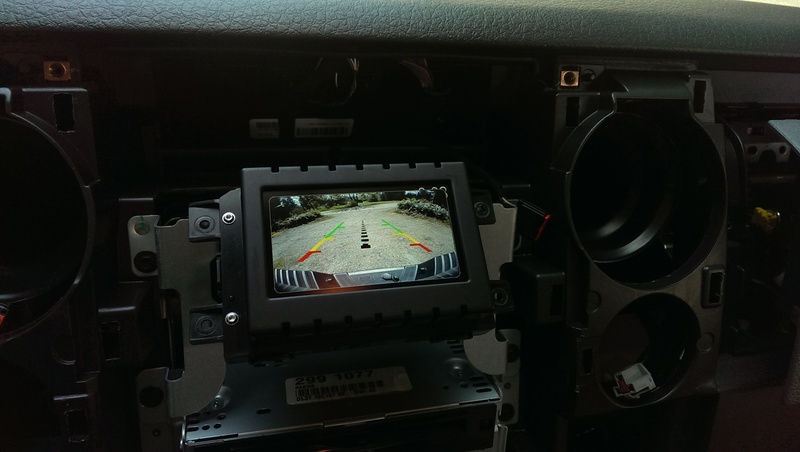
Here�s what the camera looks like all finished.
And the display.
You guessed it, refreshment time.

Here�s what the camera looks like all finished.
And the display.
You guessed it, refreshment time.


Senior Member
Joined: Jan 2014
Posts: 214
Likes: 30
From: Santa Fe, NM
Nice work! I am very interested in this. Is there a specific kit to buy? Also, I see you have 2013 xlt. Is that monitor different from mine? mine doesn't have the downhill descent like yours does.

Senior Member
Joined: Aug 2011
Posts: 599
Likes: 92
From: Indy
Good camera kit mine been on for several months no big issues. Can fog up and rain makes it hard to see but both those are temporary issues.
I don't have dash screen so use an eBay cheap LCD.
Enjoy.
I don't have dash screen so use an eBay cheap LCD.
Enjoy.
Thread Starter
Don't Touch the Trim
Joined: Feb 2013
Posts: 253
Likes: 29
From: Covington Wa
See this thread for purchase info. Use the coupon code F150Forum to save $30.
Or this link. https://camera-source.com/automotive...display-s.html
The hill descent control is part of the offroad package, shouldn't affect whether or not this kit works.
Or this link. https://camera-source.com/automotive...display-s.html
The hill descent control is part of the offroad package, shouldn't affect whether or not this kit works.


