When you click on links to various merchants on this site and make a purchase, this can result in this site earning a commission. Affiliate programs and affiliations include, but are not limited to, the eBay Partner Network.
So I've been getting the p0430 code since I lost a head gasket, I replaced the o2 sensors first but stock cat on drivers side is shot. CVF has a great black Friday deal on the catted downtubes so I went for it. Also bought their intercooler .
In addition I ordered The Faction Fab Turbo adapters from Stage 3 motorsports as I couldn't find out if CVF made any. Tried to call them several times over the last month with a few pre-purchase tech questions. FYI don't bother they don't answer or return calls.
They only do e-mail it seems. Found no reviews whatsoever so gonna do a review as I go along
Hoping for a couple of things with this upgrade:
1. No Check engine lights
2. Not overly much louder
3. More performance
Parts arrived yesterday at work. Packaged well, survived UPS
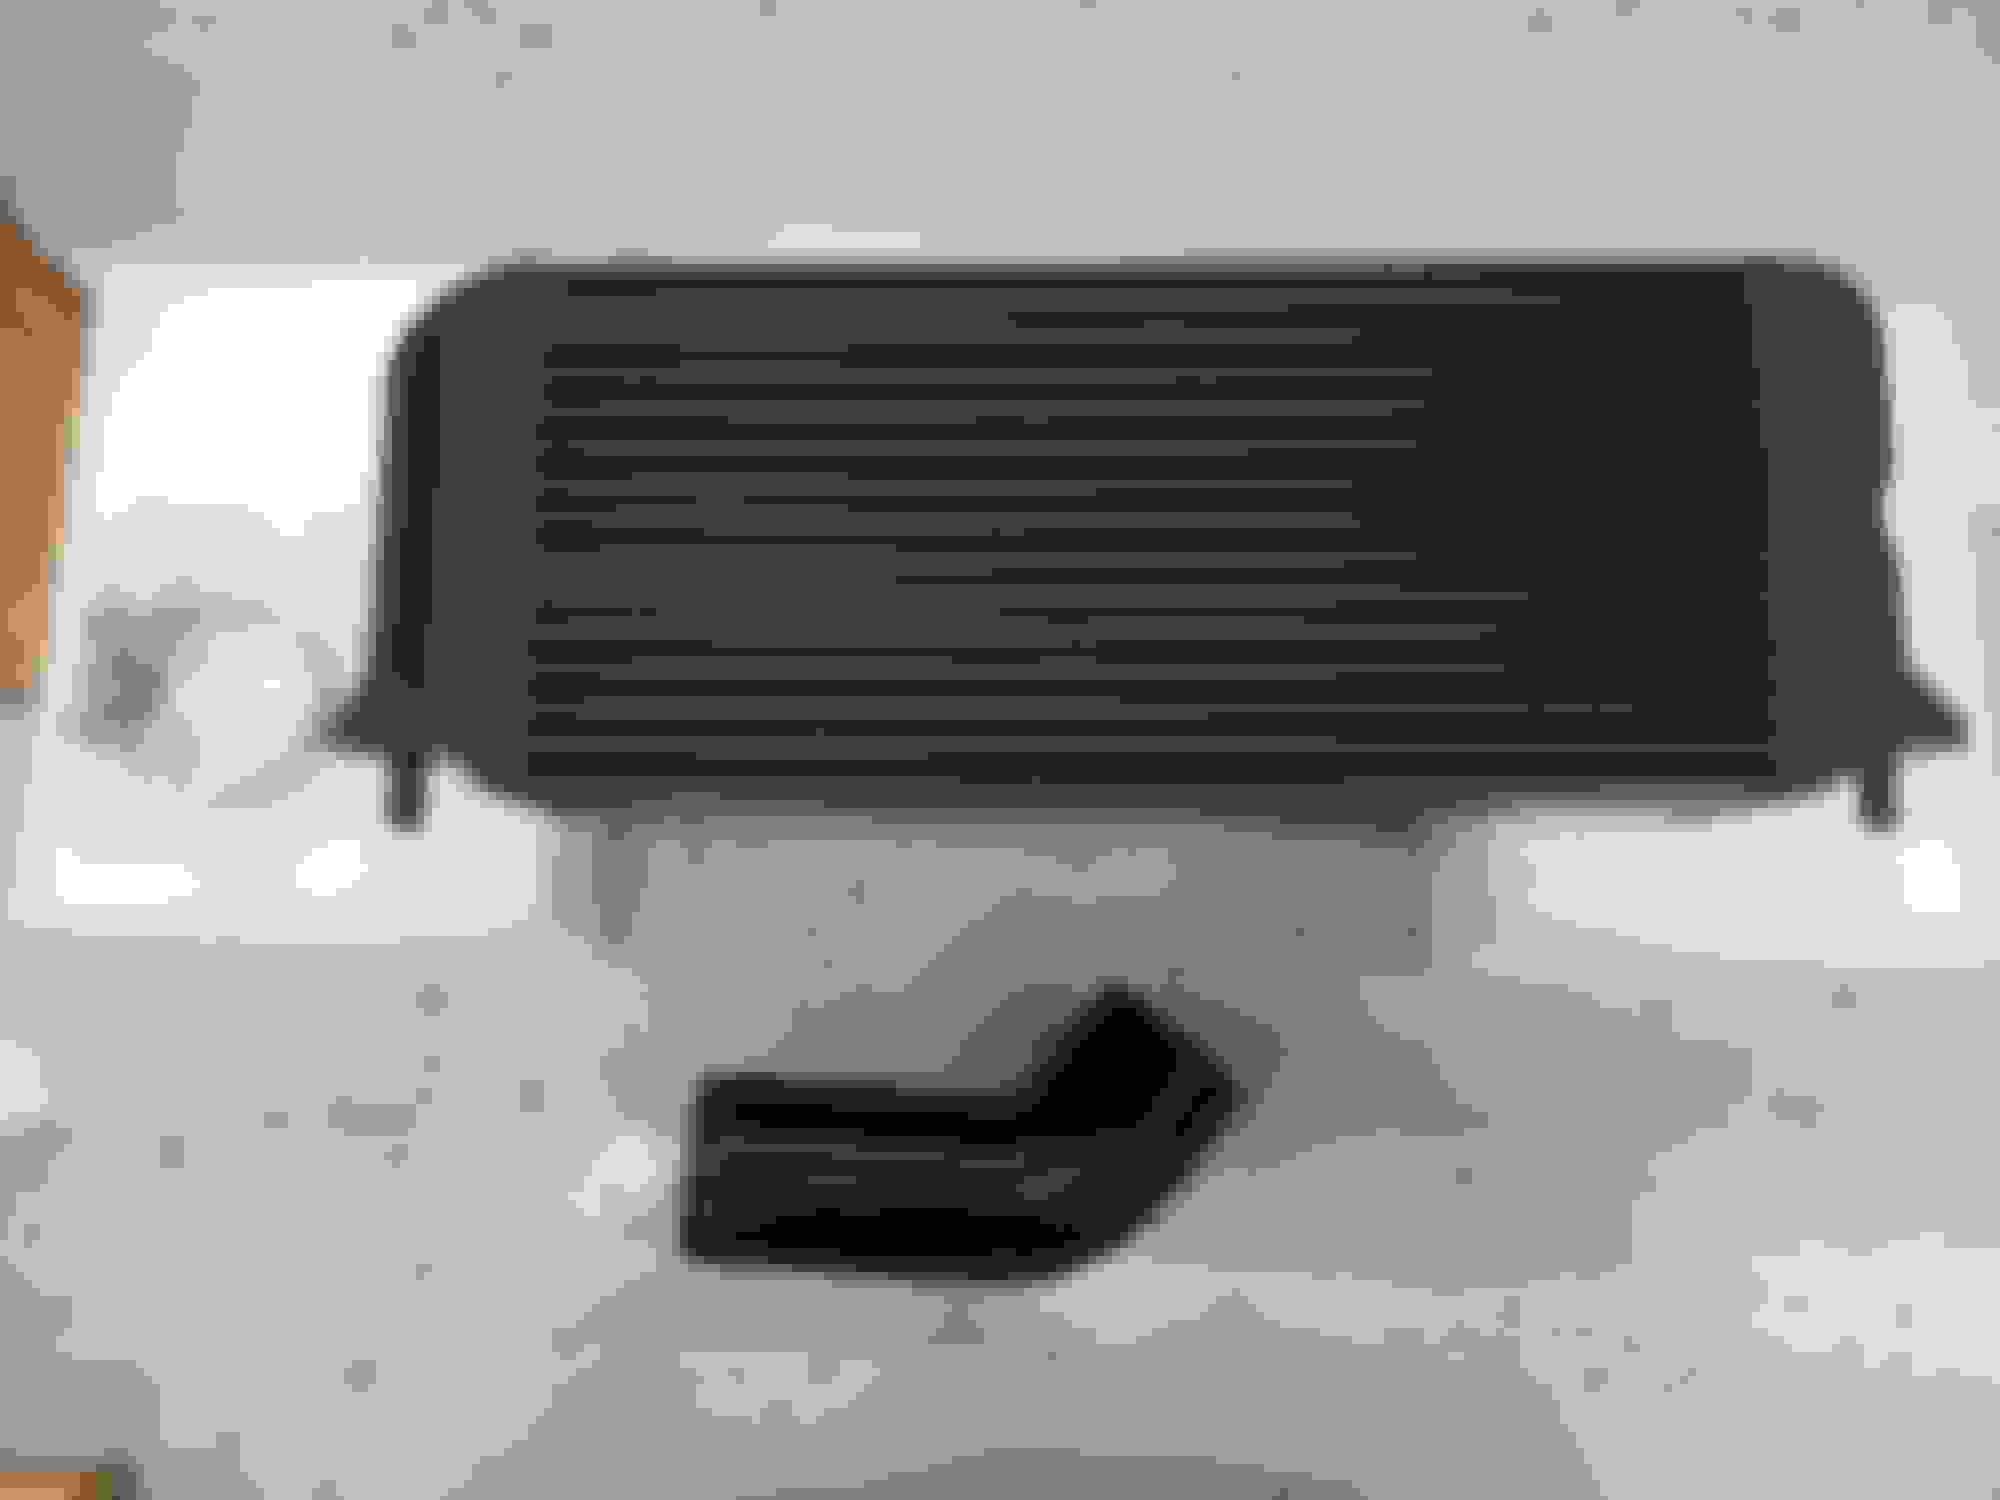
Intercooler appears Real High Quality. just 1 little paint chip, But it's on the inside so it's a non issue
No directions, But Intercooler is an easy swap
The downtubes also appear to be high quality, Also has real nice clamps Shop helper with what's in the box
Parts unwrapped and assembled as my best guess, Again no instructions whatsoever, should be reasonably easy to figure it out
400cel cats so should be no check engine lights.
Nice emblem on crossover
Turbo Adapters
Gonna do downtube install first, hopefully Saturday, then intercooler later Will update post with thoughts
Curious to see how you like the downpipe and impact on your exhaust note. I am on the fence about this one myself, especially with the great Black Friday deals out there right now.
From the turbo adapters I'm guessing this is on a 3.5? I had stainless works on my old 3.5 and if you leave the factory cat back on I think you'll be happy with the sound.
From the turbo adapters I'm guessing this is on a 3.5? I had stainless works on my old 3.5 and if you leave the factory cat back on I think you'll be happy with the sound.
I already have a MBRP catback with a resonator. Happy with the sound now and no drone. However, I had a �13 w/ 3.5 EB that had high flow cats and a Solo catback. It had horrible drone and looking to avoid that this time around.
Interesting that you don't get a CEL. I've also got a set of 400 high flows and still had to put on a set of extenders to get the CEL to go away
I did not get them on this weekend, Had to work. I was told Factory cats are only supposed to be 800 cell and it was 200 cell that caused CEL's, But Since I don't have them on yet I can't answer that question. I am getting CEL's now with factory pipes But I believe My drivers side cat is shot due to being flooded with coolant from a failed headgasket . What I said was I was hoping for no CEL's as well as not much louder. I do plan on wrapping them with DEI Non fiberglass Titanium exhaust wrap ( Which I have my aftermarket exhaust wrapped with up to and including the muffler) I have also replaced the MBRP muffler with one of the flow master laminar mufflers (much quieter).I was hoping not to see this again Hoping this is one of the last times I see this
I already have a MBRP catback with a resonator. Happy with the sound now and no drone. However, I had a �13 w/ 3.5 EB that had high flow cats and a Solo catback. It had horrible drone and looking to avoid that this time around.
Your exhaust must be similar to mine then. I'm using a MBRP 4 in single with the original muffler replaced with a flowmaster Laminar and an added resonator, stays below 85 db. on highway under full load. Hoping it doesn't get much louder with the down tubes
So On with the Install Done on the shop floor a foot to the running boards, Remember your safety stands What I've done with the MBRP system to quiet it down, About 85db in the cab under load
Back Muffler is a Flowmaster Laminar series
Using a cell phone for pics so bear with me sprayed penetrating oil on all 4 of the o2 sensors
Disconnect plugs of o2 sensors there are 2 on upper passenger side of Transmission, 1 on upper Drivers side of Trans, and 1 on rear of motor drivers side
Next you need to support trans in preparation for crossmember removal
I used a small bottle jack under the pan, just took the weight off crossmember, you can see 1 of the o2 sensor wires hanging Remove this bolt from heatshield on upper side of crossmember drivers side remove this bolt from passenger side heat shield top of crossmember
Next remove the two trans to crossmember nuts, Now remove the two bolts on each side of the crossmember. The crossmember can now be removed
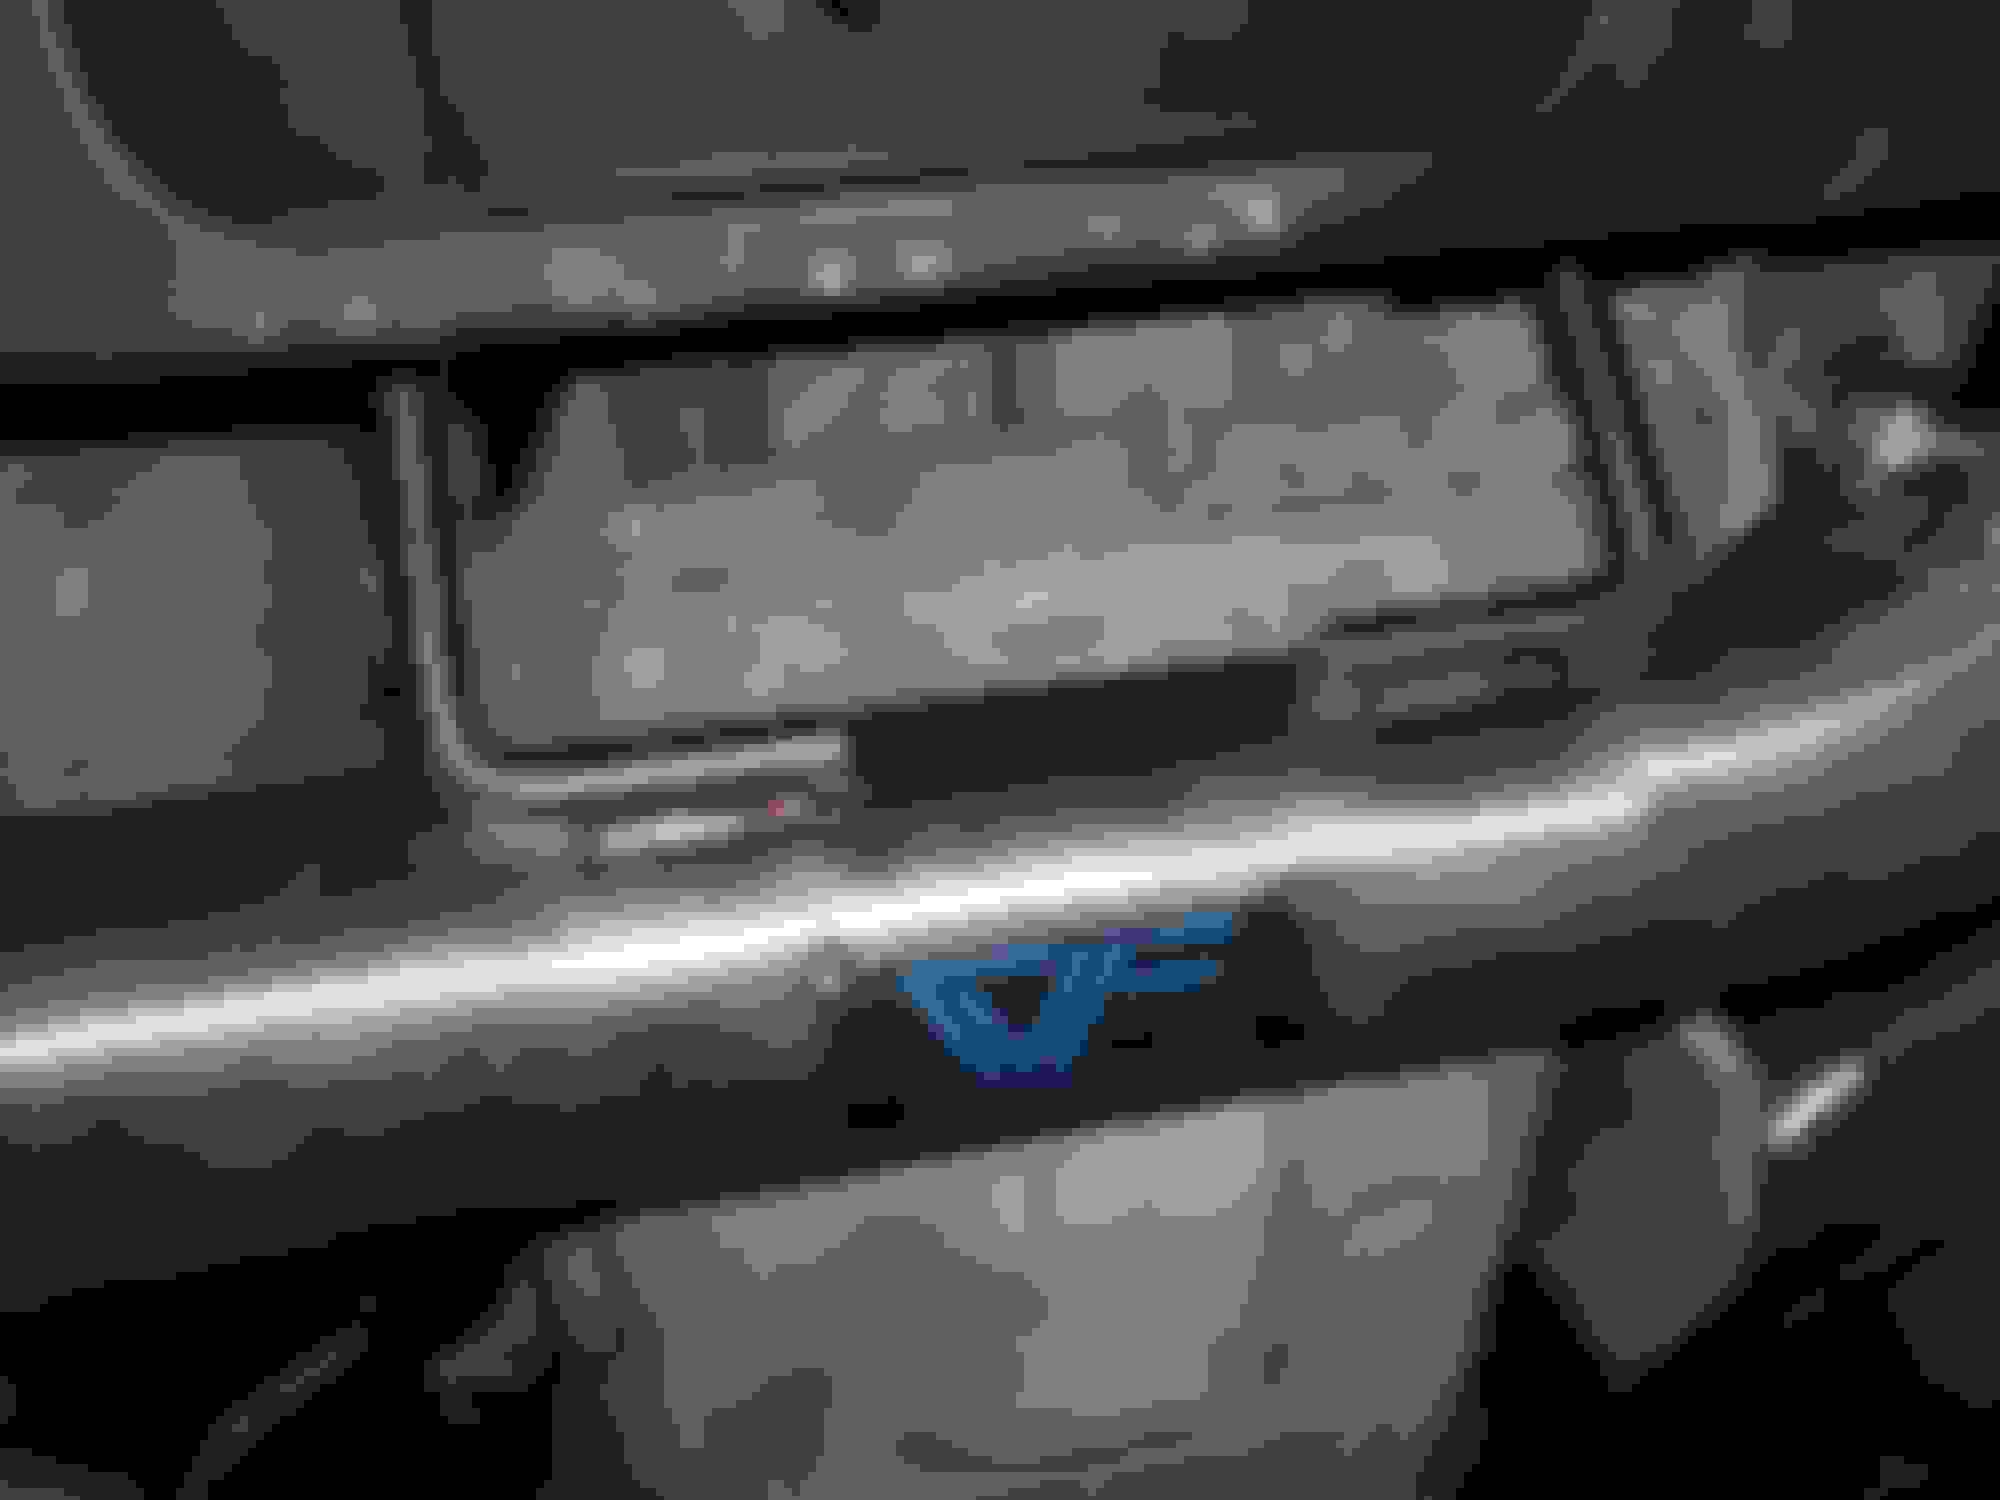
Next you must remove this mount which also supports the downtube assembly Remove the 3 bolts and work the mount off the downtube assembly
You can now remove the adapter bolts from the turbos and remove the cat back bolts and work the factory tubes out Factory down tubes out Passenger side turbo with factory adaptor, changing these to Faction Fab turbo adapters Drivers side turbo adapter
Removing factory adapters is a PIA , To remove the studs I used 2 of the downtube nuts jammed together kinda low buck engineering Home made way of removing studs, wrench is a 15mm box installed before doing the jam nuts it will slip on the factory stud so you can reposition as you loosen the studs
Still a pain to remove the factory studs, but they came out with liberal use of penetrating oil and some heat on 1 of them Faction Fab adapter, left stock right, downtube side of adapters Faction Fab adapter, left stock right, Turbo side of adapters Adaptors off Install gaskets in this orientation, writing readable from turbo side of adapter Nice SS adaptor bolts, I used nickel based anti-seize compound due to its ability to work well with SS and higher heat handling capability passenger side primary hanging
Note: well designed placement of rear o2 sensor so it didn't have to have harness moved Driver side primary hanging
At this point I reinstalled the trans mount and crossmember then the crossover tube and Y connector Crossover tube installed Y connector installed Then connected the Cat-Back, I had to use longer bolts for the Cat-Back connection
Shop Dog not much help, At this point I tightened all the exhaust bolts from the front to the rear
There is a Cat break-in procedure (the only directions contained in the package) The procedure is:
1. Start engine let come up to operating temp
2. Let idle for 10 minutes
3. Hold at 2500 rpm for 2 minutes
4. Let it cool completely( I left overnight)
So Now My final impressions as far as my hops for this mod
1. I drove 40 miles on Saturday and 120 on Sunday, I have yet to see a CEL so that's a plus #1
2. It is louder, About 88-90 db under load, seems a lot louder to me but not really annoying. You can still hold a conversation and no drone. You defiantly now hear the turbos spool at about 1500-2000 rpm( I never heard them before) calling this a neutral
3. Performance, I give this a plus 1, seems to pull smoother with less hesitation and the lie-o-meter says I've gained 2 mpg
Conclusion: Yes glad I made this purchase even with the negatives of no directions and no return phone call, But after installing and using for 2 days the questions I wanted to ask pre-purchase have been answered and are positive by my own testing and installing

 11-18-2021, 11:06 PM