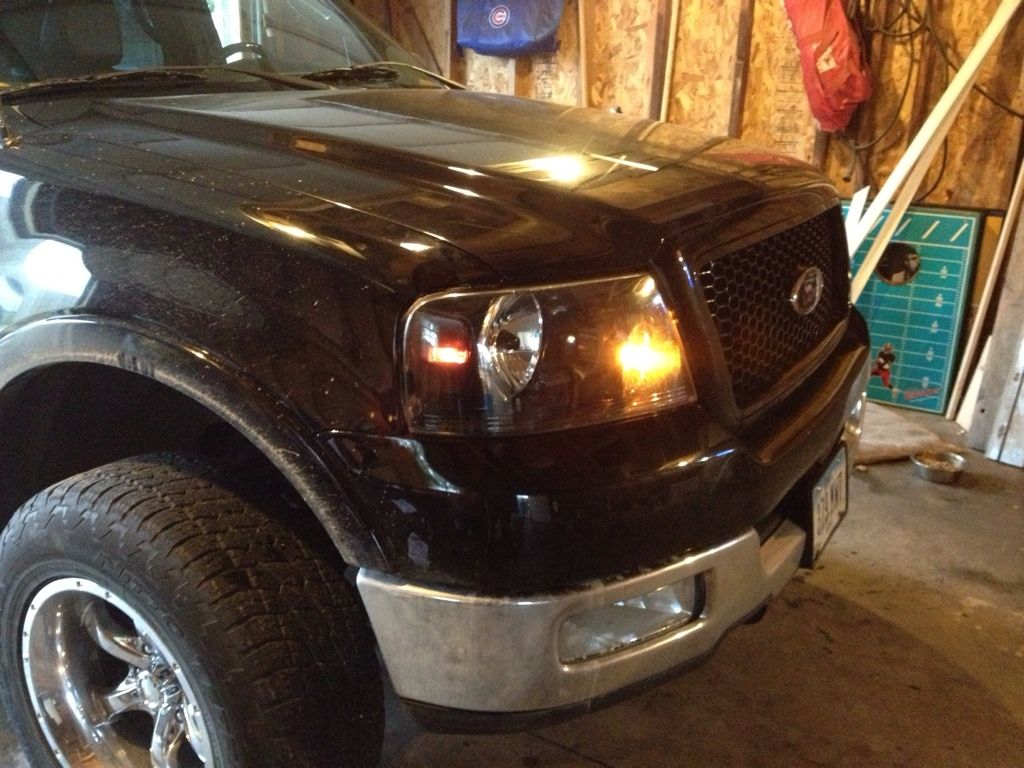
Topic Sponsor
2004 - 2008 Ford F150 General discussion on the 2004 - 2008 Ford F150 truck.

Painted headlights!

Thread Tools
 
Search this Thread
 
Old Nov 29, 2012 | 09:11 PM
  #11  
Golferguy667's Avatar
Thread Starter
Senior Member
 
Joined: Jul 2012
Posts: 321
Likes: 26
From: Colorado Springs CO
Default

I've heard of people painting the tip of the low beam reflector. Should I paint it while its apart?

This is what I'm talking about.
Attached Thumbnails Painted headlights!-image-570279767.jpg  
Reply
Old Nov 29, 2012 | 09:13 PM
  #12  
Golferguy667's Avatar
Thread Starter
Senior Member
 
Joined: Jul 2012
Posts: 321
Likes: 26
From: Colorado Springs CO
Default

Originally Posted by lbajo1

Not because it won't glue it because if they leak or you ever need to open them you are not going to able to and With butyle rubber you can do it as many times as you want
Ah I see what your saying, unfortunately for me I.started this project with silicone ready to go.. So I guess I better use all I can to make sure it's sealed haha
Reply
Old Nov 29, 2012 | 09:56 PM
  #13  
chuckd80's Avatar
Senior Member
 
Joined: Sep 2012
Posts: 141
Likes: 3
From: Des Moines, IA
Default

Originally Posted by Golferguy667
I've heard of people painting the tip of the low beam reflector. Should I paint it while its apart?

This is what I'm talking about.
I painted the tip and love the way it looks, so I would if I were you.


Reply
Old Nov 29, 2012 | 11:29 PM
  #14  
Golferguy667's Avatar
Thread Starter
Senior Member
 
Joined: Jul 2012
Posts: 321
Likes: 26
From: Colorado Springs CO
Default

Alrighty guys got em painted and put back together. Just gotta wait for em to dry now..
Attached Thumbnails Painted headlights!-image-544301940.jpg   Painted headlights!-image-2093096985.jpg  
Reply
Old Nov 29, 2012 | 11:31 PM
  #15  
Tradesman's Avatar
Senior Member
 
Joined: Apr 2012
Posts: 1,425
Likes: 103
From: Vancouver, BC
Default

Frikking awesome brother, and I mean frikking awesome! I know this has been questioned many times but to take them apart what temperature did you use and how long? I've done a search and got so many different answers. Thanks!
Reply
Old Nov 29, 2012 | 11:39 PM
  #16  
Golferguy667's Avatar
Thread Starter
Senior Member
 
Joined: Jul 2012
Posts: 321
Likes: 26
From: Colorado Springs CO
Default

Haha I know exactly what you mean man! I went with 220 degrees and several and I mean SEVERAL times back in the oven. Longest i ever left em in was about 8 minutes.

Once they were apart blow dryer worked really well to heat up remaining old silicone.

If you do do this definitely get an extra tube of silicone. I feel like mine need more, maybe I'm just a worrier but I want em sealed extra good haha. I'll prob go buy some more and add it tomorrow while the weather holds up
Reply
Old Nov 30, 2012 | 08:16 AM
  #17  
Golferguy667's Avatar
Thread Starter
Senior Member
 
Joined: Jul 2012
Posts: 321
Likes: 26
From: Colorado Springs CO
Default

And the finished product boys and girls! Now to put em on so I can get to work haha.
Attached Thumbnails Painted headlights!-image-4212053254.jpg  
Reply
Old Nov 30, 2012 | 10:13 AM
  #18  
Countryboy2744's Avatar
Senior Member
 
Joined: Oct 2012
Posts: 224
Likes: 9
From: Lloydminster,Alberta, Canada
Default

Looks good! Thanks for the play by play.
Reply
Old Nov 30, 2012 | 12:14 PM
  #19  
arsenal21's Avatar
Junior Member
10 Year Member
 
Joined: Apr 2010
Posts: 20
Likes: 0
From: Cleveland, OH
Default

Nice Job. Looks great. Gonna be doing this eventually.
Reply
Old Nov 30, 2012 | 02:29 PM
  #20  
Sunsetter's Avatar
High School Hill Climber
 
Joined: Dec 2009
Posts: 333
Likes: 6
From: Sunset, S.C.
Default

i just painted mine as well, but while i was into them i installed a dual color(white/amber) oracle angel eye kit. Pics soon.
Reply


All times are GMT -4. The time now is 03:21 PM.