

Recon Bed Light Install Guidelines

Thread Starter
Senior Member
Joined: Jun 2009
Posts: 1,650
Likes: 133
From: Fort Worth, TX
So I recently purchased a set of Recon Bed Lights and I'm extremely pleased with them. I have them wired to my cargo / interior lights, but you can wire to a magnet or other switch to your tailgate or even a switch inside if you wanted. Here's what I did (first write up, so forgive the mistakes).
Once purchased, unbox and measure where you want each light. I started 12" in on each end of the bed, then measured each light 14" from each other. (If you're a math wiz, that's 66" or 5'5" in length). I used this because it looks very stock, consistent and puts the lights at the exact same spot on each side. I found it best to attach the sticky tape to the side of the light, not behind it ... then attach the light to the side of your bed rail. It lowers the light slightly in to the bed and tilts them ever so slightly so that they're pointing towards the middle of the truck. They aren't noticable from a 'standing up' position but aren't blocked by the rails at all.

At the front of the bed you will have all the left over wire. You can tuck this in to an area between the bed and the cab. If you look closely, there is actually a spot that has a slit on it that fits the line perfectly so you don't have a loose wire dangling between the cab and the bed. Here's a pic of it, but its hard to see (given I took the picture after the fact). Its under my BakFlip panel but gives you an idea of the location.
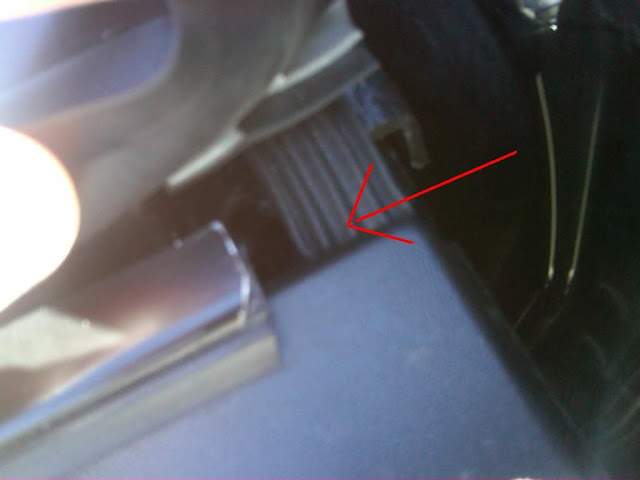
Maybe its easier to see if I back the picture up a little. In an effort to fully confuse you, I switched sides of the truck when I took this pic compared to the last one.

Run the wire down under the truck. I tucked my wires in to the frame and took them to the front of the vehicle so they were protected.
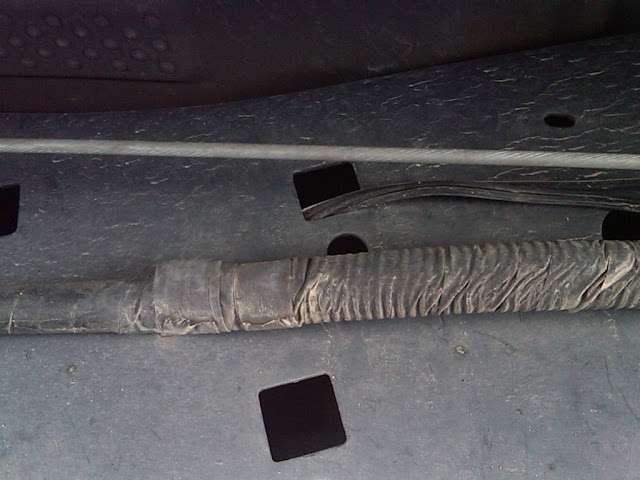
Pull them up in to the engine bay (keeping the line taut so it doesn't slack in to any moving parts). My wires weren't long enough for the journey to the front, so you'll notice they changed colors along the way. Green = ground. I used an existing set of wires that were grounded in the engine bay and simply added on to them. I wish I hid it better but I guess its good for this purpose.

The positive wire runs inside. I found an existing grommet next to the steering column and just simply pushed this in the middle of that group of wires. I grabbed it from the inside and was surprised at how easy it was to pull through. Here, yellow = hot (remember my wires needed lengthened, so they changed colors).
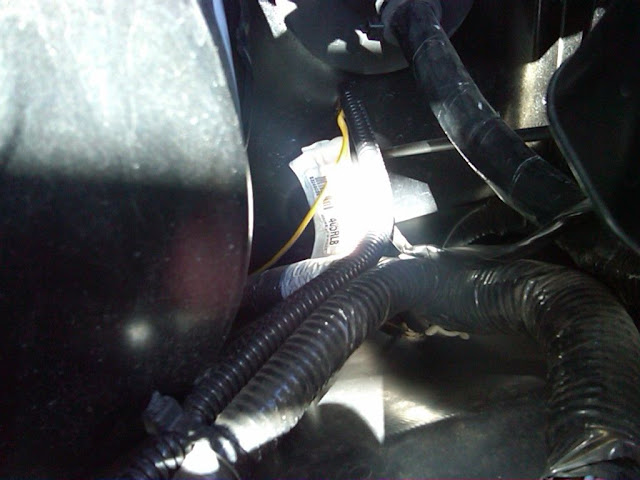
Once inside you will find a gray wire with a purple stripe in the kick panel on the driver's side. Tap in to this wire, its your interior lights. No need for a relay, these lights don't take enough energy to warrant all the extra wiring.
Go back to the rear of the truck and test your lights. They should come on when you open the door or use the interior switch, just like with your cargo light.
Once satisfied, simply use the included wire clips to tie up the excess wire behind your bed rail or tuck it behind your bed liner (if you have one). Both methods will hide the wire from anyone's line of sight, which for some reason I don't have a picture of. The first picture above is me performing my test.
This will light up your bed more than you're expecting.

Once purchased, unbox and measure where you want each light. I started 12" in on each end of the bed, then measured each light 14" from each other. (If you're a math wiz, that's 66" or 5'5" in length). I used this because it looks very stock, consistent and puts the lights at the exact same spot on each side. I found it best to attach the sticky tape to the side of the light, not behind it ... then attach the light to the side of your bed rail. It lowers the light slightly in to the bed and tilts them ever so slightly so that they're pointing towards the middle of the truck. They aren't noticable from a 'standing up' position but aren't blocked by the rails at all.
At the front of the bed you will have all the left over wire. You can tuck this in to an area between the bed and the cab. If you look closely, there is actually a spot that has a slit on it that fits the line perfectly so you don't have a loose wire dangling between the cab and the bed. Here's a pic of it, but its hard to see (given I took the picture after the fact). Its under my BakFlip panel but gives you an idea of the location.
Maybe its easier to see if I back the picture up a little. In an effort to fully confuse you, I switched sides of the truck when I took this pic compared to the last one.
Run the wire down under the truck. I tucked my wires in to the frame and took them to the front of the vehicle so they were protected.
Pull them up in to the engine bay (keeping the line taut so it doesn't slack in to any moving parts). My wires weren't long enough for the journey to the front, so you'll notice they changed colors along the way. Green = ground. I used an existing set of wires that were grounded in the engine bay and simply added on to them. I wish I hid it better but I guess its good for this purpose.
The positive wire runs inside. I found an existing grommet next to the steering column and just simply pushed this in the middle of that group of wires. I grabbed it from the inside and was surprised at how easy it was to pull through. Here, yellow = hot (remember my wires needed lengthened, so they changed colors).
Once inside you will find a gray wire with a purple stripe in the kick panel on the driver's side. Tap in to this wire, its your interior lights. No need for a relay, these lights don't take enough energy to warrant all the extra wiring.
Go back to the rear of the truck and test your lights. They should come on when you open the door or use the interior switch, just like with your cargo light.
Once satisfied, simply use the included wire clips to tie up the excess wire behind your bed rail or tuck it behind your bed liner (if you have one). Both methods will hide the wire from anyone's line of sight, which for some reason I don't have a picture of. The first picture above is me performing my test.
This will light up your bed more than you're expecting.
Last edited by sharper4; Nov 11, 2010 at 09:38 AM.

Thread Starter
Senior Member
Joined: Jun 2009
Posts: 1,650
Likes: 133
From: Fort Worth, TX
I'm floored that your dealer cut in to your dash. It seems like a no brainer for the bed lights to come at the same time as the cargo light.

Junior Member
Joined: Jan 2010
Posts: 7
Likes: 0
That's what i thought so I did not give specific directions. In the end it will work out as they had to take even more off the truck. The bed lights were free. I am going to tap the wire and put a relay in along with a switch in the box that will work off either the dome lights or constant power. End result should be good. As for the hole in the dash I will have a use for it. It is low down and I can't see it while driving. As with most people on this forum we have very good taste and specific requirement. I am sure for the last 100 the dealer installed it was fine but I am guessing these folks don't have the same passion for vehicles.
Trending Topics
Thread Starter
Senior Member
Joined: Jun 2009
Posts: 1,650
Likes: 133
From: Fort Worth, TX

