
moving the amp from the back floor to???
 12-08-2014, 10:10 PM
#11
Senior Member

That does look like a clean unit/install. It looks like the Pioneer is a bit longer than the OEM sub. True? Does it fit under the single seat, or does it use a bit of space under the larger seat too?
I have no fear of cutting wires. AAMOF, if you're not cutting wires or drilling holes, you're really not "modding"
So, thanks a lot! Now I have something ELSE I want to do to my truck (as if I needed something else)
I have no fear of cutting wires. AAMOF, if you're not cutting wires or drilling holes, you're really not "modding"
So, thanks a lot! Now I have something ELSE I want to do to my truck (as if I needed something else)
 12-09-2014, 08:38 AM
#12

Thanks for the help. I just installed my weather tech mat in the back and like the clean look with no sub. So as easy as it was to remove I think I'll pop it in when I want to thump a little and take it out when the pups are with me.
12-09-2014, 07:52 PM
#13
Junior Member

It's pretty close to being exactly the width of the seat. There may be about an inch that sticks out under the larger seat, and that's pushing it. I also don't have it as close to the door as I could.
If you're interested, Amazon has the Pioneer TS-SWX2502 loaded enclosure for $108.95, Prime eligible (or even for $79.99 under its More Buying Choices). I got the Pioneer GM-A5602 amp. SonicElectronix.com has it for $99.99 new, and I purchased the factory refurbished version from them for $69.99 and haven't had any issues out of it.
http://www.sonicelectronix.com/item_...-GM-A5602.html
12-09-2014, 10:15 PM
#14
Senior Member
Am I being presumptuous by thinking that I don't *HAVE* to get any but the Pioneer SWX2502?
12-15-2015, 12:07 PM
#15
Senior Member
So your sub isn't fastened to the floor?
Sorry about the delay in pictures. I work for Louisiana Tech, and it was a busy weekend with the C-USA Championship game and Heart of Dallas Bowl bid announcement.
It is probably possible to find a factory connector to use, but after unbolting the sub and unclipping the factory connection I just cut the truck-side factory connector off, leaving enough length that I can solder/heat shrink later when I sell the truck and put the factory sub back in. If you're not comfortable with cutting off the factory connector, you can use some of these quick splice connectors (you can get them at Walmart or any auto parts store):
Solderless Wire Quick Splice Connector - 18-22 Gauge - 25 Pack: Amazon.com: Industrial & Scientific
I soldered/heat shrunk speaker wire to the four wires coming into the factory sub connector and ran those wires to a line output converter. (I just have a cheap Scosche brand line output converter from Walmart, and it works well. You can buy more expensive options from places like Crutchfield.) Since the amp is now behind the rear passenger seat, I pulled the wires back into the carpet where they came out under the factory Sony sub and redirected them toward the back wall. My connections to the four wires are now where I can't see them, but here is what the four wires look like:

I found the wiring code for the factory sub wires in another post in this forum, but here it is:
+ purple/green
- green/white
&
+ green/purple
-gray
The line output converter provides RCA output to the aftermarket amp. I then ran speaker wire back out the the Pioneer sub. Because the speaker wire is the only connection to sub, it is easy to remove if needed.
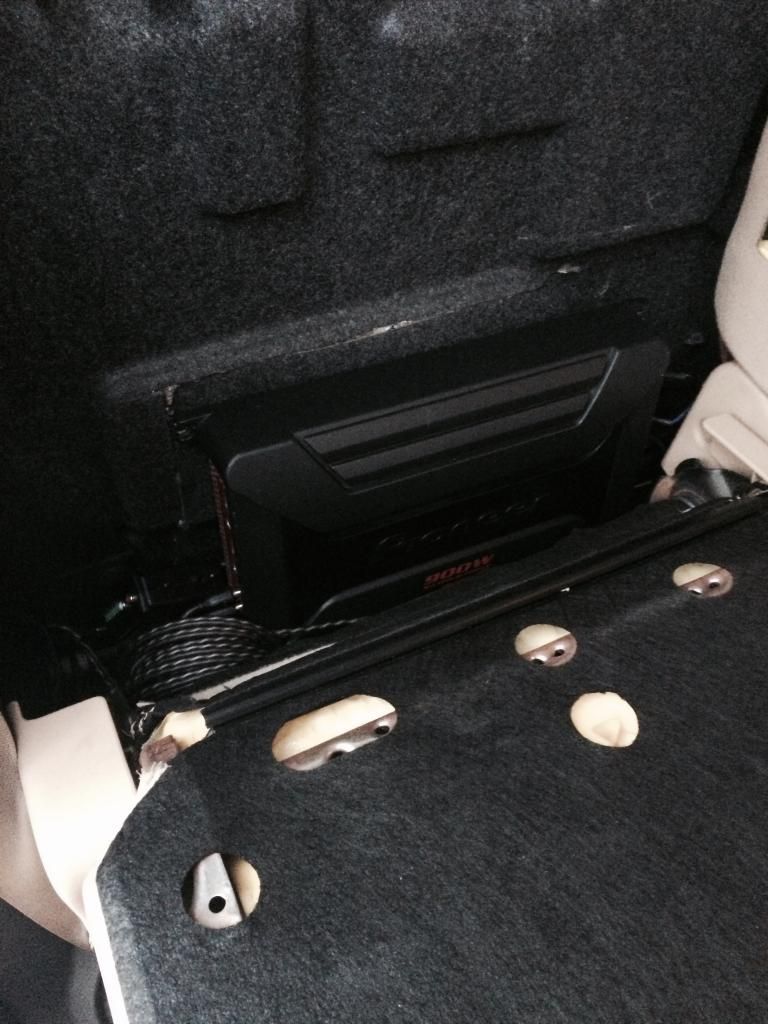
Here is the amp behind the rear passenger seat. (The lighting was bad this morning, so you can't make out much detail. Let me know if I need to take better pictures of any of these.):
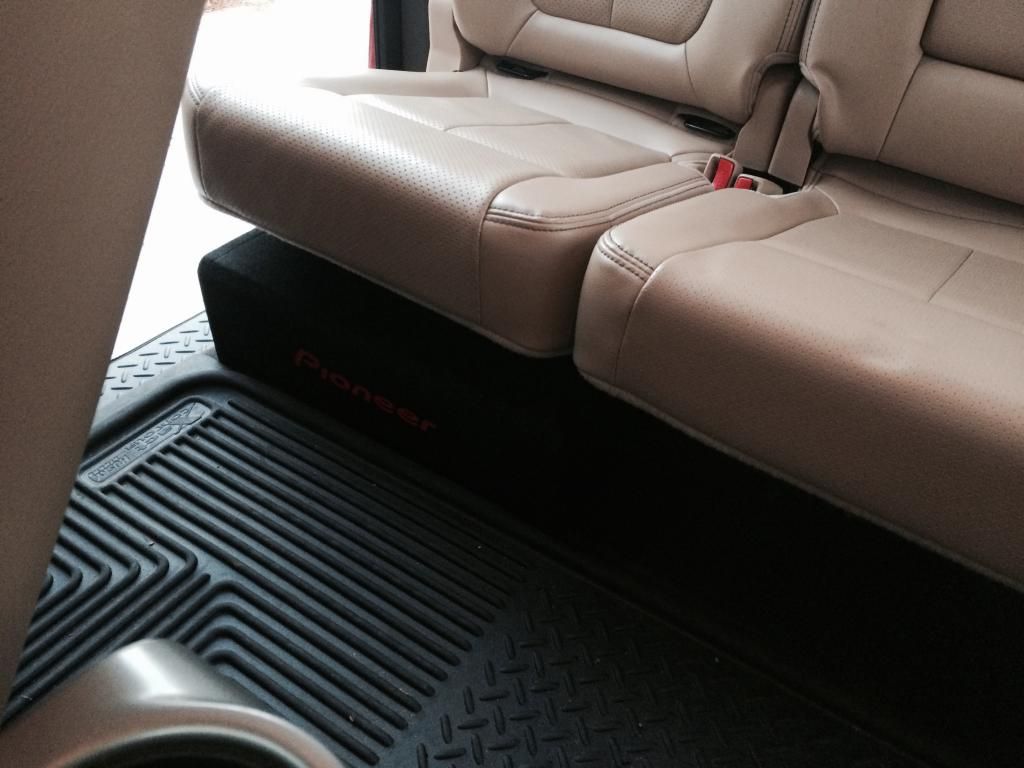
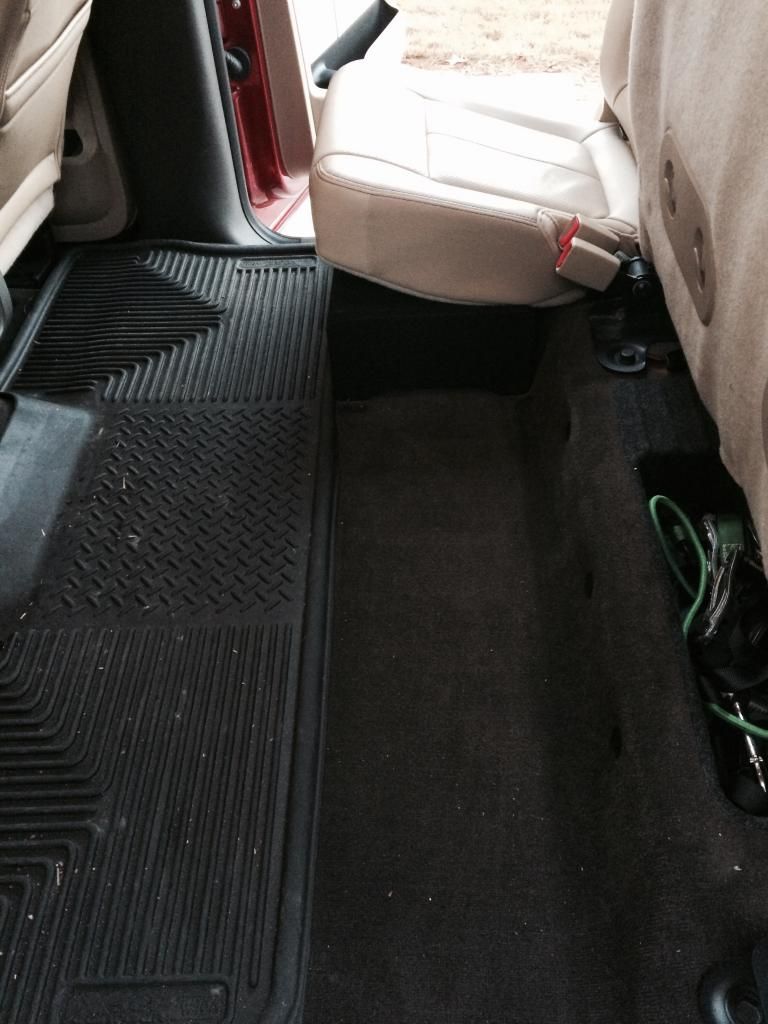
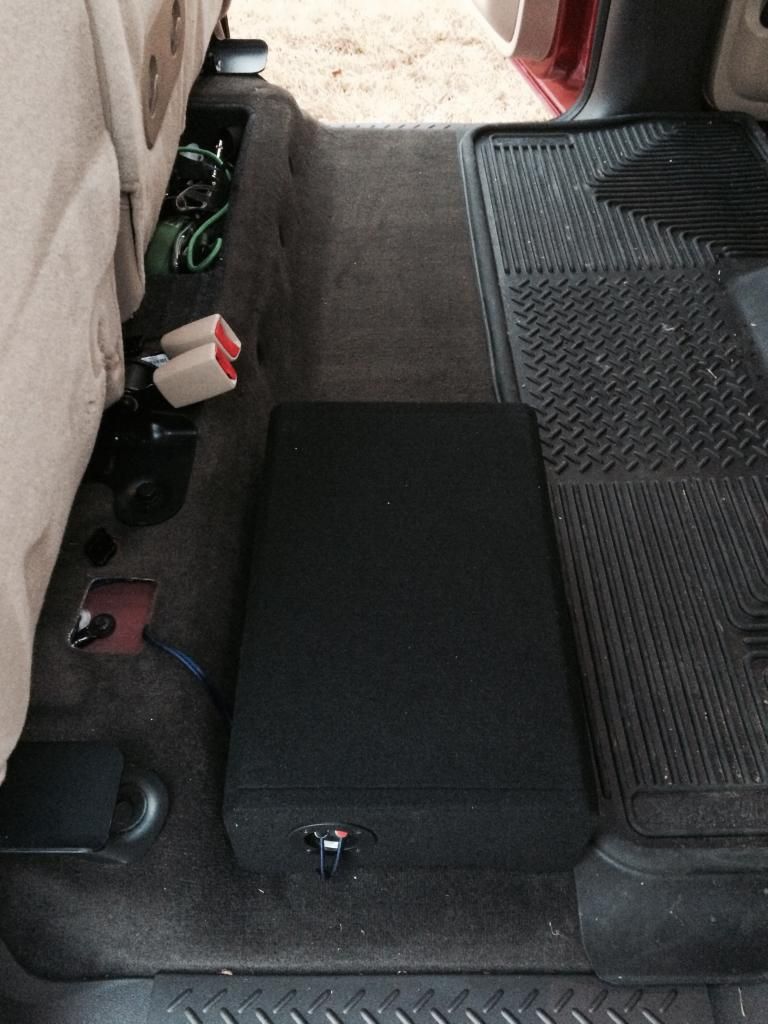
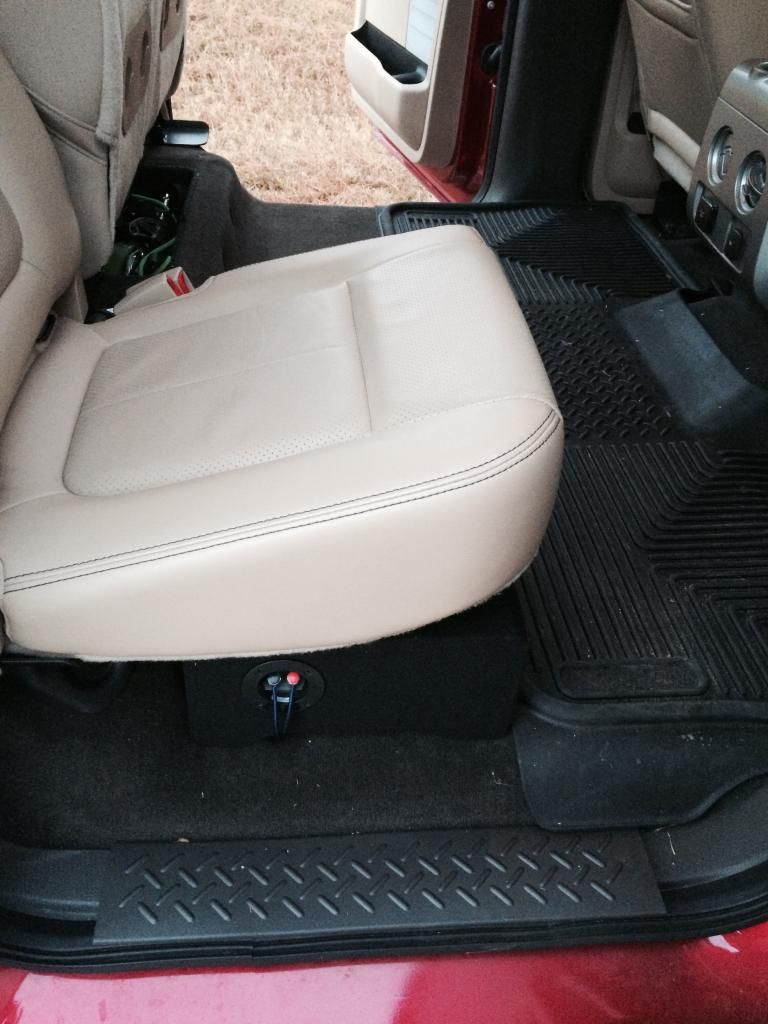
Here is the sub from different angles. You can see how unobtrusive it is, how it blends in with the factory interior (I think, anyway...), how it's easy to put things on top of it if needed given its shape, and the one speaker wire connection on the side:
I probably did a terrible job of explaining all of that, so let me know if any part needs clarification. I'd also be happy to work on some better lighting if it is needed. Also, all wiring for the amplifier was routed from the battery, through the firewall, and underneath the passenger side door sill plates. It's very easy to pop the clips up, route your wires through with the factory wiring bundle, and pop the sill plates back on.
It is probably possible to find a factory connector to use, but after unbolting the sub and unclipping the factory connection I just cut the truck-side factory connector off, leaving enough length that I can solder/heat shrink later when I sell the truck and put the factory sub back in. If you're not comfortable with cutting off the factory connector, you can use some of these quick splice connectors (you can get them at Walmart or any auto parts store):
Solderless Wire Quick Splice Connector - 18-22 Gauge - 25 Pack: Amazon.com: Industrial & Scientific
I soldered/heat shrunk speaker wire to the four wires coming into the factory sub connector and ran those wires to a line output converter. (I just have a cheap Scosche brand line output converter from Walmart, and it works well. You can buy more expensive options from places like Crutchfield.) Since the amp is now behind the rear passenger seat, I pulled the wires back into the carpet where they came out under the factory Sony sub and redirected them toward the back wall. My connections to the four wires are now where I can't see them, but here is what the four wires look like:

I found the wiring code for the factory sub wires in another post in this forum, but here it is:
+ purple/green
- green/white
&
+ green/purple
-gray
The line output converter provides RCA output to the aftermarket amp. I then ran speaker wire back out the the Pioneer sub. Because the speaker wire is the only connection to sub, it is easy to remove if needed.
Here is the amp behind the rear passenger seat. (The lighting was bad this morning, so you can't make out much detail. Let me know if I need to take better pictures of any of these.):

Here is the sub from different angles. You can see how unobtrusive it is, how it blends in with the factory interior (I think, anyway...), how it's easy to put things on top of it if needed given its shape, and the one speaker wire connection on the side:


I probably did a terrible job of explaining all of that, so let me know if any part needs clarification. I'd also be happy to work on some better lighting if it is needed. Also, all wiring for the amplifier was routed from the battery, through the firewall, and underneath the passenger side door sill plates. It's very easy to pop the clips up, route your wires through with the factory wiring bundle, and pop the sill plates back on.