Topic Sponsor
2009 - 2014 Ford F150 General discussion on 2009 - 2014 Ford F150 truck.
Sponsored by:
Sponsored by:

Installed Upfitter Switch Panel

Thread Tools
 
Search this Thread
 
Old 08-23-2013, 12:26 AM
  #1  
Hightech Redneck
Thread Starter
 
BulletsForFingers's Avatar
 
Join Date: Jun 2013
Location: Kentucky
Posts: 458
Received 87 Likes on 49 Posts

Default Installed Upfitter Switch Panel

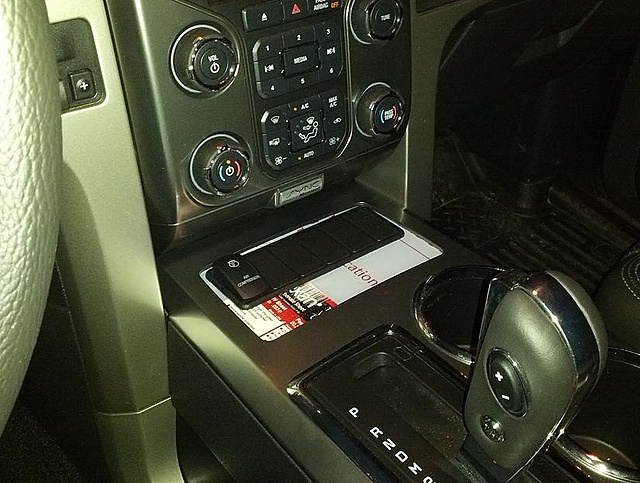
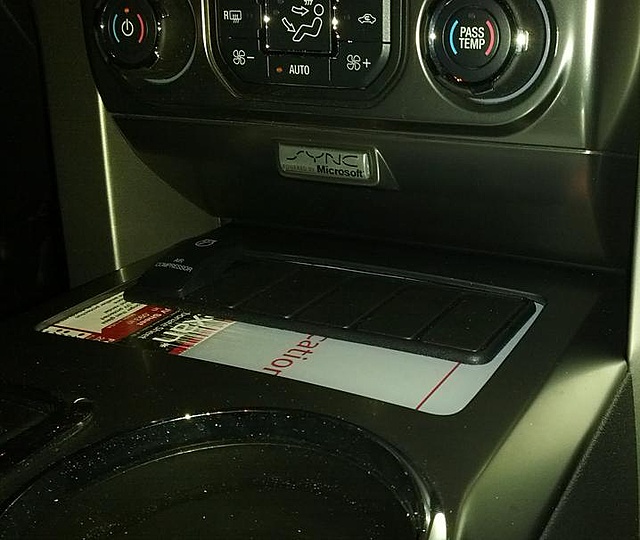
Nothing's wired yet, but I'm absolutely thrilled with how this came out. The fit is perfect and it feels very solid. The 6-switch panel from OTRATTW was practically made to fit in that spot. This installation was done with no modification of factory pieces! I can remove the panel and return the truck to 100% stock if desired. I was a little skeptical of this mounting location when I saw others' switches, but I've come around and really like it now.

I didn't want to screw up the cabin lighting with bright LEDs, so I went with no-light OTRATTW switches. Sorry for the poor picture quality, but I wanted to share what I had done. I'll make another (daytime) post once I have them all wired up and functioning.

Next step is to splash some paint or plastidip on the panel. Any suggestions?

Installed Upfitter Switch Panel-rinerqn.jpg
Installed Upfitter Switch Panel-rktj6ep.jpg
Old 08-23-2013, 12:34 AM
  #2  
Senior Member
iTrader: (1)
 
NastyFFX4's Avatar
 
Join Date: Apr 2013
Posts: 2,141
Received 310 Likes on 249 Posts

Default

What is that panel made out? This looks good. I know Starkey Products is working on something for switches.

I'd recommend against Plastidip as the dust will build up pretty bad on it.
Old 08-23-2013, 12:35 AM
  #3  
Hightech Redneck
Thread Starter
 
BulletsForFingers's Avatar
 
Join Date: Jun 2013
Location: Kentucky
Posts: 458
Received 87 Likes on 49 Posts

Default

Originally Posted by NastyFFX4
What is that panel made out? I'd recommend against Plastidip as the dust will build up pretty bad on it.
$4 sheet of lexan from Lowe's. The protective plastic is still on it until I figure out how I'm painting it.
Old 08-23-2013, 03:02 AM
  #4  
Senior Member
 
tabezic's Avatar
 
Join Date: Dec 2012
Posts: 658
Received 99 Likes on 85 Posts
Default

All that for one switch??? Jk. Looks sweet. I want to do something like this but I don't want to lose that space
Old 08-23-2013, 08:50 AM
  #5  
Senior Member
 
FX4RubyRed's Avatar
 
Join Date: Aug 2011
Location: GTA,Ontario,Canada
Posts: 2,008
Received 31 Likes on 26 Posts

Default

Did you drill a hole in the bottom of the console to run the wires???? Post pics
Old 08-23-2013, 10:33 AM
  #6  
Senior Member
 
White-Out's Avatar
 
Join Date: Jan 2013
Location: Northeast Texas
Posts: 846
Received 142 Likes on 111 Posts

Default

You don't have to drill the hole as there is already one there If its like the Raptor unit. That tray should unbolt leaving the opening there to do what you want.
Old 08-23-2013, 11:03 AM
  #7  
Senior Member
 
harrison14allen's Avatar
 
Join Date: Jan 2011
Location: Brenham, TX
Posts: 2,278
Received 108 Likes on 91 Posts

Default

That's pretty cool
Old 08-23-2013, 03:46 PM
  #8  
Alaskan by Choice
 
waterboyjlw's Avatar
 
Join Date: Jul 2011
Location: Anchorage,Alaska
Posts: 226
Received 23 Likes on 17 Posts

Default

That looks nice. Did you remove the tray or just put the lexan on top of it?
Old 08-23-2013, 04:03 PM
  #9  
Hightech Redneck
Thread Starter
 
BulletsForFingers's Avatar
 
Join Date: Jun 2013
Location: Kentucky
Posts: 458
Received 87 Likes on 49 Posts

Default

the tray sandwiches the lexan up to the trim piece.


Quick Reply: Installed Upfitter Switch Panel


All times are GMT -4. The time now is 09:05 AM.