
Aftermarket heated seat inserts
 05-05-2012, 11:47 PM
#61
Meaner than ymeski56

Originally Posted by FordEver
 Glad you got yours workng. I didn't realize the door switches didn't dim...... but now that you mention it, I don't remember seeing them dim either. So, since I have the switches it the doors and the door switches don't dim, then the heater switch dimming shouldn't be an issue anyways......

 05-06-2012, 12:25 AM
#62

Wow! glad I chanced across this thread. Thanks for doing all the research for me guys. Just went to FordEver's eBay link and pulled the trigger on a set for my XLT. No-brainer at that price and they'll earn me some points with the wife. That's the only thing she wasn't 100% behind me on buying this truck, no heaters nearly killed the deal for her
Anybody take pictures of installing the pads? Last time I tried any upholstery work was when I made a footstool in grade 9 woodshop... might need some practice.
Anybody take pictures of installing the pads? Last time I tried any upholstery work was when I made a footstool in grade 9 woodshop... might need some practice.
05-06-2012, 12:45 AM
#63
Meaner than ymeski56
Originally Posted by beauwulf
Wow! glad I chanced across this thread. Thanks for doing all the research for me guys. Just went to FordEver's eBay link and pulled the trigger on a set for my XLT. No-brainer at that price and they'll earn me some points with the wife. That's the only thing she wasn't 100% behind me on buying this truck, no heaters nearly killed the deal for her
Anybody take pictures of installing the pads? Last time I tried any upholstery work was when I made a footstool in grade 9 woodshop... might need some practice.
Anybody take pictures of installing the pads? Last time I tried any upholstery work was when I made a footstool in grade 9 woodshop... might need some practice.
Sorry for the super long post. Hope this helps and I could email you the directions that FordEver sent me which really helped.
05-06-2012, 11:25 AM
#64
2013 Ruby Red FX4 SCrew
Thread Starter
Wow! glad I chanced across this thread. Thanks for doing all the research for me guys. Just went to FordEver's eBay link and pulled the trigger on a set for my XLT. No-brainer at that price and they'll earn me some points with the wife. That's the only thing she wasn't 100% behind me on buying this truck, no heaters nearly killed the deal for her
Anybody take pictures of installing the pads? Last time I tried any upholstery work was when I made a footstool in grade 9 woodshop... might need some practice.
Anybody take pictures of installing the pads? Last time I tried any upholstery work was when I made a footstool in grade 9 woodshop... might need some practice.
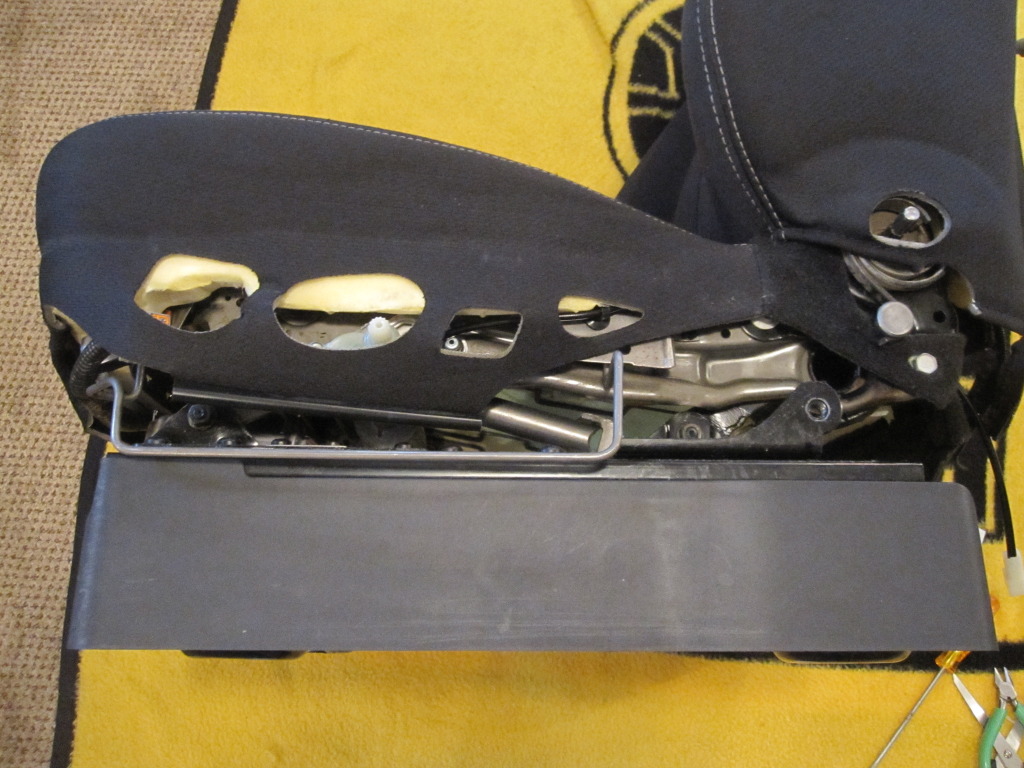
Remove seat from truck and take off side panel. See below...
When you start pulling off the bottom covering, the front will have hog rings holding the covering. Remove these... See below...

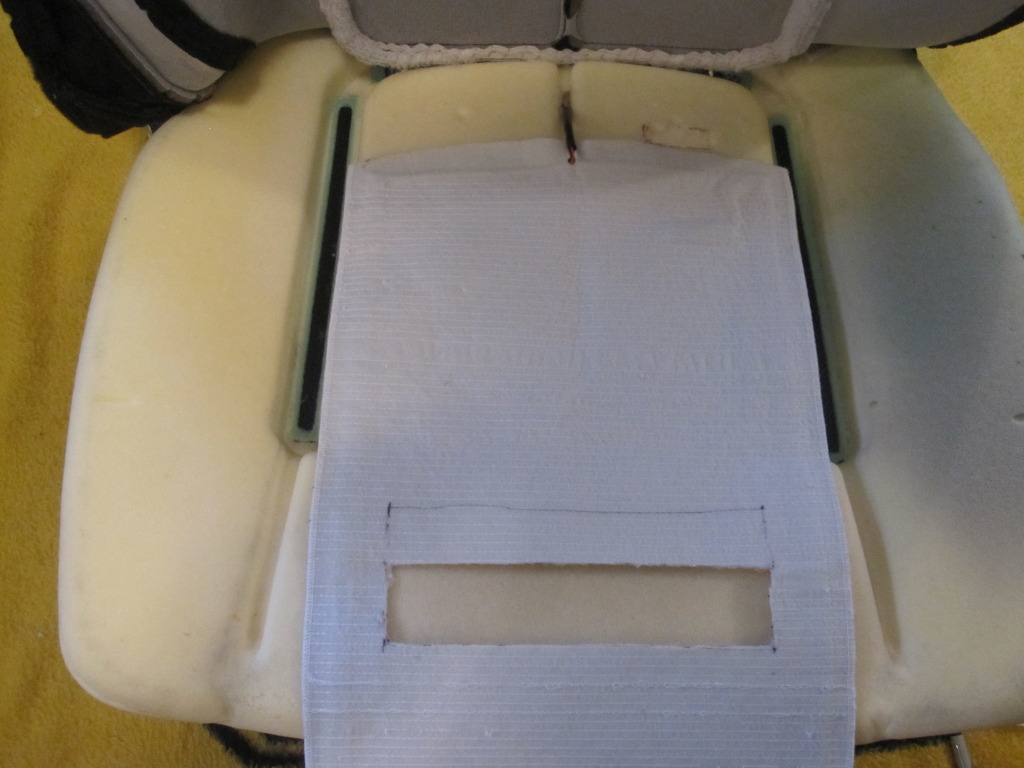
After rings are removed, the covering can be fully pulled back and pad prepped for install..... See below..

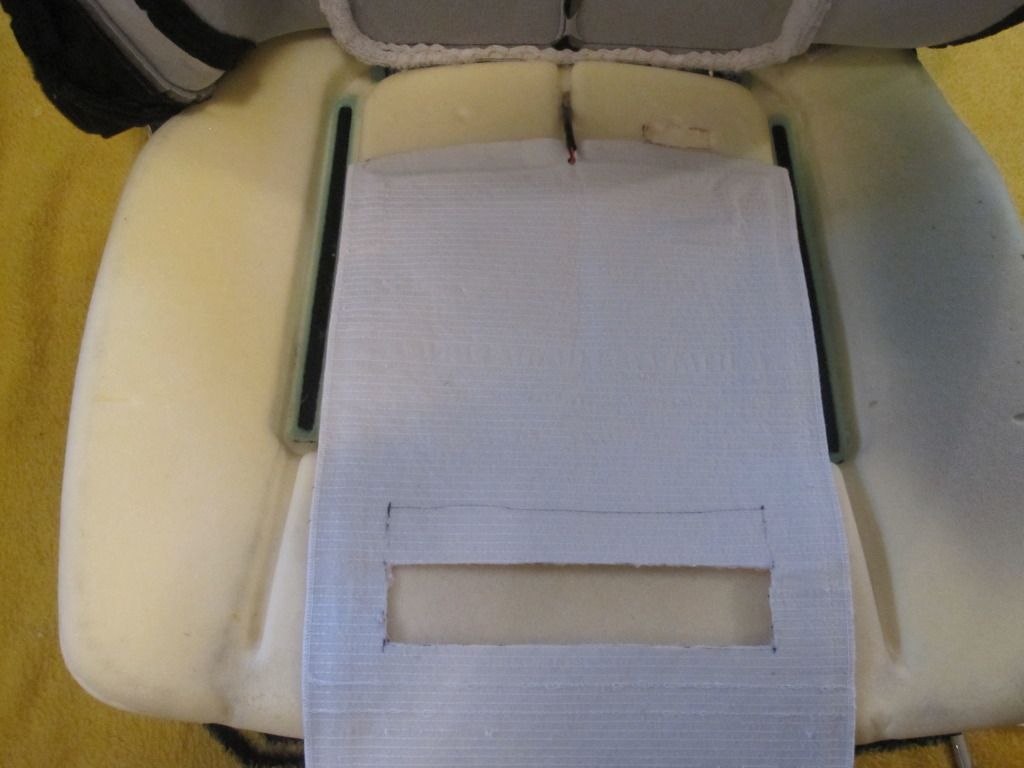
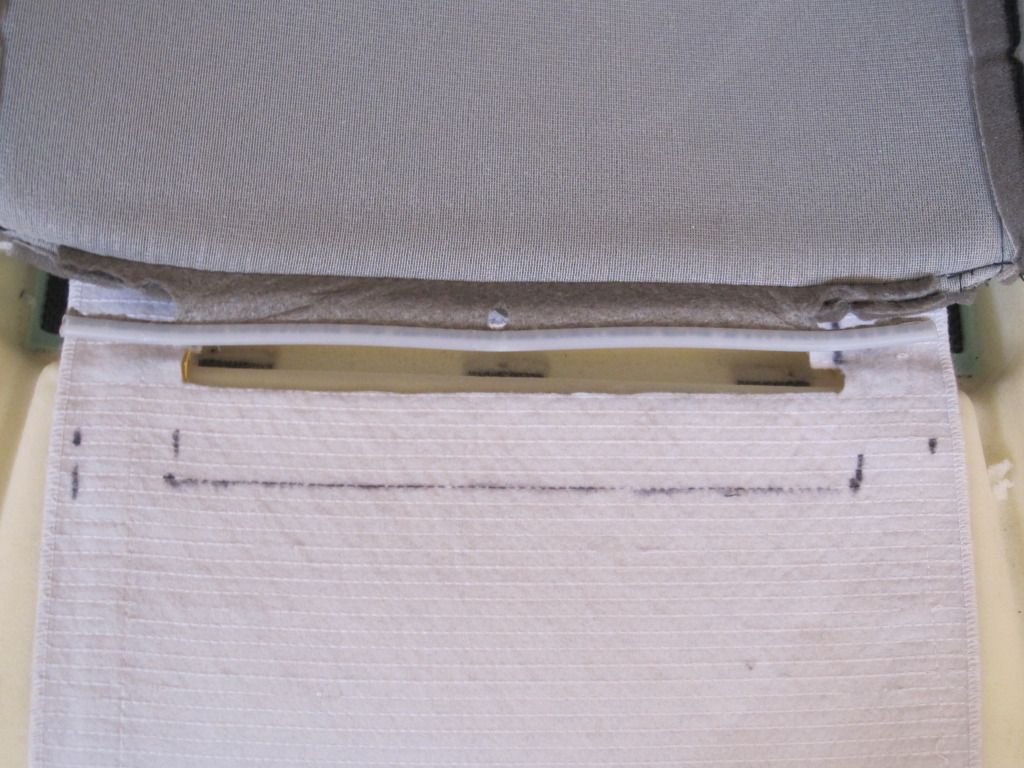
Next, Mark the pad for cutting and cut to fit. (Instructions come with the pads for how to cut)...
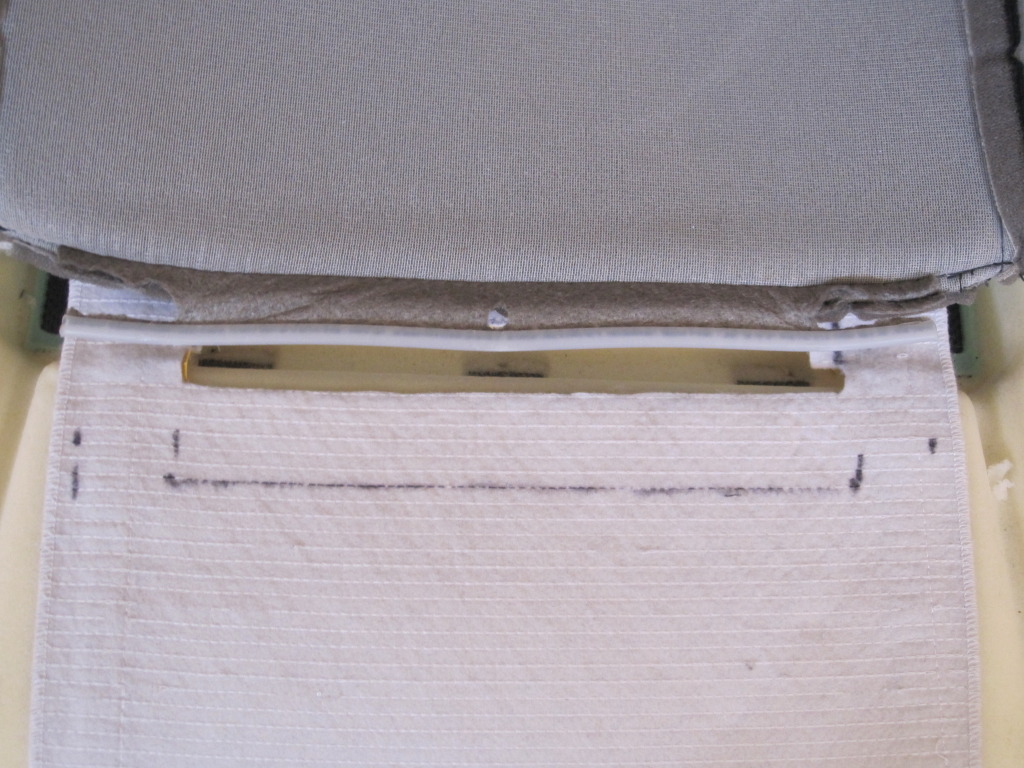
Next, I used cable ties to replace the hog rings.... Pics below...
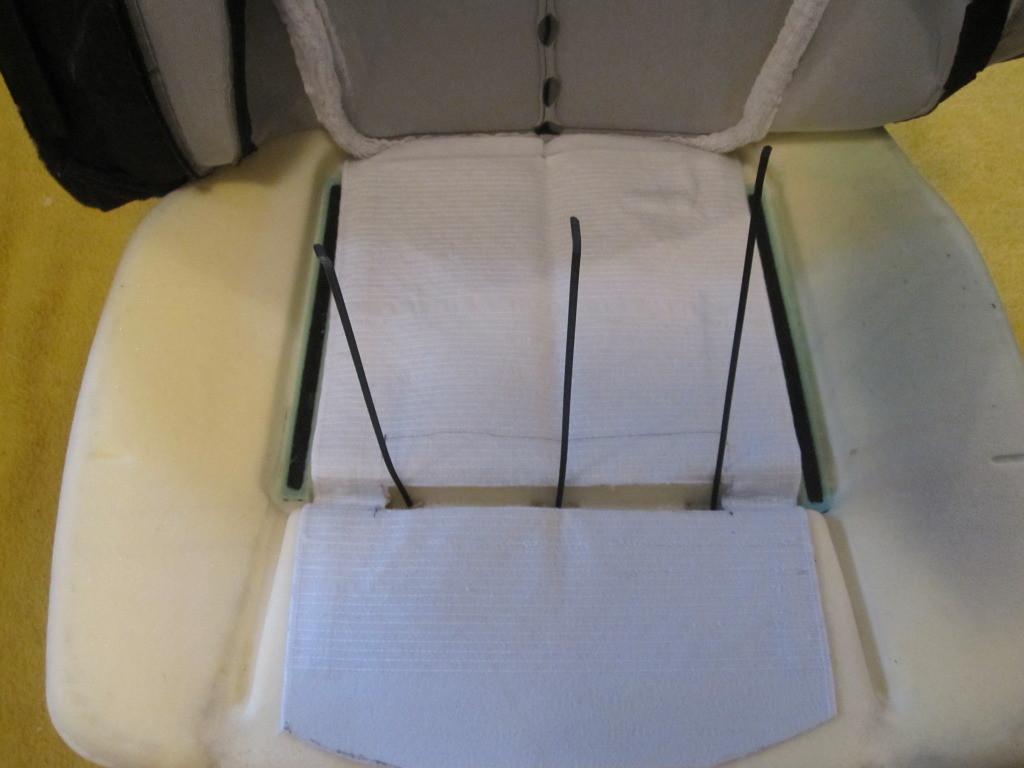
hook in the cable ties and tighten down. Ensure your velcro strips are placed properly before tightening.. See below...
Now put back bottom covering and start on the top..
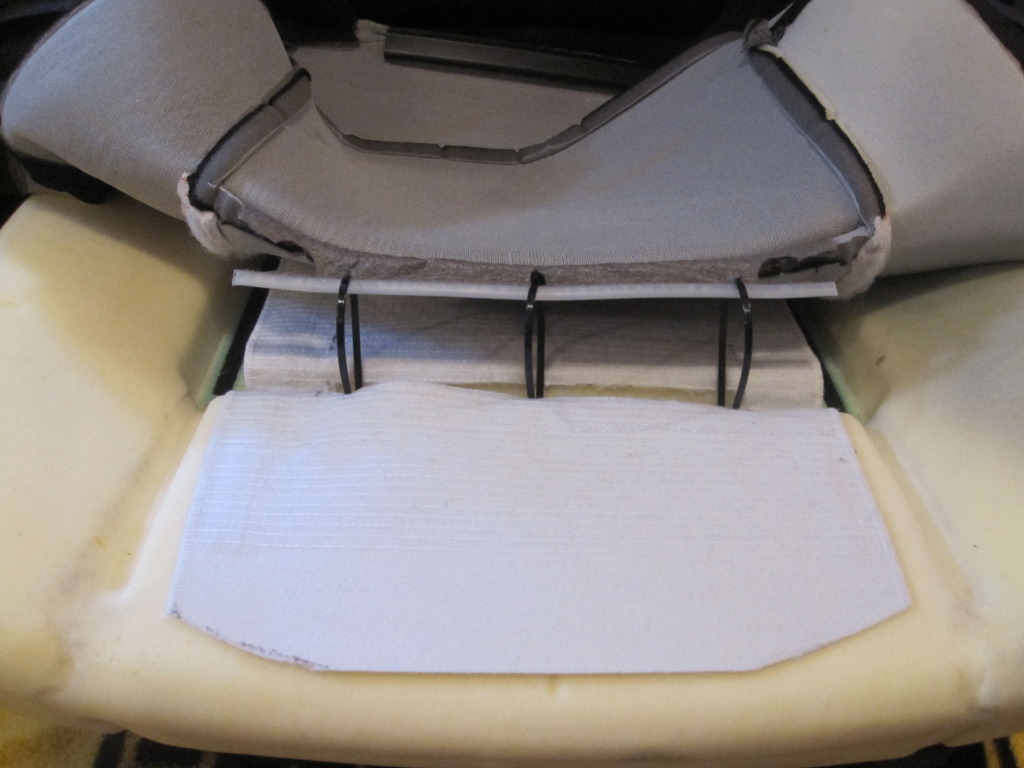
Pull back covering up.... careful for airbag section......
Here is a pic of the top pad install. I turned the pad sideways and cutt to proper length. I found that easier.
I have my switches installed in my doors. I used the rotary illuminated ones rather than the toggle ones. I just liked the look better. There was a fair bit of work putting the switches in the doors, but well worth it, i think. When I get the seats fully functioning, I will post the switch install info as well.
Last edited by FordEver; 05-06-2012 at 11:39 AM.
The following users liked this post:
bluedsteel (02-23-2014)
05-06-2012, 12:36 PM
#65
Girthy Member
Here are a few pics....
Remove seat from truck and take off side panel. See below...

When you start pulling off the bottom covering, the front will have hog rings holding the covering. Remove these... See below...

After rings are removed, the covering can be fully pulled back and pad prepped for install..... See below..
Next, Mark the pad for cutting and cut to fit. (Instructions come with the pads for how to cut)...
Next, I used cable ties to replace the hog rings.... Pics below...

hook in the cable ties and tighten down. Ensure your velcro strips are placed properly before tightening.. See below...

Now put back bottom covering and start on the top..
Pull back covering up.... careful for airbag section......
Here is a pic of the top pad install. I turned the pad sideways and cutt to proper length. I found that easier.

I have my switches installed in my doors. I used the rotary illuminated ones rather than the toggle ones. I just liked the look better. There was a fair bit of work putting the switches in the doors, but well worth it, i think. When I get the seats fully functioning, I will post the switch install info as well.
Remove seat from truck and take off side panel. See below...
When you start pulling off the bottom covering, the front will have hog rings holding the covering. Remove these... See below...
After rings are removed, the covering can be fully pulled back and pad prepped for install..... See below..
Next, Mark the pad for cutting and cut to fit. (Instructions come with the pads for how to cut)...
Next, I used cable ties to replace the hog rings.... Pics below...
hook in the cable ties and tighten down. Ensure your velcro strips are placed properly before tightening.. See below...
Now put back bottom covering and start on the top..
Pull back covering up.... careful for airbag section......
Here is a pic of the top pad install. I turned the pad sideways and cutt to proper length. I found that easier.
I have my switches installed in my doors. I used the rotary illuminated ones rather than the toggle ones. I just liked the look better. There was a fair bit of work putting the switches in the doors, but well worth it, i think. When I get the seats fully functioning, I will post the switch install info as well.
For the back heater it will also fit if you trim about 1/4" off each side. Then the entire heating element can be used. Only tall folks are likely to care though.
XLT, what is the fuse rating on the underseat circuit you used?
I would recommend running to the passenger kick panel and using an add-a-circuit when you have time. There is a specific circuit just for heated seats!
Sorry I can't remember the number.
05-06-2012, 02:09 PM
#66
05-06-2012, 02:14 PM
#67
Meaner than ymeski56
Originally Posted by sllydderrr
Great pictorial!
For the back heater it will also fit if you trim about 1/4" off each side. Then the entire heating element can be used. Only tall folks are likely to care though.
XLT, what is the fuse rating on the underseat circuit you used?
I would recommend running to the passenger kick panel and using an add-a-circuit when you have time. There is a specific circuit just for heated seats!
Sorry I can't remember the number.I don't know what the fuse rating is but I was planning on getting power from a new location anyways. If you can find it that would be great as I had to run the power wire from the passenger seat through the bottom of the jump seat and tie in with the drivers side power. If there is one on the driver's side that would be even better
05-06-2012, 02:15 PM
#68
Meaner than ymeski56
Originally Posted by beauwulf
Seconded! And thanks for the detailed instructions, XtraLargeTall. I'll also email the vendor for the instructions they offer. By the time they get here I might even think I know what I'm doing
05-13-2012, 07:42 PM
#69
2013 Ruby Red FX4 SCrew
Thread Starter
After a couple of months of picking at it. I finally finished my inserts. My last past was putting the switches in the doors,
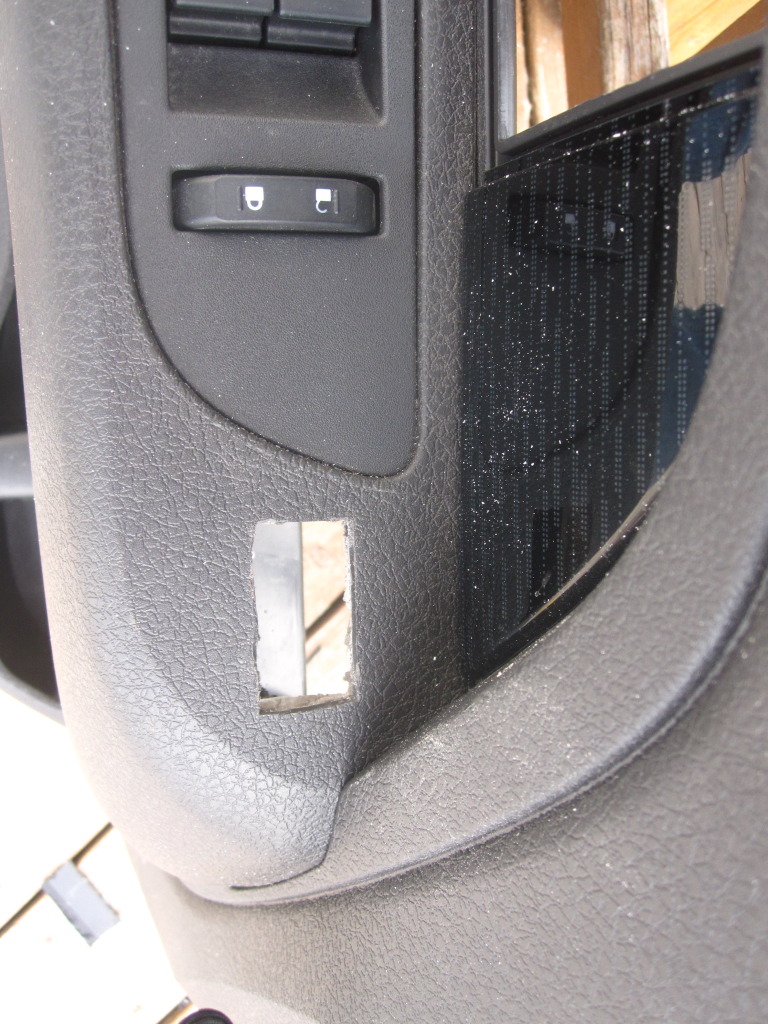
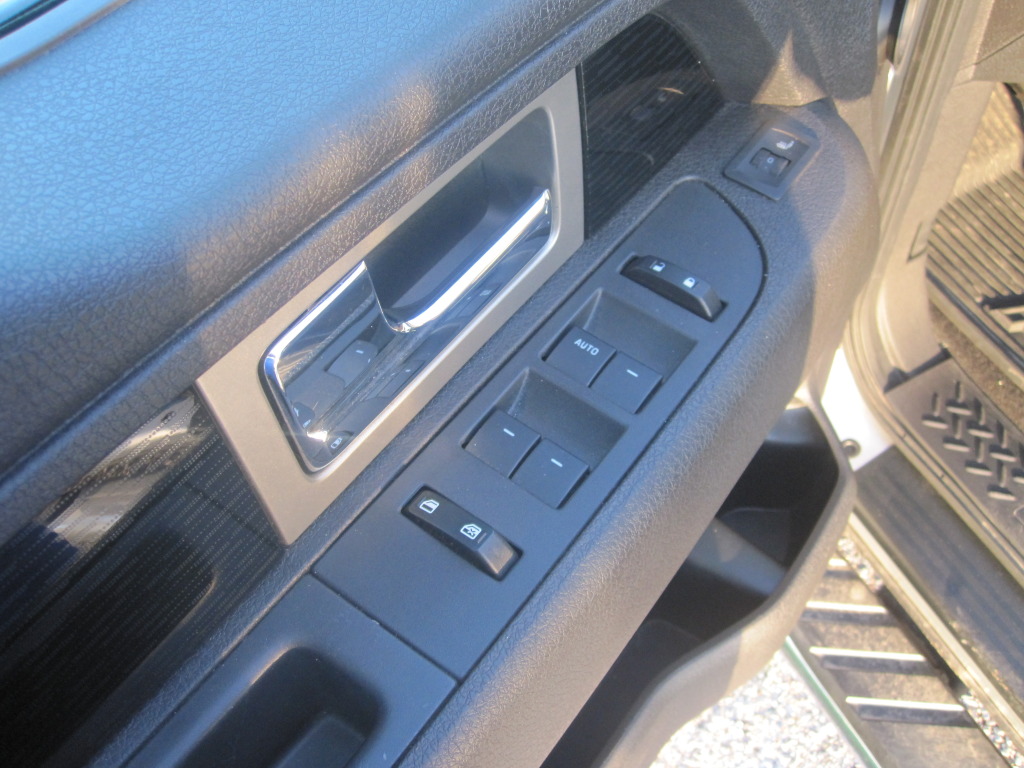
I cut out a section of the seat armrest to insert the switch....
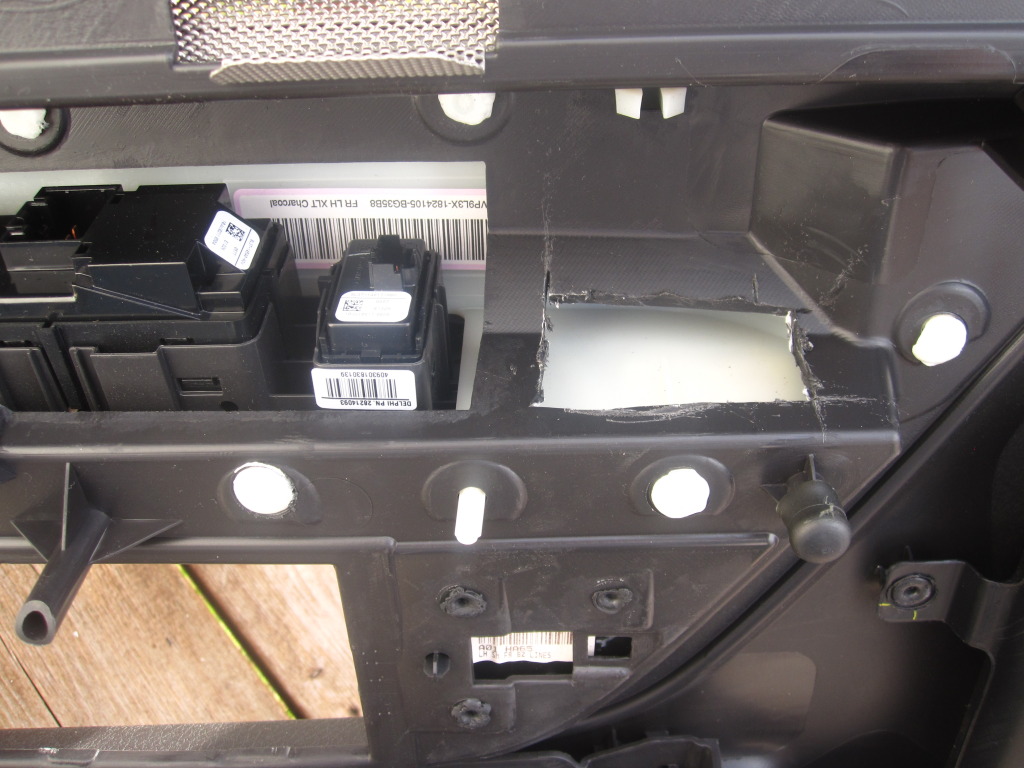
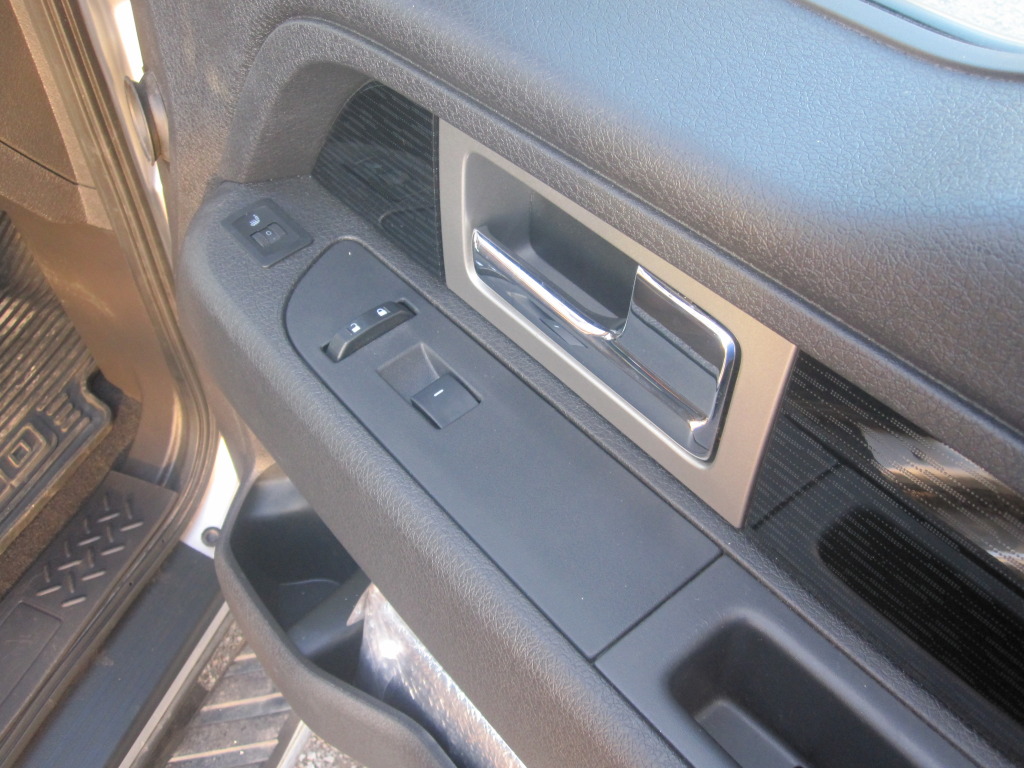
Here is the bottom view.....
I used a Dremel tool to cut out the plastic inside the door......
Next I drilled 4 corner holes from the top in order to insert the switch through the door handle......
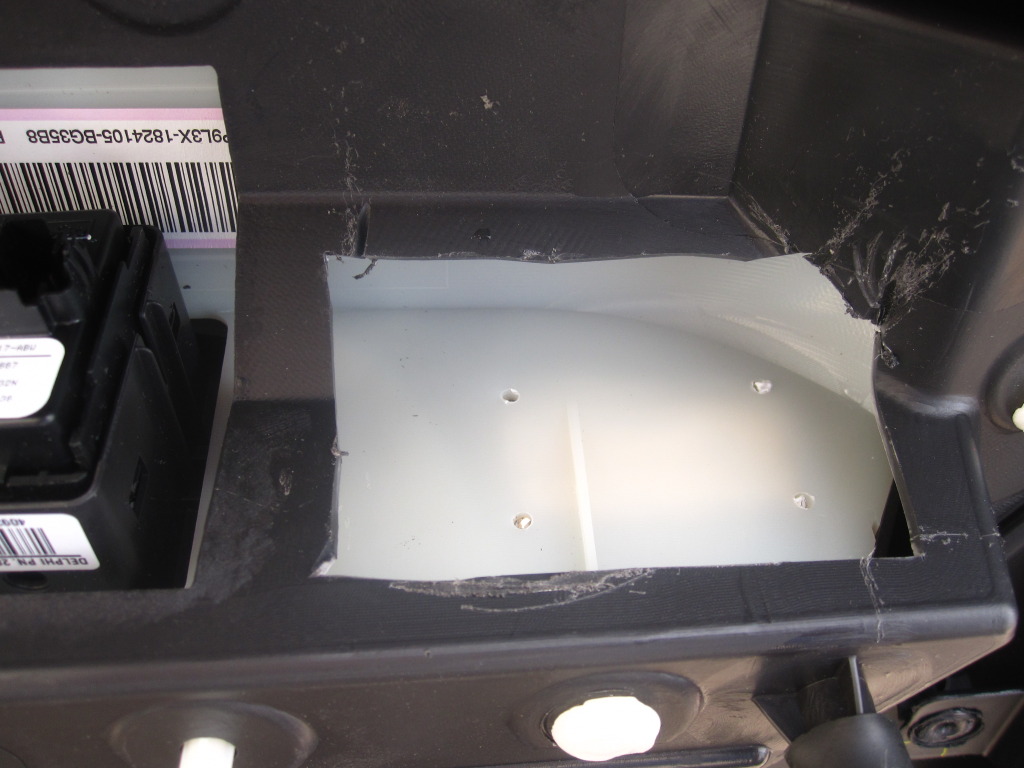
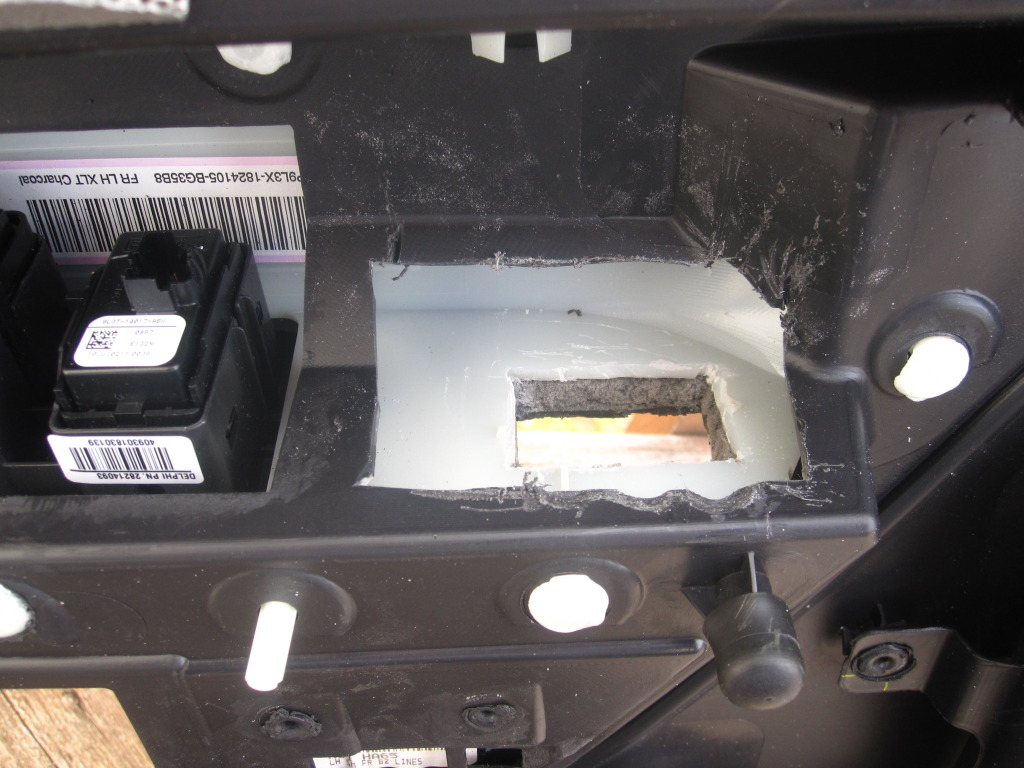
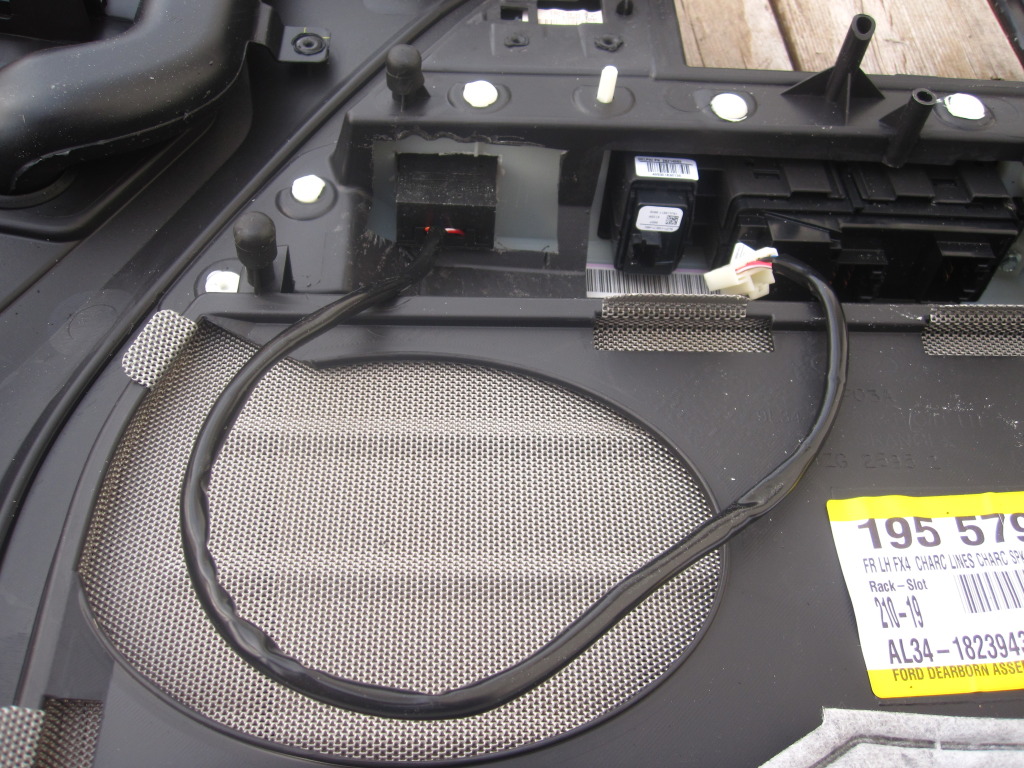
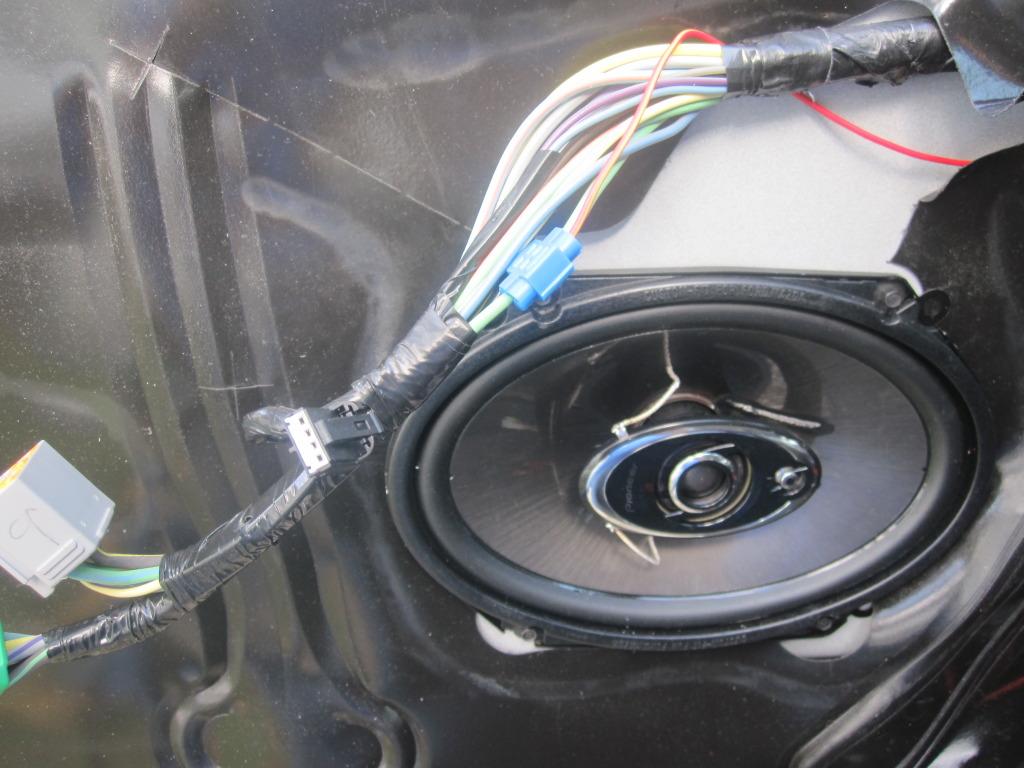
Next I had to run wiring from door to truck body. I put a small hole in the grommet (door side) and drilled a 5/8 hole in truck body.I inserted a siliconed grommet in the hole and ran the wiring. (wiring is trailer wire... waterproof shield).......
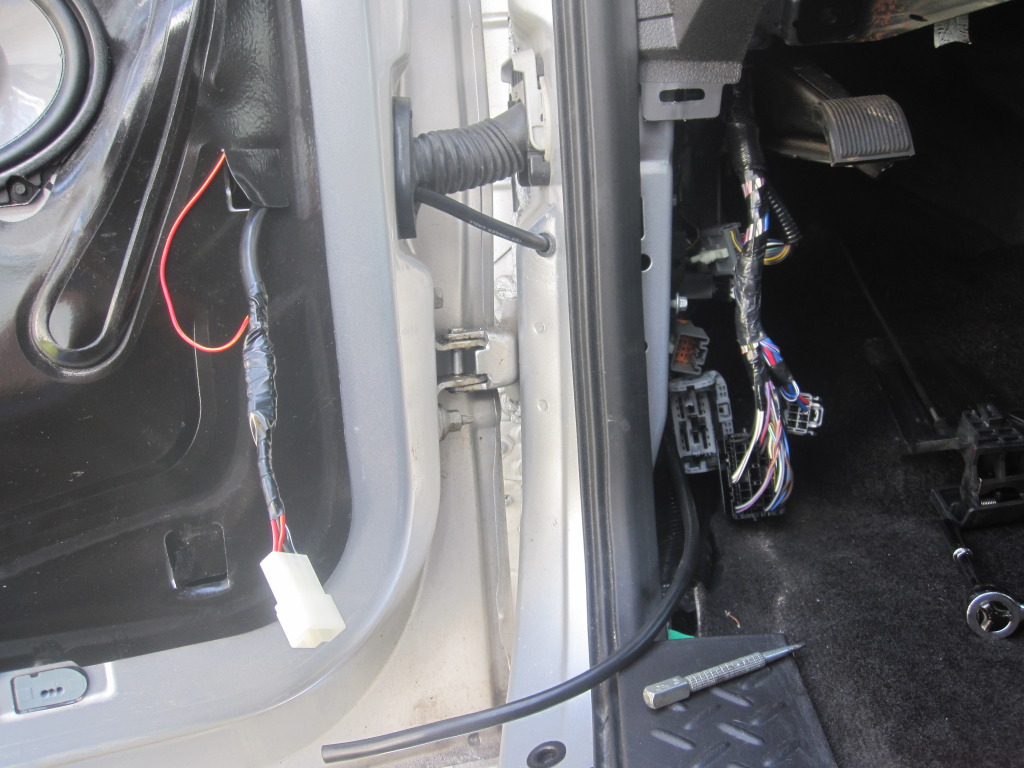
As you can see above, the hood release was removed... 1 bolt. Also the plugs were taken off in order to get access to the inside behind the cabling in order to pull out the installed wiring. There was a plastic/rubber cap behind all the cabling and connectors. I removed that. Drilled a hole in it, pulled the wiring through and replaced the cap.
My switches have lit seat icons, so I picked up the power for that LED from my window switch lights. (Only wire that has 12 voilts when ignition is on)...
Here are the finished door switches........
I ran my power to the fuse in my panel labelled rear heated seats. Works great. To bad I won't need them for months....
Almost forgot to add the night pic.......
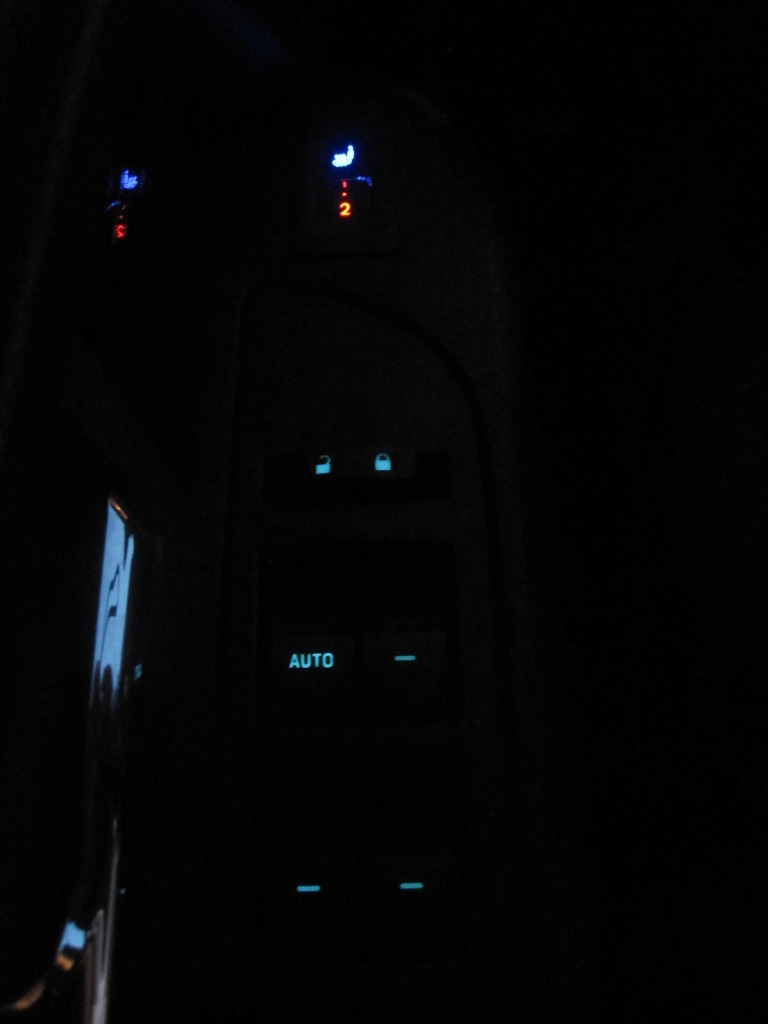
Not an exact blue match, but still looks good. The rotary (red) switch is only on when the switch is somewhere in th "ON" position. Otherwise, the switch only has the seat icon illuminated.
Lotta work to get this all completed, but I think well worth it......
I cut out a section of the seat armrest to insert the switch....
Here is the bottom view.....
I used a Dremel tool to cut out the plastic inside the door......
Next I drilled 4 corner holes from the top in order to insert the switch through the door handle......
Next I had to run wiring from door to truck body. I put a small hole in the grommet (door side) and drilled a 5/8 hole in truck body.I inserted a siliconed grommet in the hole and ran the wiring. (wiring is trailer wire... waterproof shield).......
As you can see above, the hood release was removed... 1 bolt. Also the plugs were taken off in order to get access to the inside behind the cabling in order to pull out the installed wiring. There was a plastic/rubber cap behind all the cabling and connectors. I removed that. Drilled a hole in it, pulled the wiring through and replaced the cap.
My switches have lit seat icons, so I picked up the power for that LED from my window switch lights. (Only wire that has 12 voilts when ignition is on)...
Here are the finished door switches........
I ran my power to the fuse in my panel labelled rear heated seats. Works great. To bad I won't need them for months....
Almost forgot to add the night pic.......
Not an exact blue match, but still looks good. The rotary (red) switch is only on when the switch is somewhere in th "ON" position. Otherwise, the switch only has the seat icon illuminated.
Lotta work to get this all completed, but I think well worth it......
Last edited by FordEver; 05-13-2012 at 08:04 PM.
05-13-2012, 09:47 PM
#70
Meaner than ymeski56
That is awesome! Great work and looks factory besides the slight mismatch in color. One thing I've learned is that using the heaters in the morning is nice for the back
The following users liked this post:
Toddman38 (02-13-2014)