When you click on links to various merchants on this site and make a purchase, this can result in this site earning a commission. Affiliate programs and affiliations include, but are not limited to, the eBay Partner Network.
Well, I finally figured it all out! Here is my full writeup on swapping OEM SYNC 1 Nav into your F150! Before I begin, I'm going to list the options in my truck: base audio, dual climate control, heated/cooled seats. You will need the following parts to complete the swap:
-nav radio and screen
-HVAC module BL3T-18C612-AF (in order to work heated and cooled seats)
-Sony amp CL3T-18B849-AA
-ALL pigtail connectors from donor truck plugging into the radio, HVAC module, and Sony amp
-Video wire 9L3Z-10E929-A
- Sirius/nav splitter antenna wire 9L3Z-10E928-A
-female radio harness, plugs into your original speaker wiring harness that plugged into your original radio (ACM)
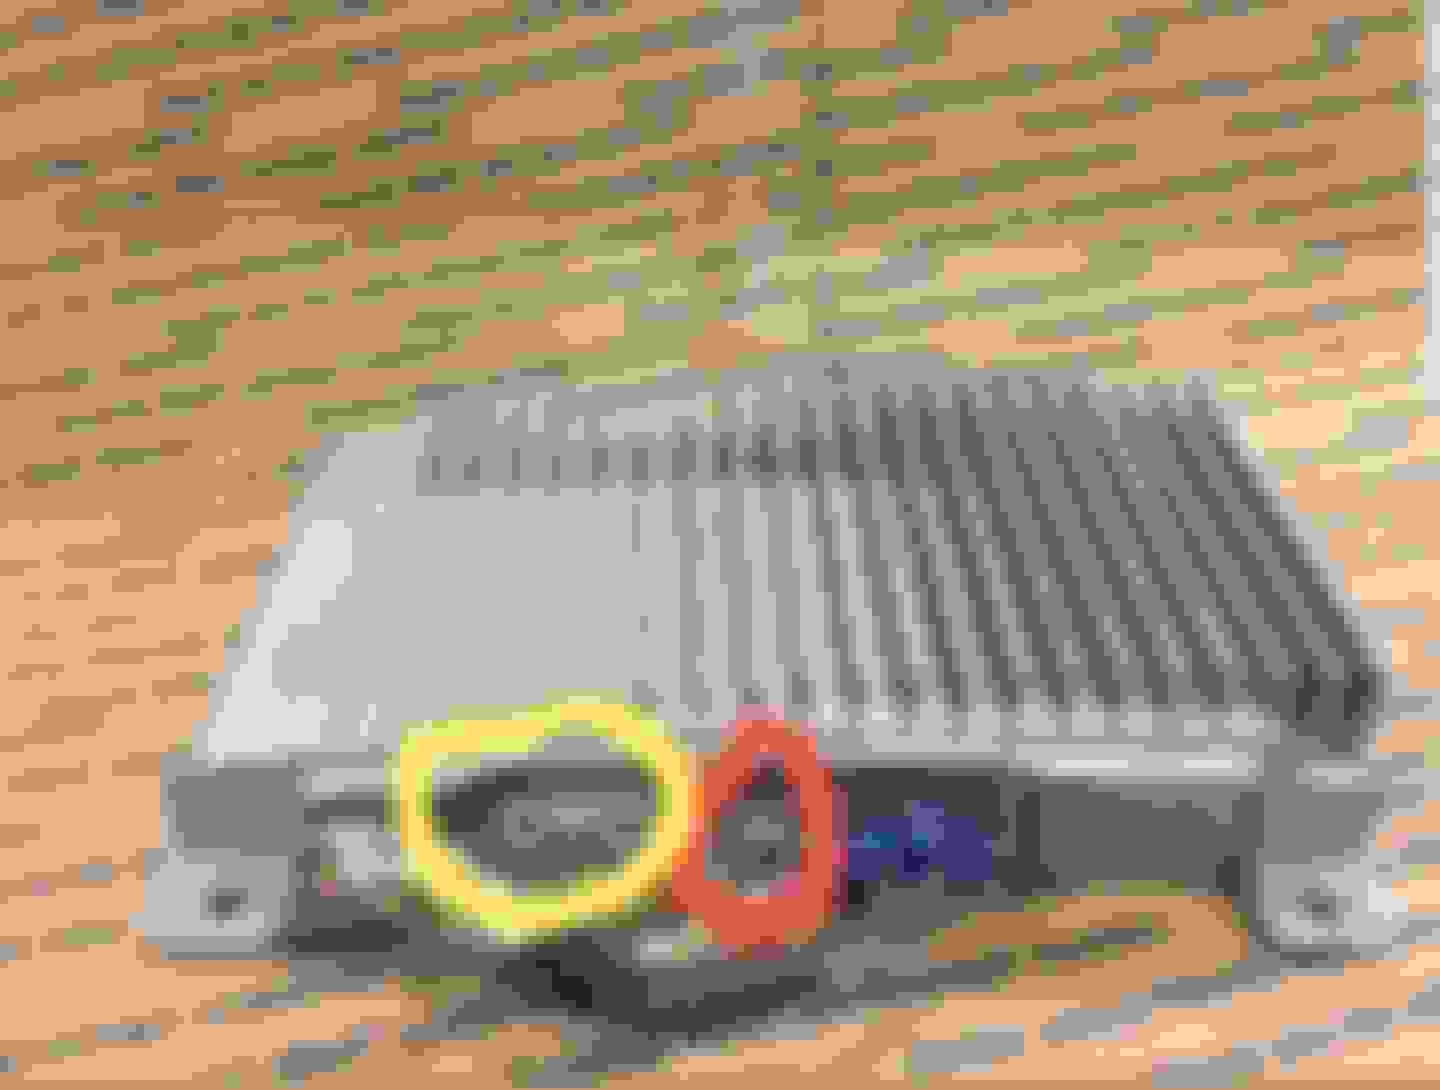
Thanks to member ProAktion who sent me all the wiring diagrams, I was able to repin all the connectors to the appropriate spot to get my nav up and running. You will need to obtain from a donor truck the nav display connector (circled in red below) and splice it to your existing connector that was running to the back of your radio display. You will need to add a few wires to the existing connector and you will then have power to both the ACM and nav display. Now, to get audio, that's a different story. The nav ACM does not have a built in amplifier like the original, so you will need to obtain a Sony amp and the pigtails that plug into it. I took the female adapter and made a harness that runs from my original speaker harness behind the radio, down to the amp (circled in red). You will also need to run wire from the connector circled in yellow to the ACM pigtail for the nav radio. You'll then splice the CAN BUS +/- to the power harness behind the radio (circled in yellow). You'll splice the ground, power, and starter control sense wires to the female wire harness that plugs into your original radio harness. To get power to the amp, I simply ran a designated power wire from the blue pigtail on the amp, under the glove box, and to the fuse box where theres already a fuse (fuse #19 20a) and added a fuse tap to get power to it. I simply then grounded from the same connector to the bare metal nearby. That should get your amp up and running. Without modifying your new ACM in Forscan, you will only have sound to your front speakers/tweeters, and you will not be able to adjust the volume. I posted below my modified ACM (I still need to modify it to gain my steering wheel controls back), but itll get you sound to all of your speakers, in theory. Now, lastly, for the HVAC. You need to completely unpin your existing HVAC connectors and repin them to your new HVAC module pigtails. Once that's done, simply plug them into the HVAC module and you're done. I will post my "in progress" pictures, but if you need help with figuring out what wire goes where, feel free to let me know. Hope this helps. P.S please ignore my poor wiring setup, I had it a mess just until I got it up and running so I know it would be staying. Nav ACM (color of wires does NOT match what youll have) Sony amp Original radio ACM harness plugged into my purchased female harness adapter Nav ACM harness How i have my navi ACM set up in Forscan (before modifying it to make my steering wheel controls work again and add HD radio)
Well, I finally figured it all out! Here is my full writeup on swapping OEM SYNC 1 Nav into your F150! Before I begin, I'm going to list the options in my truck: base audio, dual climate control, heated/cooled seats. You will need the following parts to complete the swap:
-nav radio and screen
-HVAC module BL3T-18C612-AF (in order to work heated and cooled seats)
-Sony amp CL3T-18B849-AA
-ALL pigtail connectors from donor truck plugging into the radio, HVAC module, and Sony amp
-Video wire 9L3Z-10E929-A
- Sirius/nav splitter antenna wire 9L3Z-10E928-A
-female radio harness, plugs into your original speaker wiring harness that plugged into your original radio (ACM)
Thanks to member ProAktion who sent me all the wiring diagrams, I was able to repin all the connectors to the appropriate spot to get my nav up and running. You will need to obtain from a donor truck the nav display connector (circled in red below) and splice it to your existing connector that was running to the back of your radio display. You will need to add a few wires to the existing connector and you will then have power to both the ACM and nav display. Now, to get audio, that's a different story. The nav ACM does not have a built in amplifier like the original, so you will need to obtain a Sony amp and the pigtails that plug into it. I took the female adapter and made a harness that runs from my original speaker harness behind the radio, down to the amp (circled in red). You will also need to run wire from the connector circled in yellow to the ACM pigtail for the nav radio. You'll then splice the CAN BUS +/- to the power harness behind the radio (circled in yellow). You'll splice the ground, power, and starter control sense wires to the female wire harness that plugs into your original radio harness. To get power to the amp, I simply ran a designated power wire from the blue pigtail on the amp, under the glove box, and to the fuse box where theres already a fuse (fuse #19 20a) and added a fuse tap to get power to it. I simply then grounded from the same connector to the bare metal nearby. That should get your amp up and running. Without modifying your new ACM in Forscan, you will only have sound to your front speakers/tweeters, and you will not be able to adjust the volume. I posted below my modified ACM (I still need to modify it to gain my steering wheel controls back), but itll get you sound to all of your speakers, in theory. Now, lastly, for the HVAC. You need to completely unpin your existing HVAC connectors and repin them to your new HVAC module pigtails. Once that's done, simply plug them into the HVAC module and you're done. I will post my "in progress" pictures, but if you need help with figuring out what wire goes where, feel free to let me know. Hope this helps. P.S please ignore my poor wiring setup, I had it a mess just until I got it up and running so I know it would be staying. Nav ACM (color of wires does NOT match what youll have) Sony amp Original radio ACM harness plugged into my purchased female harness adapter Nav ACM harness How i have my navi ACM set up in Forscan (before modifying it to make my steering wheel controls work again and add HD radio)
i have the same small sync display with bluetooth and Syrius. I'd like to get the NAV. but I installed the kicker sound system with AMP/SUB under the backseat. Do you think it's still possible?
i have the same small sync display with bluetooth and Syrius. I'd like to get the NAV. but I installed the kicker sound system with AMP/SUB under the backseat. Do you think it's still possible?
The OEM Sony amp also serves as a DSP, so I'm honestly not sure if that would work for you, as the radio has to talk to the DSP to work the audio, and all the speakers receive power from the amp. So my assumption is going to be no
Thanks to another member who's taken on the install, they got the Forscan ironed out before I had the chance to. Below is the copy of his that you'll plug in. If you have no backup camera (like me), change "CEA5" to "CEE5" and the backup camera screen will not pop in. All features are now working for me, including voice commands.
Did you use a separate radio and screen or the combined unit? do you know the part number for the unit? Also do you have the complete acm data, as ther are a few lines of code missing.

 01-15-2019, 07:17 PM