When you click on links to various merchants on this site and make a purchase, this can result in this site earning a commission. Affiliate programs and affiliations include, but are not limited to, the eBay Partner Network.
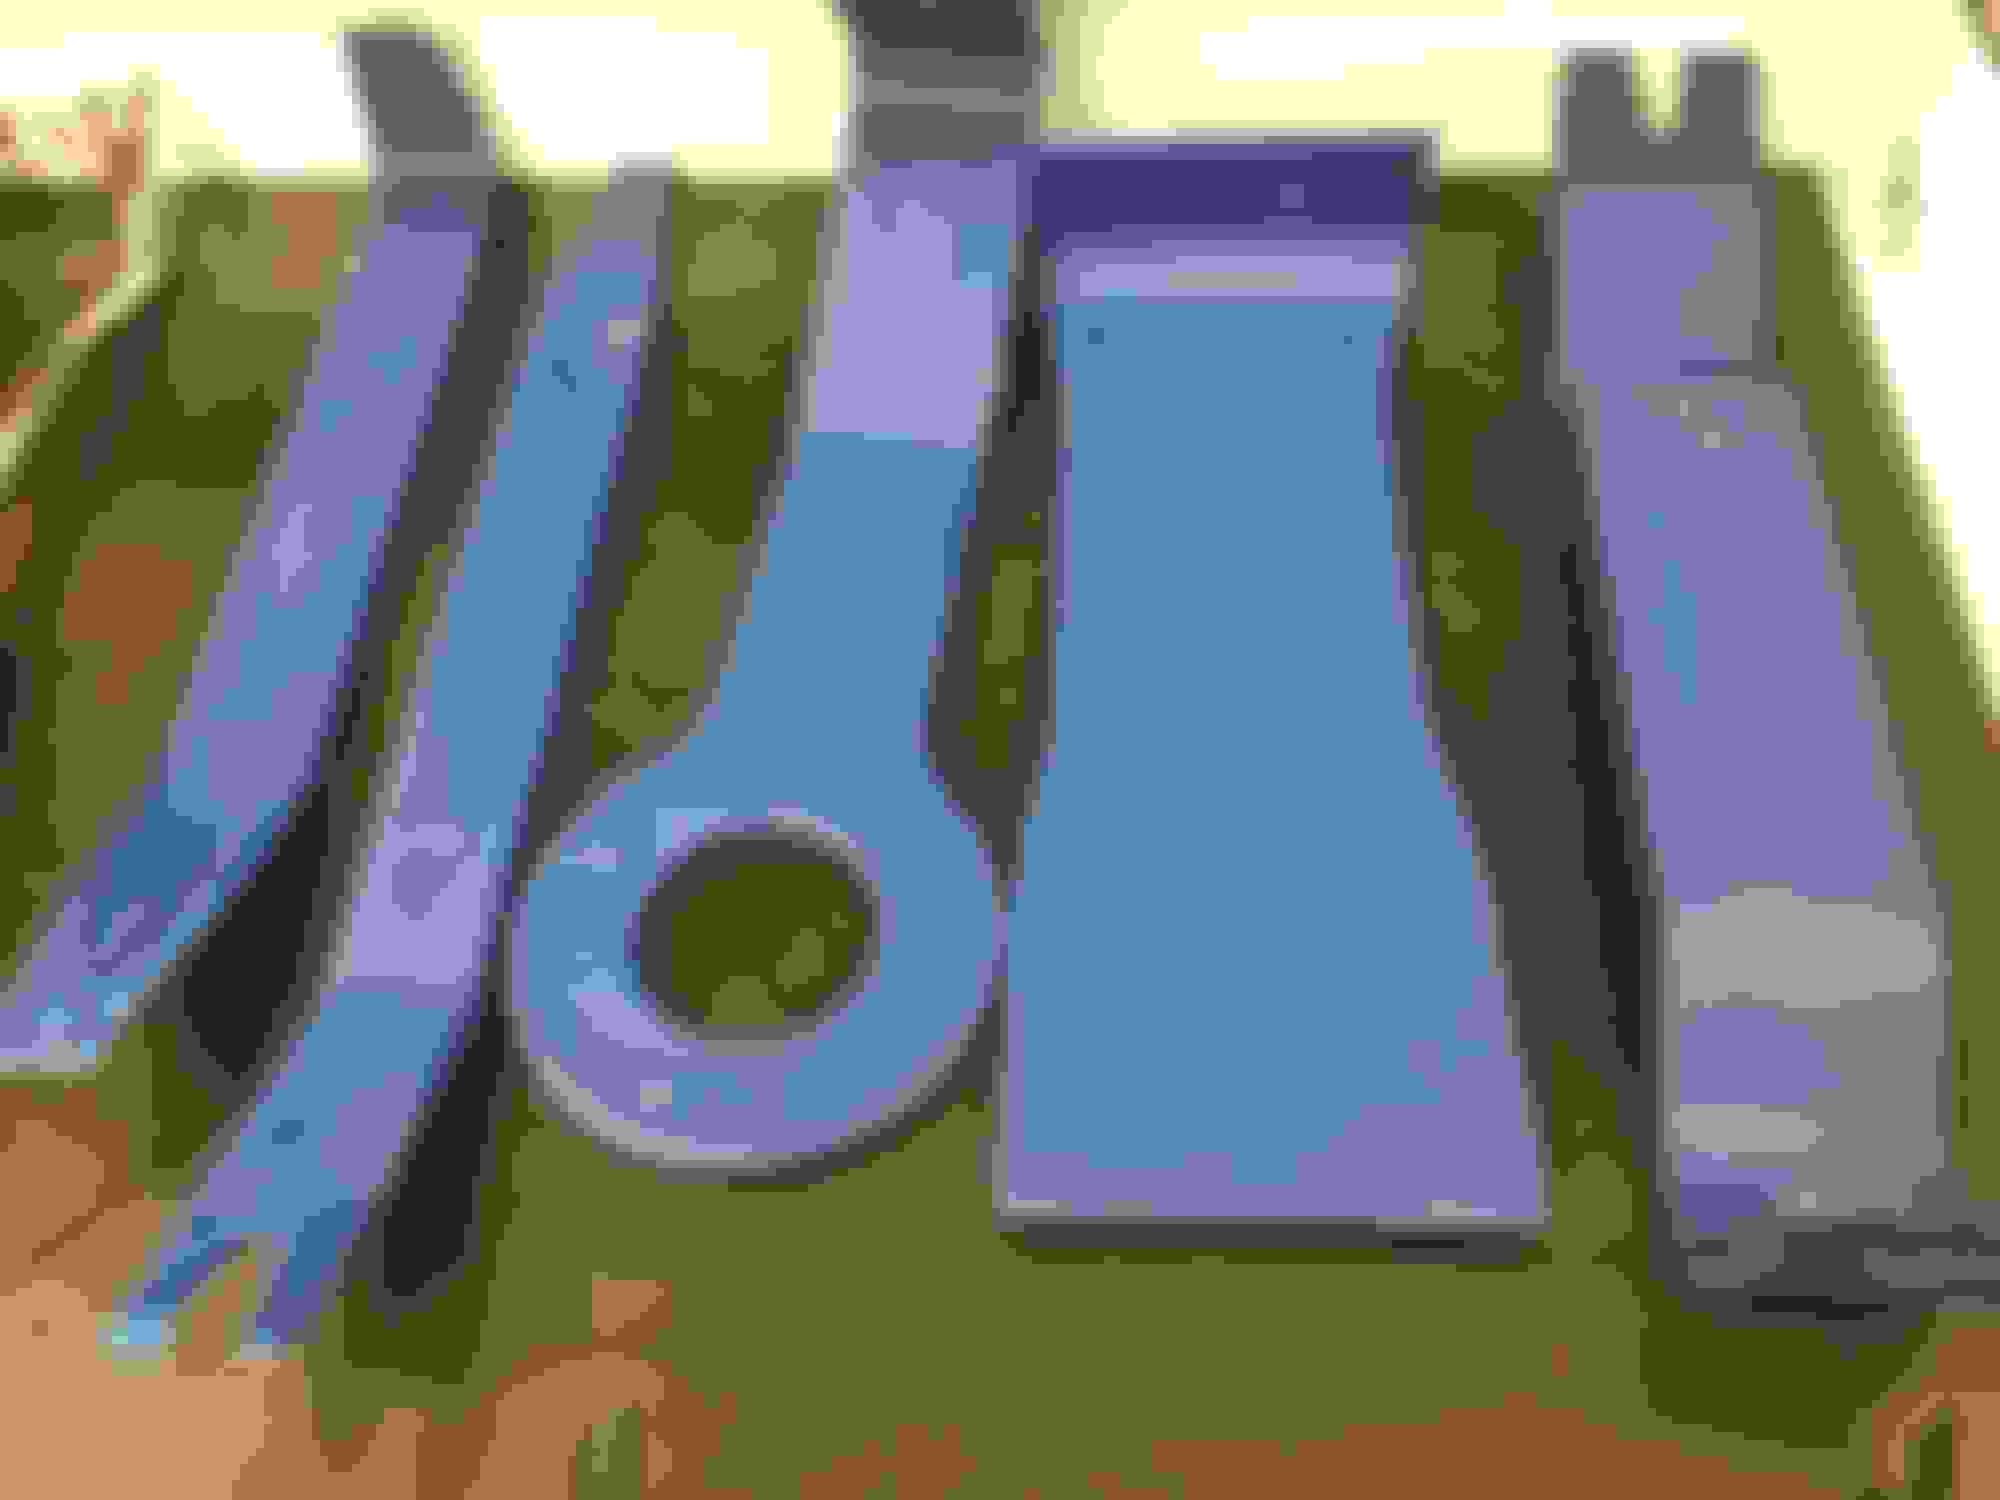
Removing fender badges '17 F150 to disassemble and paint
Custom Fabrication DepartmentThis is the section to discuss any and all custom work that you've done or had made that may not be available on the retail market.
Removing fender badges '17 F150 to disassemble and paint
Wanted to make others aware that removing the badges in the fenders can cause damage to the aluminum fenders. Be VERY VERY careful.
I put several pieces of tape around the badges to protect the paint but had no idea carefully prying with a set of plastic trim tools would so easily damage the aluminum like it did.
Yes I used fishing line first as best I could, it doesn't work great due to the two plastic posts and two squeeze clips that prevent you from cutting the adhesive except for the outer edges.
I recommend taking a thin trim tool and pushing it carefully down and up behind each area to sever the adhesive. Then reach from the top of the engine bay to gaijbeasy access to squeeze and push each clip one at a time while using a plastic trim tool in the outside.
I managed to put 4-5 very small shallow dents under the badge that can only be seen at certain angles, but they're definitely there and I will need to get PDR to remove them now.
Driver side I got smart and added thin strips of wood to use as leverage for when using the trim tools. Worked well but still came away with two dents behind where the badge sits on the fender. I can probably leave those since they'll never be seen but I'll have them addressed when I get the other side fixed.
Can't see the dents in the above photo but they're there, all 4 or 5 of them lined up where the rounded backside of the truck took was
All in all, painting the badges will now be an expensive mod due to the damage I caused not realizing, even when I was very careful and taking my time.
Anyone that defends the aluminum body and thinks I was a great idea never had this happen to them I'm thinking. While it has its advantages it's very easily dented. The aluminum panels are very soft, doubt this would happen on steel so easily.
There are a lot of different ideas about debadging, but truth be told, the only (ONLY) way to debadge *properly* is to use a heat gun. Done right, the heat will break the adhesive's grip, and the badge will come right off using a plastic tool (like you used). I've done lots of emblems that way with -0- issues. Then, if after you get the badge off and there's some gooey sticky stuff left over, use 3M Adhesive Remover to finish the job. Just like it was never there...
I thought that was my downfall. It wasn't warm enough, only 60 degrees out. I should've heated it with my heat gun. Would've helped it come off much easier for sure.
I wonder if others have subtle damage but haven't realized since their very difficult to see except at particular angles.
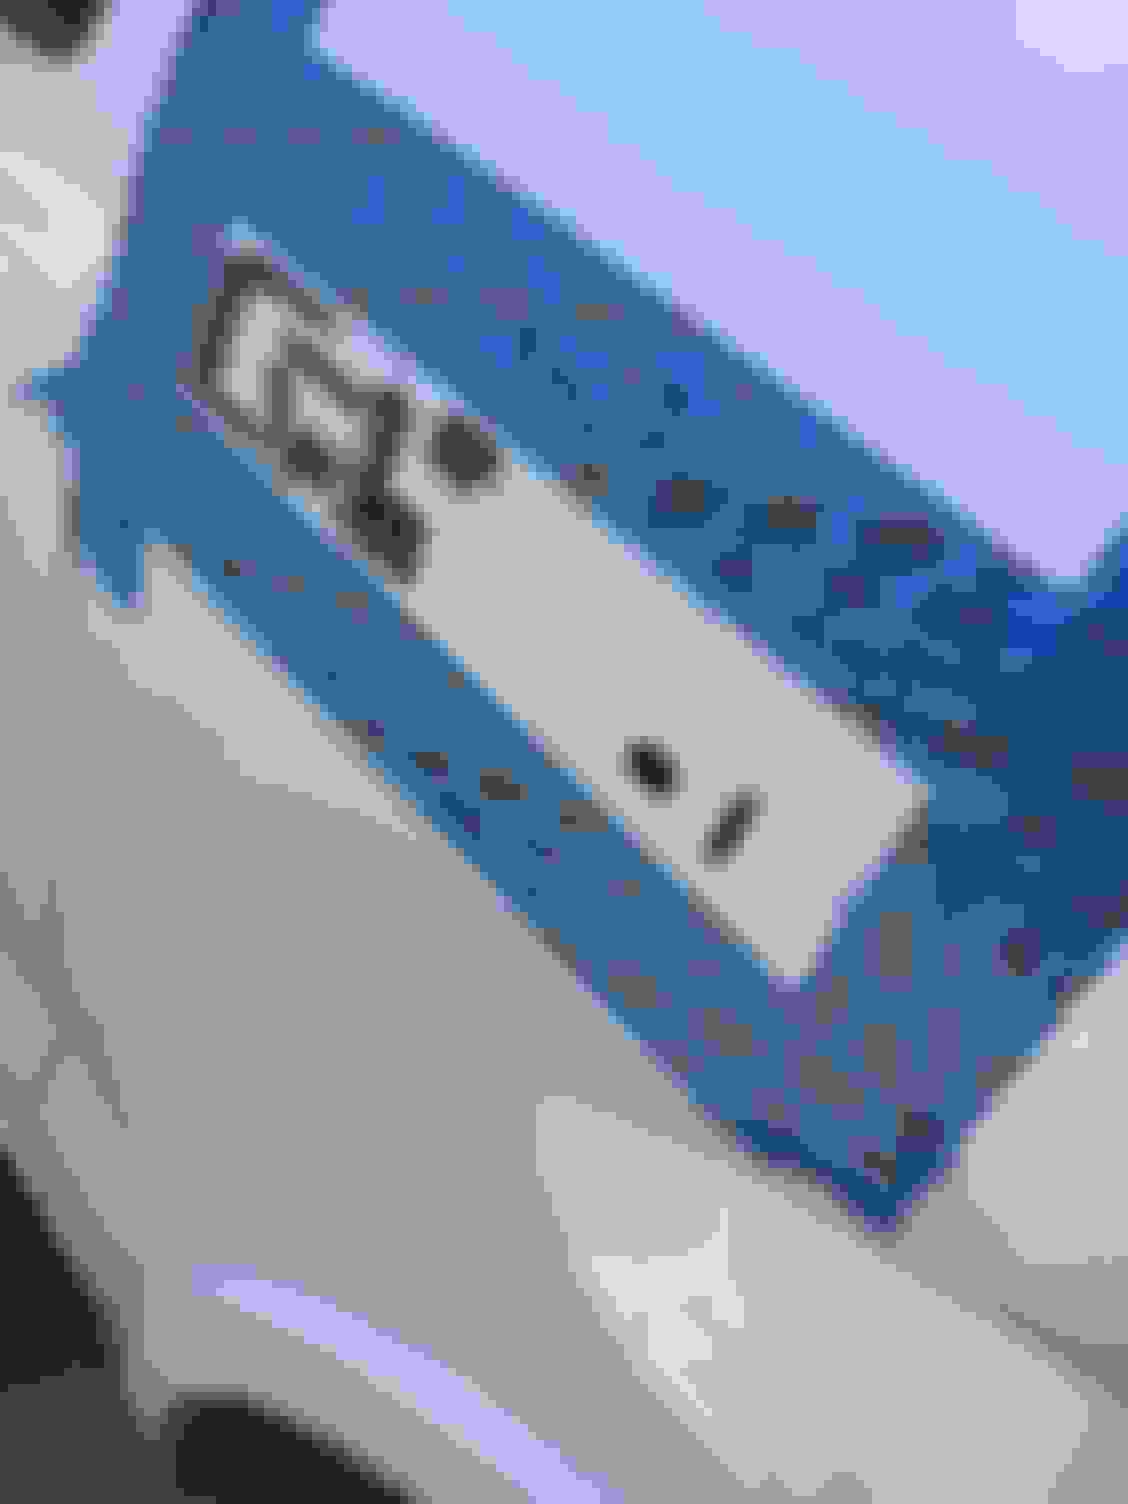
How is the silver 'F 150' held onto the black 'F 150' outline?
I want to do this to paint the silver, but am concerned about it all going back together.
Did you have to break anything to separate the two parts?
Are their clips holding the posts on the inside of the fender, or just the adhesive tape on the emblem?
Yep, which makes it impossible to use fishing line to get them off.
I got the dents out with PDR. Once the tech put his UV light up against the side of the truck I could see just how bad they were. The first side had 7-8 very shallow dents, the second side I thought I was more careful with has 10.
They're all out now.
Also don't pull too hard on the fishing line I actually cut through the plastic a little in a few areas!
How is the silver 'F 150' held onto the black 'F 150' outline?
I want to do this to paint the silver, but am concerned about it all going back together.
Did you have to break anything to separate the two parts?
Looks like I didn't answer your question fully. You have to use a small pick or screwdriver to break (pop off) the melted plastic caps that hold the pieces together. Then carefully pull the pieces apart, if they don't come apart easy enough you may have missed a melted cap or left too much of it.

 09-09-2017, 04:56 PM


 .
.