Making room behind the Screw seat...?
#11
" The LMI 1520 SA, Straight Ahead, is a unique product for the "aluminum Body" trucks in that it shifts the entire rear seat straight ahead 2 inches at the top of the seat and can be adjusted to shift the seat bottom from 2 inches up to 3.25 inches ahead. The extra room behind the seat makes an ideal location for amplifiers, speakers and other components without sacrificing head room. It is an easy bolt on product that also allows the seat backs to be folded ahead easier than they are from stock."
#12
looks like the pictures are videos are only for the package that lifts the seats up. I googled and couldn't find any info on the package that moves it forward.
Anyone else got more info?
Anyone else got more info?
#13
Senior Member
Thread Starter
According to Lee, everything is bolt up with no cutting, welding of mods of the truck involved. I am not sure of any included instructions but, if it is as simple as it seems, I am sure we can figure it out. I ordered a kit from him and plan using a square and tape measure when installing to keep the seats as even as possible.
I also ordered the driver's side seat back release kit from Off-road Alliance which I will install once the LMI kit arrives. No sense breaking it all apart twice.
I will keep y’all update with pics when I receive the kit and begin install. Install time was quoted as about an hour.
The following 2 users liked this post by Sainte:
Old Grey Mule (02-18-2019),
PLASMAN (02-17-2019)
#14
'19 Lariat 3.5
I spoke with Lee at LMI the other day. He said the kit consists of 7 strap mounts and two bracket stand-offs for the seat latches. The standoff goes on the seat back on the passenger side and on the frame for the drivers side. I spoke with him for about 15 minutes and he seemed like a genuinely nice guy and, judging from zero complaints from the guys with the seat lifts, I’d say he is turning out a quality product.
According to Lee, everything is bolt up with no cutting, welding of mods of the truck involved. I am not sure of any included instructions but, if it is as simple as it seems, I am sure we can figure it out. I ordered a kit from him and plan using a square and tape measure when installing to keep the seats as even as possible.
I also ordered the driver's side seat back release kit from Off-road Alliance which I will install once the LMI kit arrives. No sense breaking it all apart twice.
I will keep y’all update with pics when I receive the kit and begin install. Install time was quoted as about an hour.
#15
Senior Member
Thread Starter
Do you know if it would be possible with the LMI 1520 SA kit, to move only the bottom of the rear seat forward, and leave the seatback in the factory location at the top, giving it some "recline" ? Or does this kit move the entire seat bottom and back straight forward 2" ? Rear seat back seems too flat to me.
no no idea really. I think with some minor adjustments you could use this kit to recline the seat backs. I do not have the kit yet so I can not say for sure.
#16
'19 Lariat 3.5
Maybe shorter length stand-offs for the seat latches? Anxious to see your photos.
#17
Senior Member
Thread Starter
#18
Senior Member
Thread Starter
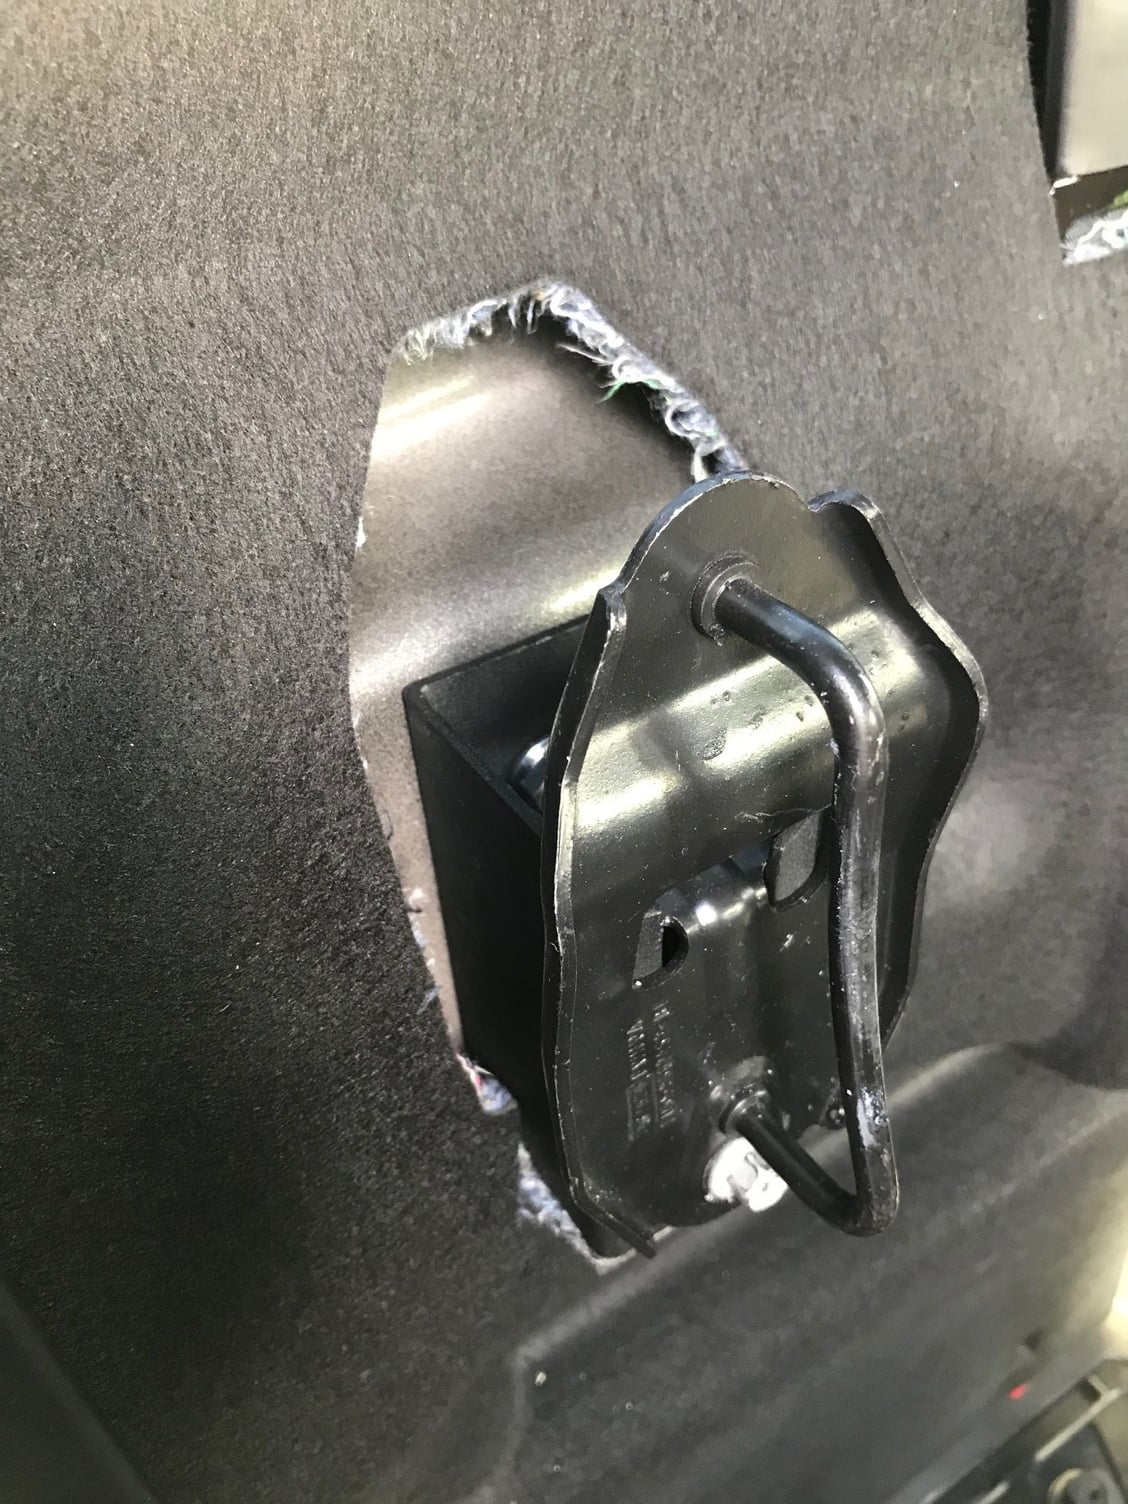
2" square stock stand off installed. A bolt with a large washer welded to it is fed thru the rear wall and secured with a nut. VERY tricky portion of install. Factory bolt installed in bottom of stand off to rear wall. Supplied nut/bolt combo used to hold lock bar to stand off.

The following users liked this post:
isthatahemi (12-22-2019)
#19
Senior Member
Thread Starter
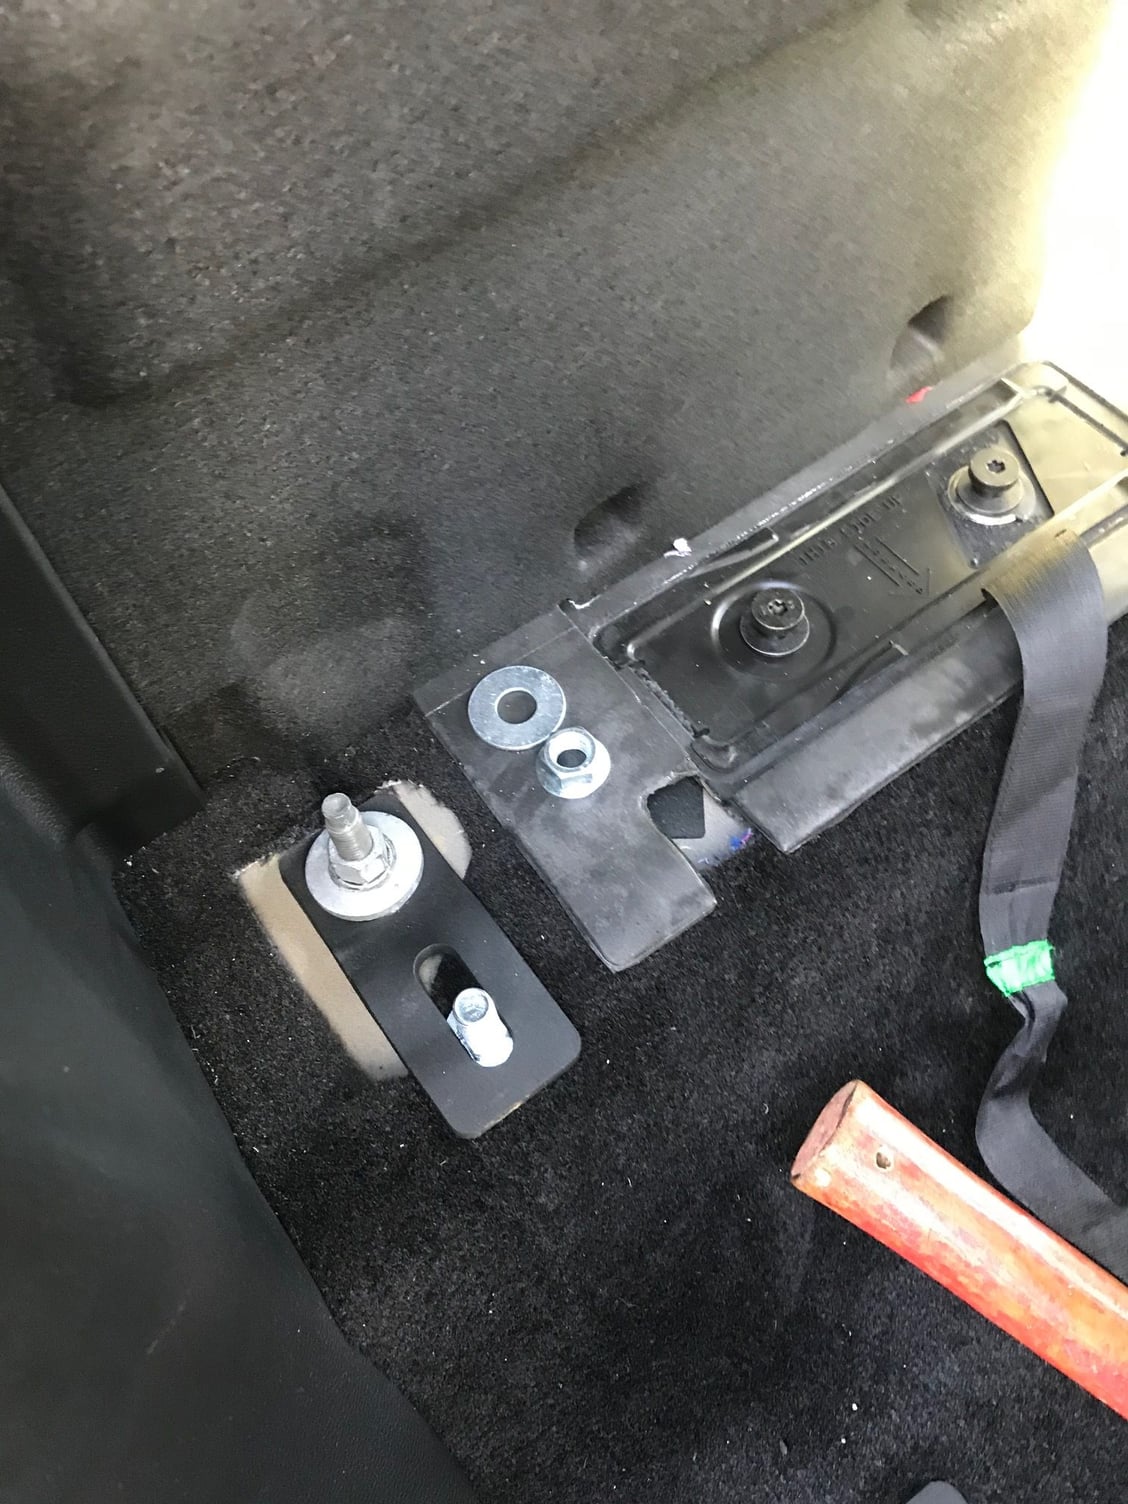
You WILL WANT/BEG and CRY for an impact drill to remove and re-install these nuts and bolts.
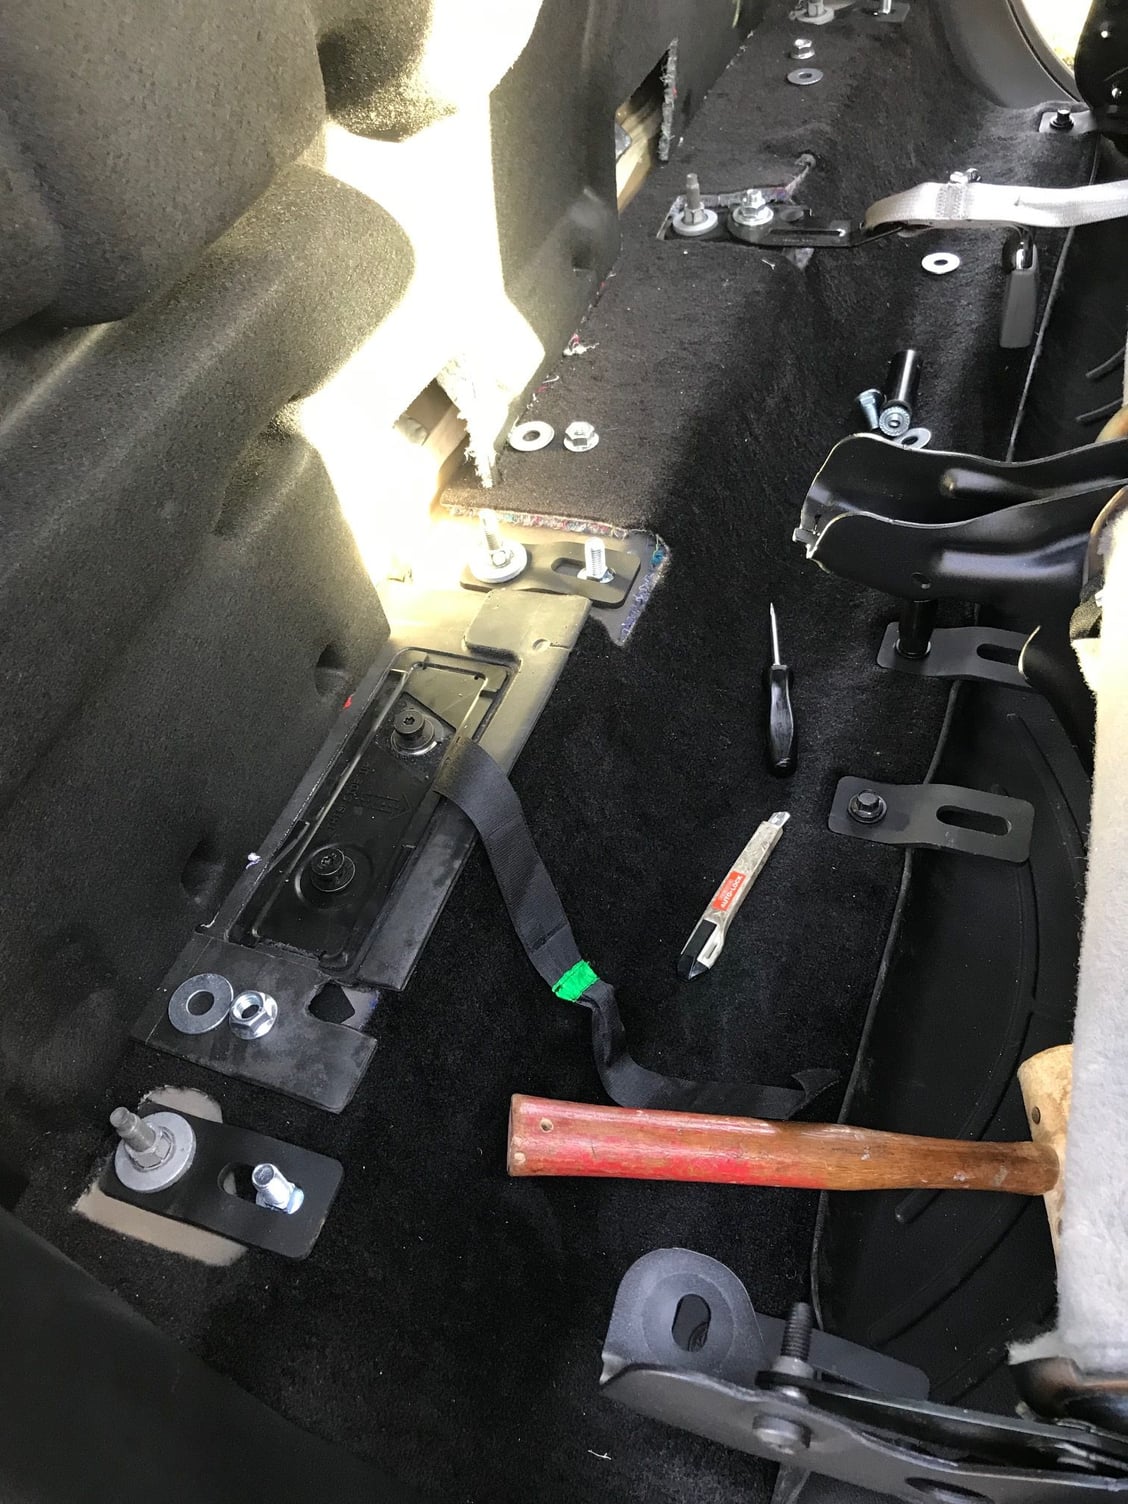
Do your very best to square ALL these straps. Also watch for routing the seat belt. I got the driver's side rear caught up on the inside of the strap. I removed the bolt securing it to the side of the seat mount, un-F'd it and reinstalled bolt.

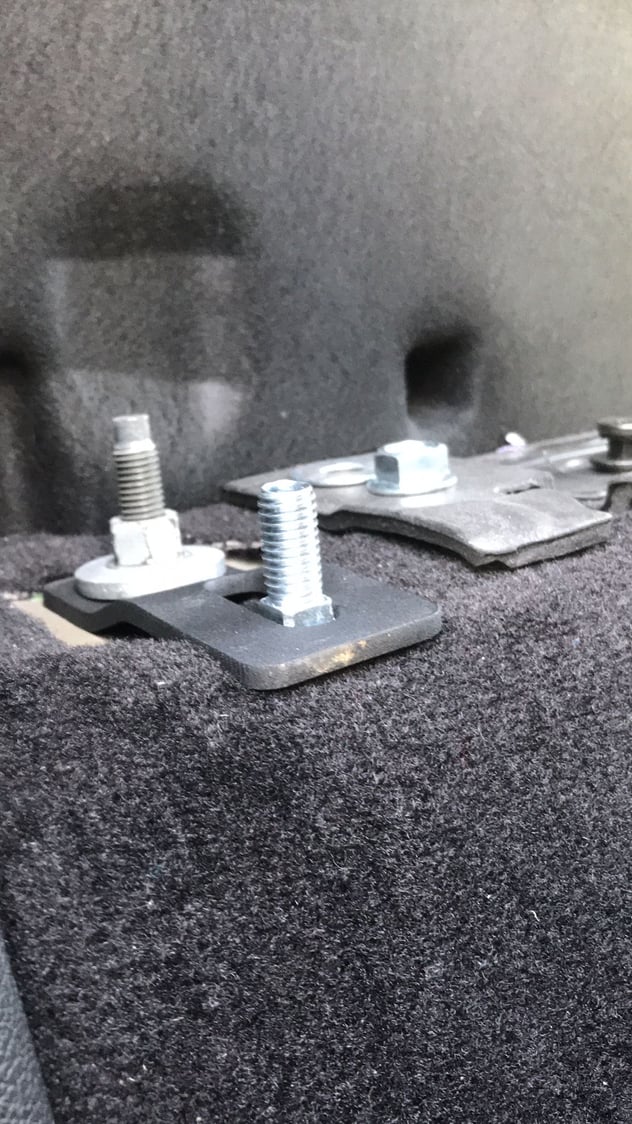
Carriage bolts installed in all straps.
#20
Senior Member
Thread Starter

Definitely added room to behind the seat. The seat backs do appear to be more upright now though, not sure if this is an optical illusion.

Driver's side stand off attached to the rear of the seat. It was a difficult portion of the install as using the factory T30 Torx bolts to attach the stand off to the seat were a PIA to get to through the two small holes in the stand off with tools. The latch will attach to the stand off with supplied hardware.
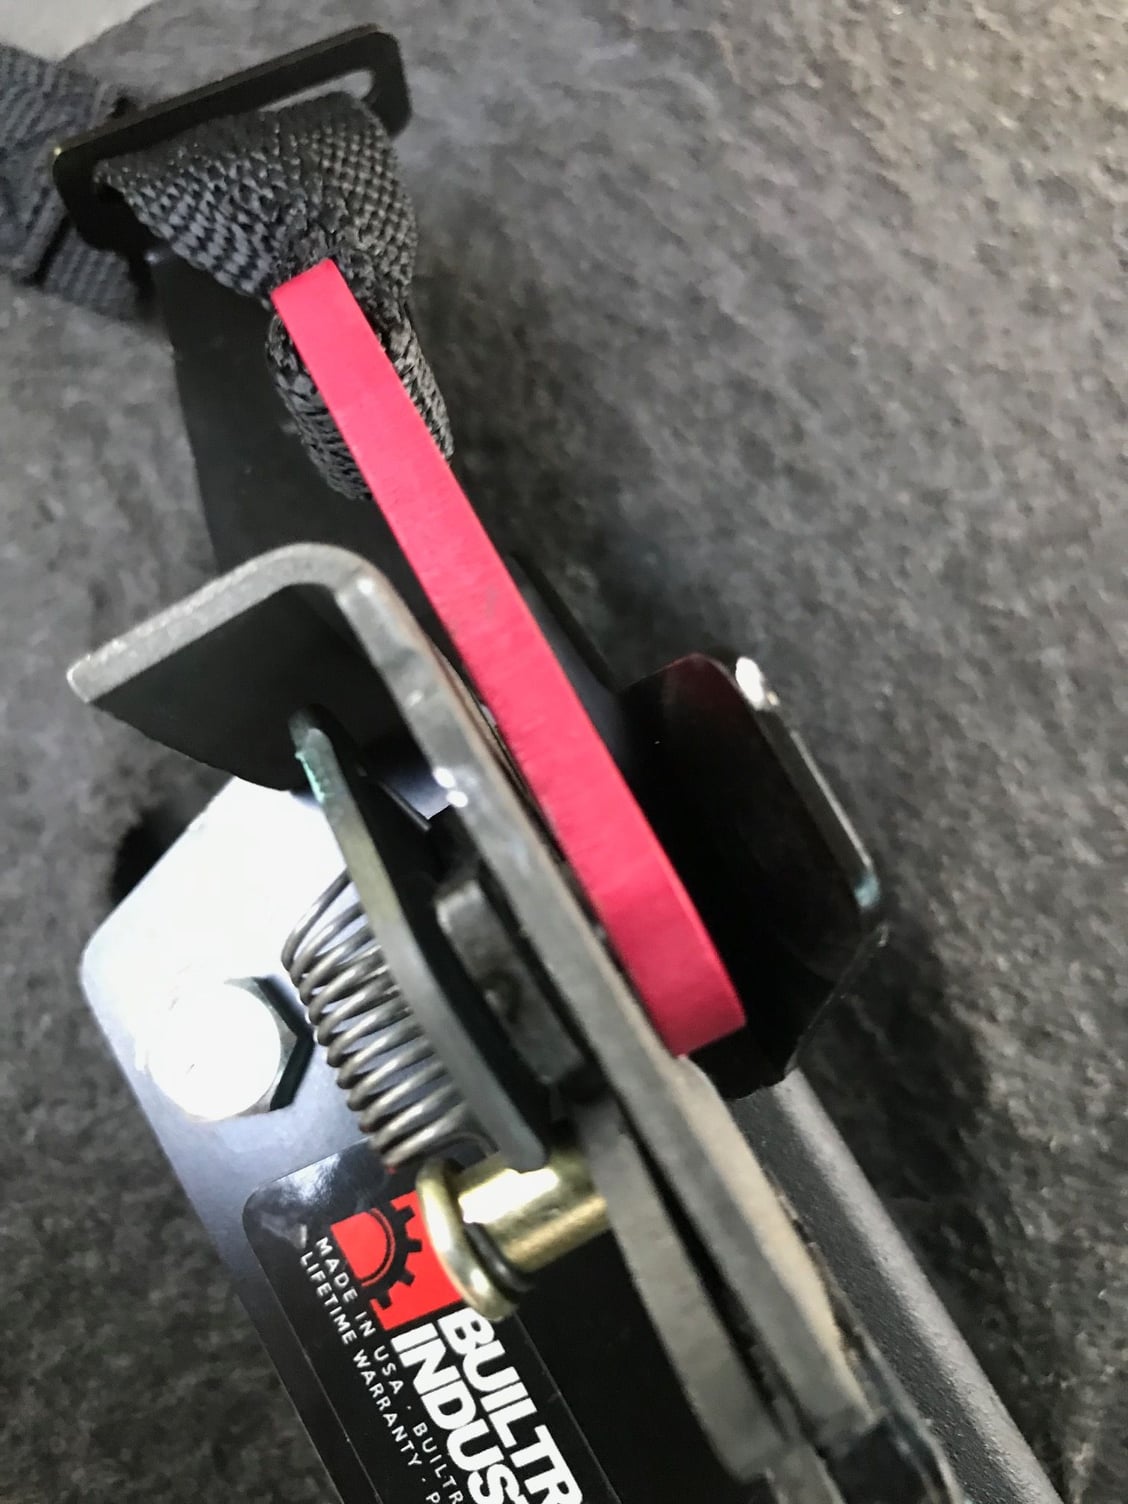
Installed the lanyard on the release pin. Nice concept, POOR execution in materials. The red aluminum clip is fine but, the black metal "keeper" is way too thin to keep the red clip in place.

I had to bend the black metal keeper back into place several times. The stand off did not allow the latch to catch on the locking mechanism on the rear wall. I had to drill out the holes in order to allow the mount to be moved to more easily latch. It still is not 100% and I am not very happy with this portion of the kit and install at all.

