2013 Center Console LED light install
 12-28-2013, 02:10 AM
#1
Senior Member
Thread Starter

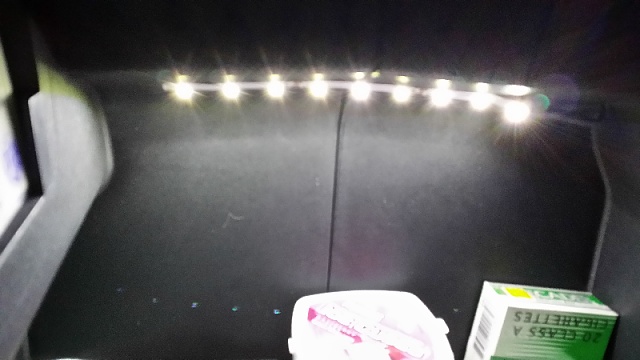
I just completed my install of LEDs inside the center console (non-flow through) of my 2013 Scab. I based my installation on this post by oskerb so hat tip to him for the idea.
Parts list:
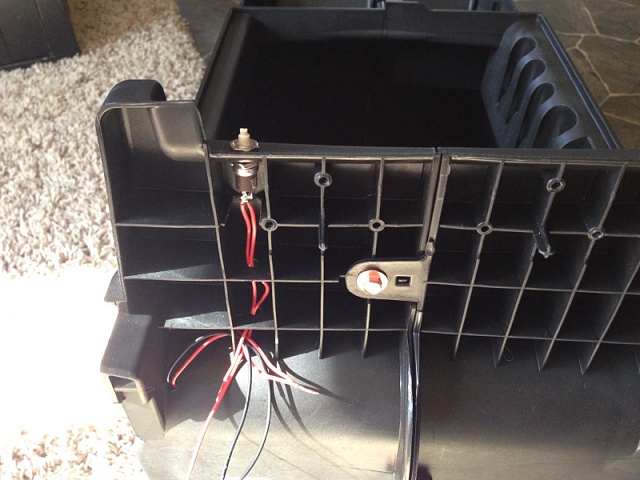
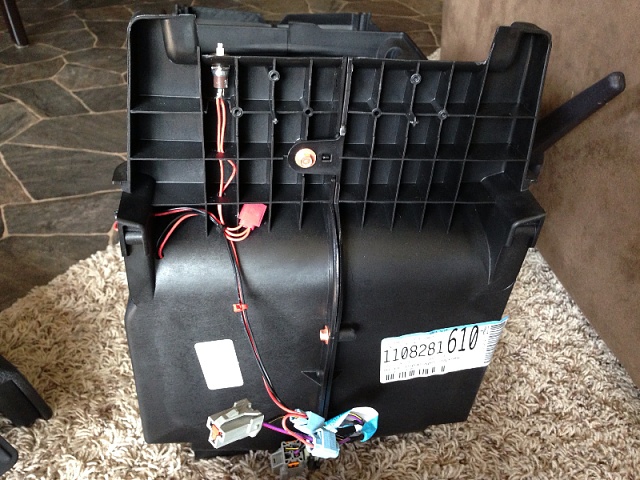
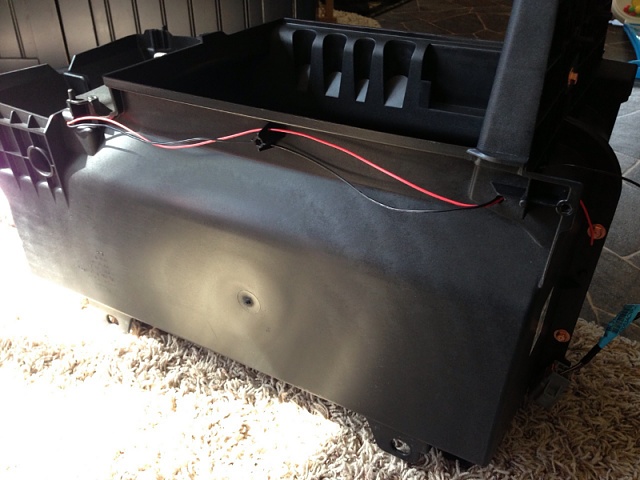
I took the LED light strip & just cut it into two equal length segments & then soldered wires to the second strip. I tucked the light strips just underneath the curved portion of the inner top of the console. The passenger side has more of a lip than the driver's side does but both light strips are relatively hidden. As for the wiring I drilled a small hole through the plastic of the back end of the console. Before actually drilling into the console, I made test holes on a scrap piece of wood to make sure I had the correct hole size.
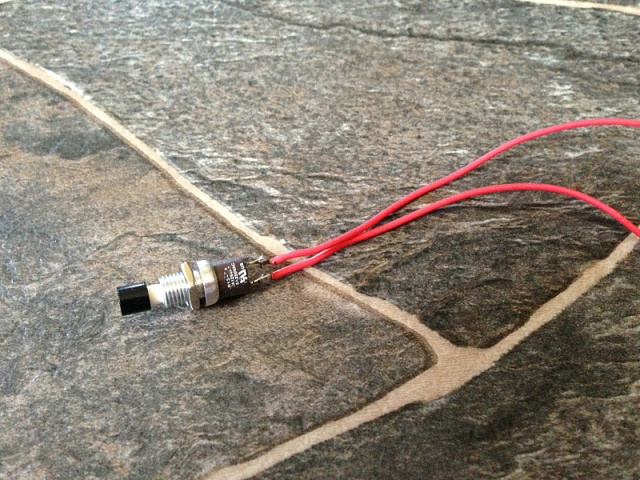
In Oskerb's install, he had some trouble with the momentary switch actually closing properly when the lid closed. I experimented a bit and settled on a different location for the placement of my switch. The momentary switch poked out just a little too much so I added a washer or two before inserting the switch through the console's plastic wall. This just about set the depth perfectly. I think if my switch was 1/8" lower, this adjustment may not have been necessary.

Hopefully the wiring makes sense. On the 12v factory wiring harness the black/yellow wire is ground and the pink/orange wire is the positive. I basically used a few terminal splices and some quick connectores for the two momentary switch wires should I need to replace it. Power goes from the factory harness to the momentary switch and then the second wire from the momentary switch goes to the first LED light strip. On the ground side, a wire goes from the factory harness to the first LED strip's ground. The second LED light strip is just spliced into the first strip down the line from the previously described connections.


Pretty easy installation. Just take your time and measure three times before making any holes.
Parts list:
- 50cm of High Power LED Flexible Light Strip - NFLS-x from superbrightleds
- Normally-closed Momentary Switch from Radio Shack
I took the LED light strip & just cut it into two equal length segments & then soldered wires to the second strip. I tucked the light strips just underneath the curved portion of the inner top of the console. The passenger side has more of a lip than the driver's side does but both light strips are relatively hidden. As for the wiring I drilled a small hole through the plastic of the back end of the console. Before actually drilling into the console, I made test holes on a scrap piece of wood to make sure I had the correct hole size.
In Oskerb's install, he had some trouble with the momentary switch actually closing properly when the lid closed. I experimented a bit and settled on a different location for the placement of my switch. The momentary switch poked out just a little too much so I added a washer or two before inserting the switch through the console's plastic wall. This just about set the depth perfectly. I think if my switch was 1/8" lower, this adjustment may not have been necessary.
Hopefully the wiring makes sense. On the 12v factory wiring harness the black/yellow wire is ground and the pink/orange wire is the positive. I basically used a few terminal splices and some quick connectores for the two momentary switch wires should I need to replace it. Power goes from the factory harness to the momentary switch and then the second wire from the momentary switch goes to the first LED light strip. On the ground side, a wire goes from the factory harness to the first LED strip's ground. The second LED light strip is just spliced into the first strip down the line from the previously described connections.
Pretty easy installation. Just take your time and measure three times before making any holes.
 12-28-2013, 08:40 AM
#2
noob :)

Nice write up... if you wanted to skip the switch you could just wire the led lights to ignition power and have them light up whenever the key is on 
12-28-2013, 07:47 PM
#4
Senior Member
Thread Starter
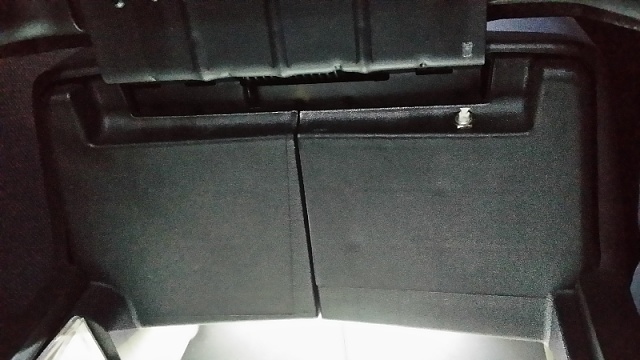
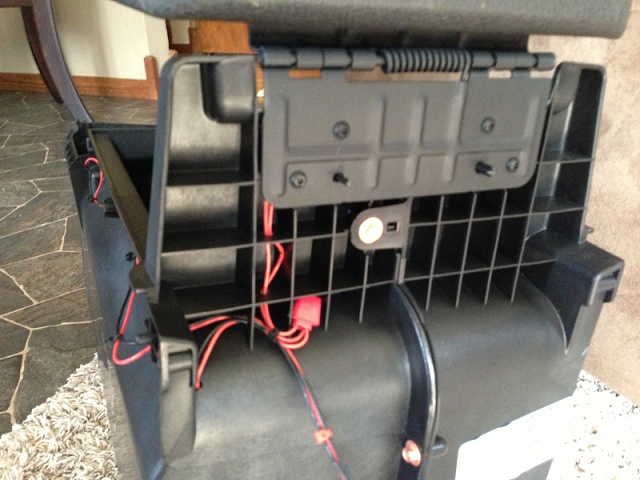
Thanks! Here's one more photo from inside the console looking towards the back. You can see the momentary switch in the upper right:

My original plan was to tap into the cargo light wire that's used to provide power for the LED bed light project but I really didn't feel like running a wire underneath the carpet from the sill to the console area. I definitely don't want them on all the time so this setup should work fine.
My original plan was to tap into the cargo light wire that's used to provide power for the LED bed light project but I really didn't feel like running a wire underneath the carpet from the sill to the console area. I definitely don't want them on all the time so this setup should work fine.
12-29-2013, 01:36 AM
#6
One Clean Machine
iTrader: (5)
I basically did the same thing. same Radio Shack switch just a different location . two strips of 9 LED's one front one back, for much needed lighting here are some pics... love this mod...


 12-29-2013, 02:26 AM
#7
Senior Member
Thread Starter
Damn. I didn't think about trying to mount the switch in that orientation. If you look closely at the first photo I included, you'll see a hole in the upper left corner of the photo. I originally tried to mount the switch in the metal of the console lid hinge but it turned out that there was zero clearance for a switch. Never thought about mounting it like you did. Well done!
The following users liked this post:
Toddman38 (12-29-2013)
Trending Topics
12-29-2013, 01:28 PM
#8
One Clean Machine
iTrader: (5)
Damn. I didn't think about trying to mount the switch in that orientation. If you look closely at the first photo I included, you'll see a hole in the upper left corner of the photo. I originally tried to mount the switch in the metal of the console lid hinge but it turned out that there was zero clearance for a switch. Never thought about mounting it like you did. Well done!
This one of my favorite mods I've done, next to the led bedlights mod...
Yours turned out very nice as well...

Last edited by Toddman38; 12-29-2013 at 01:31 PM.
01-28-2014, 06:19 PM
#9
One Clean Machine
iTrader: (5)
I got these pics from Joseph, as I always forget to take pictures of what I did!...
Its the same Switch & setup exactly how I wired my setup, hope this helps others wanting to put lights in theyre Console...
Its the same Switch & setup exactly how I wired my setup, hope this helps others wanting to put lights in theyre Console...


