Eco-BEAST Build Thread
 11-02-2012, 03:19 PM
#21
www.sldraftingdesign.com

Someone is addicted to Plastidip. Please lay off of it! I know its not my truck, but hate to see someone plastidip the mess out of a truck to where it looks like everything was spraypainted. You now have a 40k truck with a bunch of spraypainted parts.....
I LOVED it before all the Plastidip
beautiful right here:
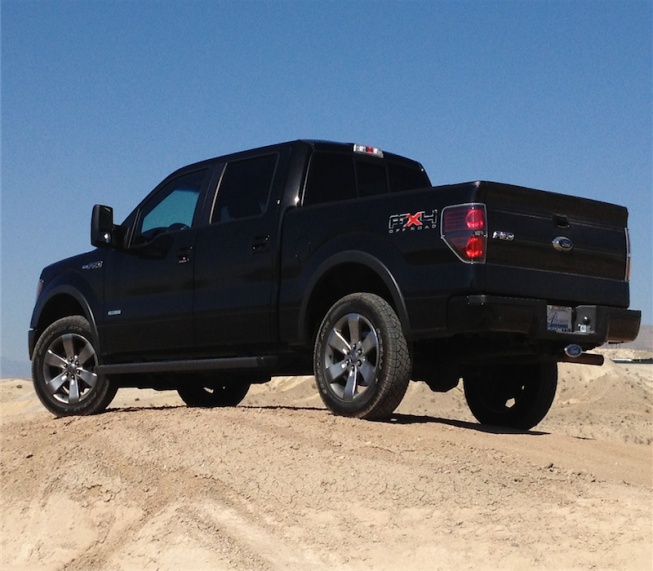
sorry im just being honest before you plastidip the whole truck
I LOVED it before all the Plastidip
beautiful right here:
sorry im just being honest before you plastidip the whole truck

The following 8 users liked this post by dixie_boysles:
2002FX4 (06-01-2013),
clubsfit (11-03-2012),
debryant71 (08-08-2014),
JaredTT (07-06-2014),
JaredTyson (10-20-2014),
and 3 others liked this post.
11-02-2012, 03:27 PM
#22
Just here for the MPG's
Thread Starter

Someone is addicted to Plastidip. Please lay off of it! I know its not my truck, but hate to see someone plastidip the mess out of a truck to where it looks like everything was spraypainted. You now have a 40k truck with a bunch of spraypainted parts.....
I LOVED it before all the Plastidip
beautiful right here:
sorry im just being honest before you plastidip the whole truck
I LOVED it before all the Plastidip
beautiful right here:
sorry im just being honest before you plastidip the whole truck
Well i was hoping to not have to admit this but I know its a problem, i will be totally honest the only things i plan on keeping plasti dipped are the chrome edges around the overlays. I will also admit i do NOT like my rims plasti dipped. The only reason im keeping them dipped is because i just lost 2 days of my life to working on them and i cant rip it off just yet lol As soon as i see them start to peel or crack they are all coming off and my wife will kill me cuz i ignored her for those 2 days so i could work on my truck lol I do appreciate the honesty man and even I cant wait until my rims are back to normal, should of never done gunmetal
 11-02-2012, 03:43 PM
#23
www.sldraftingdesign.com
Well i was hoping to not have to admit this but I know its a problem, i will be totally honest the only things i plan on keeping plasti dipped are the chrome edges around the overlays. I will also admit i do NOT like my rims plasti dipped. The only reason im keeping them dipped is because i just lost 2 days of my life to working on them and i cant rip it off just yet lol As soon as i see them start to peel or crack they are all coming off and my wife will kill me cuz i ignored her for those 2 days so i could work on my truck lol I do appreciate the honesty man and even I cant wait until my rims are back to normal, should of never done gunmetal
11-02-2012, 04:12 PM
#25
Proudly Canadian
Looks really good so far man! Although I am glad to see you're removing the plastidip from the wheels. They look way better stock. But would look supremely badass if you got them powder coated tux black!! Looking forward to watching your progress.
11-02-2012, 04:24 PM
#26
Just here for the MPG's
Thread Starter
Got my quote for Tux Black Metallic last week. Local paint shop wants $500 because of the price of the paint  Might be a month or so until i get it done but i love that idea. Now ya'll got me wanting to go home and just rip the plasti dip off now haha
Might be a month or so until i get it done but i love that idea. Now ya'll got me wanting to go home and just rip the plasti dip off now haha
11-02-2012, 04:47 PM
#27
Confused Member
The plastidip is easy to add too much. I was the same way! I plastidipped quite a few things on my truck and planned to do my wheels. Then I realized that it was pointless and looked cheap. Now I only have it on my reflectors.. I like the truck a lot, and I think you need to get those wheels back to the original color ASAP haha. But your definitely on the right track, and the truck is gonna turn out great!!
11-02-2012, 05:10 PM
#28
Just here for the MPG's
Thread Starter
i plasti dipped ONE thing at first and then was like "I MUST DO EVERYTHING!!!!!" yea now im sitting here looking out at my poor rims saying to myself "Why?" lol I dont think the rims will make it the weekend depending on if i get my LED conversion stuff in.
11-02-2012, 05:13 PM
#29
Confused Member
Originally Posted by Eco-BEAST 28
i plasti dipped ONE thing at first and then was like "I MUST DO EVERYTHING!!!!!" yea now im sitting here looking out at my poor rims saying to myself "Why?" lol I dont think the rims will make it the weekend depending on if i get my LED conversion stuff in.
11-03-2012, 02:50 AM
#30
Just here for the MPG's
Thread Starter
Hope this can help some people out. My electrical knowledge is about as expansive as installing some speakers, so almost none. ALL my LED conversion bulbs are from forum member Jon_To. Best prices I've seen for the highest quality bulbs. Also i placed my order on Monday and got everything on Friday morning. Please check out his thread and PM him for a quote.
Here is what i like to call the Hangover 3 (because without these 3 things you will end up working all night and not feeling so hot the next day)
Tools: Small pry bar, i plasti dipped one side of mine
LED Bulbs from Jon_To
Small amount of electrical tape
Time: 25 minutes
Beer Scale: 2 Beers Time
Tips: UNPLUG YOUR BATTERY!!!!!!!!!!!!!!!!!!!!!!!!!!!!!
Install:
Incase you missed the above notes UNPLUG YOUR BATTERY!!!!
Now we can move forward amicably. Thanks to Jon_To and his vendors this install is about as straight forward as it gets. Grab the edge of the lights from the FRONT (closest to the engine) for both the Map and Dome lights. Be sure to use caution when doing so and use common sense. If you feel like you have hit a snag then stop, find a different angle and see if you can fit the pry bar in the trouble spot. Take a look at the pictures i have attached with this and you can find out where the pry points will be that have clips on them. I chose on my own to completely remove the housing holding the controls for the lights and the moon roof. It helped me to be able to move things around freely. You could honestly complete this without taking out the whole housing and just taking off the metal reflectors Ford attempted to use in an effort to make their crappy bulbs seem to have decent light output. While you might not believe me now, just wait till you see the stupid bright output on these lights.