When you click on links to various merchants on this site and make a purchase, this can result in this site earning a commission. Affiliate programs and affiliations include, but are not limited to, the eBay Partner Network.
Progress! Even though it wasn't on the to-do list.
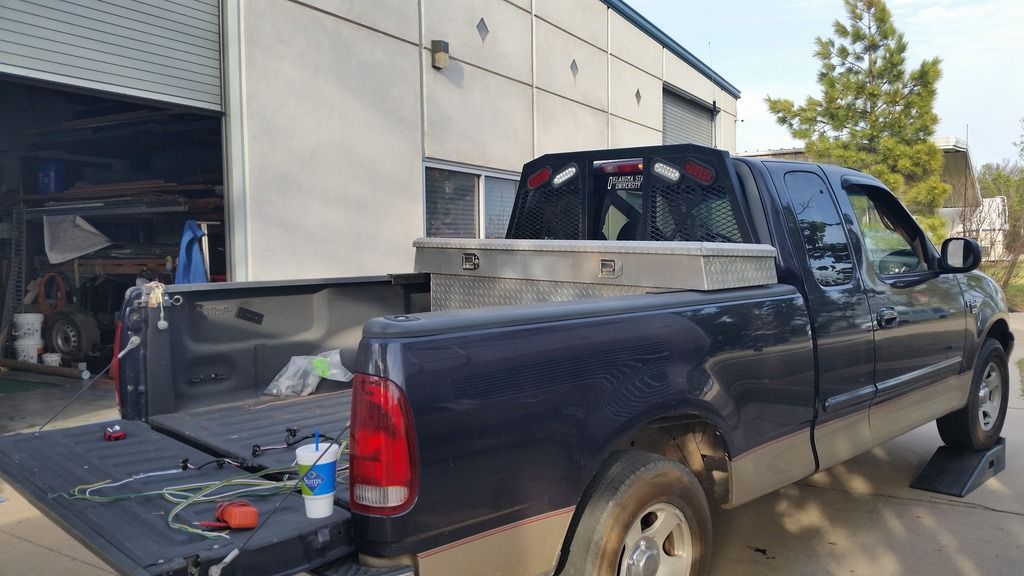
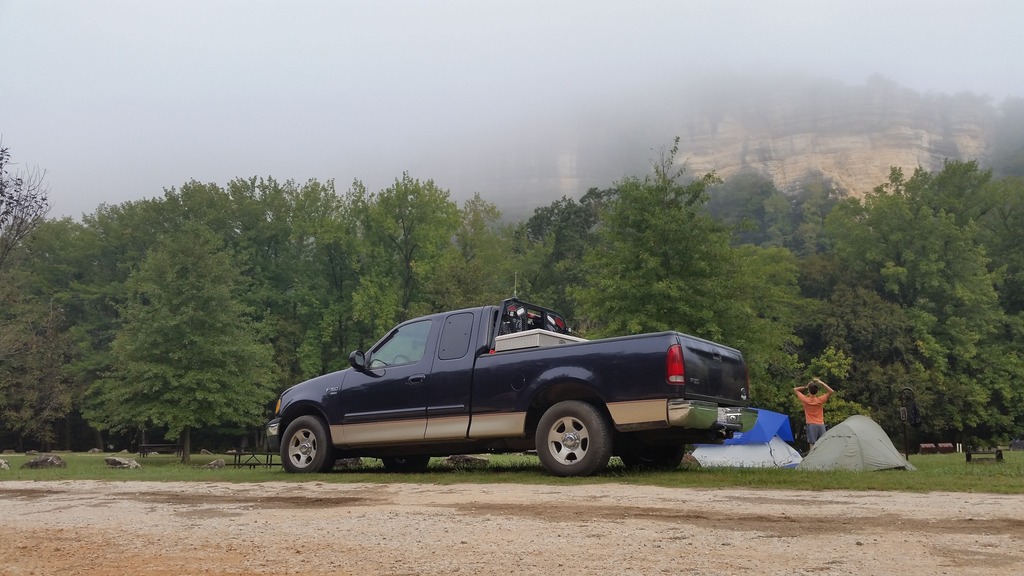
A guy I go to school with had a friend that made the headache rack and was thinking about selling it. Some measuring, and a trip to the bank and I picked it up.
Now debating about putting my side boxes back on. I may throw them on Craigslist with the lights still attached and see if anyone wants them.
And I still need to wire up the headache rack lights. Probably gonna tie the backup lights to my remote.
Well it's summertime now, and I yet I still haven't made much progress. Was sick for a while, and worked 80 hours last week. But here's a post to bring it up-to-date.
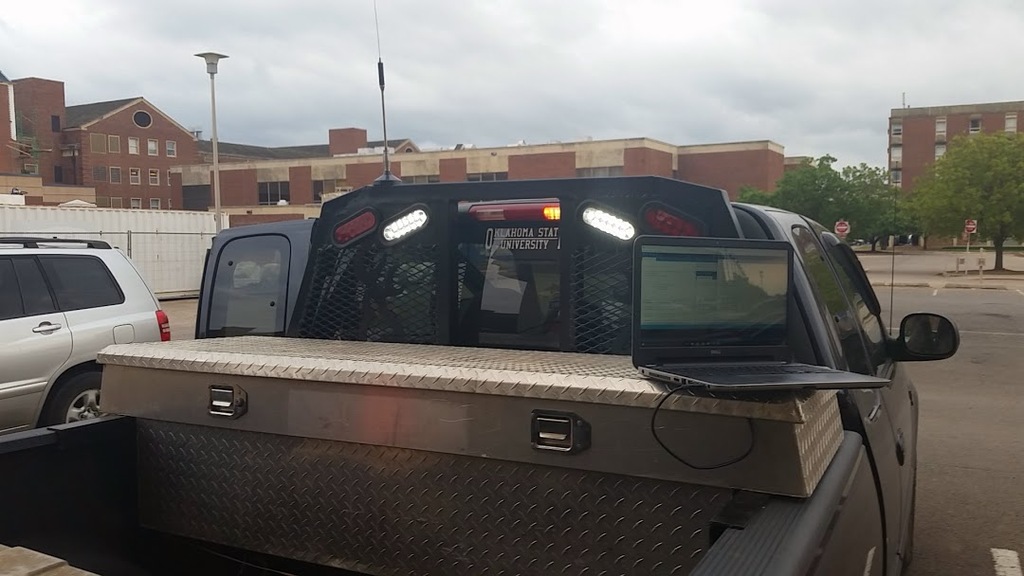
Got the headache rack lights wired up. Brakes/Turn function as normal. Reverse and tails go through my module.
Then added a strobe function to start testing the complex portions of the code.
Since I took my sideboxes off, I needed a new place for rear floods. Bolted some to the headache rack.
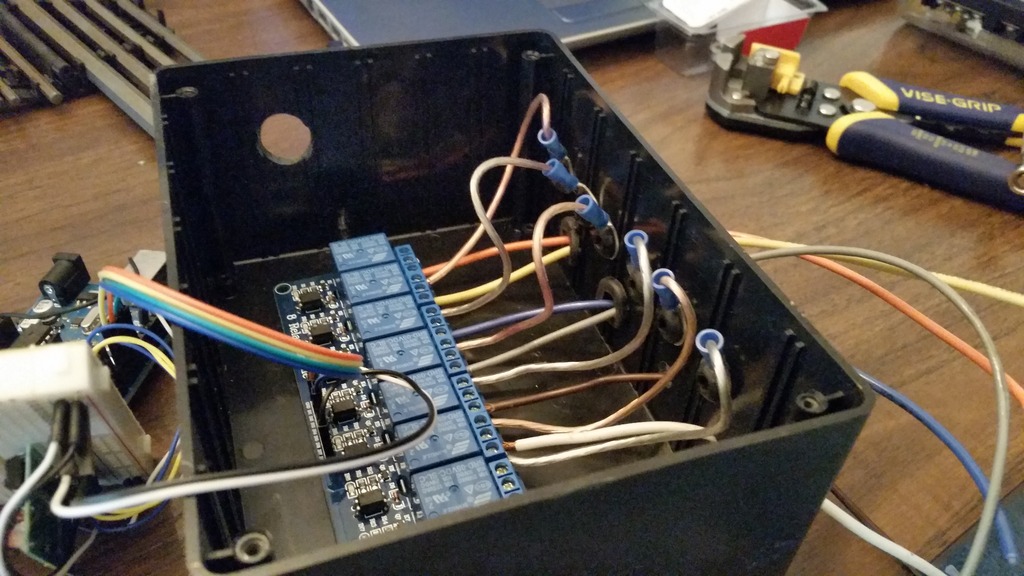
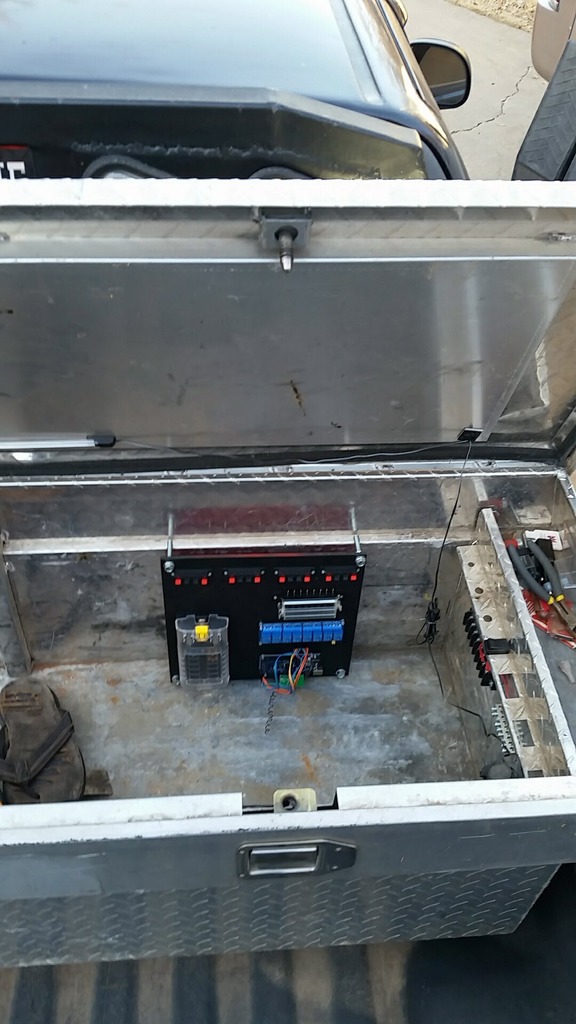
Then redid my control box, which I am go to re-do again, cause I hate it.
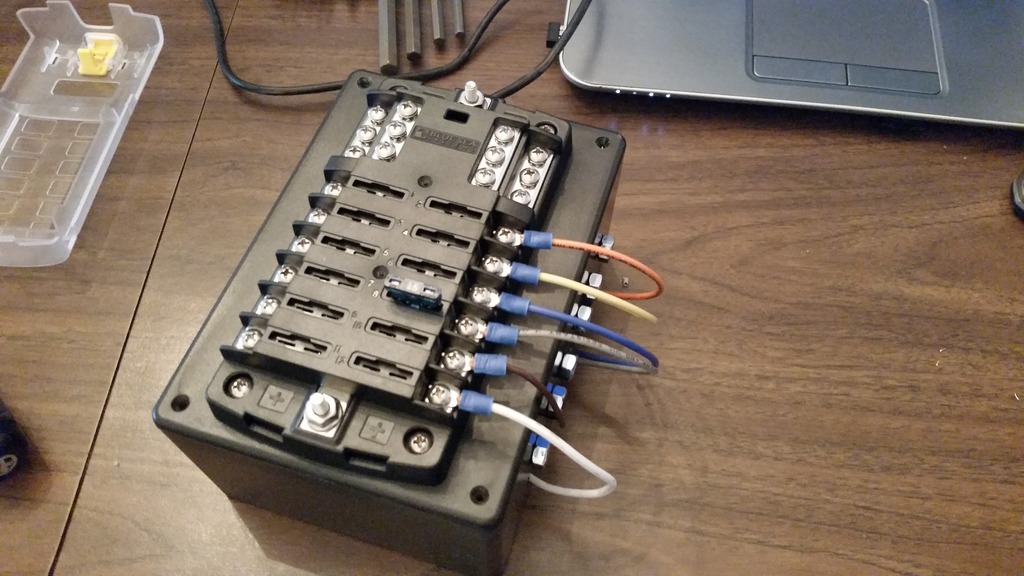
Put a blue sea fuse box on top, but I'll move it before too long.
Not a good picture, but now have a group 24 battery in the toolbox.
I just got an antenna for my remote control module, in hopes of increasing the range a little bit. Now have to decide how to wire it.
Still on the summer to-do list is a solar panel, OBA, and new mini center console.
It's a lot harder when I don't have a shop to work in up at College lol.
Hopefully I'll have a better update shortly!
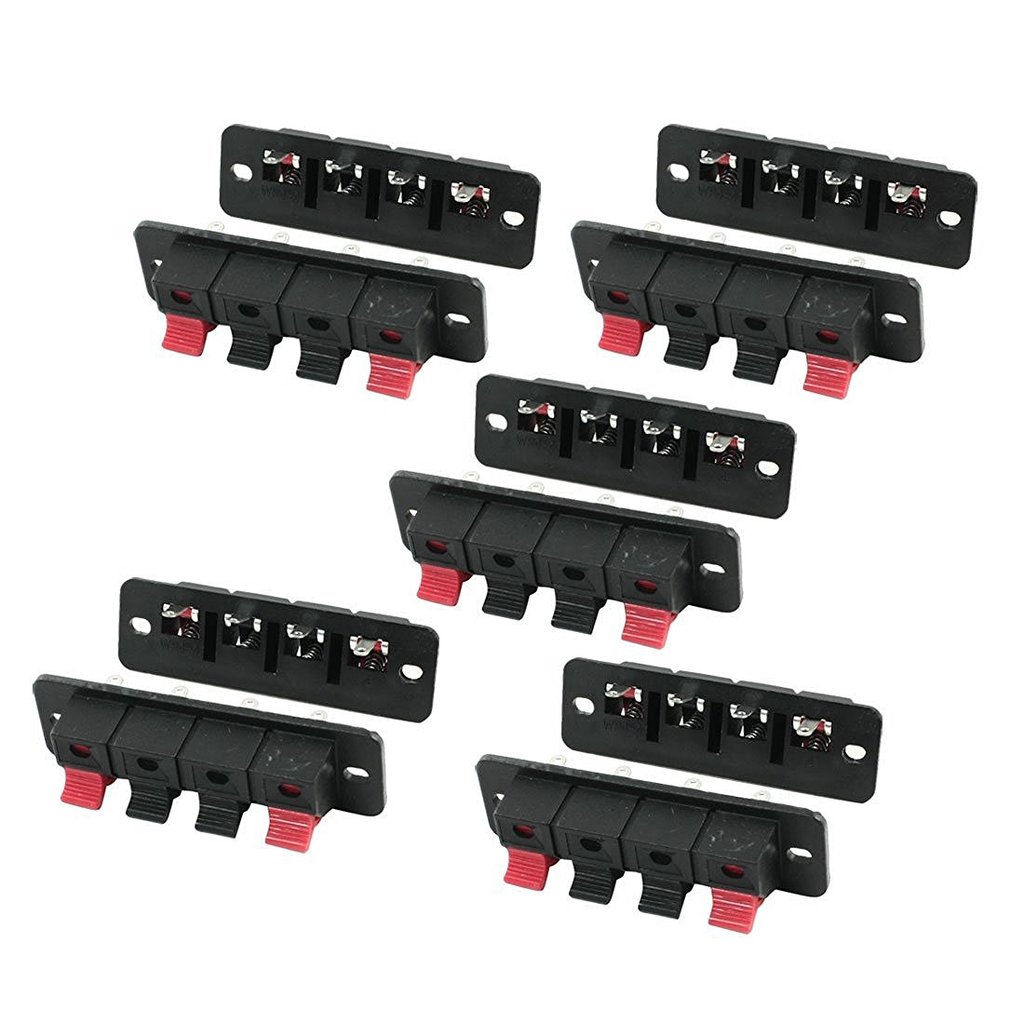
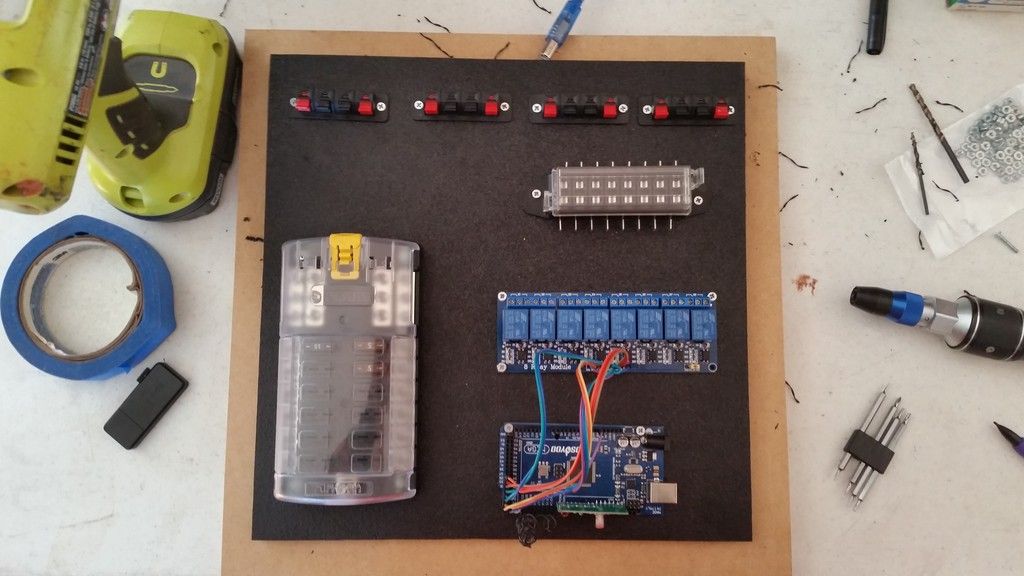
Ordered these speaker terminals to make my next wiring system revision more modular.
To get things back on track, I'll be ordering an Arduino Mega, and another 8 channel relay board.
Hopefully over Thanksgiving I'll be able to make progress on my lighting system, and get started on my new center console. Being in school sucks sometimes lol.
School is over for the year, and I'm about to hop in the truck and head home. I finally have some more parts waiting for me at home. Ordered a new CB Cable and Antenna Stud for my 63" Whip that I haven't ordered yet. Will probably mount it on the headache rack or toolbox.
Picked up waterproof connectors, so will be rewiring the headache rack lights to be able to easily remove stuff if I need to.
Also picked up a super cheap knockoff to my Uno's big brother - Arduino Mega - with 54 Digital I/O pins so I shouldn't run out of controllable channels.
With any luck the knockoff microcomputer works decently and I will be able to at least get back to my previous control abilities when I cooked the old controller!
Mounted my new 64" whip to the headache rack with a custom bracket I made.
Got the Micro Controller + Wireless Receiver, 8 channel relay board, fuse block for the relays, speaker terminals, and Blue Sea Fuse block all mounted to a sheet of ABS Plastic.
Put 4x 5/16 Bolts through the toolbox and into the control panel. This way I can just unscrew the 4 stop nuts and yank the control panel out to reprogram it or replace any of the modules. I really like this new layout. Much cleaner and easier to diagnose.
Last edited by TJ1996; 07-23-2017 at 12:09 PM.
Reason: Updated Photos (some)
Update: I've moved to Houston for the summer, and with that I have some free time and projects to work on. I came up with what I believe is my next big addition to the truck. A center console switch panel w/ GUI. http://expedition.lighting/LightingSystem.html
See next page for more!
Last edited by TJ1996; 06-01-2017 at 09:00 AM.
Reason: Broke post into 2.
 03-28-2016, 01:11 PM