My remote oil rilter hoses were leaking, cheap fix...
 01-25-2015, 09:59 PM
#1

I found my remote oil filter hoses leaking from all four of the crimped joints. There was also a leak between the engine block and the adapter that hooks up to the hose assembly.
The Ford dealer price of a replacement hose assembly was $500 and change, the best price on the Dorman jobber hose assembly turned out to be $350. Both are too much for a truck to use around the acreage once in a while.
Removing the hoses is just plain ugly. Remove the front left inner fender liner. A few screws. The hose assembly is comparatively easy to take off the engine block end; two 10 mmm nuts on studs hold the o-ring block to the adapter. The nuts are very ugly to reach, Using 3/8 drive, about 18 inches wobble extension and a socket got the ratched down in the front suspension area.
The oil filter base end of the hose assembly sits on a bracket attached to the frame. Theres a bolt behind the bracket you have to get to, so the bracket has to come off the frame. There are three bolts holding the bracket to the frame. The bottom one, from the inner fender area is easy. The other two bolts are on top of the frame, one at the front of the bracket, the other near the back of the bracket. The bolt at the front of the bracket is reached by taking off the front license plate and going through the big air hole in the front bumper. The back bolt holding the bracket to the frame has a slot in the bracket, so you only have to loosen it a couple turns, and the bracket will come off.
Once the bracket is off the frame, you can get behind the bracket and remove the bolt to get the oil filter base off the bracket, then remove the bolts holding the hose assembly to the base and bracket.
Once the hose assembly is out, you will note that the rubber is not rubbery any more, it is more like hard plastic. Thats what causes the leaks, the rubber is hard and no longer seals.
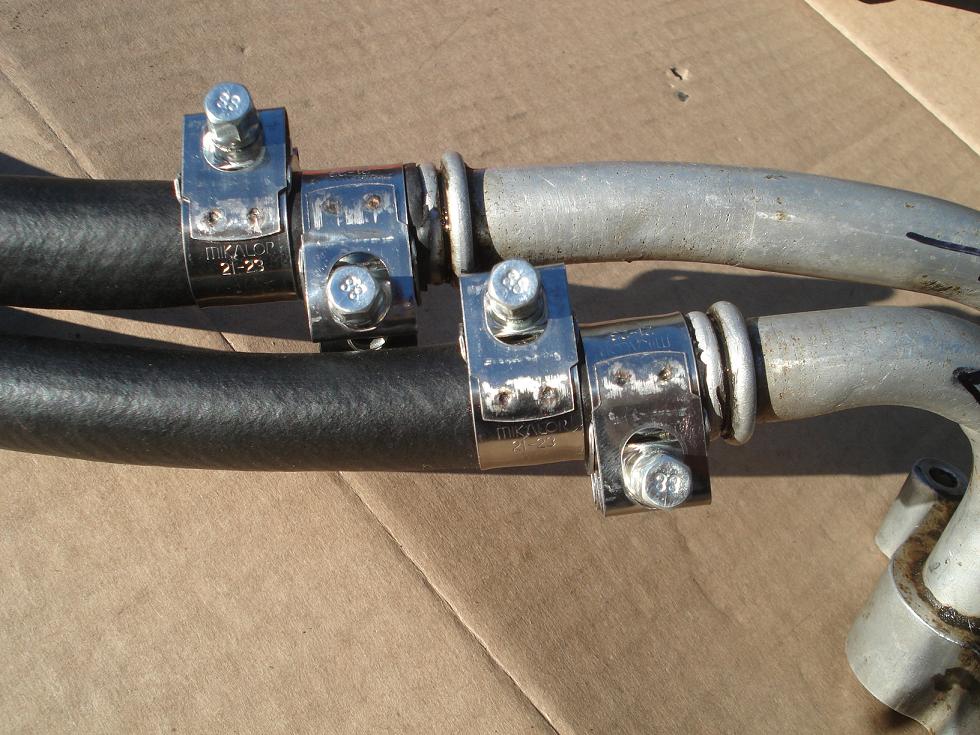
I used a hacksaw to cut through the crimp sleeves, and peeled the sleeves off. Be careful to only cut the sleeve, there is a double crimped ring at the end of the rubber that is part of the tube, stay off that with your hacksaw.
Once the crimp sleeves are off, you can pull the hard old hoses off. Check the aluminum for cracks where the tubes meet the junction blocks. Mine were not cracked, but one should check.
I bought 4 feet of 250 psi 250 degF rated hose, and 8 t-bolt clamps. The hydraulics technician who sold me the stuff assured me that double t-bolt clams would hold beyond the rated pressure of the hose, and better than the factory crimp sleeves. Total price $32.
Put the hose assembly together, and re-installed it, after replacing the gasket between the adapter fitting and the engine block. The adapter fitting is held to the block with four bolts, the bolts have 10mm heads and 7mm diam, and are easiest with the 18" wobble extension on the ratchet.
When reassembling, I stuffed rags into the ends of the hoses. The return line from the filter would go straight to the important parts of the engine, and a bit of crud that accidentally fell into the return line could get carried straight to my main bearings. So threading the hose assembly around the front axle and over the frame provides lots of opportuinty for dirt or contamination to happen. Even steam claeaning and pressure washing prior to work is likely to leave something. So best to plug off the openings, and remove the plugs at the last moment of assebly to minimize risk of contamination.
After assembly, I ran the truck parked at idle for about an hour, then drove for an hour, checking frequently for leaks or signs of hose popping off. Not a drop anywhere.
One thing to make sure of is the hose connections. There are three holes in the engine block. The top one is coolant inlet, the middle hole is oil return and the bottom hole is oil outlet from pump to the filter. At the filter, the oil goes into the little holes in the circle, through the filter media from outside to inside, out of the centre bolt hole, and back to the block. Cross connecting or mixing up this plumbing would be disastrous, since oil filters have a built-in anti drain back valve that would prevent backwards oil flow. That would be bad. Both pieces of replacement hose are 24 inches long, and the short pipe on the block outlet is connected to the long pipe on the filter end, and vise-versa. Just make darned sure you don't get them backwards. Mark them, make notes, or take pictures.
I will post followup observations and results, of how the repaired hose assembly performs and holds up.
The Ford dealer price of a replacement hose assembly was $500 and change, the best price on the Dorman jobber hose assembly turned out to be $350. Both are too much for a truck to use around the acreage once in a while.
Removing the hoses is just plain ugly. Remove the front left inner fender liner. A few screws. The hose assembly is comparatively easy to take off the engine block end; two 10 mmm nuts on studs hold the o-ring block to the adapter. The nuts are very ugly to reach, Using 3/8 drive, about 18 inches wobble extension and a socket got the ratched down in the front suspension area.
The oil filter base end of the hose assembly sits on a bracket attached to the frame. Theres a bolt behind the bracket you have to get to, so the bracket has to come off the frame. There are three bolts holding the bracket to the frame. The bottom one, from the inner fender area is easy. The other two bolts are on top of the frame, one at the front of the bracket, the other near the back of the bracket. The bolt at the front of the bracket is reached by taking off the front license plate and going through the big air hole in the front bumper. The back bolt holding the bracket to the frame has a slot in the bracket, so you only have to loosen it a couple turns, and the bracket will come off.
Once the bracket is off the frame, you can get behind the bracket and remove the bolt to get the oil filter base off the bracket, then remove the bolts holding the hose assembly to the base and bracket.
Once the hose assembly is out, you will note that the rubber is not rubbery any more, it is more like hard plastic. Thats what causes the leaks, the rubber is hard and no longer seals.
I used a hacksaw to cut through the crimp sleeves, and peeled the sleeves off. Be careful to only cut the sleeve, there is a double crimped ring at the end of the rubber that is part of the tube, stay off that with your hacksaw.
Once the crimp sleeves are off, you can pull the hard old hoses off. Check the aluminum for cracks where the tubes meet the junction blocks. Mine were not cracked, but one should check.
I bought 4 feet of 250 psi 250 degF rated hose, and 8 t-bolt clamps. The hydraulics technician who sold me the stuff assured me that double t-bolt clams would hold beyond the rated pressure of the hose, and better than the factory crimp sleeves. Total price $32.
Put the hose assembly together, and re-installed it, after replacing the gasket between the adapter fitting and the engine block. The adapter fitting is held to the block with four bolts, the bolts have 10mm heads and 7mm diam, and are easiest with the 18" wobble extension on the ratchet.
When reassembling, I stuffed rags into the ends of the hoses. The return line from the filter would go straight to the important parts of the engine, and a bit of crud that accidentally fell into the return line could get carried straight to my main bearings. So threading the hose assembly around the front axle and over the frame provides lots of opportuinty for dirt or contamination to happen. Even steam claeaning and pressure washing prior to work is likely to leave something. So best to plug off the openings, and remove the plugs at the last moment of assebly to minimize risk of contamination.
After assembly, I ran the truck parked at idle for about an hour, then drove for an hour, checking frequently for leaks or signs of hose popping off. Not a drop anywhere.
One thing to make sure of is the hose connections. There are three holes in the engine block. The top one is coolant inlet, the middle hole is oil return and the bottom hole is oil outlet from pump to the filter. At the filter, the oil goes into the little holes in the circle, through the filter media from outside to inside, out of the centre bolt hole, and back to the block. Cross connecting or mixing up this plumbing would be disastrous, since oil filters have a built-in anti drain back valve that would prevent backwards oil flow. That would be bad. Both pieces of replacement hose are 24 inches long, and the short pipe on the block outlet is connected to the long pipe on the filter end, and vise-versa. Just make darned sure you don't get them backwards. Mark them, make notes, or take pictures.
I will post followup observations and results, of how the repaired hose assembly performs and holds up.


Last edited by jiggseob; 01-25-2015 at 10:12 PM. Reason: spelling

The following users liked this post:
2002FX4 (01-25-2015)

 01-25-2015, 11:51 PM
#3
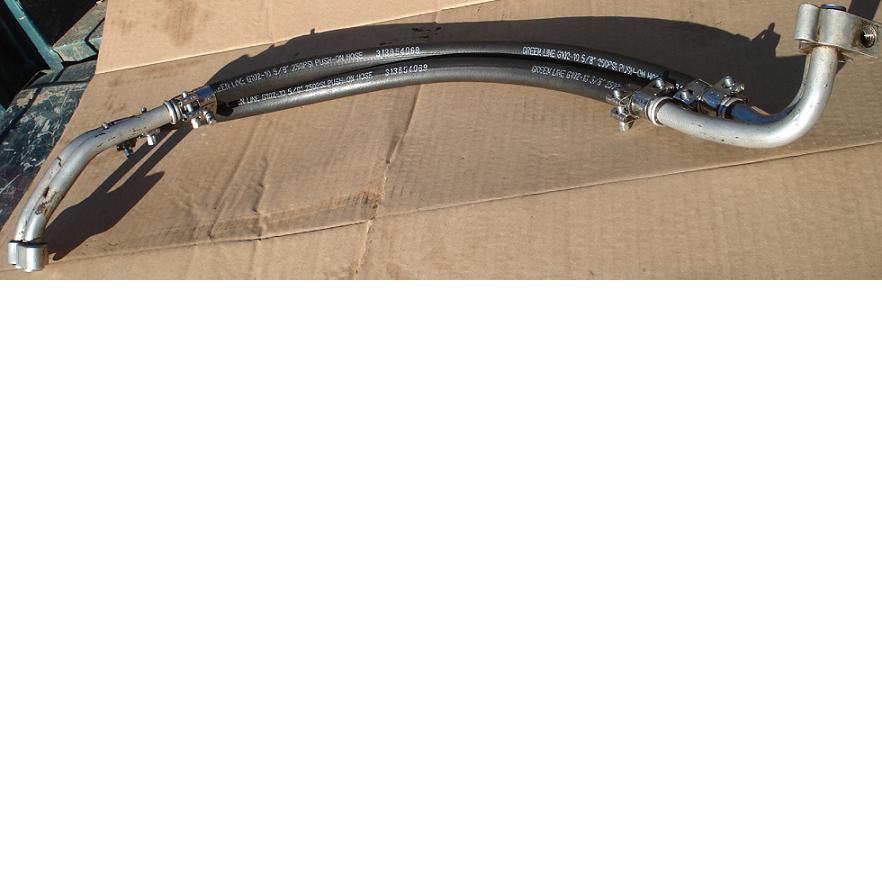
When I went to the hose supply (Greenline), I asked for hose that would resist engine oil, hold 250 psi, and 250 degress farenheit. The hose they selected is rubber in and out, with a single nylon braid. Basically heavy duty heater hose.
Any hose with metal braid would not be "clampable" with screw clamps. Metal braid hose would be too stiff to provide vibration isolation, and would have put stress on the relatively weak aluminum tubing, which would be the next thing to fail if the hose was too stiff.
The Parker hose that was on the assembly had a number, the Greenline guy looked up the number, and it cross-referenced to a hose of slightly lower rating than this hose, 150 psi. We checked out that hose, it had a class B of oil resistance, just a lower pressure rating. The hose he selected had a class A resistance to oils.
The new hose was soft, pliable, and easy to bend. The hose that came off was hard like plastic, from 17 years of heat-cold cycling and exposure to oil.
Last edited by jiggseob; 01-26-2015 at 12:03 AM.
01-26-2015, 09:54 PM
#4
Still no oil or coolant leaks.
Go for a drive, got about a mile from home the temp guage pinned to the top, and the oil warning light came on and the engine seemed to burp and skip. I panicked, thinking the hoses I put on blew off. Killed engine and rolled to a stop. Checked those hoses, still on fine. No coolant or oil all over the place. Oil level still at 3/4 on the stick, just where it was. Re-started, all seems normal. Does it again on the way home.
Turns out this is relatively normal on coolant drain and refill. The cooling system has to work all the air out, and in so doing sometimes that CHT sensor in the left head runs hi and dry for a few seconds, tricking the system into thinking meltdown is imminent.
I hope.
Anyone have any suggestions about how to bleed those air bubbles out of cooling system?
01-26-2015, 10:17 PM
#5
Bruski
Run it to operating temp, 175-195 degrees roughly, with heat on max. Once at temp rev to about 2500rpm for 20-30 seconds and watch the coolant level as the thermostat opens making sure it stays filled. (use the linkage at the throttle body to increase rpm while you watch reservoir) once the coolant level holds steady and the heater blows hot, air should be gone. You might also bleed the radiator. On the passenger side bottom of the radiator there is a bleeder screw. Crack it to bleed air from radiator.