When you click on links to various merchants on this site and make a purchase, this can result in this site earning a commission. Affiliate programs and affiliations include, but are not limited to, the eBay Partner Network.
How-To: Expedition Eddie Bauer Leather seats in Supercrew! PICS
Thought I'd share this with you all since i couldnt find a how to on this specifically for this application. I've seen it done before all over the net but not alot of documentation. So here it is.
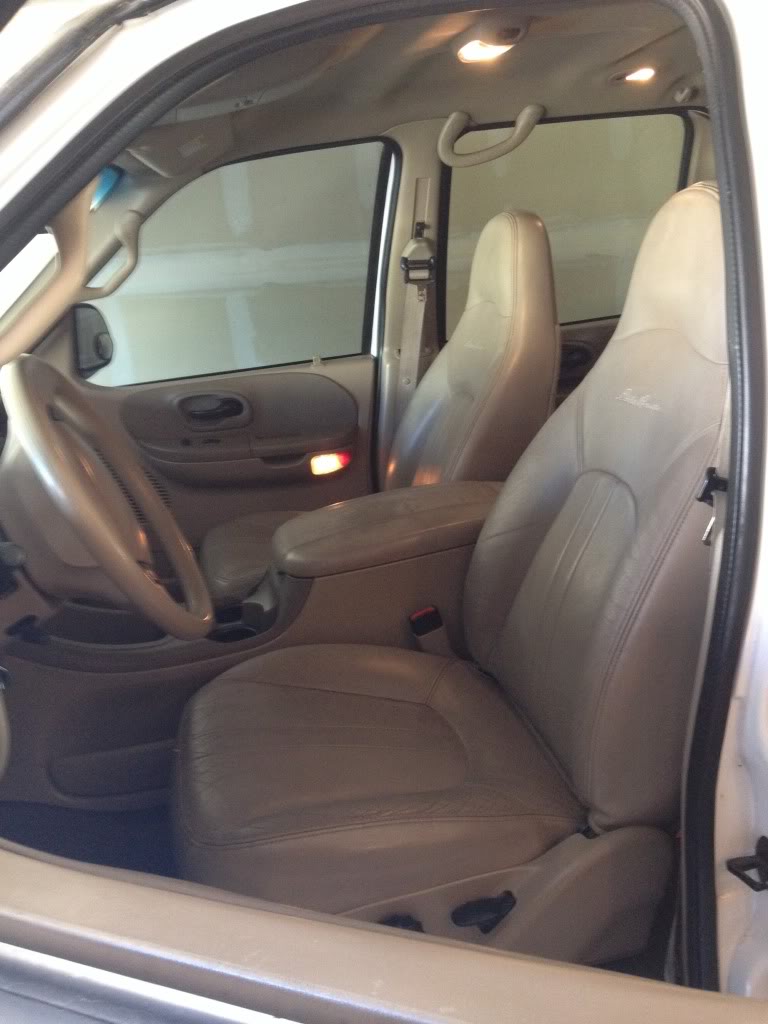
To start off, i searched for some decent seats and they happened to come out of a 2000 Eddie Bauer Expedition, which are wider, which also is bundled with the huge ice chest of a center console. The 97-99 models came with armrests on the chairs and narrower center consoles.
I got the entire front setup for about 180$, and the rear for about 80$. When you get the parts from the u pull yard be sure to get everything that the seats and console came with to mount and it will all go in as it came out of the expedition.
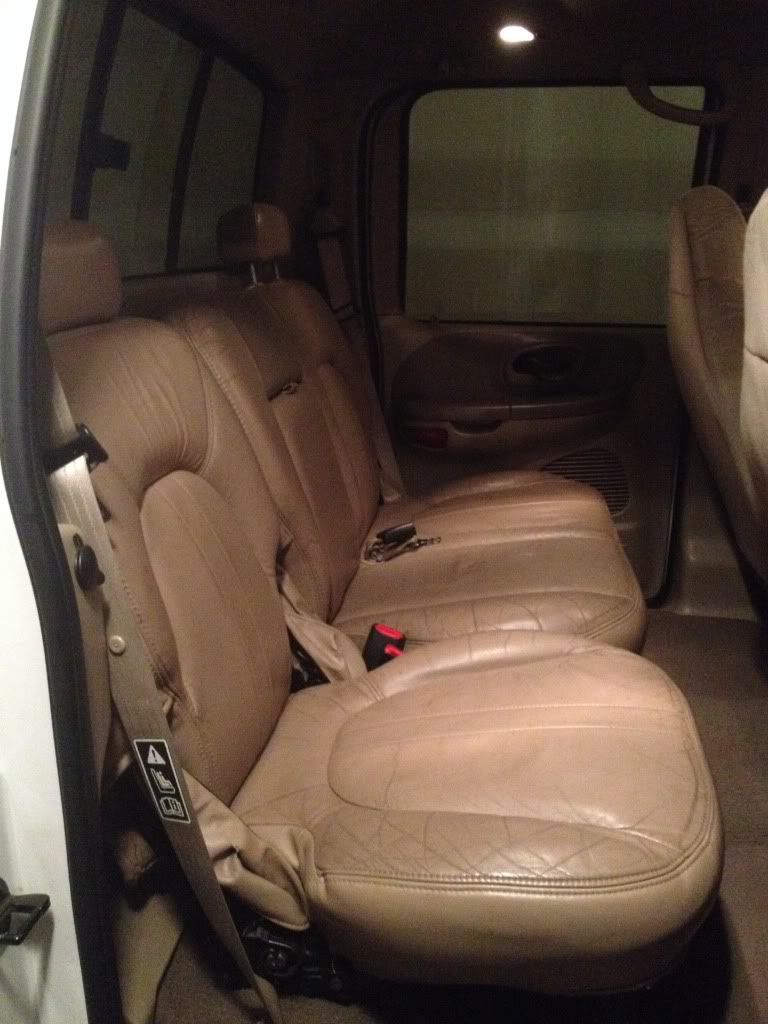
I started with the back seats. Pretty simple, the long bench side will bolt in no problems at all. The smaller single seat side requires more work. You will need to pretty much disassemble the entire seat from the expedition frame and replace it with the one from your truck. then of course it will bolt right and fold normally.
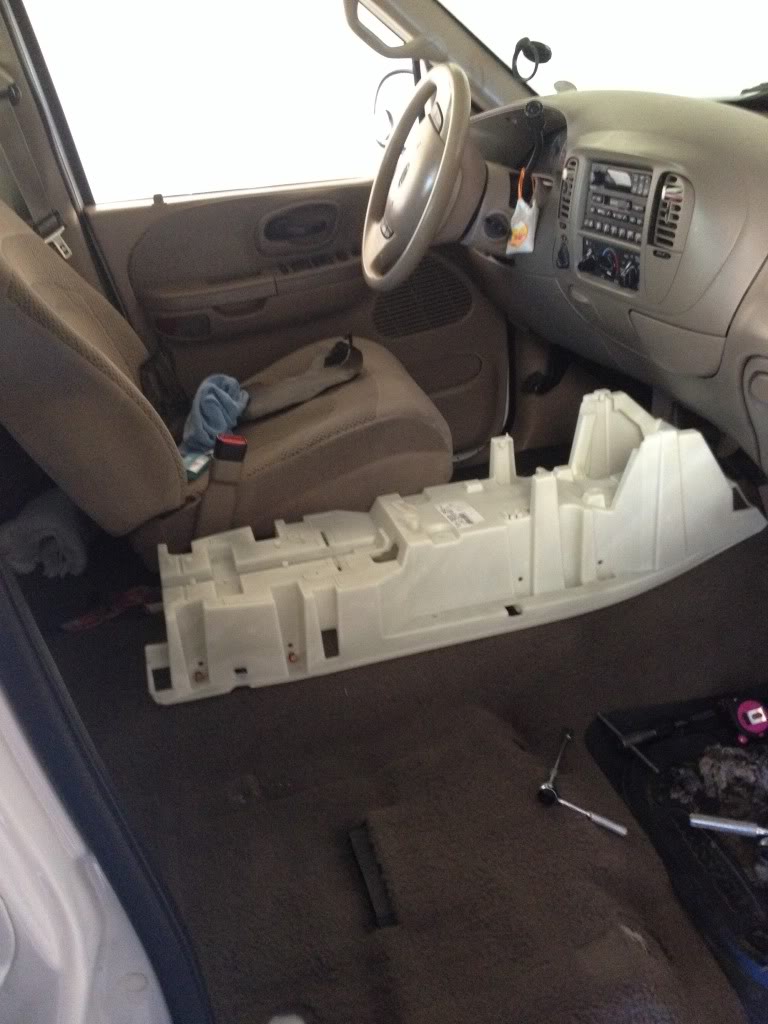
the front was a little more work. as you take your bench side out of the passenger side with your Torx T55, you will notice that you are missing a hole to mount one of the front feet, no worries. Set the seat in place temporarily so you can see where you need to make the cut, take the seat out, continue cutting the hole and you will find a little rubber plug. Take it out and the next step is to tap new threads into it, as obviously it wasnt tapped from the factory. You will need a 10mm X 1.50 tap for this. Napa seems to have these readily available. Once the hole is tapped the seat goes right in, but dont put it in yet cuz you will need to run wire for the power seat.
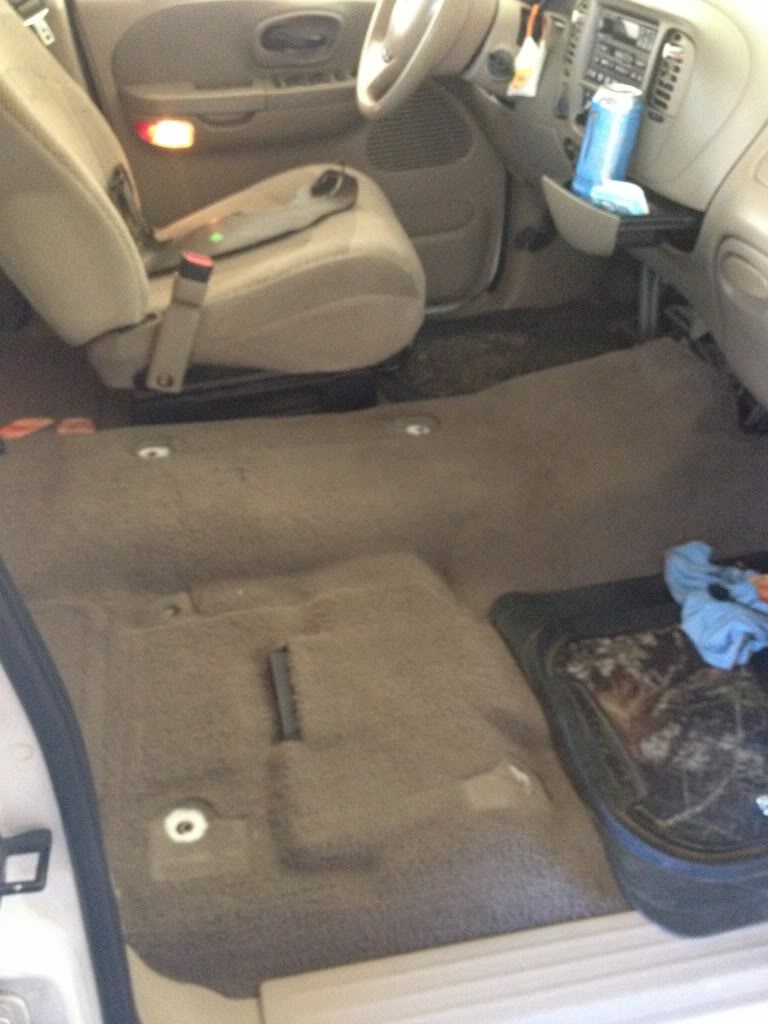
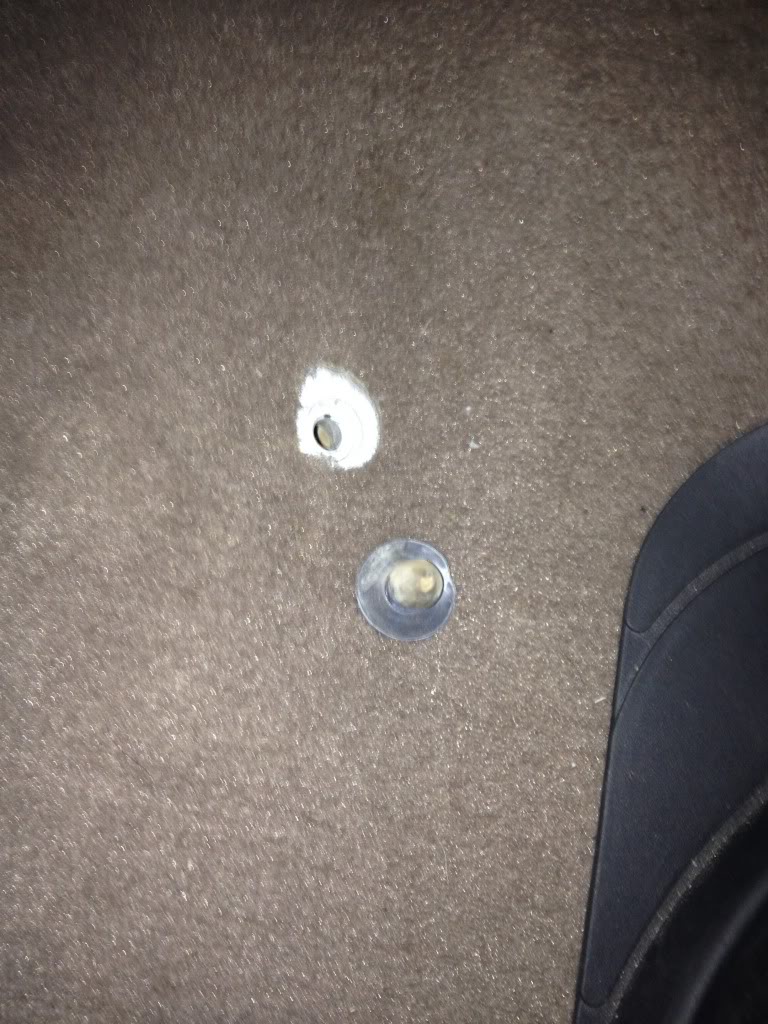
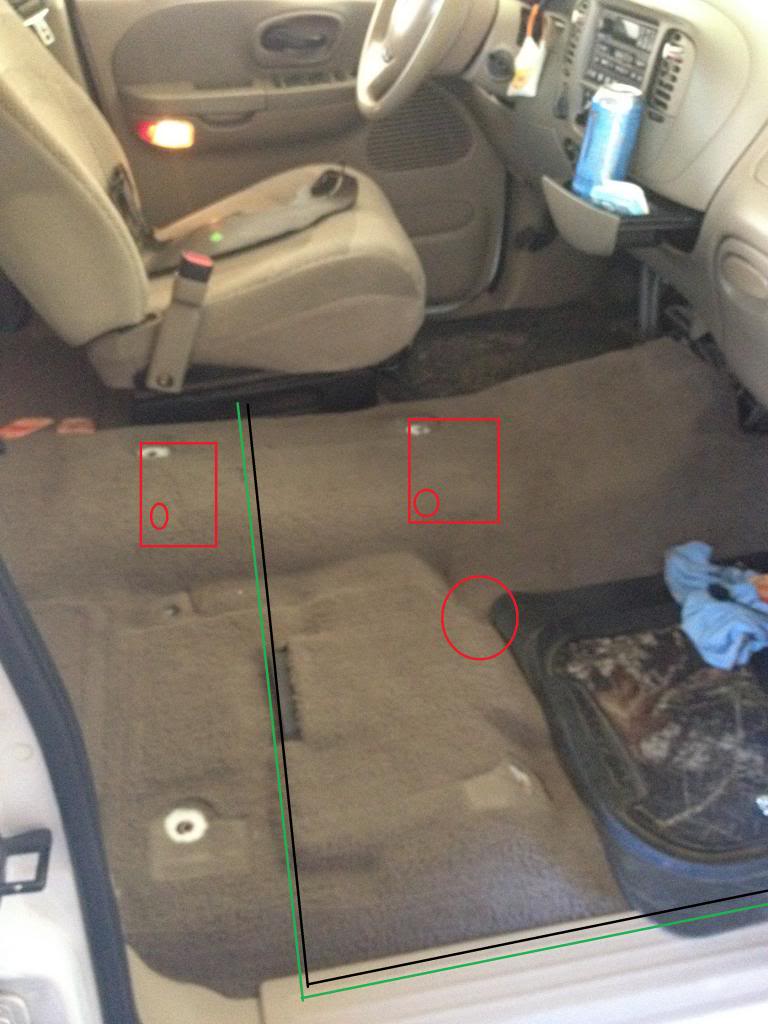
Next is the center console. The 2 holes that are left behind from the bench seat will be used here. First step is to layout the mounting brackets so you can see where you need to cut the carpet. Cut the carpet away and you will find one more hole beside each existing hole, with a rubber plug in each. Again you will need to tap both holes but with the addition of a different size tap. You will tap the one hole with the 10mm X 1.50 tap and the other with a 12mm x 1.75 tap. once the holes are tapped the mounting brackets can be mounted, but make sure not to pinch the seat belt wires that run from the drivers seatbelt.
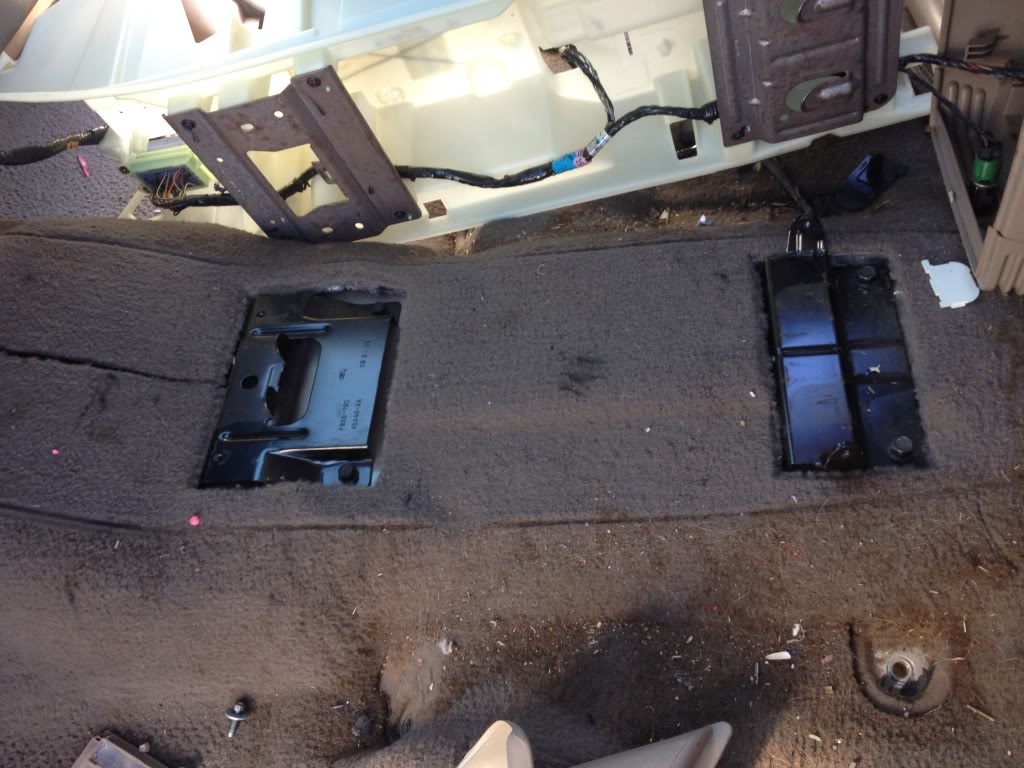
Heres what it looks like from inside the expedition i took the parts out of.
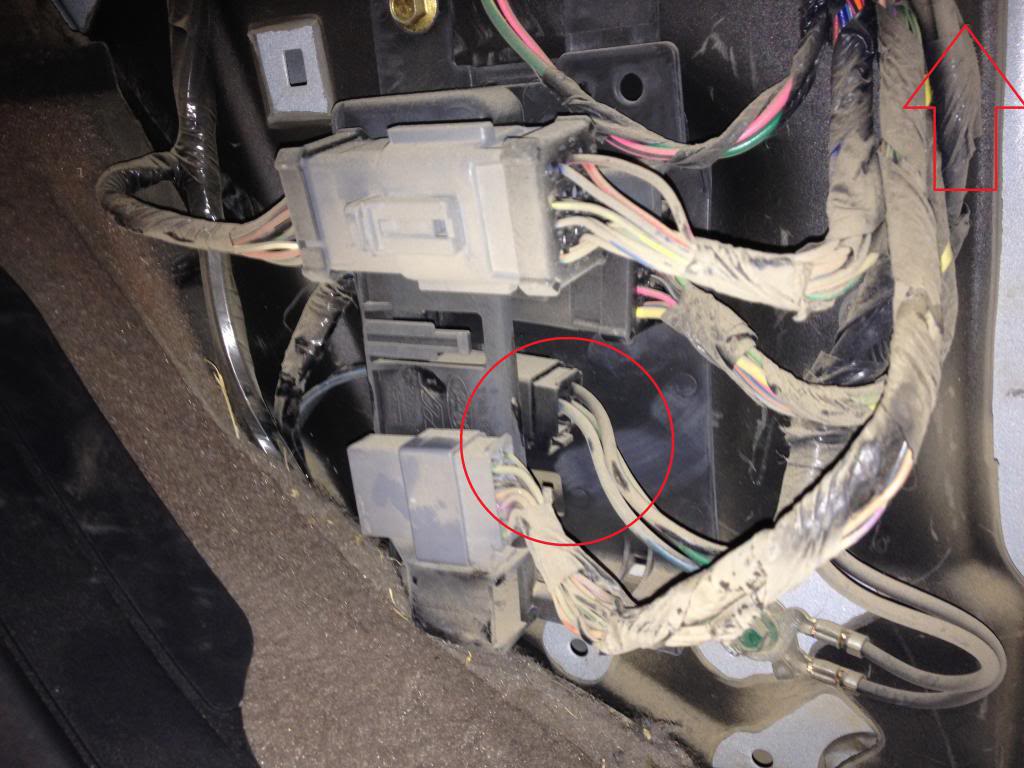
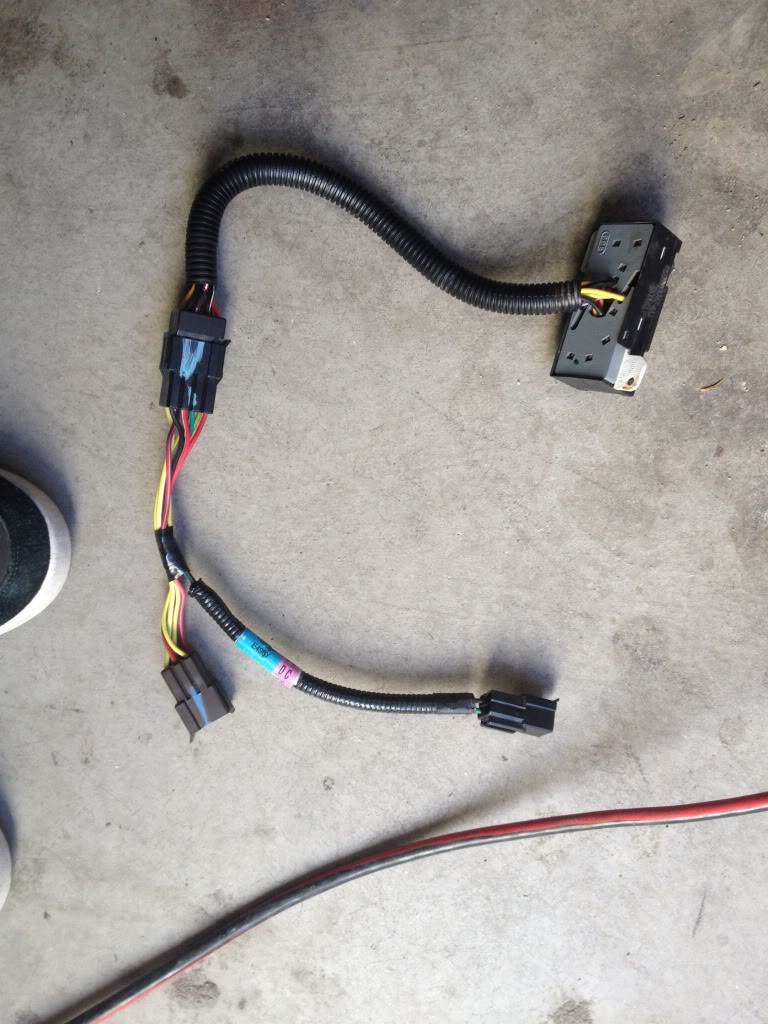
Next task is to take the drivers seat out, if not already done, and run the power and ground wires. in the picture, basically just run a length the same route as the seat belt wires to the passenger side and towards the kick panel.
now in the picture below, you will connect your green wire from the new power seat to the green wire on that plug that is circled. Be sure to unplug your battery FIRST!!!!! I just used a simple spade connector so i could unplug it easily if need be. As for the ground, i just used a ring terminal that would fit over the stud above the red arrow(not pictured but right underneath the glove box but behind the top of the kick panel.)
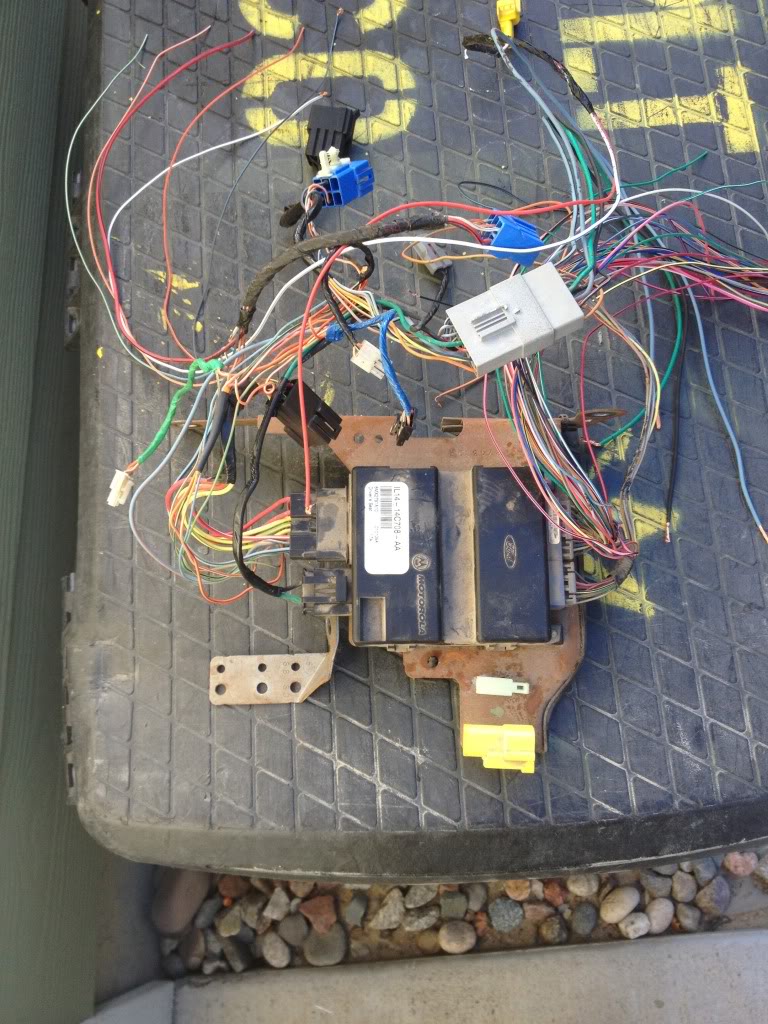
hook the battery back up and you should be ready to roll! I should mention however that when i bought my seats, the power seat had a butt load of extra wires and extra module attached.
This whole mess can be removed, but you need to get a regular harness from a basic power seat setup pictured here. This way you can retain a factory plug to plug into the seat and then solder your length of wires onto the plug.
Finishing it all up:
Also i snagged some eddie bauer emblems that will be goin on the truck as well tomorrow
thanks!, it took a bit to find these ones, i even considered even taking some terrible quality ones, then either getting new bottoms from theseatshop.com or see if an upholstery shop could replicate. i still might consider if these deteriorate quickly.
So after scrolling through the site, I came across this thread.. I had to try it, as leather has always been on my wish list. Thanks to thebathtub for giving great instructions to help me through it. I went down to pull-a-part and started searching yesterday. After checking out every expedition on site, I realized I would have to settle for an interior that definitely showed some age, but for $153 for a complete set up, I can't complain. A few things I came across:
Have your torx set handy! You will use pretty much most sizes from t20 to t55.
The rear driver's side bench seat was pretty much a bolt on replacement, with the exception of taking the hinged panel off the rear of the seat.
Now for the rear passenger seat. This did take a little more work, as you have to completely strip down both the expy seat and your old seat to just the cushions themselves. You then have to reassemble your frame with the expy cushions. It was only difficult because of the hard to reach t45 bolts under the upholstery on the sides of the backrest portion. After you get it on your frame, it bolts right back in.
Once you have your front seats removed, its time for the center console, as having plenty of room up front was definitely very handy. After cutting and removing the carpet, I used the bolts I pulled with it from the expy. As for the holes to tap... I did not need a tap kit, as I removed the plugs after cutting the carpet, and simply used a bolts to tap themselves (with a little muscle)
The front passenger seat was as easy as removing from the expedition and placing in the supercrew. Again, as oppose to using a tap kit, I used a bolt to tap itself for the front left bolt.
The driver's side front seat in the eddie bauer was originally on a power track. I personally do not see a need to play electrician and try to wire up the power seat as I do not really mind the manual track. So I removed the seat from the expy, and took only the seat, leaving the power track assembly behind. I removed my cloth seat from the track and bolted the new one on. The tracks did not match up exactly from the power to manual track, but there are untapped holes already there to mount it on. So again, just using the bolts, I found they tapped themselves into the new seat.
Here's some pics of the final product. (The camo strip on the console lid is duct tape, as some a*****e decided to graffiti some immature words in permanent marker on the only console lid in the yard that wasn't torn. But I think the camo actually looks pretty decent, and is much better then some torn up piece of crap)
Last edited by 01white4x4; 07-12-2015 at 08:10 PM.
I know this is a decently old thread, but what tools are needed for the console? I will be buying a console this weekend and can not find a list of tools needed for just the console swap. Thanks
 11-09-2013, 07:52 PM