Painted My Headlights

Thread Starter
Senior Member
Joined: May 2010
Posts: 136
Likes: 0
From: San Antonio, TX
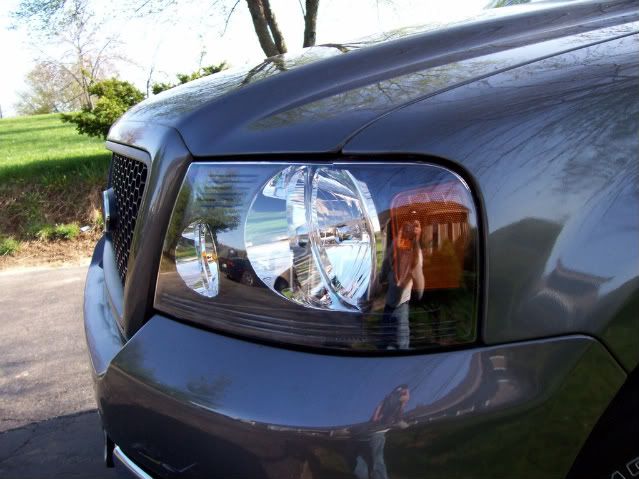
I decided the other day that Roxanne needed to put on some makeup.....So after already having done my taillights, I decided to put on some eye shadow on Roxanne....Let me know what you think!!!
Before:

And After!:


Before:
And After!:


Thread Starter
Senior Member
Joined: May 2010
Posts: 136
Likes: 0
From: San Antonio, TX
Unfortunately I did the harder way and took the lenses off....It is a PITA, but it yields better/longer lasting results.. Here the steps:
1. Remove Headlights using the 3 bolts(2 bolts behind the splash guard)
2. Bake Headlights in oven 275* for 5-6 minutes
3. After removed from oven, pry off the lens starting in one corner, once it is free just use your fingers to get the rest off. Note: THIS WILL TAKE AWHILE, REINSERT INTO THE OVEN IF NEEDED.
4. Remove the two screws on the back of the lens to free the lens from the housing.
5. Using 600+ grit sandpaper, sand the chromed areas EXCLUDING the bulb housings of course.
6. Mask off the bulb housings and remove the orange reflector piece.
7. Apply 4-5 coats of Black SATIN spray paint and let sit 30 mins in between.
8. Remove OLD sealant from the housings and reapply NEW sealant, reattach the housing to the lens, let dry for 12-24 hrs.

Senior Member
Joined: Nov 2009
Posts: 1,213
Likes: 36
From: Cleveland, OH
Kudos to you, but considering the time involved and the risk at breaking them / doing it wrong... this looks very tempting to me: http://www.americantrucks.com/f150-d...eadlights.html
Trending Topics
Thread Starter
Senior Member
Joined: May 2010
Posts: 136
Likes: 0
From: San Antonio, TX
Those are pretty SICK, but I don't wanna spend over 200$ just for that, Plus I was willing to take the risk considering I had already done it with my tails....Why not spend 15$ for paint, sealant, and sandpaper...??? haha