HOW TO: Install Waterproof LEDs Under 04-08 F150
 01-08-2013, 02:01 PM
#1
Senior Member
Thread Starter
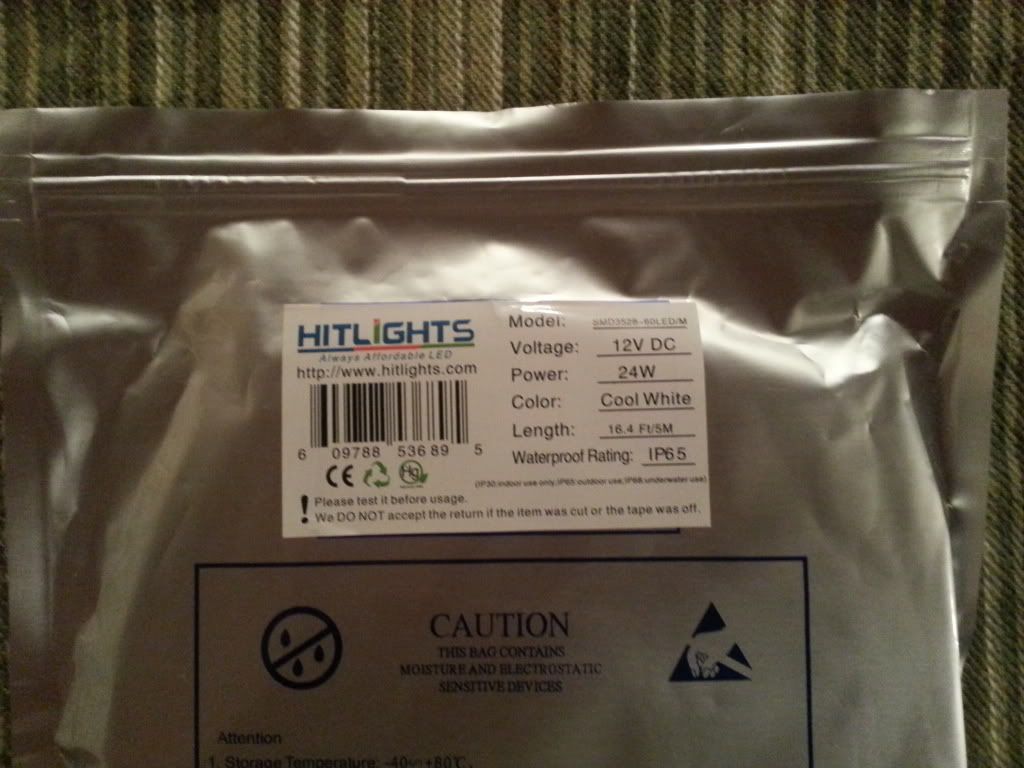
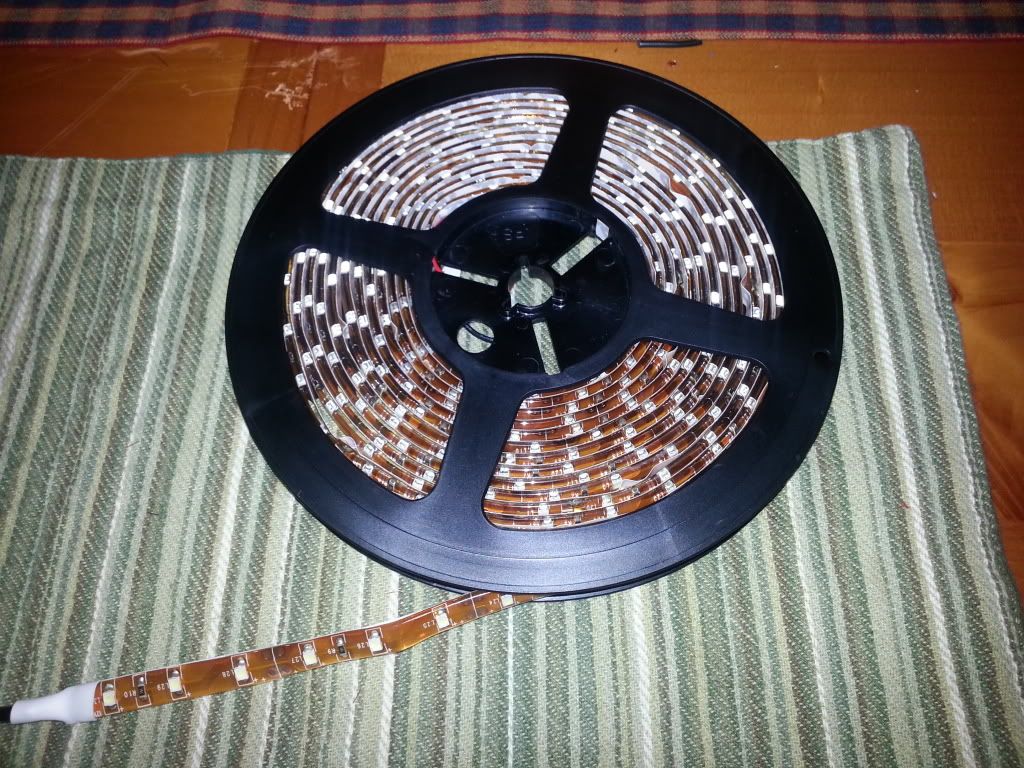
For someone like me who has had absolutely no previous electrical wiring experience, a complete tutorial on how to add undercarriage lights would have been extremely helpful. Hopefully this will help some people out who are in the same boat as I was. I just got done wiring up the floorboards with a non-waterproof LED strip, and for $10 it is one of the best mods I've done yet. I ordered two 16' waterproof LED strips from Amazon
to do the undercarriage of my truck (06 F150 Scab). Last week when I ordered them, they were $15, but for some reason they went up a few bucks. Nonetheless, they are still cheap and will add a significant change in the way your truck looks. IF ANYONE FINDS ANY FLAWS IN MY DESIGN, OR DIFFERENT IDEAS, PLEASE CHIME IN. I'M STILL NEW TO THE WHOLE WIRING THING
These are the lights that came from Amazon...
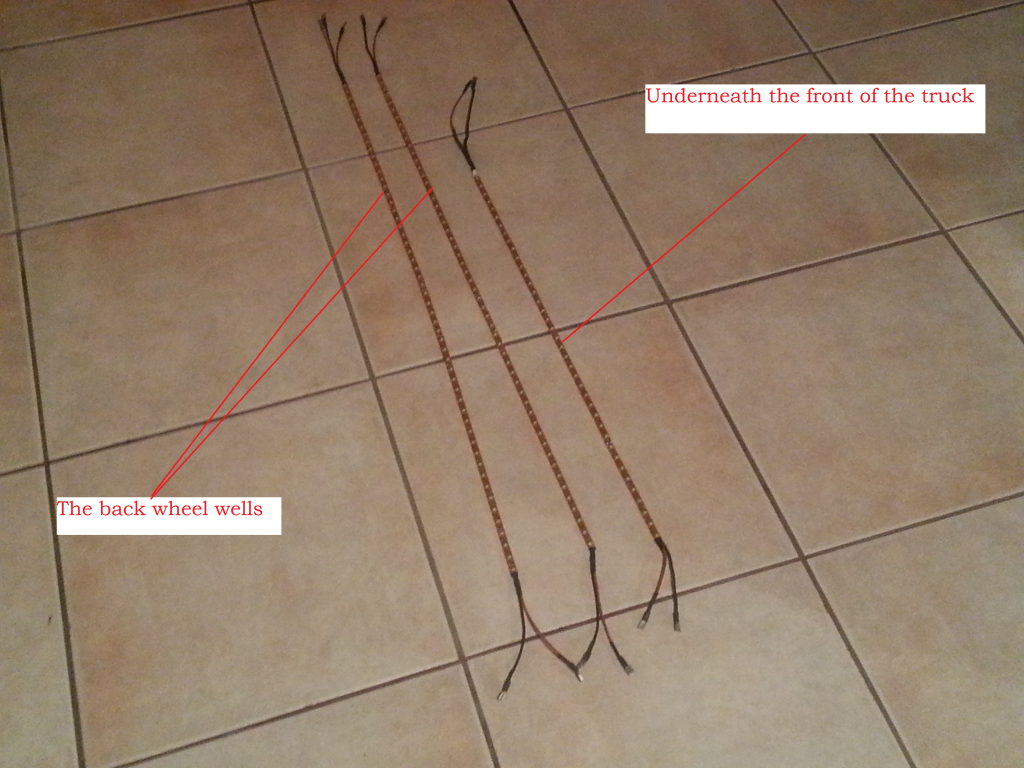
I first had to decide where I was going to put the strips. So I came up with the left side of truck, under the rear bumper, on the right side of truck, under the front of the truck, and all 4 wheel wells. Once I had that figured out, I then had to figure out how I was going to wire them in sequence so that I would have the least amount of wire under the truck as possible. This is what I came up with.....
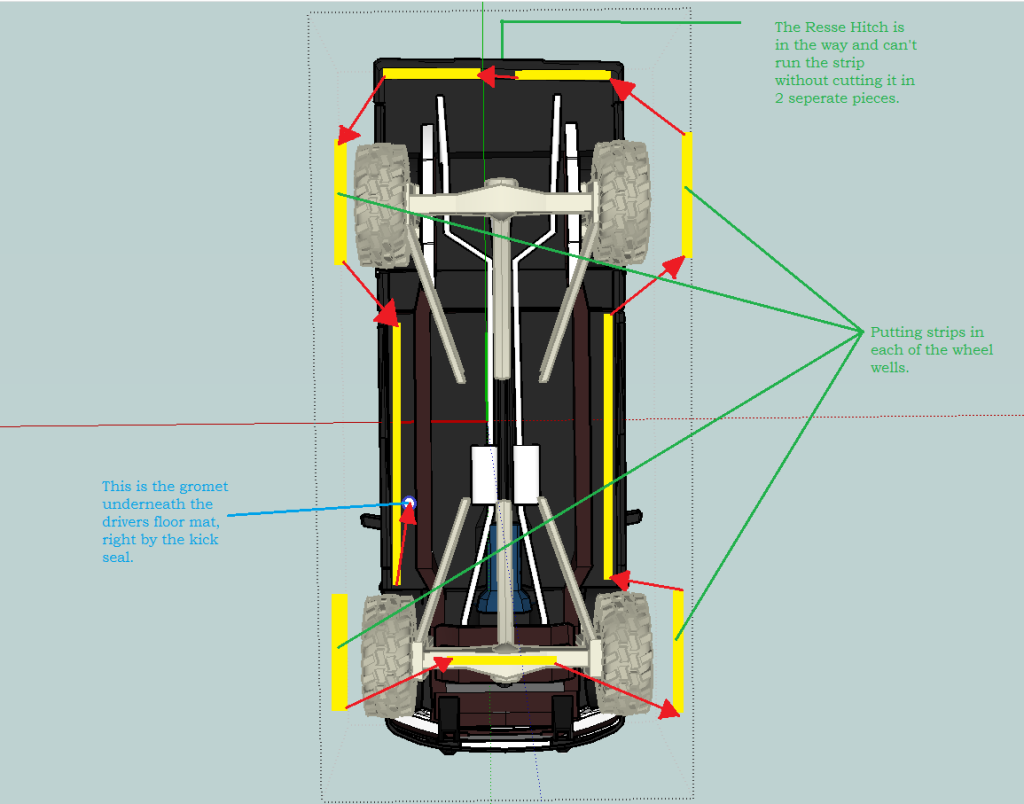
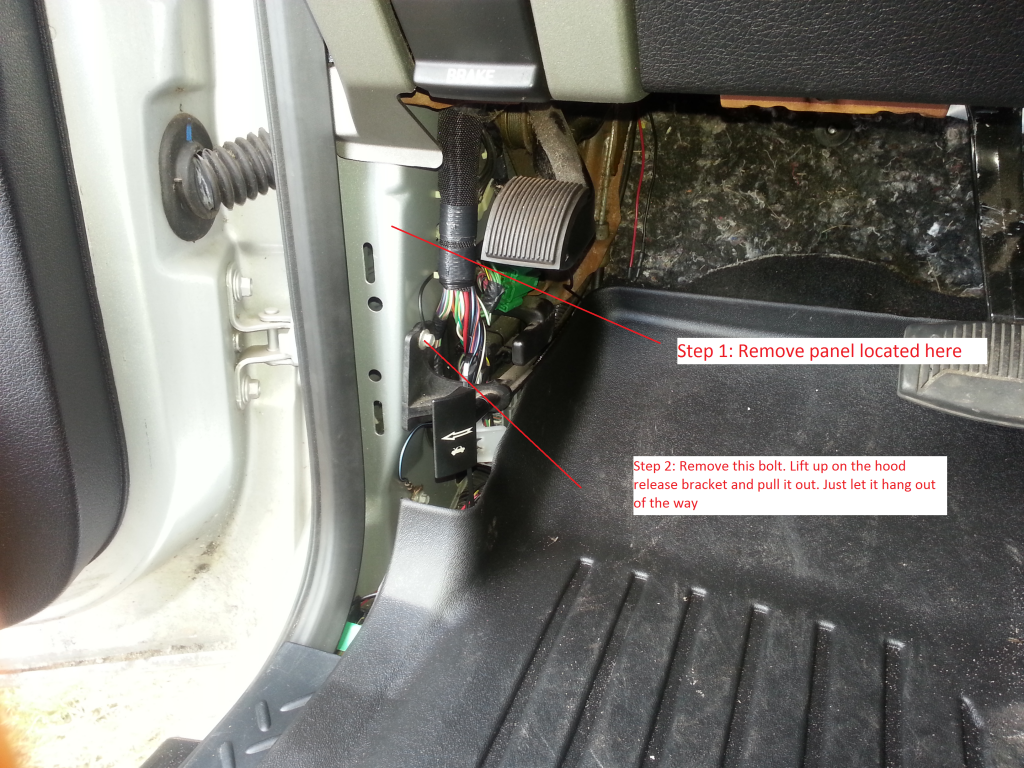
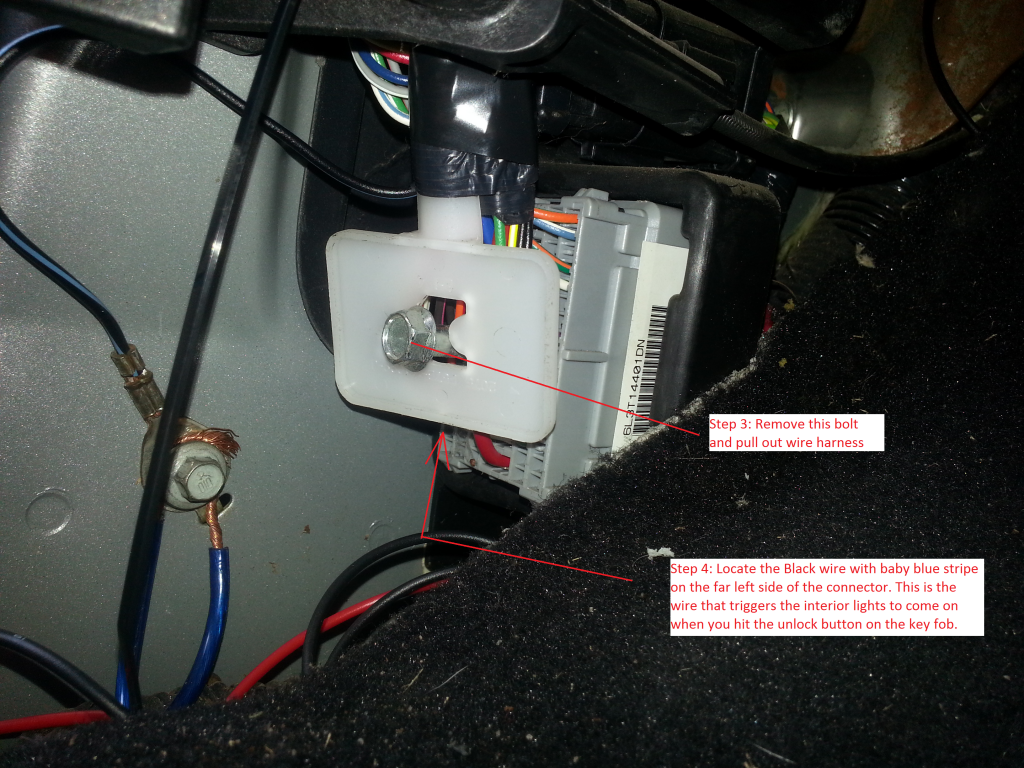
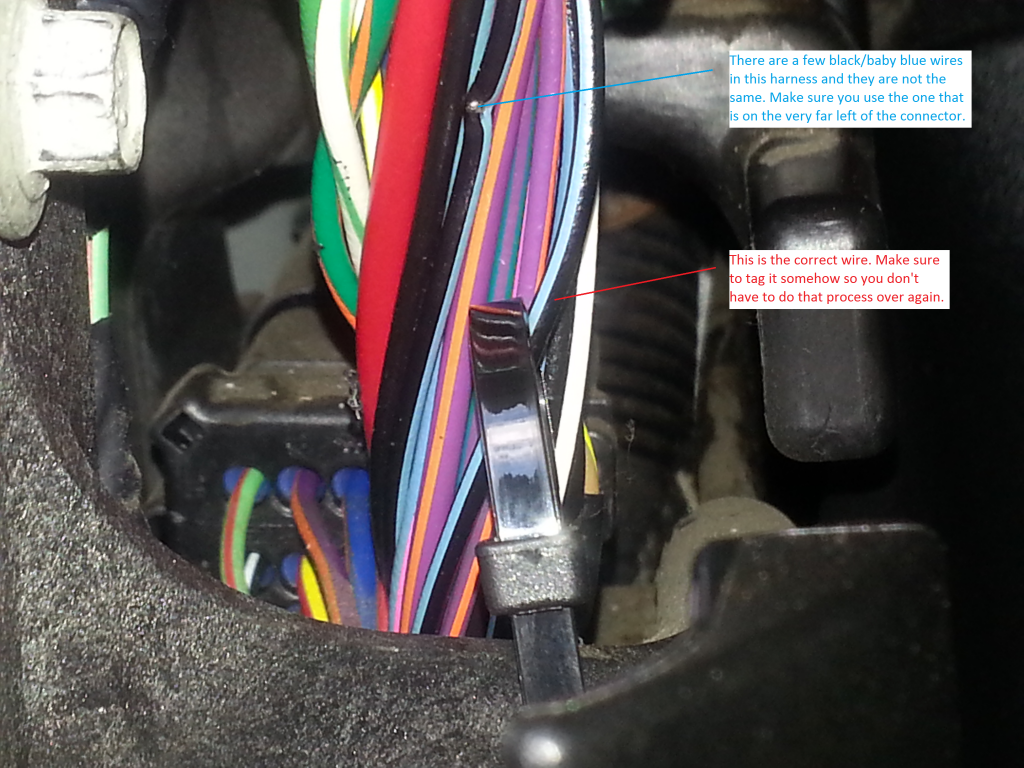
I knew I had to have the circuit end near the drivers side, so that I could feed the +/- wires up through the grommet in the drivers side floorboard. As luck would have it, it's close to where the wire I need to tap into for power is, and also a great location to ground the wires.
I wanted the lights to come on whenever the dome lights inside the truck come on when I hit the unlock button, and go off when I hit the lock button or shut the door. I ordered a wire piercing tester so that I wouldn't have to get in there and start cutting & testing wires, and to be sure I had the right wire before I made any adjustment to the wire itself.
This is where the wire is...
This is all I have for now. I'll be adding to this tutorial as the project comes along. If anyone see's any flaws or something I'm doing wrong, please let me know.
These are the lights that came from Amazon...
I first had to decide where I was going to put the strips. So I came up with the left side of truck, under the rear bumper, on the right side of truck, under the front of the truck, and all 4 wheel wells. Once I had that figured out, I then had to figure out how I was going to wire them in sequence so that I would have the least amount of wire under the truck as possible. This is what I came up with.....
I knew I had to have the circuit end near the drivers side, so that I could feed the +/- wires up through the grommet in the drivers side floorboard. As luck would have it, it's close to where the wire I need to tap into for power is, and also a great location to ground the wires.
I wanted the lights to come on whenever the dome lights inside the truck come on when I hit the unlock button, and go off when I hit the lock button or shut the door. I ordered a wire piercing tester so that I wouldn't have to get in there and start cutting & testing wires, and to be sure I had the right wire before I made any adjustment to the wire itself.
This is where the wire is...
This is all I have for now. I'll be adding to this tutorial as the project comes along. If anyone see's any flaws or something I'm doing wrong, please let me know.
 01-09-2013, 10:41 AM
#2
Senior Member
Thread Starter
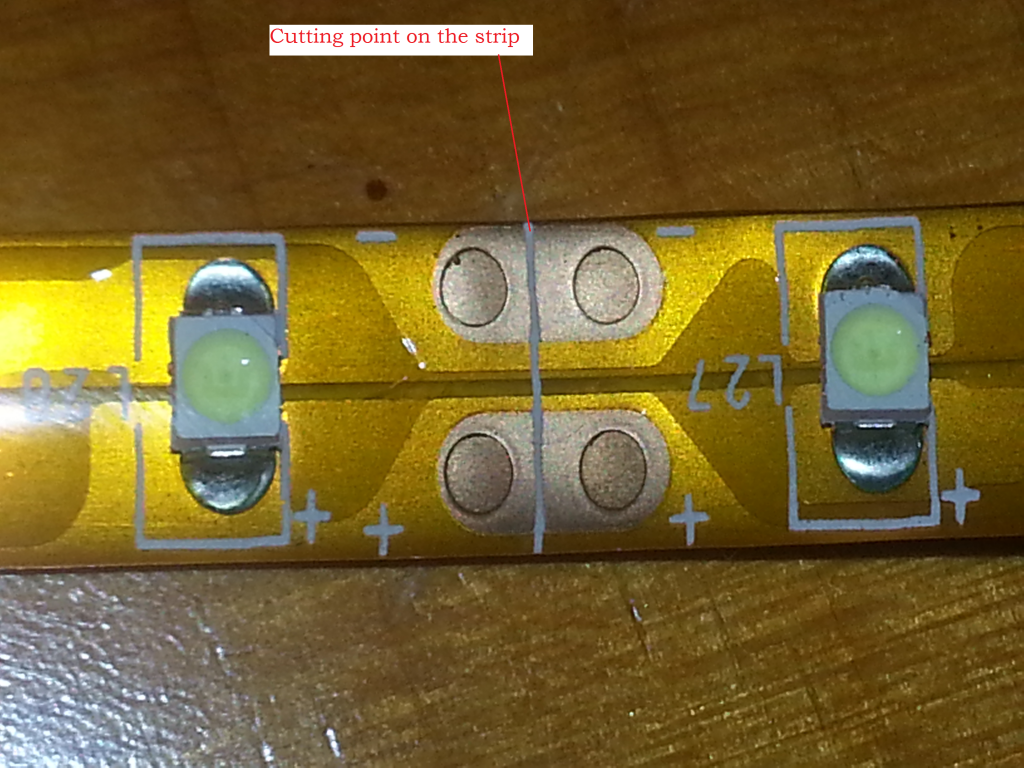
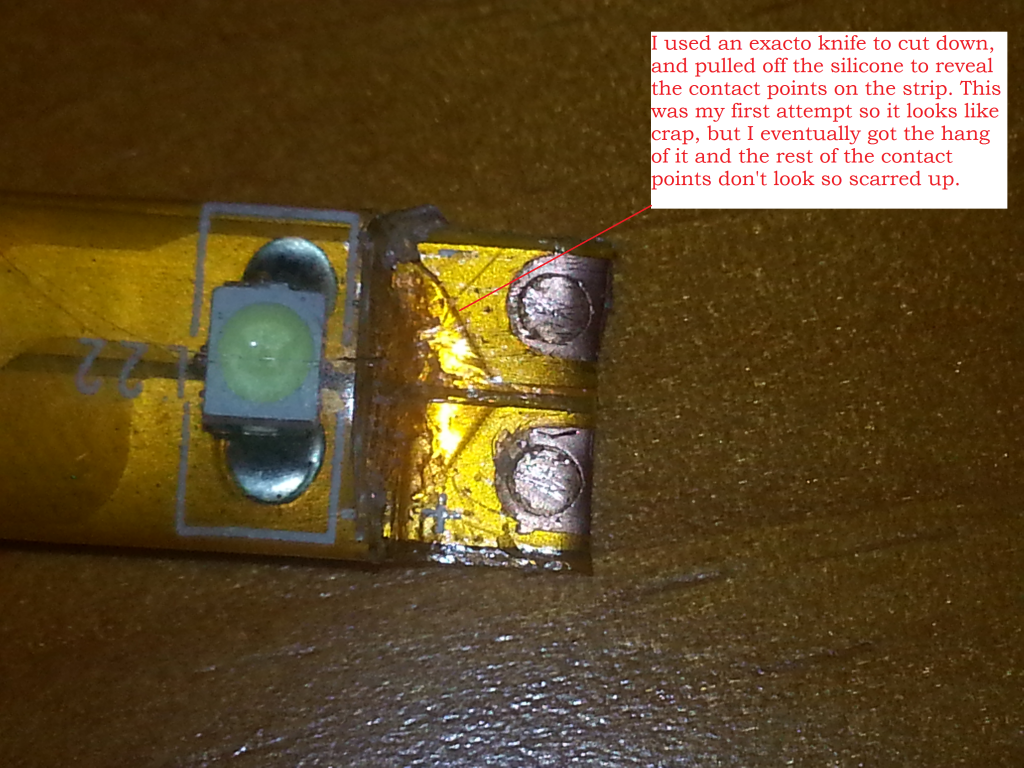
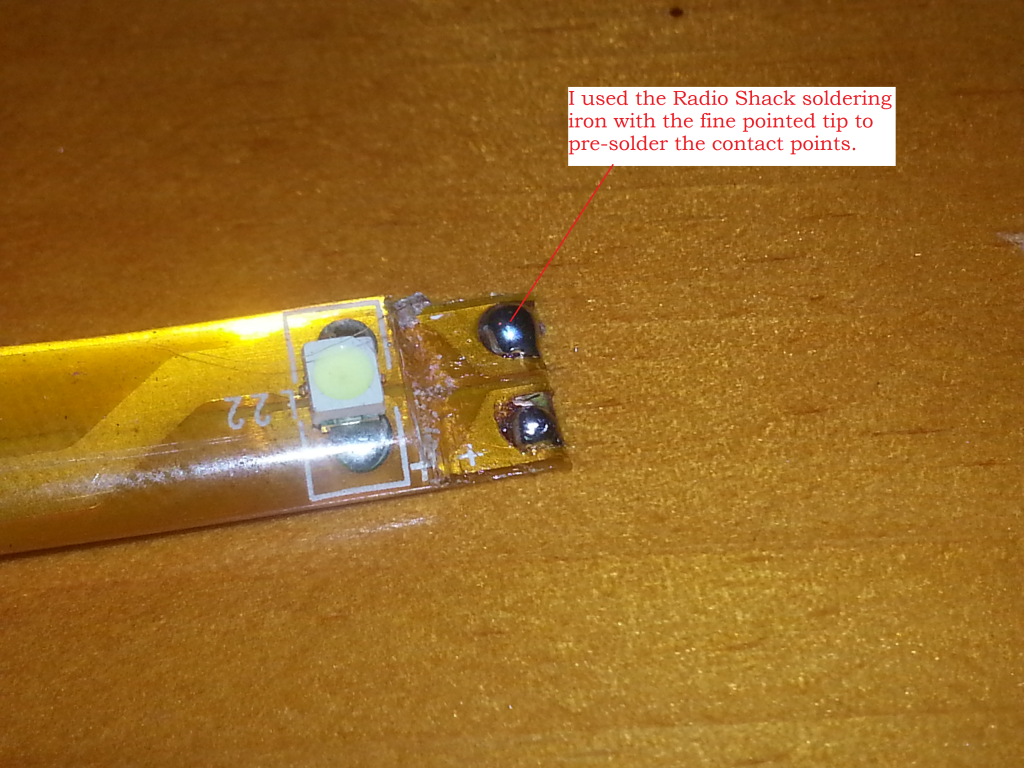
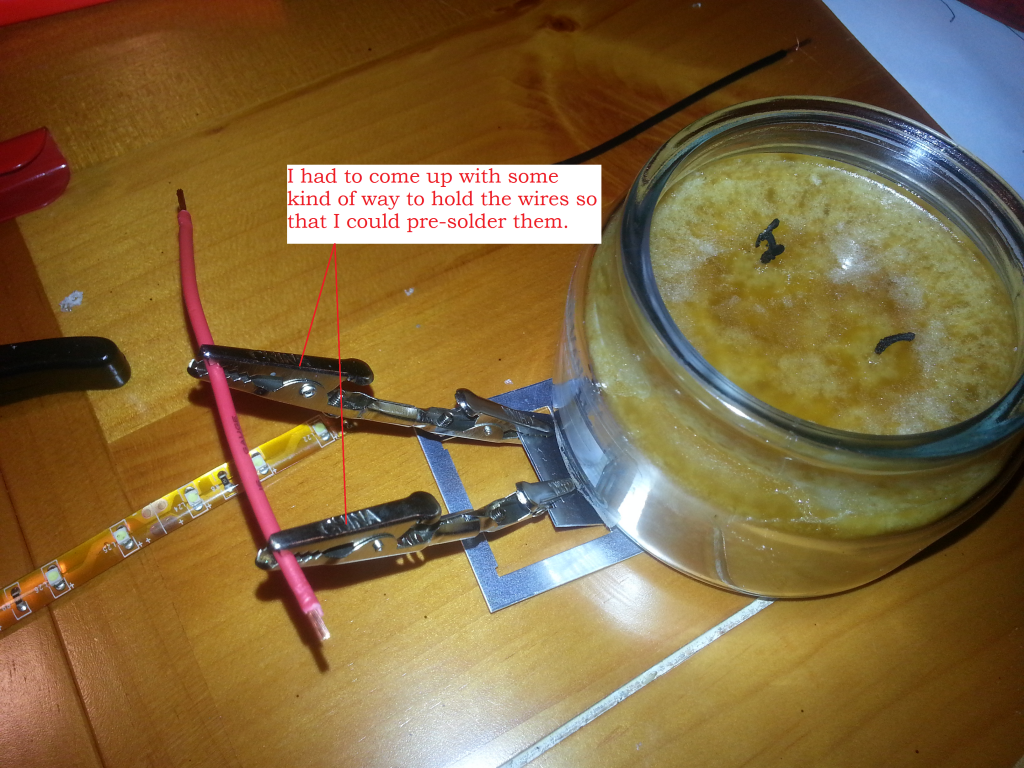
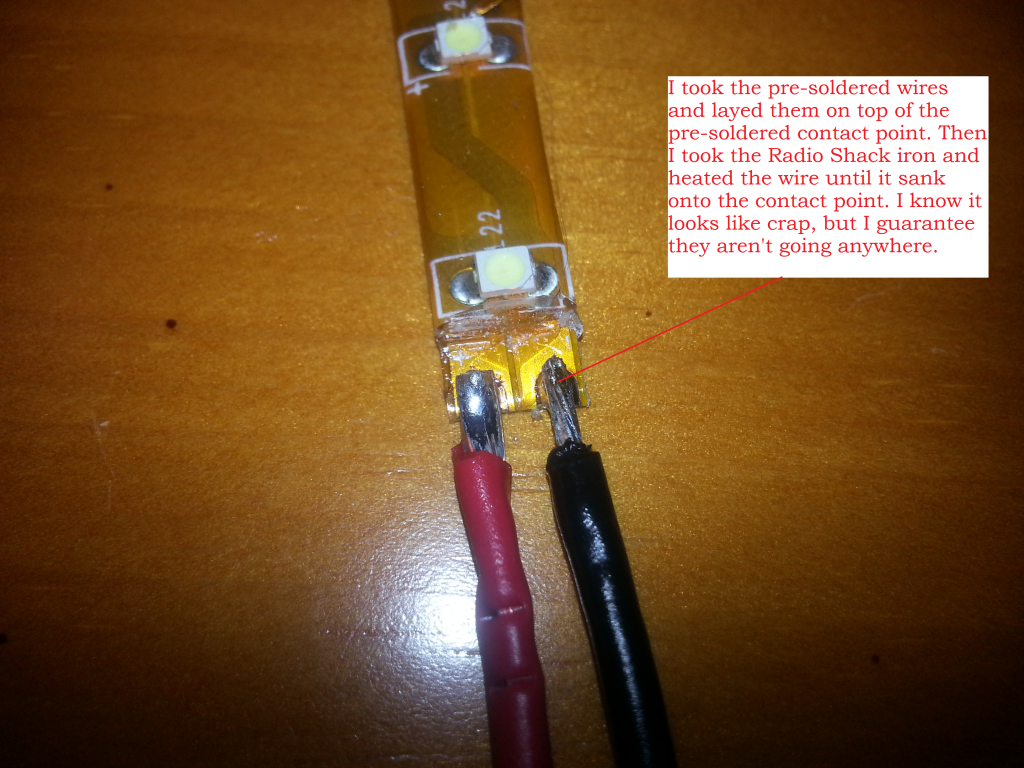
So I went home last night after work and got some more done on the lights. I took a bunch of pictures of everything. I don't know about yall, but I like to see a lot of pictures whenever I'm browsing through threads. So here they are.
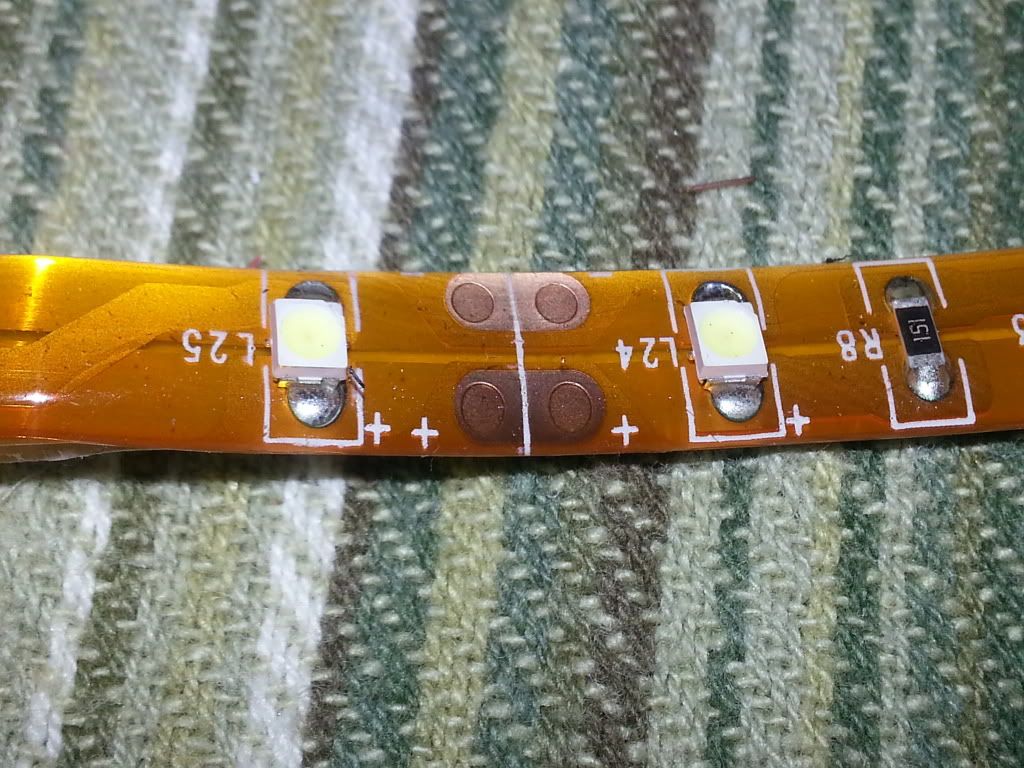
These are the materials/tools I'm using....
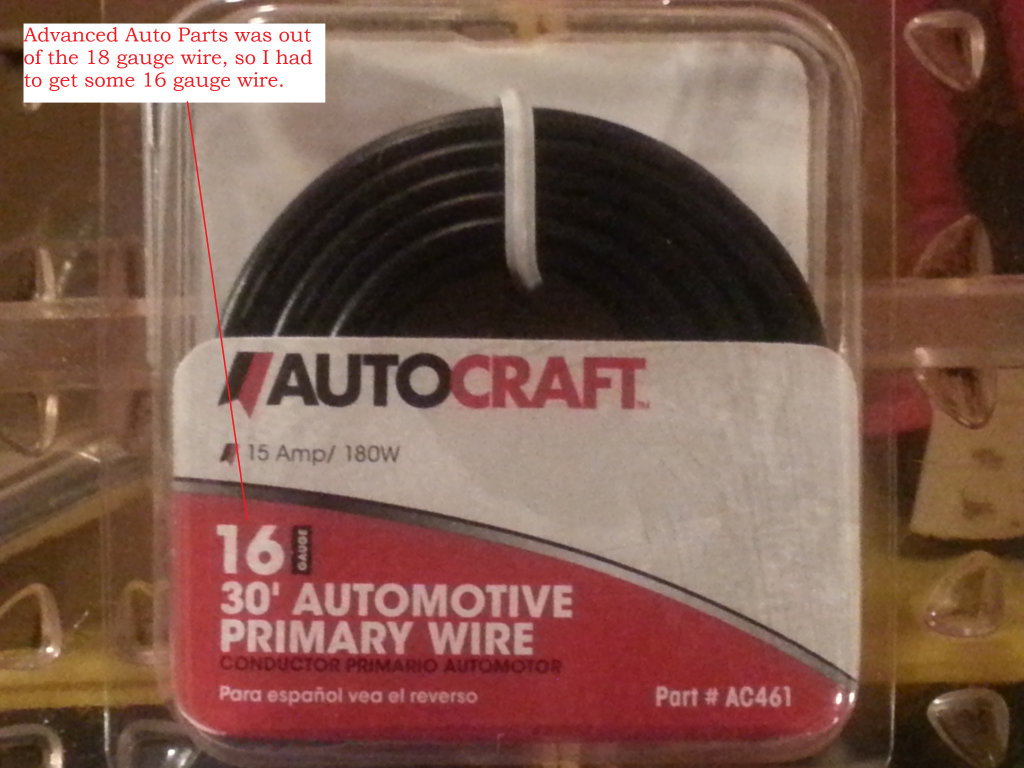
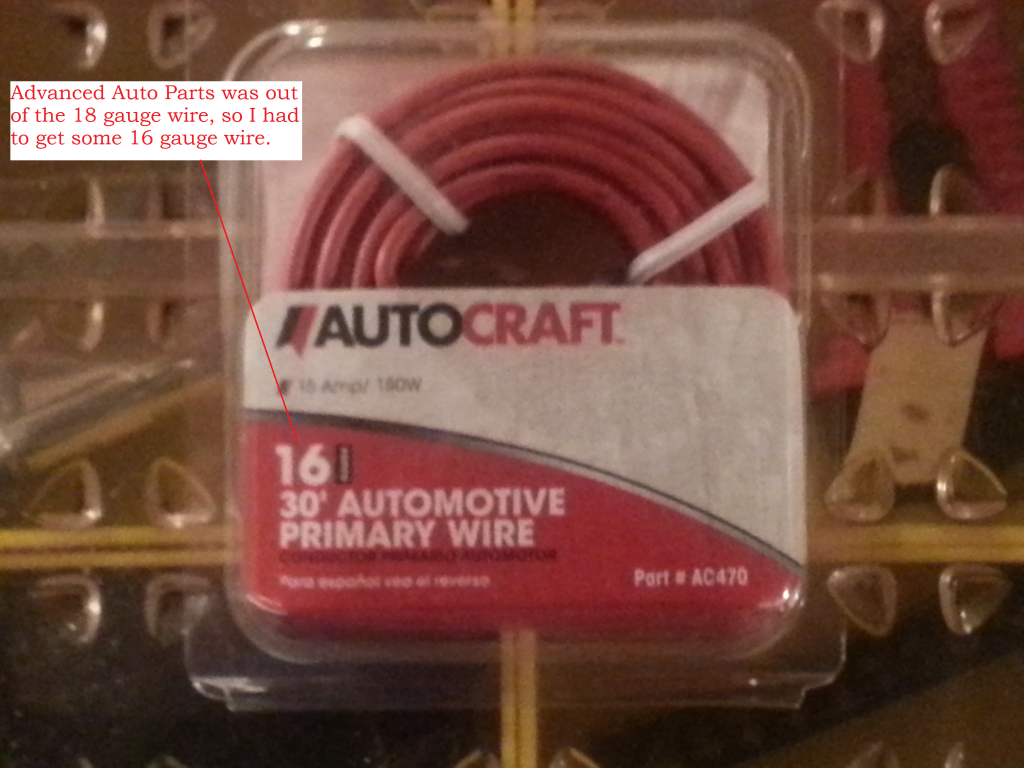
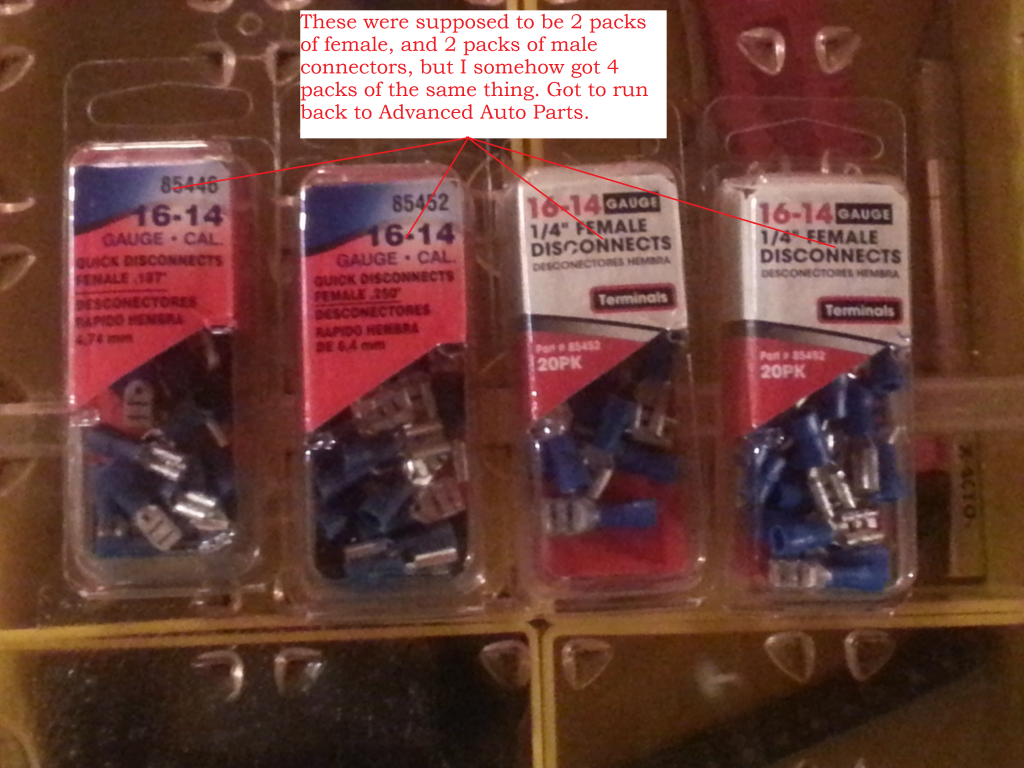
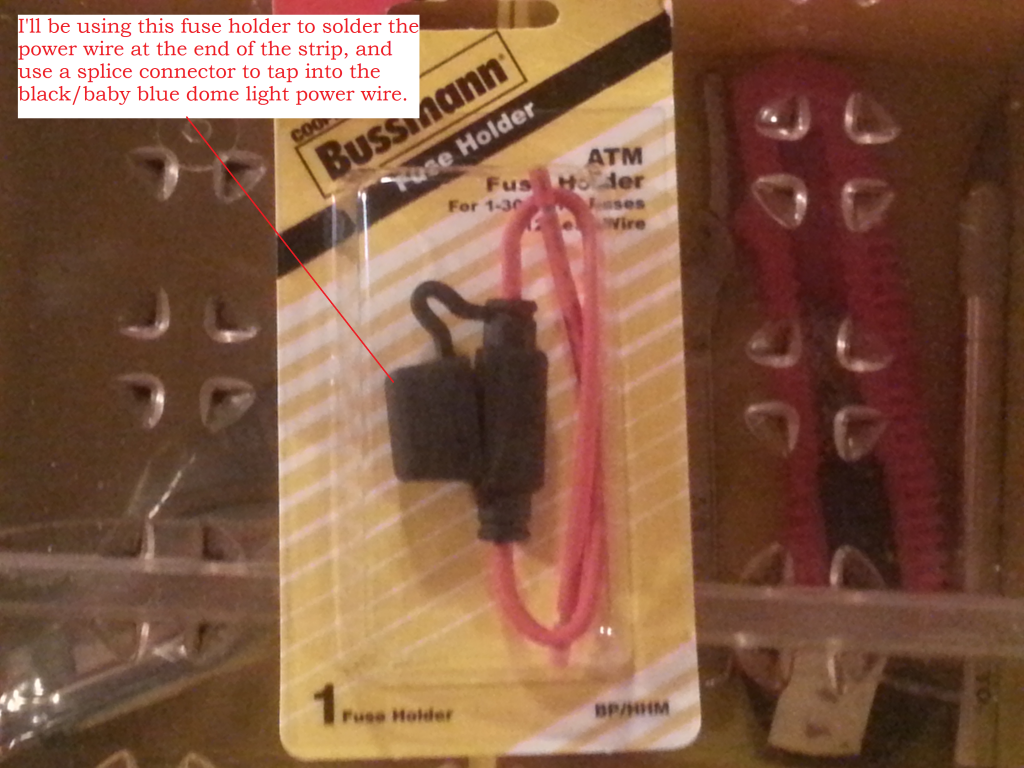
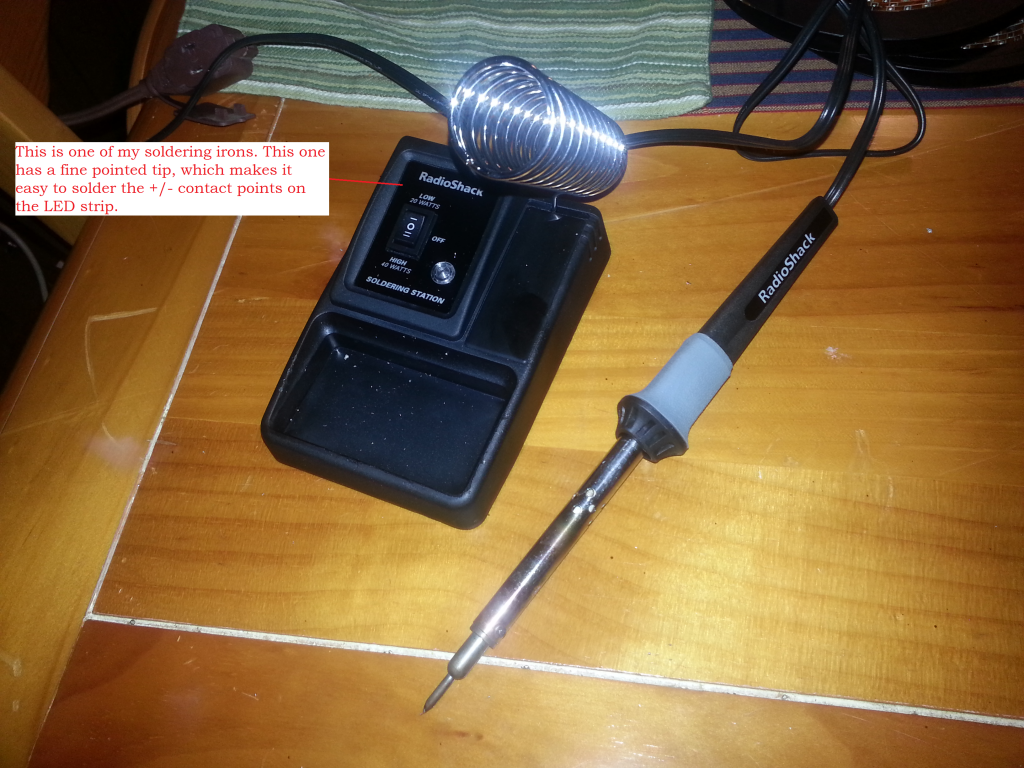
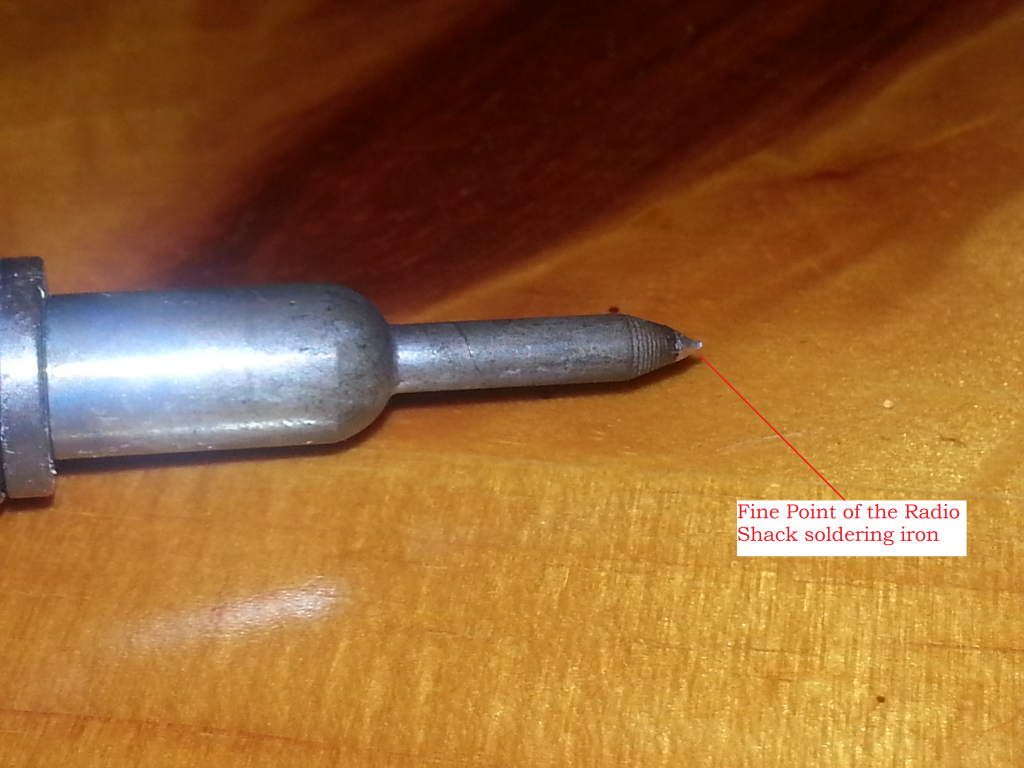
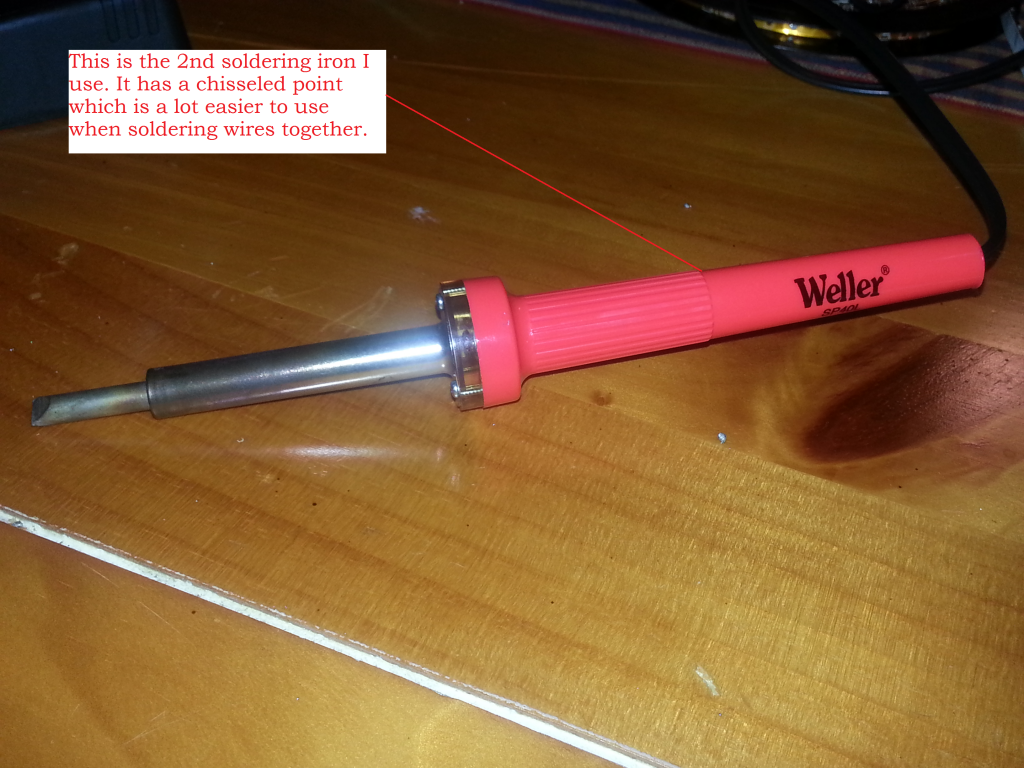
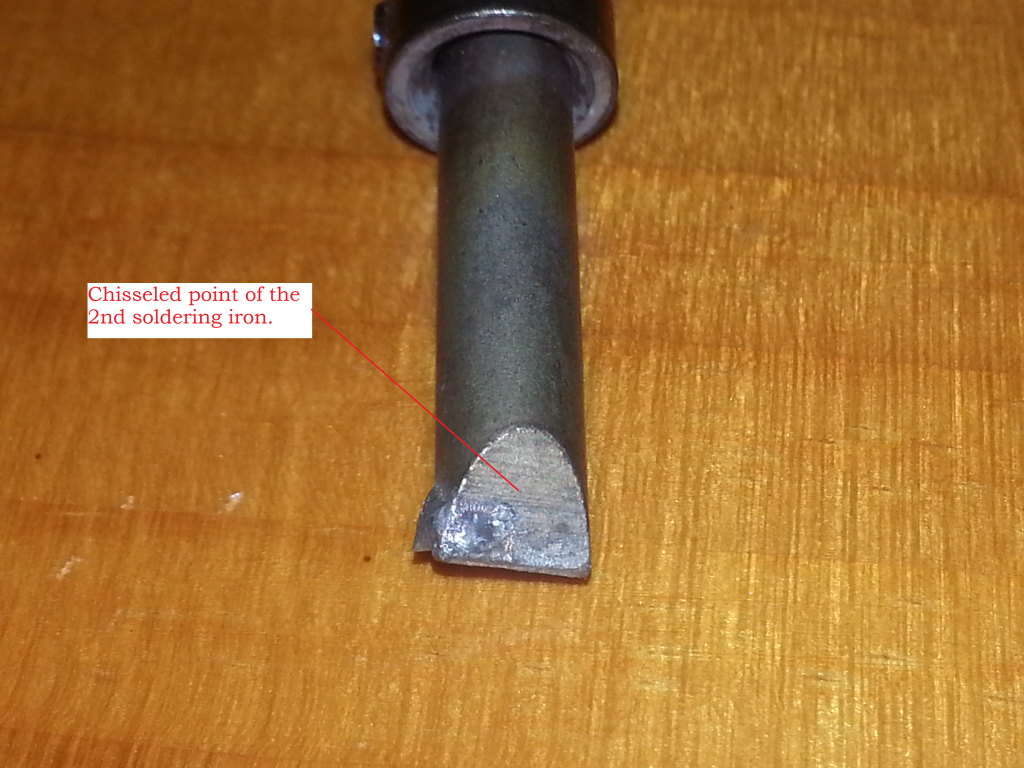
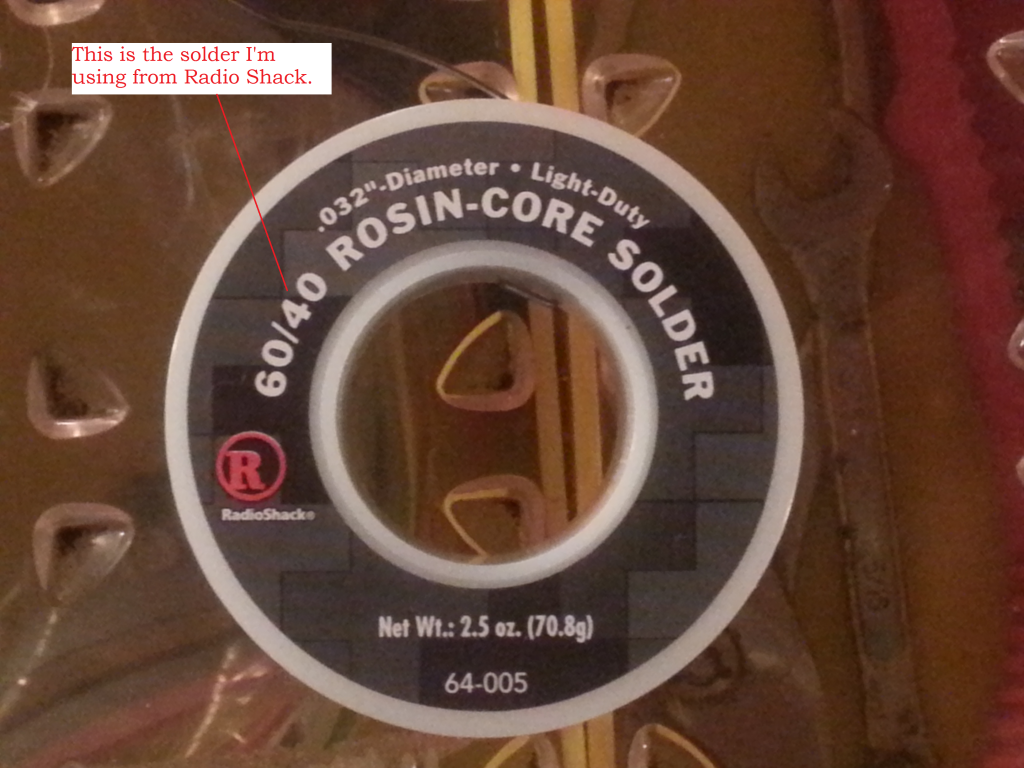
These are the materials/tools I'm using....
01-09-2013, 10:44 AM
#3
Senior Member
Thread Starter
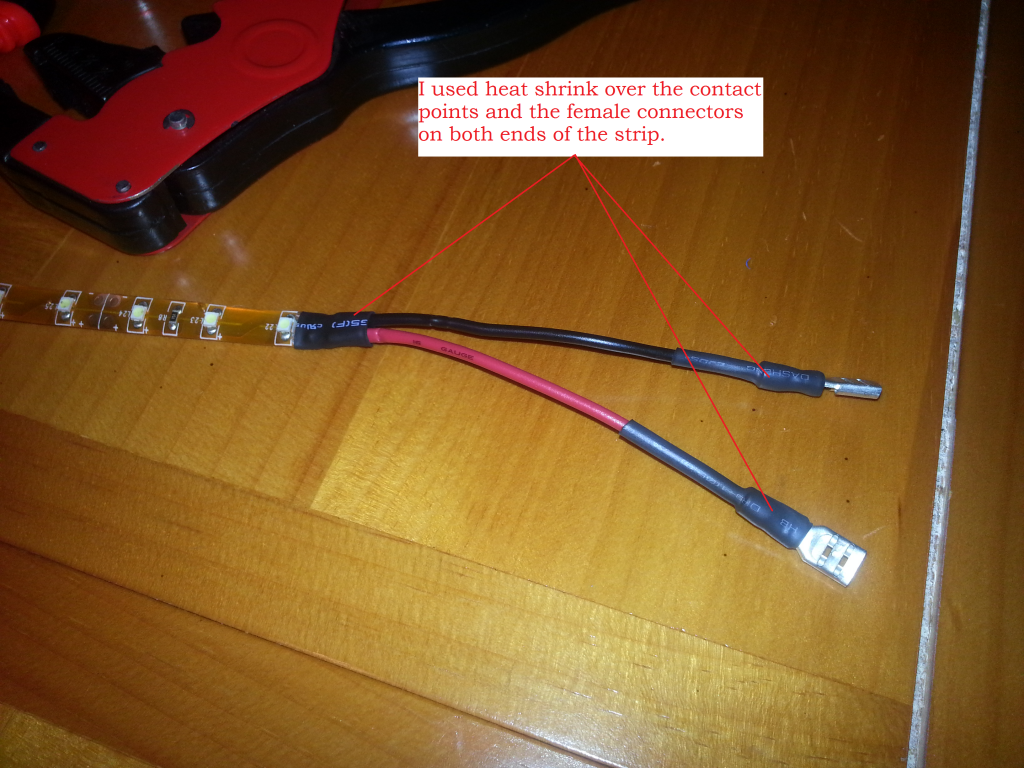
And here are some more pictures of the progress I made last night....
The following users liked this post:
Patrick Gravel (01-13-2016)

The following users liked this post:
FL0rida CrAcK3r (01-09-2013)
01-09-2013, 08:07 PM
#5


Nice. I plan to do the same thing for my bed lights. Might have to do some shopping around. I was planning on using superbrightleds.com, but the ones on amazon are a good price.
01-10-2013, 08:16 AM
#8
jaxwireman

Cool project, I think your main concearn will be making sure to get a good type of fastner to keep the lights and wiring in place, I dont think just an adhesive would be the way to go. The placement in the wheel well's will be something to watch, especialy the fronts. Nice work, on the wiring. The only thing i would suggest different there would be to put a male on one wire and a female on one so you dont cross them up when you do the tie togehter.
Last edited by sglover; 01-10-2013 at 08:22 AM.
01-10-2013, 09:20 AM
#9
Senior Member
Thread Starter
01-10-2013, 09:23 AM
#10
Senior Member
Thread Starter
If everything goes right, they'll be installed and working this weekend. Don't have enough daylight after 5pm right now to get them done after work. I hate it that it get's so dark, so early. I'm stuck in this damn office all day, and when I get off, I have a good solid hour of daylight left, and can't get anything done outside.