When you click on links to various merchants on this site and make a purchase, this can result in this site earning a commission. Affiliate programs and affiliations include, but are not limited to, the eBay Partner Network.
So, I've been researching the best options for restoring/refinishing these faded plastics for several years and just never brought myself to take the time to do it. Mostly, this is because if I'm gonna do it, then I expect it to look professional and it took me a while to work out exactly what I wanted to do since it was going to be so involved.
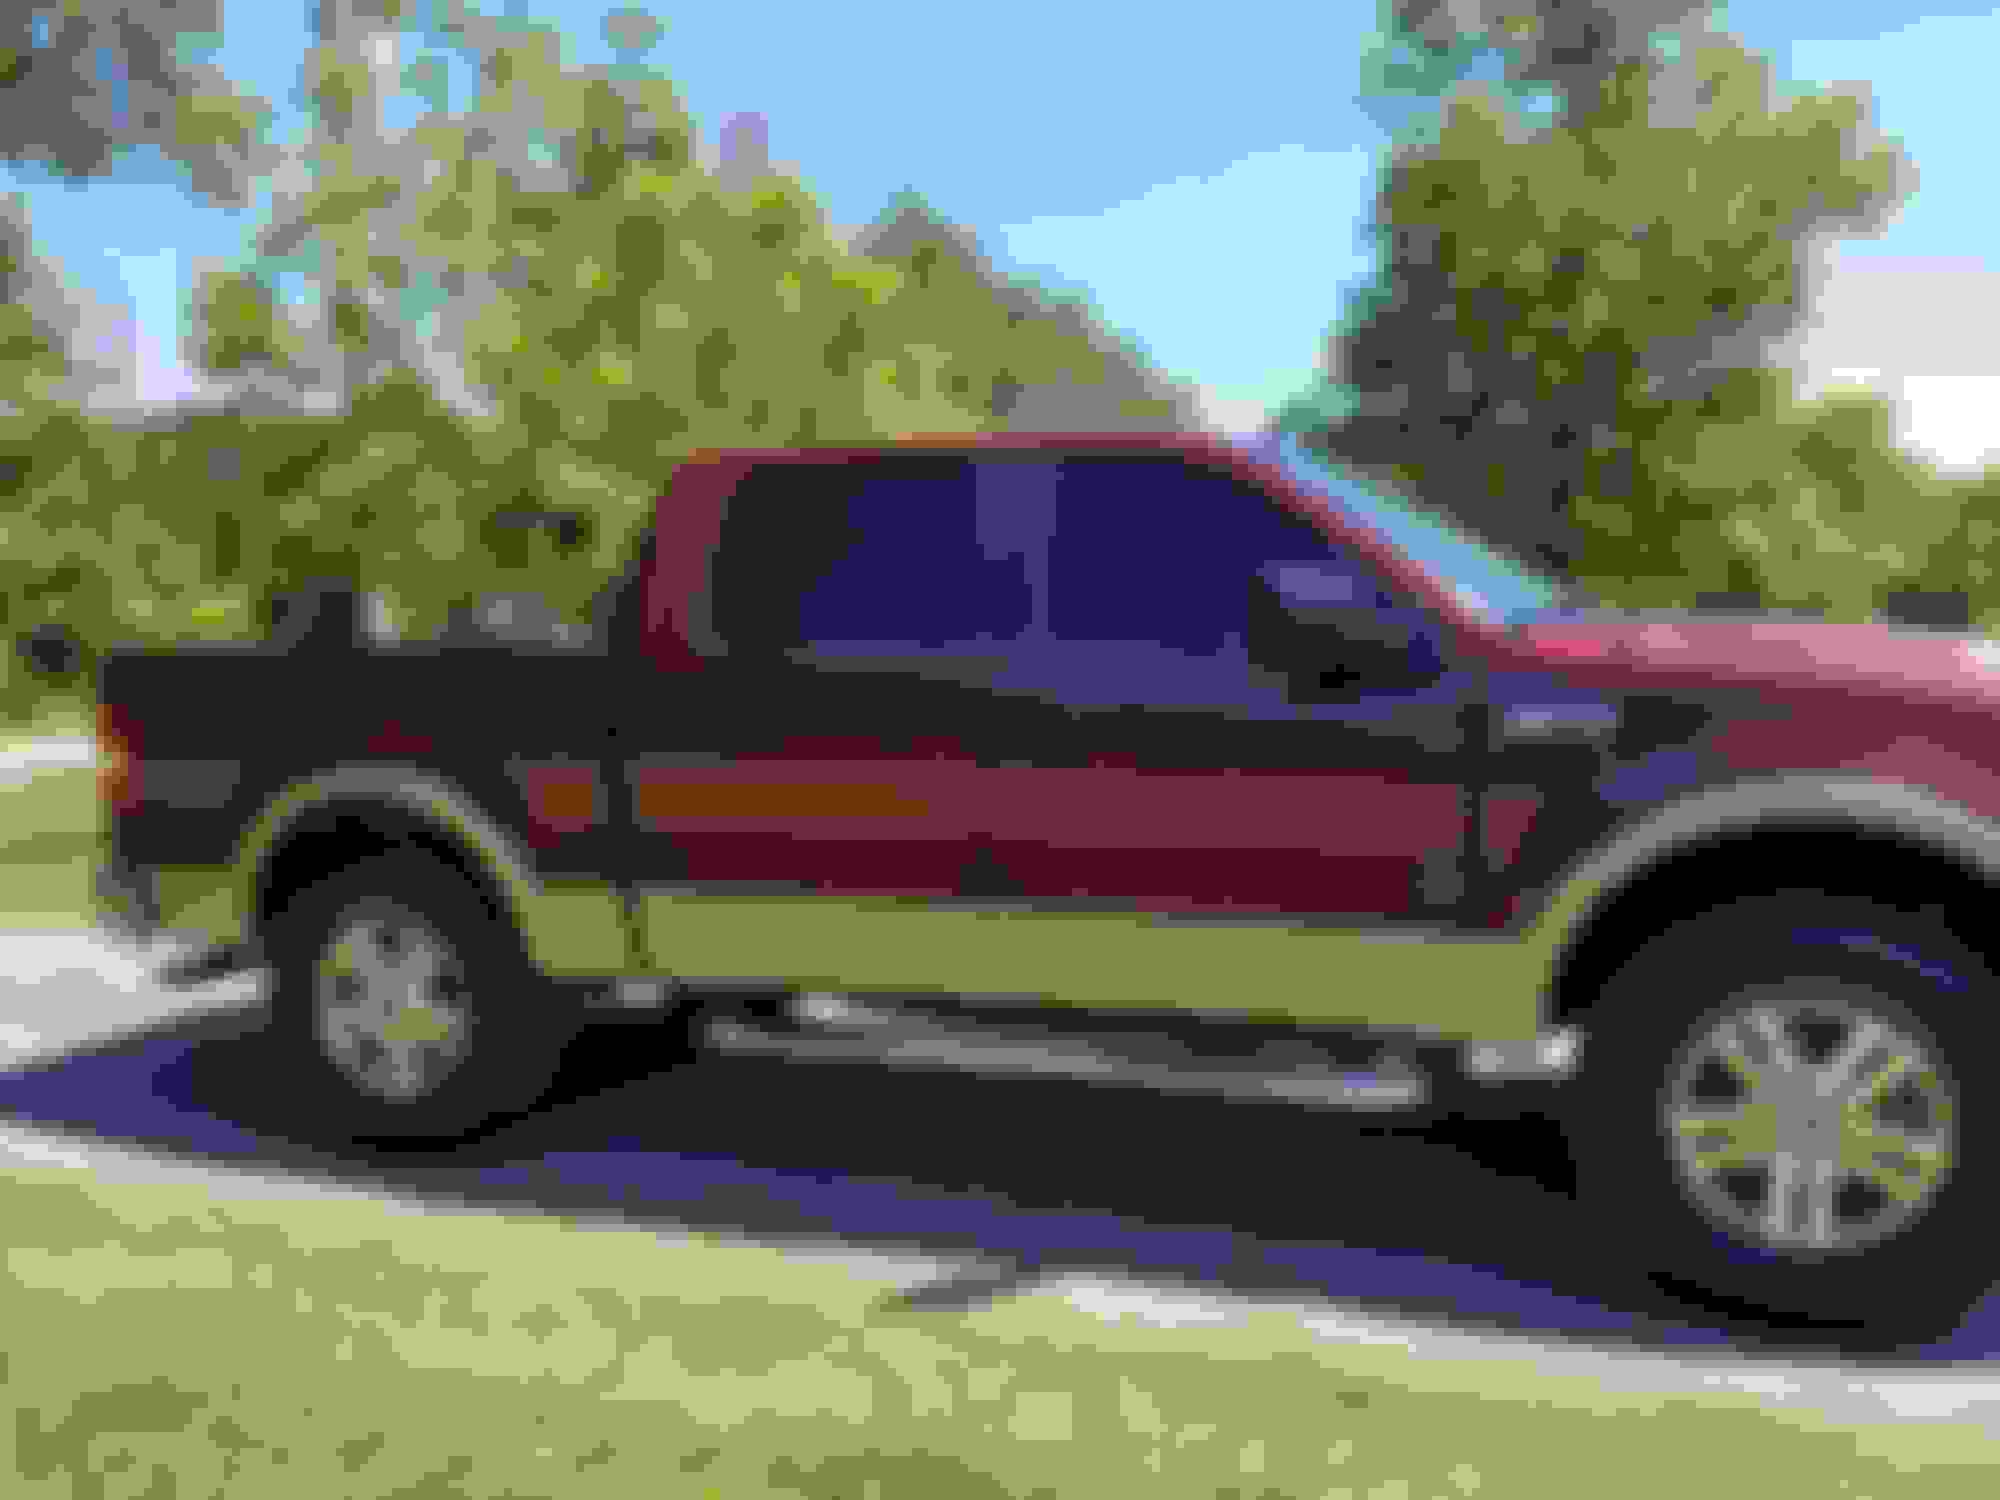
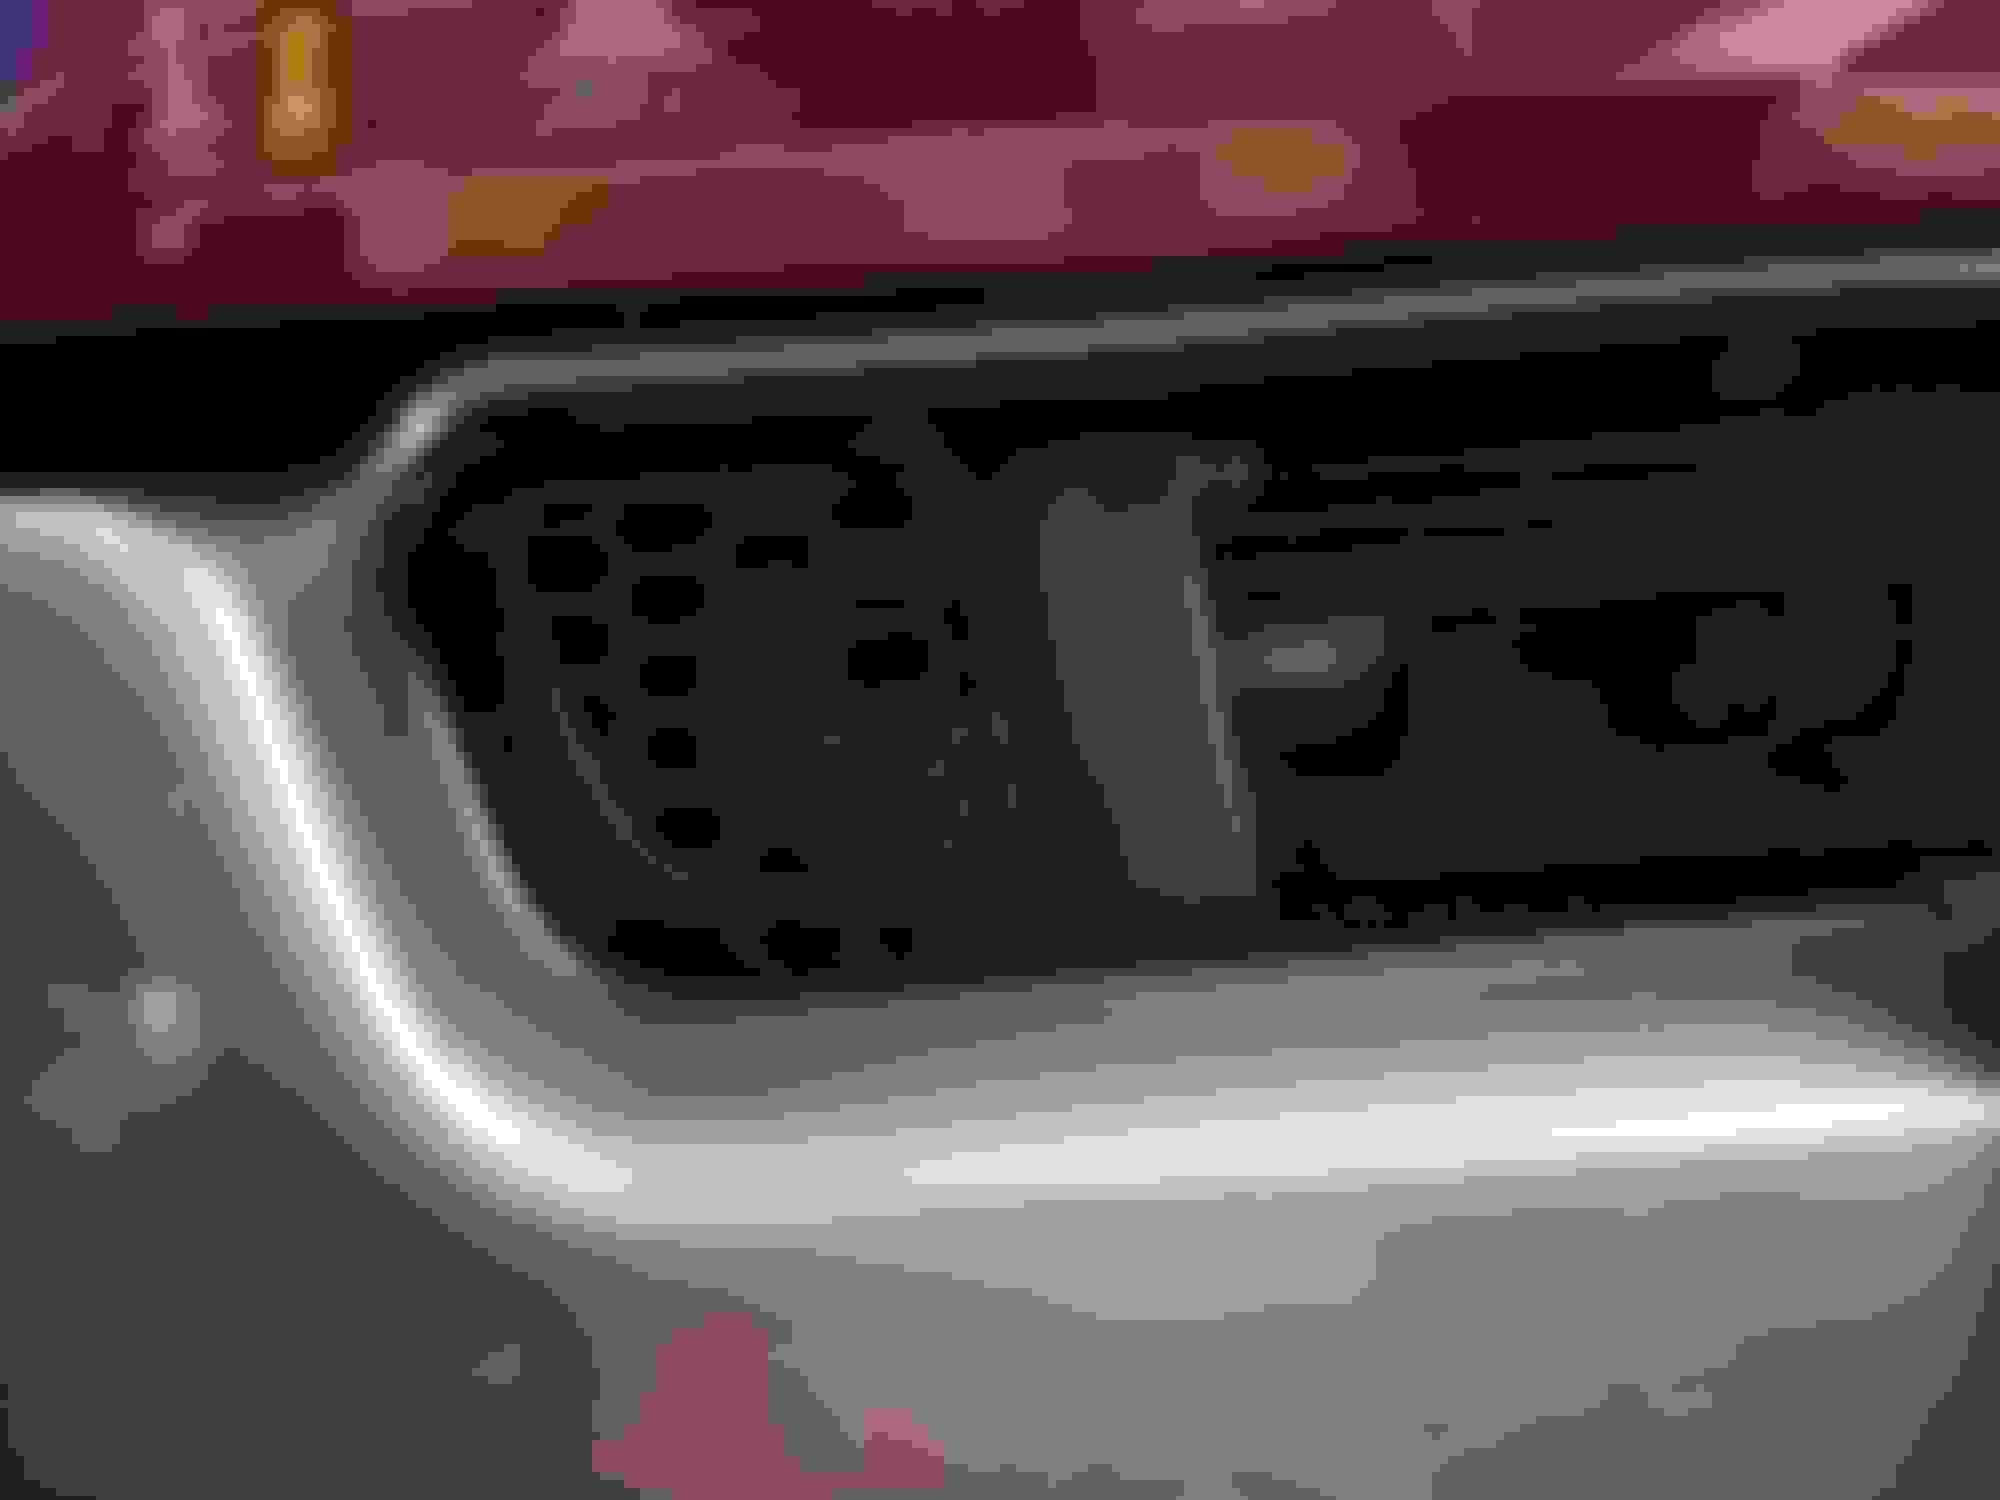
So, I removed the front spoiler and bumper insert (plastic piece inside the bumper), tag holder, front windshield cowling (whatever it's called), door handles, mirrors, bed rail caps, tail gate cap, and rear bumper cover.
I used wiped with acetone, gloss off, paint thinner, plastic paint prep spray, then soap and water (I had build up of years of "products" that I'd used to try and make the plastics look good again). I wanted to make sure they were clean.
Then sanded with 220 grit to remove some of the scuffs and scratches I'd accumulated in the 13 years I've owned this truck. Then wet sanded with 600 and again with 1000 grit.
Then, 3 coats of adhesion promoter, 4 coats of flat black paint, and then 3 coats of satin clear.
I then applied 5 coats of plasti dip to each piece for the final result.
The reason I plasti dipped over the "finished product" is, the plasti dip will only last for a few years if I maintain it properly ( which I will) so, I figured why not have 2 brand new finishes?
Meaning, in a few years (hopefully) when the plasti dip begins to wear, I can then peel it off and reveal the freshly painted trim pieces that will hopefully last several years as well.
So, my thinking was this will hopefully keep my plastics looking good for at least 5-7 years and hopefully longer as I will vigilantly care for them.
Just wanted to share some photos with you guys as I'm sure there are others who have been irritated by their faded plastic pieces taking away from the look they want and also tired of applying products that wash away or dont give "like new" results.
Let me know what you think. And, I am extremely pleased with the plasti dip and the finish it left. You can still see the texture in most of the plastics which I did not anticipate would be the case. I applied it with an HVLP spray rig and cannot be more pleased. Against the advice of the folks at plasti dip (whom helped me out tremendously and have great customer service) I sealed it with some Eagle One Nano Spray wax. The spray wax really gave it a slicker feel and eliminated the static that caused fibers to stick to it when wiped and also made it not "drag" when you rubbed across it.
Thanks
Didn't realize the wifes van was in the pic at the time.
Really happy about how the bed rail caps turned out.
Very nicely done. That's a beauty of a truck you have. The plastics came out great. What's the trick to getting the bed rail caps off without damaging them? I kinda want to do this to my '05 after seeing your results.
-P.S. In that last picture it looks like there is something really wrong with your hood until I realized it's the reflection of your textured garage ceiling. That truck is way too clean and shiny, you're making the rest of us look bad...
Well, you can squeeze the tabs together on the back side to release the side of it inside your bed. However, there are two rows and the other cant be accessed as it is inside the fender.
So, I did it one at a time. I'd release the one I could access, then move up to the next and I placed a flat pry tool that I'd plasti dipped and wrapped in electrical tape to protect the paint and pry til it popped off applying pressure from both sides.
I did this to both sides and broke 3 clips completely and about 5 more were partially broken.
I was able to repair all but one with some crazy glue and got it back in place with no movement detectable. This was one of my main concerns as I did not want it to move or rub the paint.
Thanks for the compliment, and yeah, the ceiling can make it look kinda funny till you realize what your looking at.
I cleaned her up real good after I got all the pieces back on so it was an ideal time to take some photos.
Nice work! You applied a clear coat, which is key to long time protection.
Many here have done the same with the plastics fusion paint, but then they fail to apply a clear coat that provides the UV protection. Krylon has this now in a rattle can setup.
Nice work! You applied a clear coat, which is key to long time protection.
Many here have done the same with the plastics fusion paint, but then they fail to apply a clear coat that provides the UV protection. Krylon has this now in a rattle can setup.
I tried to approach it with the thought of making it last as long as possible. It was a good deal of work, fortunately I was able to park the truck for a week and had time to remove the pieces and do it properly.
I used SEM trim paint. My friend owned a body shop and got the products for me through his distributor.
SEM is nice stuff. Looks awesome. I wish my truck was this clean!
When the plastidip wears, you can peel it off and redip and have it last even longer.
The reasoning behind doing the plasti dip on top of the paint is so that when (hopefully later than sooner) it does wear, I can peel it off and have a newly painted surface to protect and care for for however many years I'm able to maintain it.
I'm more confident in the paint holding up for several years than I am the dip. This is mostly due to the fact that if the dip gets chipped, it's gonna want to continue to peel unless I touch it up quickly.
I removed all the pieces so that I could "wrap the edges" with the paint and the dip. From the research I've done and after speaking with the reps at SEM and Plasti Dip, this is the way to go to prevent premature peeling or it getting chipped on the edges while reinstalling. I'ts supposed to make a considerable difference. On top of the fact I did not want to mask off my entire truck for days to prevent over spray and then have to scribe all the edges since I have a total of around 15 coats on all the pieces, I figured I'd have some issues scribing the lines out before removing the masking without damaging the paint or surrounding areas.
And, thanks for the compliment, I've always taken as good of care of this truck as I can. It didnt get rained on or put on a wet road for the last 2 years as I had a work vehicle I could drive on those days so it sat in the garage!
I just wanted to share what hopes to turn out to be, a success story about restoring the plastics that nagged me and so many others. I cant begin to say how many products, applications, and money I've spent trying to make them look new or atleast good again with limited success.
I've done back to black, ultimate black, wipe new, 303 aerospace (I think thats the right number), trim restorers out the wazzzoooo! So, hopefully, I can keep these up with some spray wax and good maintenance and well see what happens.
 05-14-2017, 11:45 PM