When you click on links to various merchants on this site and make a purchase, this can result in this site earning a commission. Affiliate programs and affiliations include, but are not limited to, the eBay Partner Network.
I have a 2006 F150 and my firewall has a heat shield on it that is molded over this drain plug, my question is did you guys have to cut out this heat shield?
Fixed my 2003 4.2L A/C from draining back into the cab. Took off passenger side wheel and plastic wheel well for access. It was running back into and through the foam gasket to the interior of the cab.
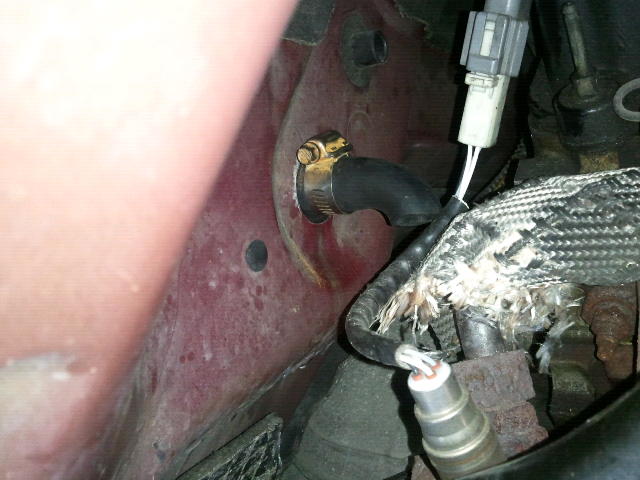
I do not know what the upper outlet in this pic goes to.
Many of the model years have the black plastic shield over the drain tube. I don't know why Ford spent the money on the shield instead of the real fix, which is the elbow. I think clearance was a serious issue. But anyway the elbow fits all of them with no problem. Most of the trucks, SUV's, Vans, have the same problem up till the 2010 model year, when Ford actually started putting the elbow on the end of the drain tube from the factory.
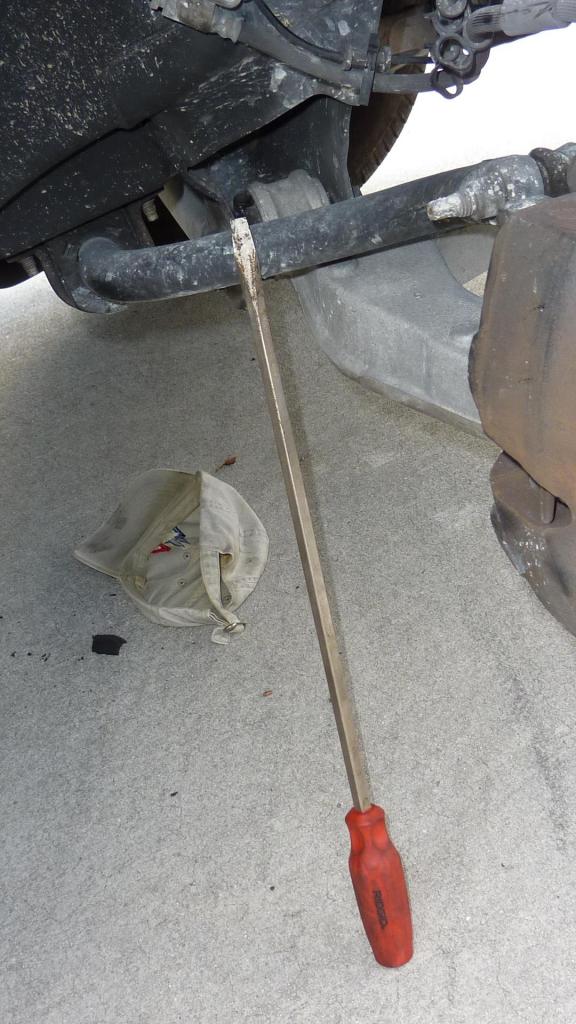
Installation usually involves removing the right front wheel, wheel-well liner, transmission dipstick tube, just to gain a little access to the drain tube. You'll probably find it covered by the black plastic shield. This shield is held on by two plastic rivets and just pries off. You can discard it as it won't be used once the elbow is installed. Jack the truck up high enough to work under it comfortably, using jackstands of course. I found it easiest to boil the elbow in hot water for about 10-15 minutes to soften it up, even shoving a 9/16" socket into the end that's gonna go over the drain tube to help expand it out some. (it'll shrink back to a tight fit when it cools...). I did my installation from underneath the truck, using a large long screwdriver to push the elbow onto the tube end. Just stuff the long end of the elbow onto the screwdriver end and raise it up into position and push it on. Wallah you're done. Re-install the tranny dipstick tube, wheelwell liner, tire, and you're done. No more wet carpet.
-Mike
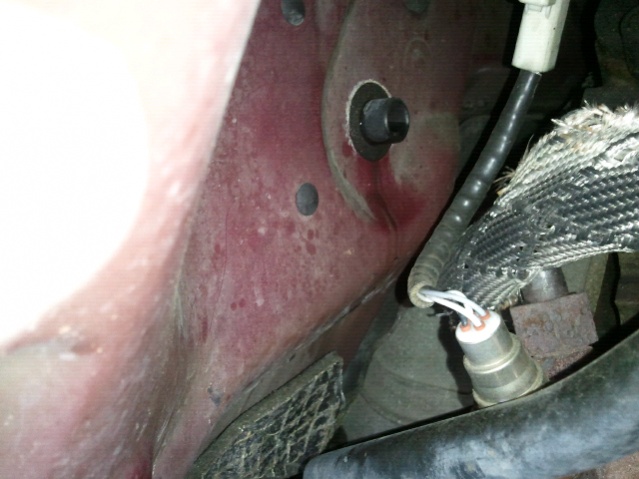
Plastic shield in place on truck ... looking up from underneath.
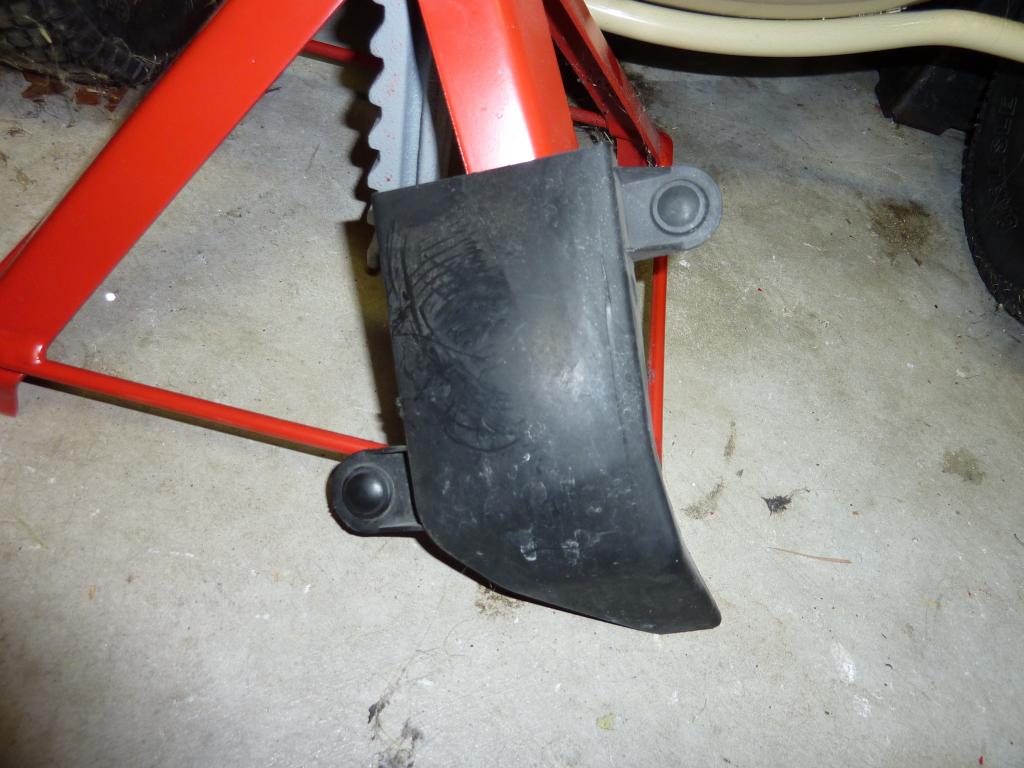
Plastic shield off the truck.... discard
Elbow installed on drain tube... looking up from underneath the truck.
I am a new member and I just wanted to say thanks for this thread, it was spot on and the directions were perfect and the pictures made it a piece of cake to fix. A bit more space would have been great, but without the thread I would have not have even been able to find the drain.
I think this is the cause of my problem also as the foam gasket I noticed water leaking a little when I pushed on it. I wonder if the elbow will fix my problem or if I have a clog in that area.
Definitely a huge thank you for showing me where that drain is though!
Mine was exactly the same, the foam was saturated and I packed towels around it to keep the carpet dry. The good news is I installed the elbow three weeks ago and the the carpet is dry, the foam gasket is dry and life is good for just a $17.00 part. I thought mine was cloged as well but that was not the problem.
This is great information. I have the same problem and just ordered the part from Ford. I'll let you know how it goes currently my passenger side floor is flooded. 2006 F-150 2wd XLT
Originally Posted by mattd17
sounds like you might need to get the A/C drain elbow that FORD realized these trucks should have had from the factory. the A/C drain is in fact in the passenger side of the firewall, and it is poorly designed. if you look at the firewall just above the passenger side exhaust manifold, you will see the drain tube (it is MUCH easier to see if you take the fender liner out). this tube is in a horizontal position, and only entends beyond the firewall by about 3/16-1/4". so, as you drive down the road, the moving air will cause the condensate to flow along the bottom of this shprt tube, rather than drop to the ground. then what happens is the condensate will soak into the padding where the tube penetrates the firewall, and then will continue to soak into the carpet padding on the passenger side.
long story short, you can put this elbow onto the drain, and it will force the condensate to drip onto the ground. its part number is F3LY-6A614-A, and it costs about 6.00 from FORD. It can be a little tricky to install, but seems to do the trick. i removed my carpet a couple times to dry it all out correctly before i finally found the culprit and fixed it.
here is a picture to show you where it is located. i had put a temporary elbow at the time until my dealer got the correct elbow.


 06-02-2012, 06:56 PM