
My Retrofit project
 03-15-2017, 10:32 PM
#1

Just copy/paste from another forum, but thought I'd share my project.
I've wanted to do a retrofit for years, but finally pulled the plug recently. Great learning experience, and lots of info available.
2011 F150,
Morimoto D2S 4.0 projector, 35w morimoto bulbs and ballasts, 5500k
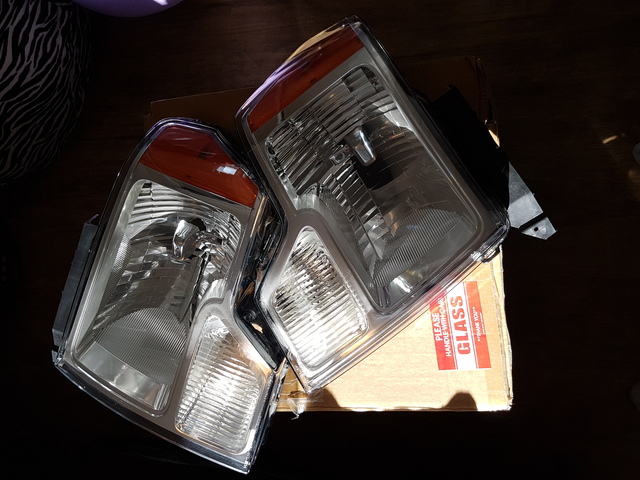
Spare set of headlights was a must, luckily found a set in great shape.
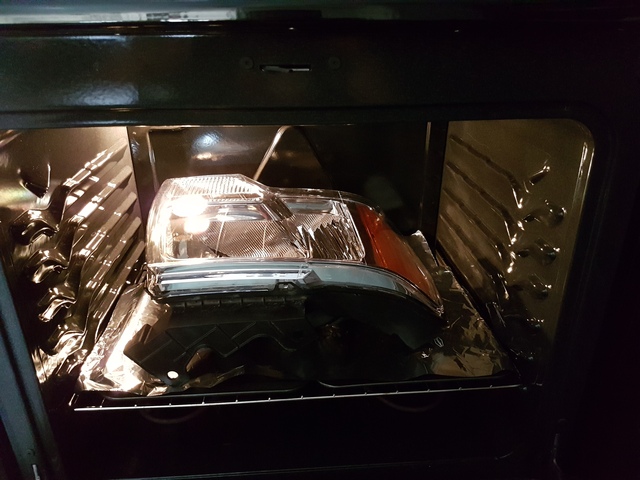
The whole oven method can be scary, way easier to melt **** than I thought, more on that later.
Forgot to take out the screw holding the lens, so I cracked the bezel, or trim piece prying it open.

nothing a little JB Weld won't fix. Shape of the trim made it hard to hold in, so electrical tape was somewhat holding it together while curing.
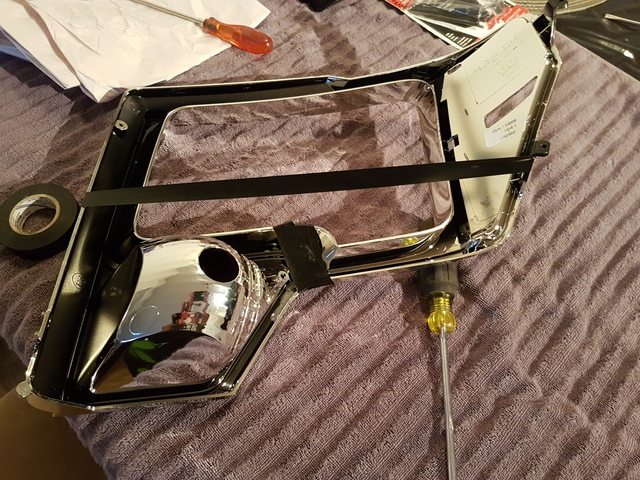
I used the nut and bolt method to mount the projector to the reflector
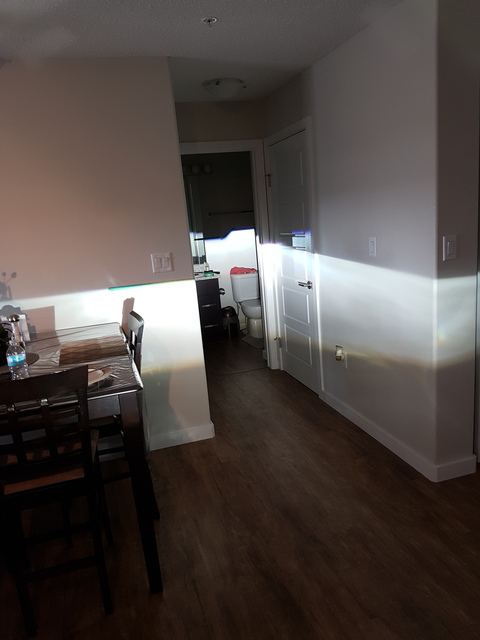
Aiming was challenging, since I live in an apartment, had the light on the kitchen counter, aiming into the bathroom lol
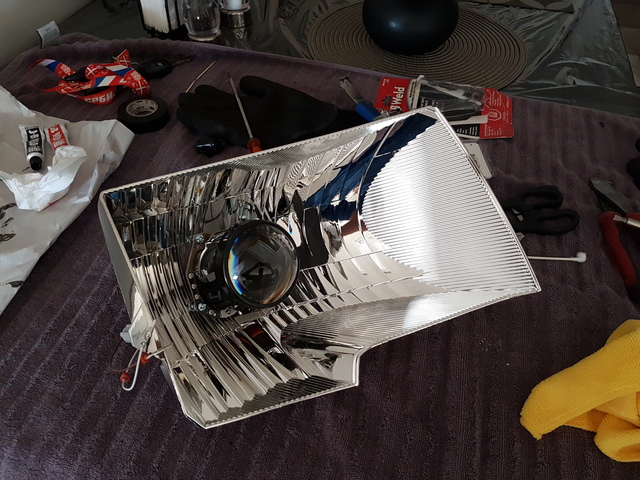
I'm a man of simple taste, So all black errythin. The chrome comes off easy with oven cleaner.

Taped up the lens to the housing for testing, to see if my kitchen aiming is on par...it wasn't
kinda looks good, but the cut off lines are so sharp, you can see that the passenger side is rotated CCW, and it also points a little to the left. so at some distance, the projector "step" cross eachother. ****ty part is that I already JB welded the nuts on the reflector, So I took it all apart, new bolts, and redid aiming. It was a lot of back and fourth between the kitchen and installing it on the truck. Good thing is, I can do it in minutes now haha
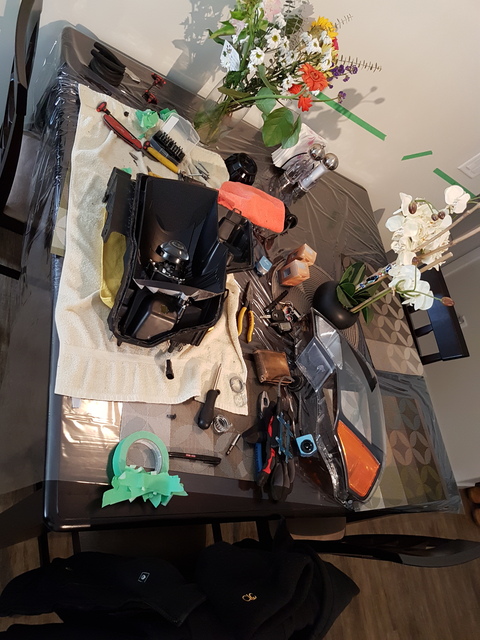
This is what the kitchen table looked like a lot of the time, wife wasn't too happy. I need a garage.
At this point, I'm ready to put everything back together. I put the housing in the oven to soften it up, and fix up the channel for the lens to sit in, and melted it lol. it melted quick. Used less temp than suggested, and less time, but still just melted. luckily, on the Alberta F150 forum, asked for a headlight, and got one within an hour, for $25. damaged, but worked for me. Lucky
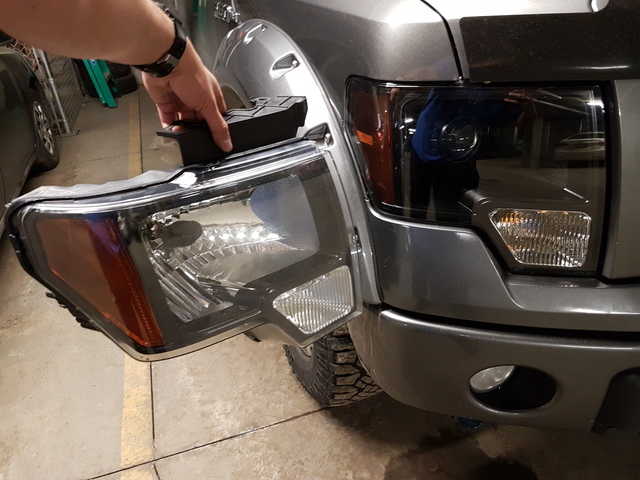
Finally done, and happy about it.
Got everything From TheRetrofitSource, and they were great to deal with. Had a faulty igniter, and they sent another one pretty quick, I'll definitely deal with them again. Huge difference between the stock output and the retro. I'd recommend anyone to try it, definitely doable with so much information out there
I've wanted to do a retrofit for years, but finally pulled the plug recently. Great learning experience, and lots of info available.
2011 F150,
Morimoto D2S 4.0 projector, 35w morimoto bulbs and ballasts, 5500k
Spare set of headlights was a must, luckily found a set in great shape.

The whole oven method can be scary, way easier to melt **** than I thought, more on that later.

Forgot to take out the screw holding the lens, so I cracked the bezel, or trim piece prying it open.

nothing a little JB Weld won't fix. Shape of the trim made it hard to hold in, so electrical tape was somewhat holding it together while curing.

I used the nut and bolt method to mount the projector to the reflector

Aiming was challenging, since I live in an apartment, had the light on the kitchen counter, aiming into the bathroom lol

I'm a man of simple taste, So all black errythin. The chrome comes off easy with oven cleaner.

Taped up the lens to the housing for testing, to see if my kitchen aiming is on par...it wasn't

kinda looks good, but the cut off lines are so sharp, you can see that the passenger side is rotated CCW, and it also points a little to the left. so at some distance, the projector "step" cross eachother. ****ty part is that I already JB welded the nuts on the reflector, So I took it all apart, new bolts, and redid aiming. It was a lot of back and fourth between the kitchen and installing it on the truck. Good thing is, I can do it in minutes now haha
This is what the kitchen table looked like a lot of the time, wife wasn't too happy. I need a garage.

At this point, I'm ready to put everything back together. I put the housing in the oven to soften it up, and fix up the channel for the lens to sit in, and melted it lol. it melted quick. Used less temp than suggested, and less time, but still just melted. luckily, on the Alberta F150 forum, asked for a headlight, and got one within an hour, for $25. damaged, but worked for me. Lucky

Finally done, and happy about it.
Got everything From TheRetrofitSource, and they were great to deal with. Had a faulty igniter, and they sent another one pretty quick, I'll definitely deal with them again. Huge difference between the stock output and the retro. I'd recommend anyone to try it, definitely doable with so much information out there


 03-16-2017, 12:15 AM
#4

Very nice!


 03-16-2017, 06:53 AM
#7
Very nice! I plan on doing this in the next couple months as well. Did you buy the kit from TRS? What style of housing is the one you put around the projector? Or better yet maybe a whole parts list you purchased!
Trending Topics
 03-16-2017, 07:56 AM
#9
Senior Member

Looks good! For anyone who is purchasing a "kit" from TRS, go into the lighting section on this forum and there's a thread for a TRS group buy and the code still works...I just used it last week to buy my stuff and saved over 100 bucks on my order.
