
Daystar Budget Boost installed (with pics)
 07-25-2012, 04:54 PM
#1
Senior Member
Thread Starter

First off here is thread #9530 on lifts. I hope you find it as good as the last one you read.
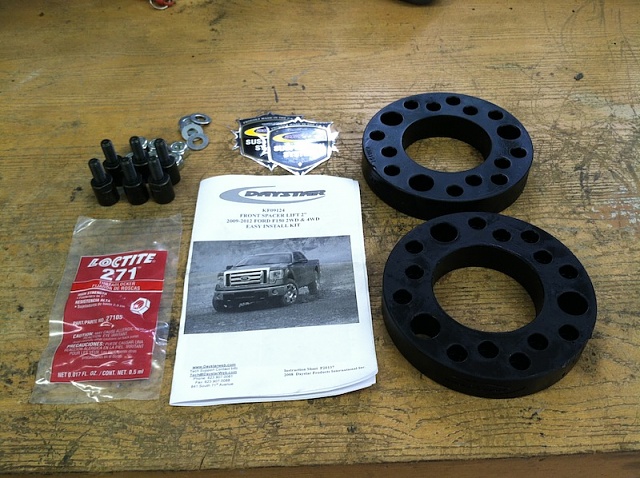
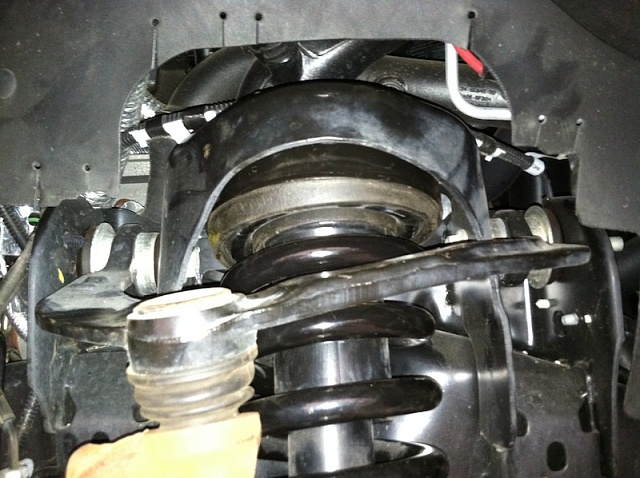
I installed my 1" budget boost this morning. It went pretty good for my first kit. If you have access to these things it will go easier:
air wrench with 30mm socket for bottom of strut
deep well 21mm socket for tie rod & upper ball joint
deep well 18 mm socket for torsion bar
thread chaser metric 10x1.5
standard or deep well 10 mm socket for brake line bracket
jack and jack stand
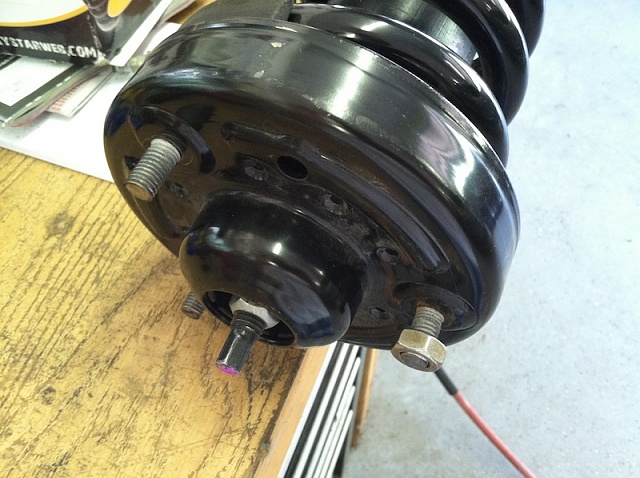
The thread chaser is for after you grind about an 1/8 in off the top of the stock strut bolts to be able to install the stud extenders. I was leary of doing this if ever want to go back to stock. So, did one first and put the strut back in the tower to make sure the nut has plenty of stud left to grab.
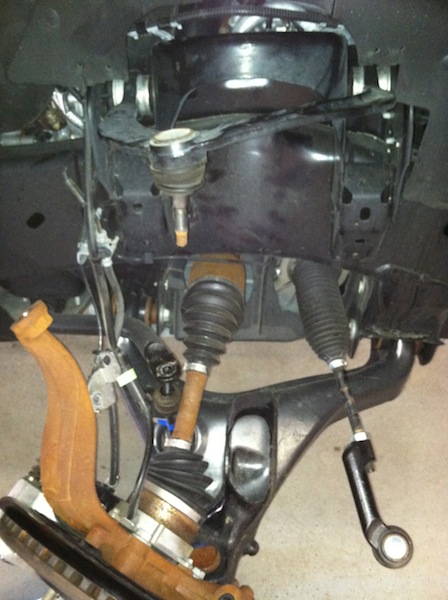
Daystar instructions say you do not need to remove the strut to do this. I did anyway for the extra room and think it went better this way.
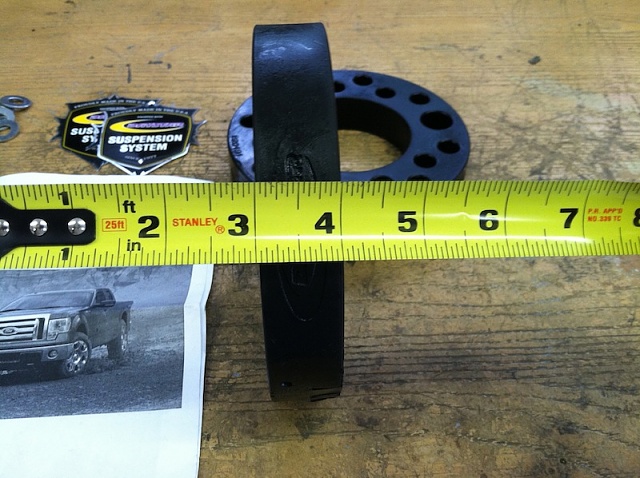
The lift raised the front about 1 1/4 to 1 1/2 inches. Roadmaster is on the rear with pretension set at the black disc setting.
It seems to drive like stock with no clunks. Only went a couple miles as it will need an alignment.
End result is one inch of rake left. That was my goal so very happy about that
I installed my 1" budget boost this morning. It went pretty good for my first kit. If you have access to these things it will go easier:
air wrench with 30mm socket for bottom of strut
deep well 21mm socket for tie rod & upper ball joint
deep well 18 mm socket for torsion bar
thread chaser metric 10x1.5
standard or deep well 10 mm socket for brake line bracket
jack and jack stand
The thread chaser is for after you grind about an 1/8 in off the top of the stock strut bolts to be able to install the stud extenders. I was leary of doing this if ever want to go back to stock. So, did one first and put the strut back in the tower to make sure the nut has plenty of stud left to grab.
Daystar instructions say you do not need to remove the strut to do this. I did anyway for the extra room and think it went better this way.
The lift raised the front about 1 1/4 to 1 1/2 inches. Roadmaster is on the rear with pretension set at the black disc setting.
It seems to drive like stock with no clunks. Only went a couple miles as it will need an alignment.
End result is one inch of rake left. That was my goal so very happy about that


 07-25-2012, 05:34 PM
#5
Senior Member
Thread Starter
^ Ya I felt was committed when the grinder came out. Instructions said may or may not have to trim the stud down. Maybe different struts for different years?
Thanks for the compliments!
Thanks for the compliments!

Trending Topics
07-25-2012, 07:14 PM
#8
F150 Forum


Originally Posted by Bender
Thanks man!
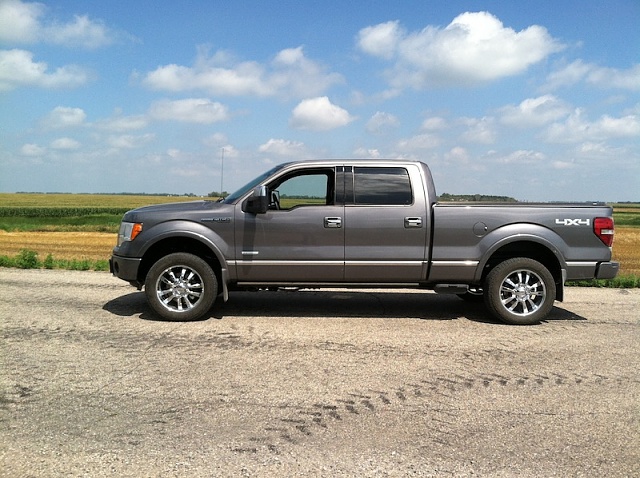
 Stock 275/55/20 scorpions.
07-25-2012, 11:59 PM
Stock 275/55/20 scorpions.
07-25-2012, 11:59 PM
#9
Senior Member
Thread Starter
