When you click on links to various merchants on this site and make a purchase, this can result in this site earning a commission. Affiliate programs and affiliations include, but are not limited to, the eBay Partner Network.
Awesome write-up. Do you happen to have the part numbers for the up fitter switch assembly, harness and relay box that you used? Also, are you sure the relay box doesn't mount right next to the primary fuse box? Look at the mounting points right next to the primary fuse box...they look like they were made for something to mount there.....
Differently doesn't go there as the harness is no where near long enough, there is only a couple feet between the switch connection and the main power feed connection. I Had a 08 F450 and the relays are right above the parking brake.
Originally Posted by gDMJoe
Do you happen to know/have the part # for the wiring harness/relay-box?
.
Great work. But after all that crap, I'll be getting the SPOD kit. Lol
Really? I actually looked at them recently when my kid & I went to Northridge 4X4 Canada's shop in Ponoka, Alberta and I just couldn't see a clean way of mounting them.
In all I would say that it only took me 2 hrs from start to finish for the wiring and I really took my time to keep it really clean, I just have to have the factory look.
But you know what they say everyone has there own style and I am not a guy to say " dude that looks like shyte"
I do not like the sPOD switches, and I don't have a sunroof so I'll be mounting it in my headliner. I just think this is a bit over my head, and I would much prefer the stock ford ones though
I do not like the sPOD switches, and I don't have a sunroof so I'll be mounting it in my headliner. I just think this is a bit over my head, and I would much prefer the stock ford ones though
Buy the parts and kidnap a Ford tech for a day & feed him beer
So I got my trim off and it went well. I don't have the flow thru console so that was not an issues. The air bag did come off fairly easy. I have trimmed the plastic back and now headed off to get some epoxy putty. I really appreciate this post as I have been wanting to do this for a while. Finally got some nice weather.
Just FYI, I got two switches and multiple wiring harnesses off Ebay for way less than 75 dollars each, I seem to recall getting the switches for like 40 dollars new in the box. The point is you don't have to spend 500 bucks, unless your getting 2 sets of rigids.
Ready to mount this up and get to wiring those Duallys.
thanks again....so it was the one for the 2011-15 Superduty not the earlier models....
Yes that is correct Heavysledz
Originally Posted by dthomas60
So I got my trim off and it went well. I don't have the flow thru console so that was not an issues. The air bag did come off fairly easy. I have trimmed the plastic back and now headed off to get some epoxy putty. I really appreciate this post as I have been wanting to do this for a while. Finally got some nice weather.
Just FYI, I got two switches and multiple wiring harnesses off Ebay for way less than 75 dollars each, I seem to recall getting the switches for like 40 dollars new in the box. The point is you don't have to spend 500 bucks, unless your getting 2 sets of rigids.
Ready to mount this up and get to wiring those Duallys.
Glad this is going good for you as well. If I had to do it all over again I would have gone the Ebay route but when I went to my ford dealer they where able to get them the next day and I said what the hell. Could have saved some cash but i got what I wanted right away without worrying it might be the wrong part. Hope my post will at least save others some $$$, like a pay it forward kind of thing.
So i have had a question about this and thought I should add some more info that I forgot to detail.
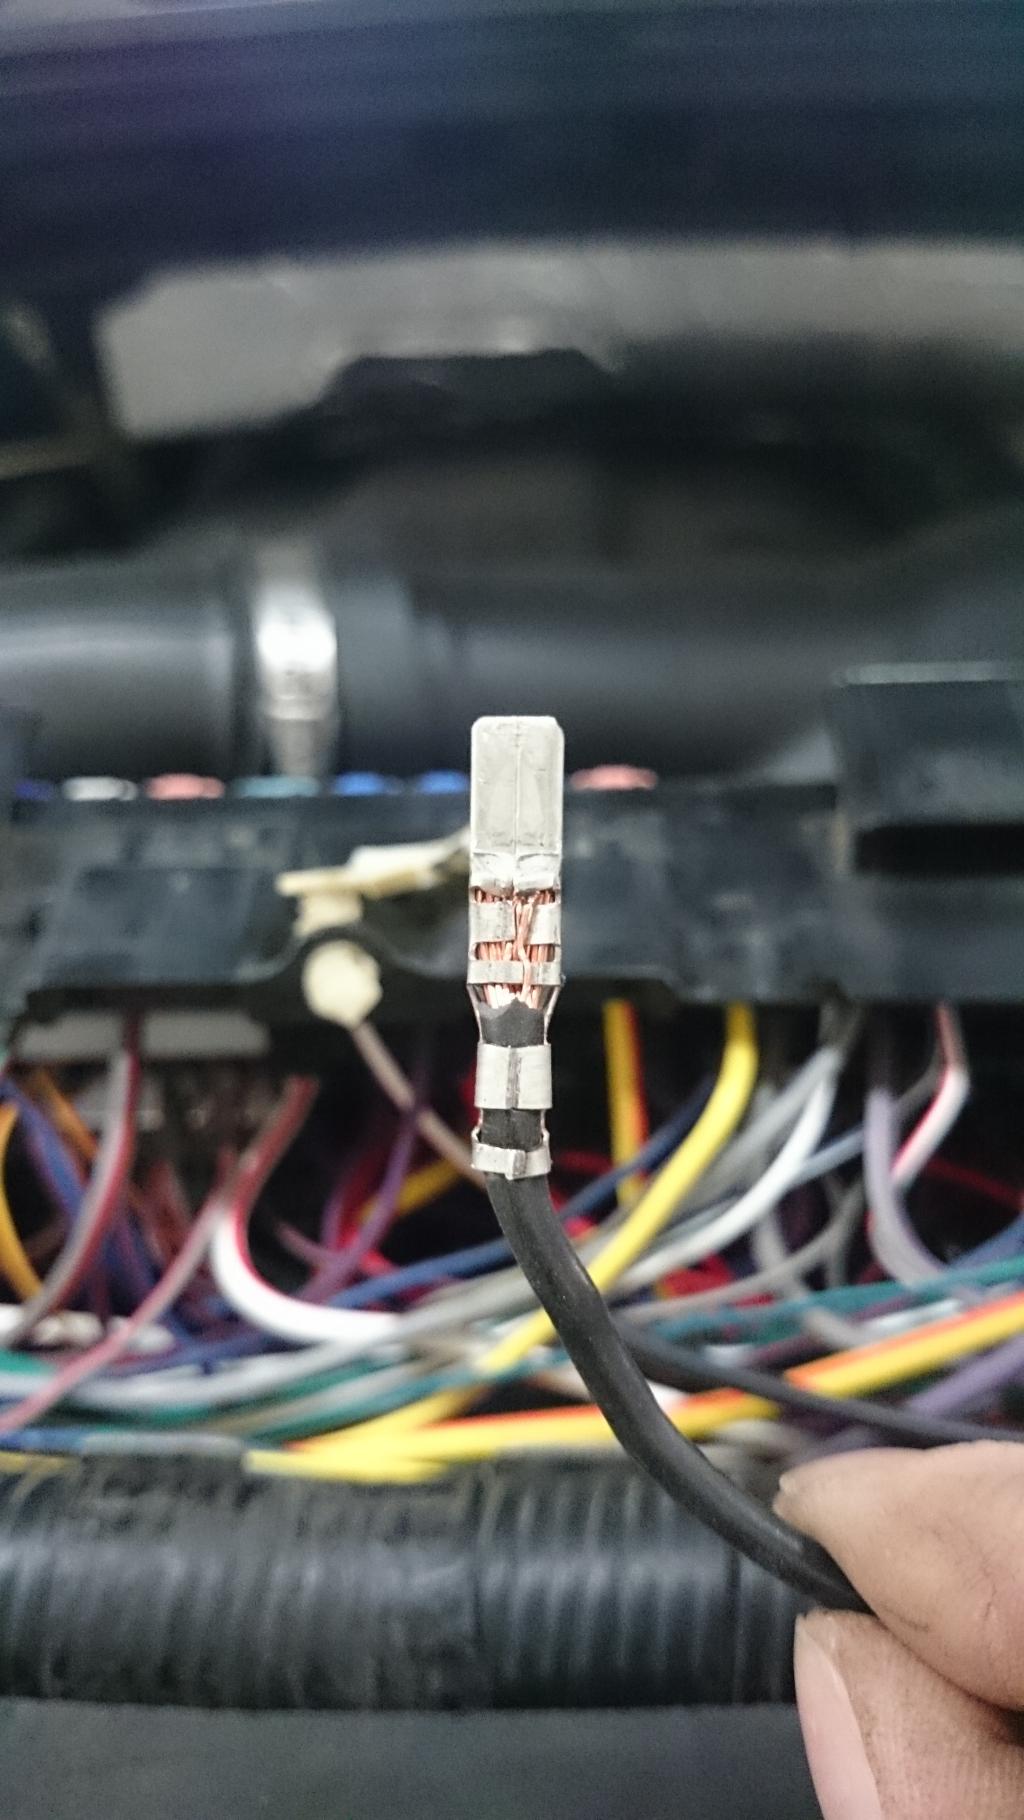
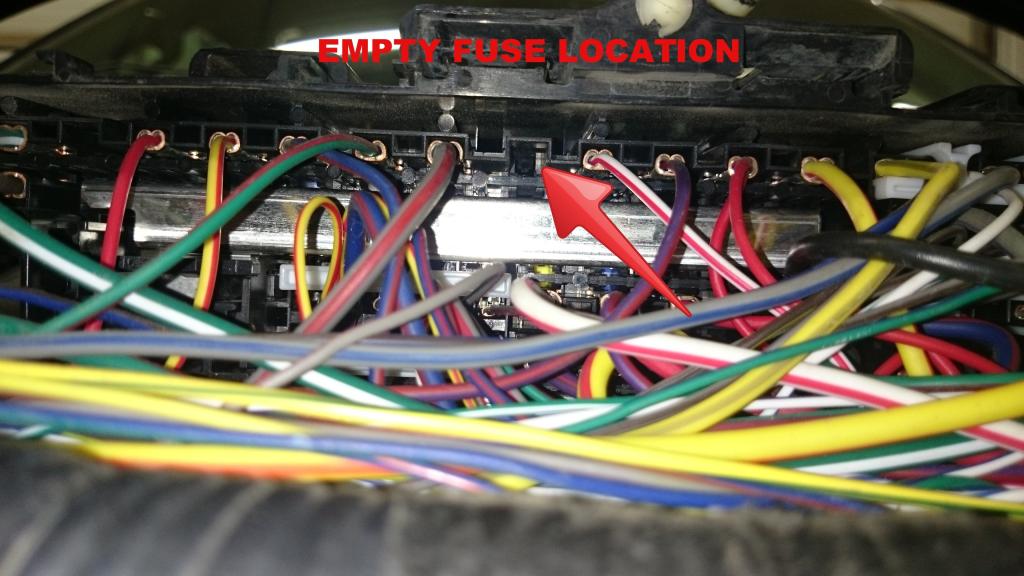
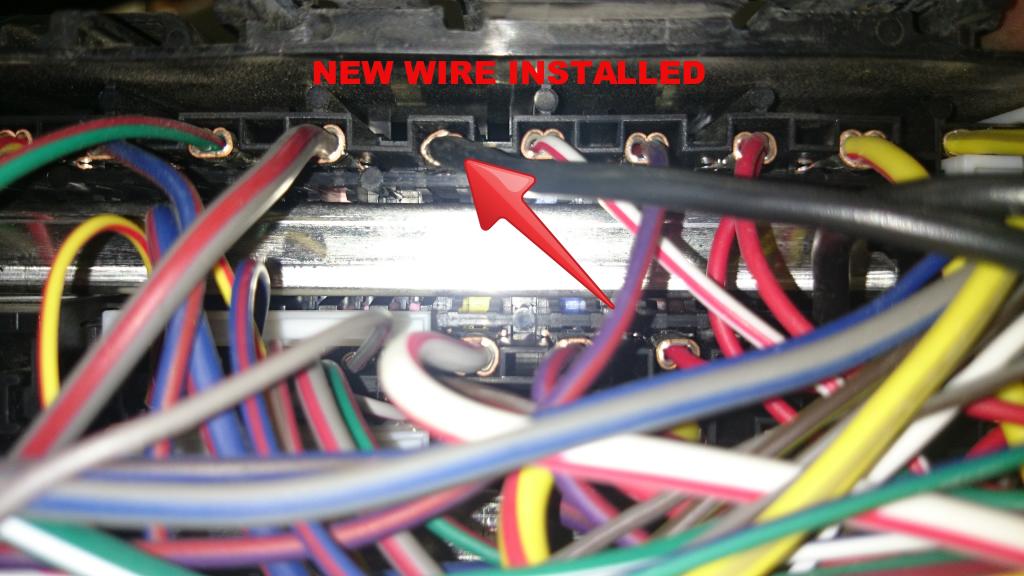
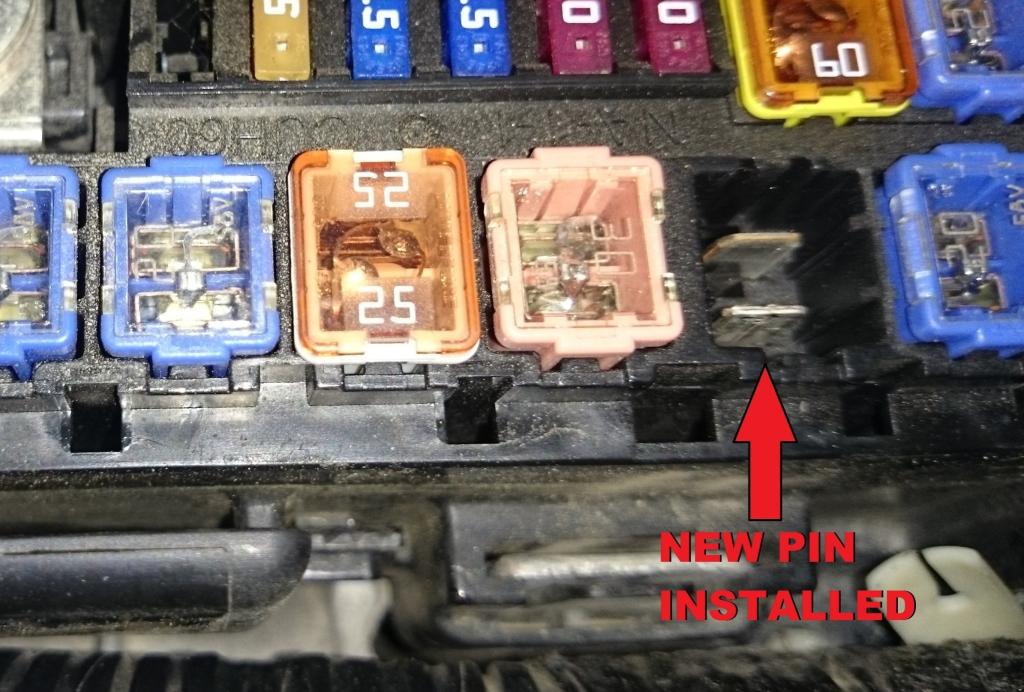
For the wires added into the engine compartment fuse box I got a male spade for none other then a GM dealership ( only because they had a good selection ) that where the same size as the factory Ford one's ( my Ford dealer didn't have them, go figure). Once crimped onto the new wires, you locate the corresponding spot on the underside of the top half of the fuse box and push it into the slot. Once you have all the wires pushed in, secured and fuse box snapped back into place take a pair of needle nose pliers and give each spade a gentle tug to make sure they are up as far as they go.

 02-05-2015, 10:13 PM