
Home Made Rear Bumper - pic heavy
 03-09-2016, 02:43 AM
#1
Senior Member
Thread Starter

After realizing that the F150's rear bumper is like 18ga steel, I've been interested in building a real bumper. Well, I finally got the new bumper mounted today, after having it sprayed with truck bed liner (to match my running boards).
The other reason I built my own, is the cost of a prefabbed bumper ($1500-2500). I am cash poor and have more discretionary time available, so... Hopefully this will encourage others to try their own (caveat, I have 25 years of structural experience and 30 years of certified welding experience - that does help):

OEM bumper/tow package frame off. New subframe. Old bolts: Gr. 8.8 (?) 14mm. new bolts: 5/8" Gr. 8

Lower subframe. New receiver position (4" higher than OEM = increased departure angle)

Outer frame starting.
Last edited by STingray1300; 03-09-2016 at 03:06 AM.

The following users liked this post:
FORD PERFORMANCE (05-18-2017)

Popular Reply
03-10-2016, 12:57 AM
Senior Member
Thread Starter

Side skirt. Getting ready for....

Got it sprayed yesterday (off truck)


Now to reinstall wiring.
The project was a bit daunting, being my first-ever bumper build, but well worth the time $pent. Again, I hope this encourages others to try it.
03-09-2016, 02:55 AM
#2
Senior Member
Thread Starter
More:

Lower outer frame (.120 wall round tube), light buckets for the Rigids, new position for the receiver (4" higher than OEM = greater departure angle)
Some complex angles. Each member supports another

New location for trailer hook ups (so it doesn't get ripped off on a rock.... AGAIN!)

Lower outer frame (.120 wall round tube), light buckets for the Rigids, new position for the receiver (4" higher than OEM = greater departure angle)

Some complex angles. Each member supports another

New location for trailer hook ups (so it doesn't get ripped off on a rock.... AGAIN!)
The following users liked this post:
sigma pi (03-10-2016)
03-09-2016, 03:02 AM
#3
Senior Member
Thread Starter
More tomorrow. I guess I've been cut off...
 03-10-2016, 12:20 AM
#6
Senior Member
Thread Starter
Hi all, hopefully I be allowed to add more photos now...

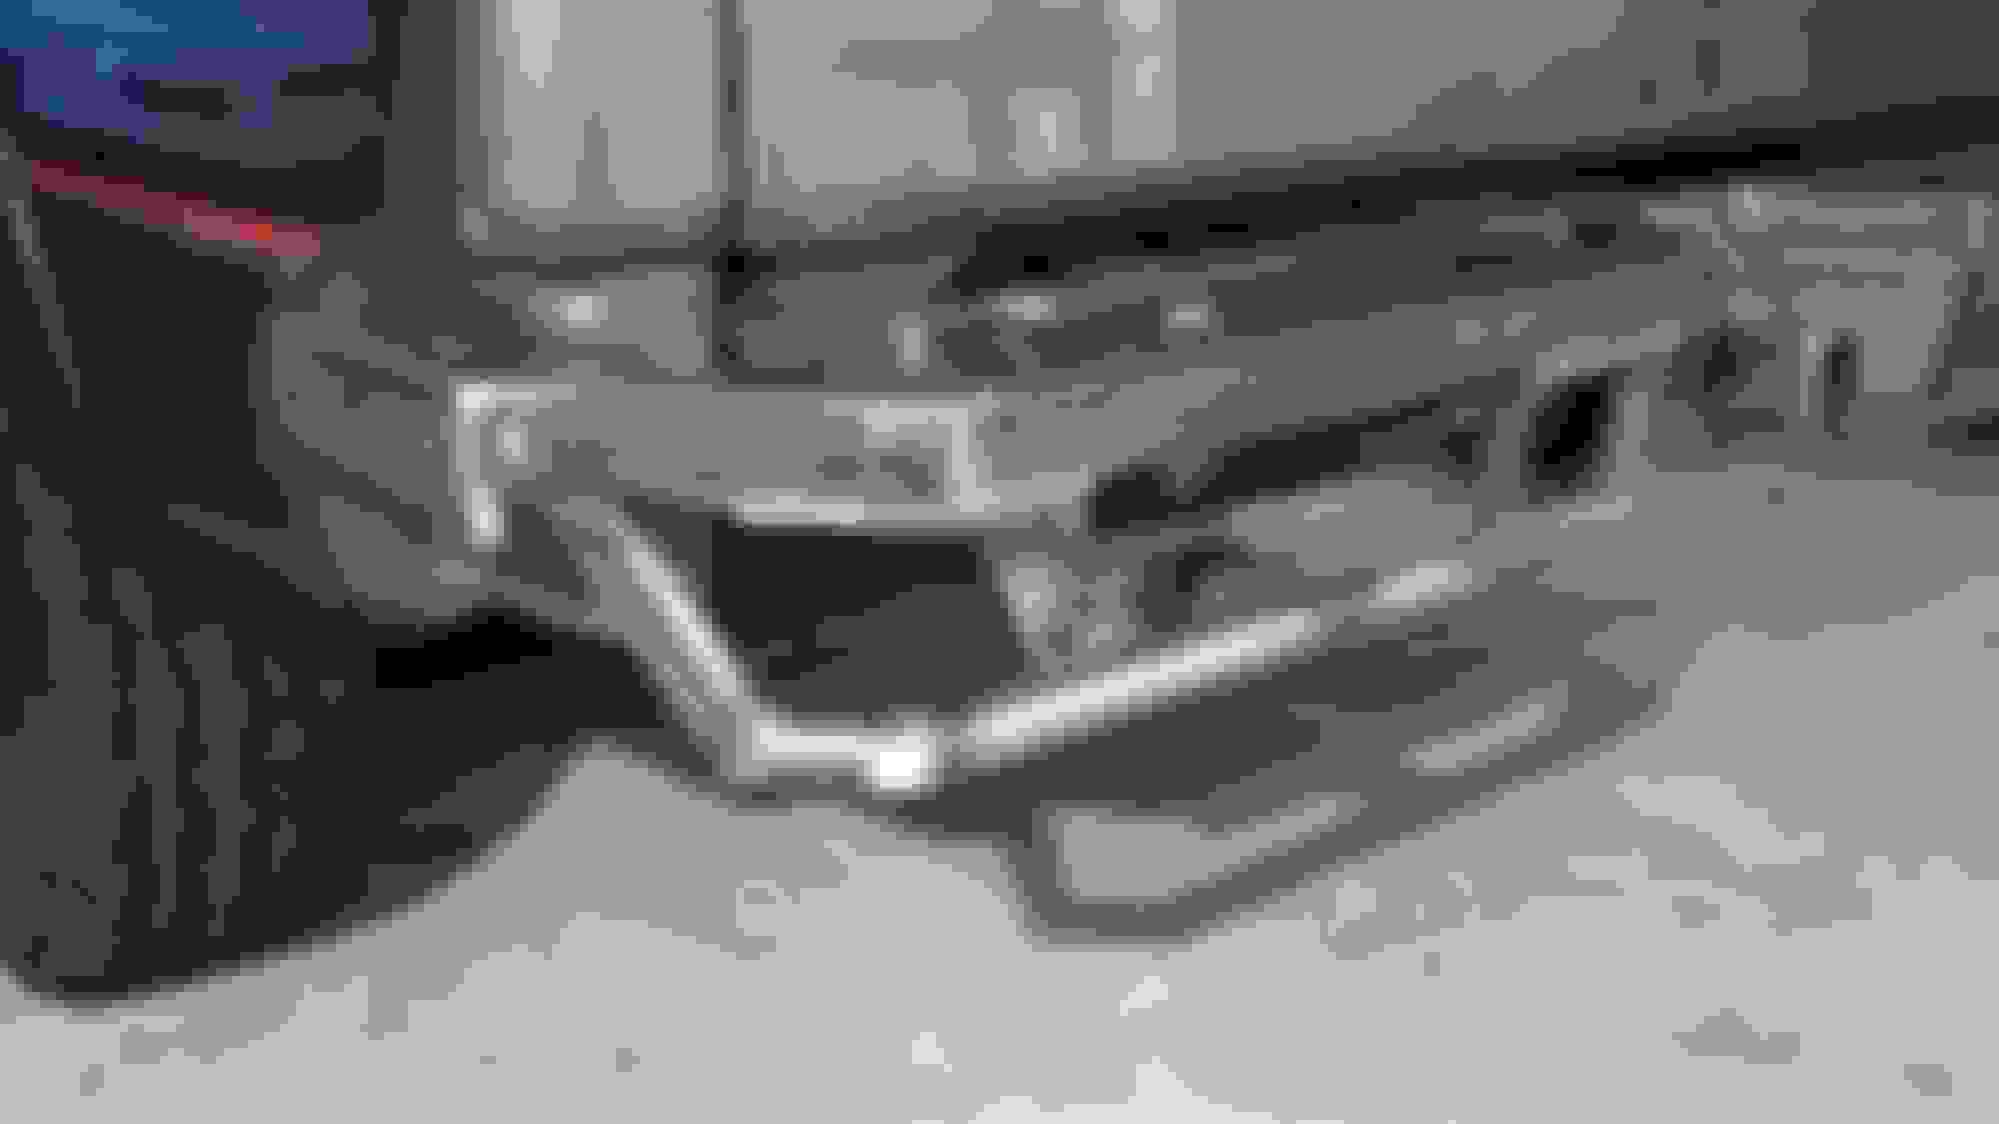
3/4" shackle mount (a.k.a. "tow hook") welded to the frame instead of just to the steel skin, as so many companies do.

10 gauge steel plate as the skin. Welded both sides. It is a structure itself.

Lower part of bumper skirt is angled for even more departure angle.

3/4" shackle mount (a.k.a. "tow hook") welded to the frame instead of just to the steel skin, as so many companies do.

10 gauge steel plate as the skin. Welded both sides. It is a structure itself.

Lower part of bumper skirt is angled for even more departure angle.
The following users liked this post:
Sbrown128 (03-04-2018)
03-10-2016, 12:27 AM
#7
Senior Member
Thread Starter
Here's some more:
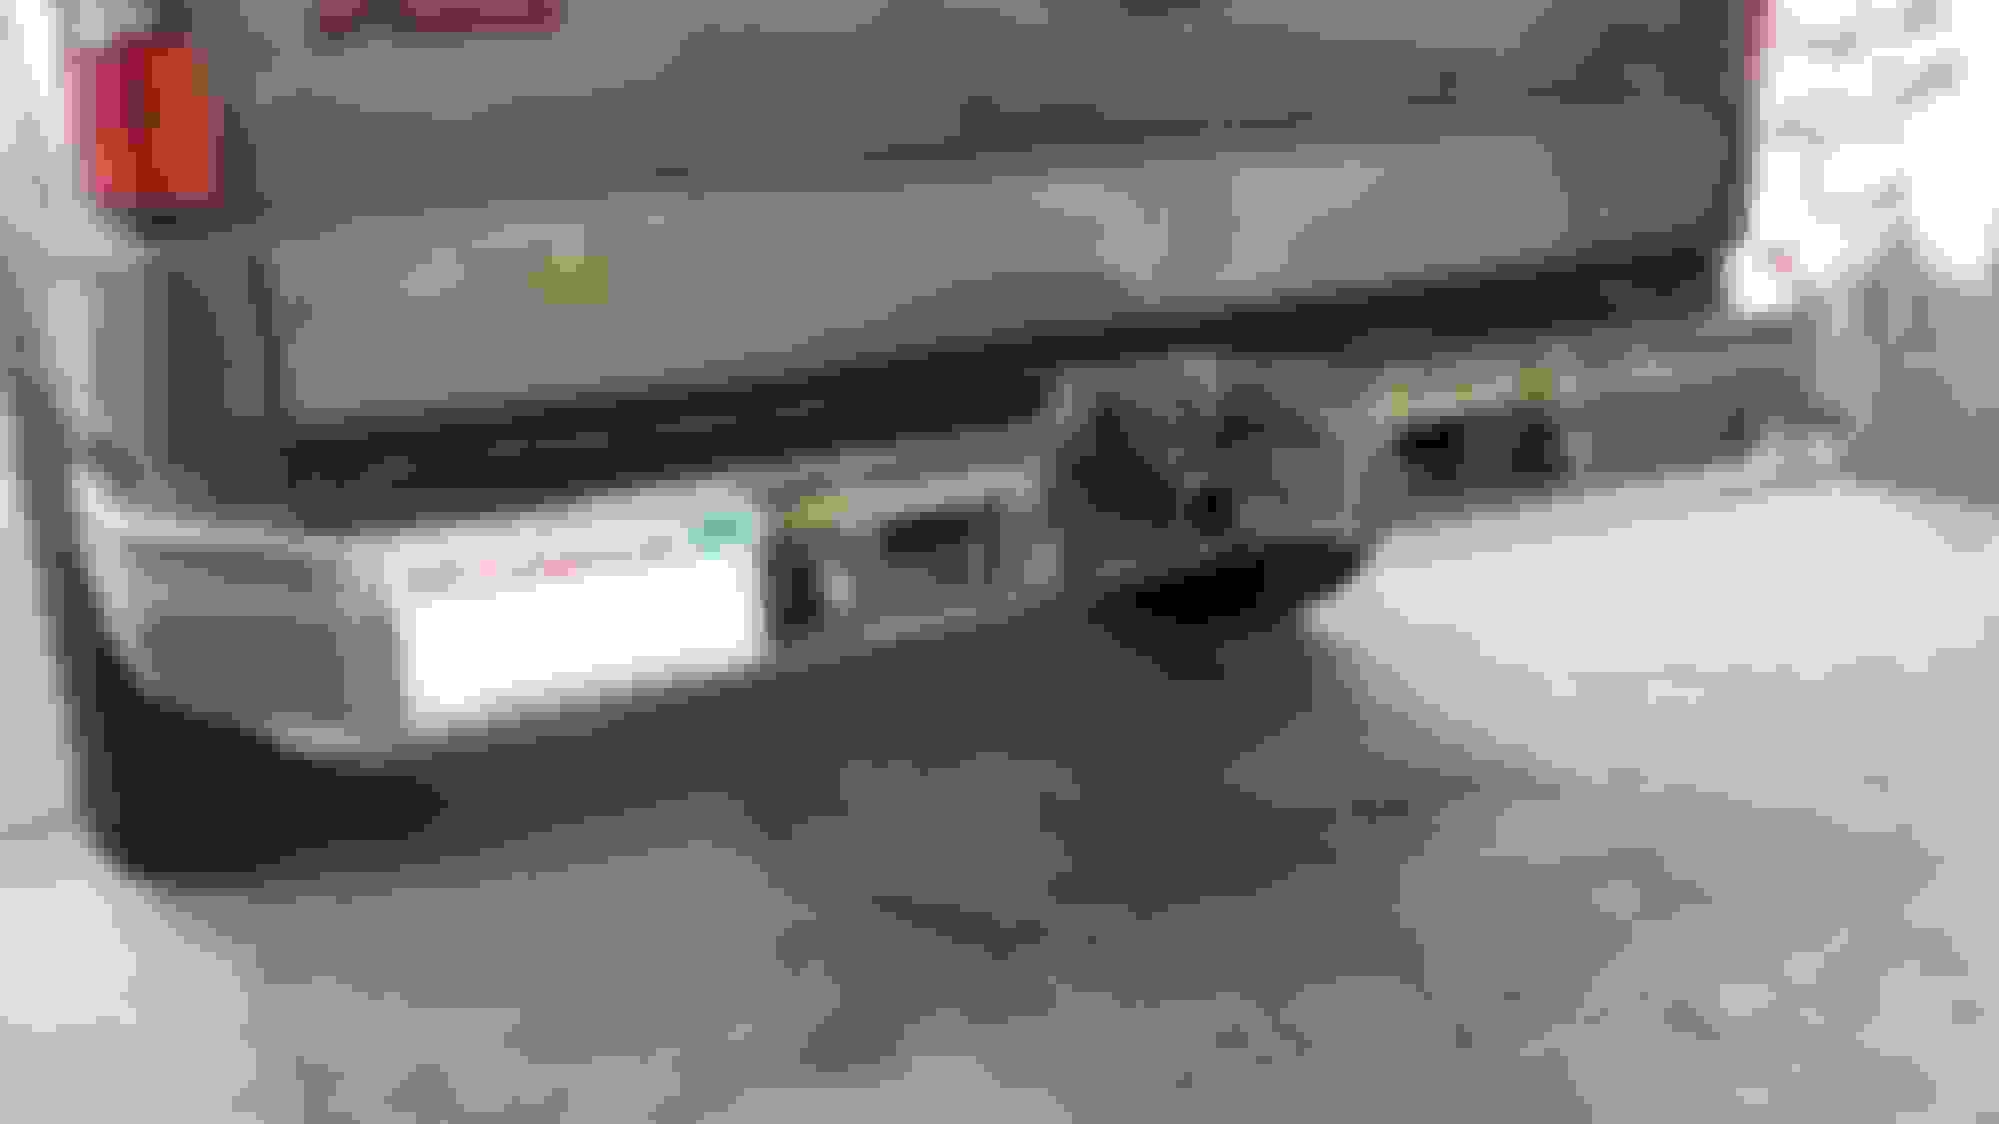
As a preliminary answer to the "where's the plate going to go?". Of course, you can probably see where this is going, right: (now that the sensor holes are drilled, I had to come up with another idea):

I made a mount that utilizes the hitch receiver. (this is only temporary until I can come up with a better idea. The hitch pin is a locking type.)
Last edited by STingray1300; 03-10-2016 at 04:34 PM.
The following users liked this post:
rsylvstr (01-03-2017)
Trending Topics
03-10-2016, 12:57 AM
#8
Senior Member
Thread Starter
Side skirt. Getting ready for....
Got it sprayed yesterday (off truck)
Now to reinstall wiring.
The project was a bit daunting, being my first-ever bumper build, but well worth the time $pent. Again, I hope this encourages others to try it.
The following 10 users liked this post by STingray1300:
blue4x4 (03-22-2016),
DanAustin (03-10-2016),
FORD PERFORMANCE (05-18-2017),
JamesF (03-12-2016),
Pretired (04-25-2016),
and 5 others liked this post.
03-10-2016, 10:03 AM
#9
music man
That looks great!
I wish I had mad skills like you do.
I wish I had mad skills like you do.
03-10-2016, 10:12 AM
#10
Beer, Boats, and Trucks.
Dude that's awesome!! Curious what you are in it at (cost wise)
Looks incredible though!
Looks incredible though!