
Stereo Build in 2013 Ford F150 FX4
 04-04-2014, 12:09 PM
#81
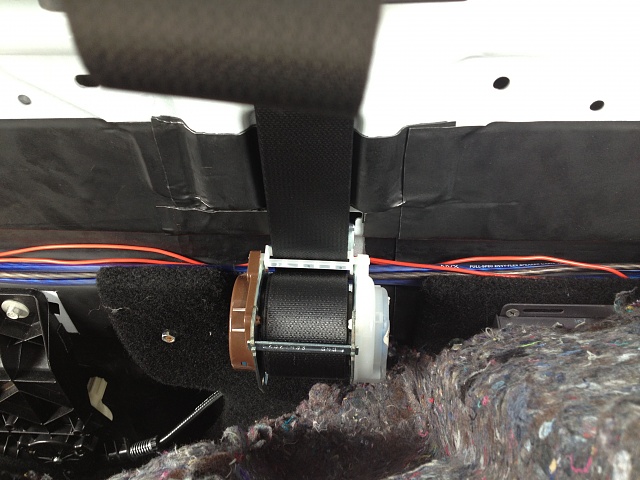
FYI, the roofs rattle like crazy in these trucks. I did dynomat on everything except the floor and roof. The floor has lots of sound dampening material from the factory, but the roof needs help. Looks good.

The following users liked this post:
jr07 (04-05-2014)
04-05-2014, 09:05 AM
#82


[MENTION=54579]Jamers[/MENTION], thanks for the heads up. By the way, your truck looks awesome man. I'd love to upgrade my rims and tires, but I park in a garage for work (height limit).
I may pull the headliner down and dampen the roof at some point if it's gonna rattle. Right now, the whole build is dragging on b/c of the weather I've been having in Louisiana.
Has anyone drilled through the molex connector to run 12 gauge wiring to the door speaker? I found a build where he did this:
http://www.diymobileaudio.com/forum/...50-raptor.html
If someone else has done this, where exactly do you move the pin to? Or can you move it to any pin that's open on the molex?
04-05-2014, 11:27 PM
#83
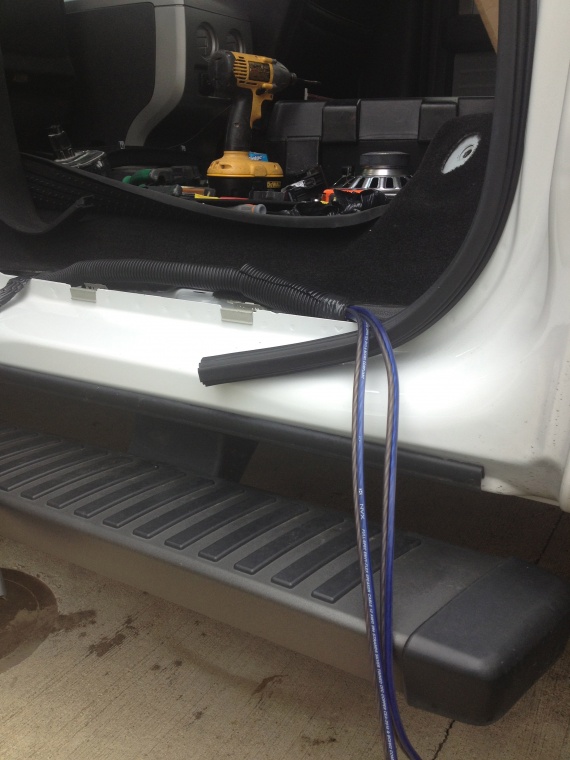
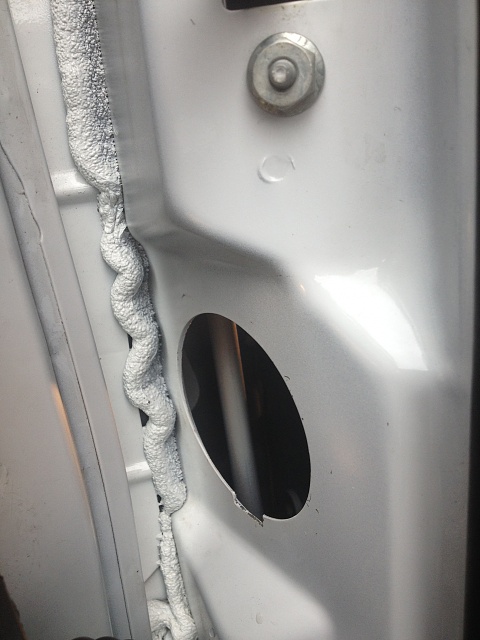
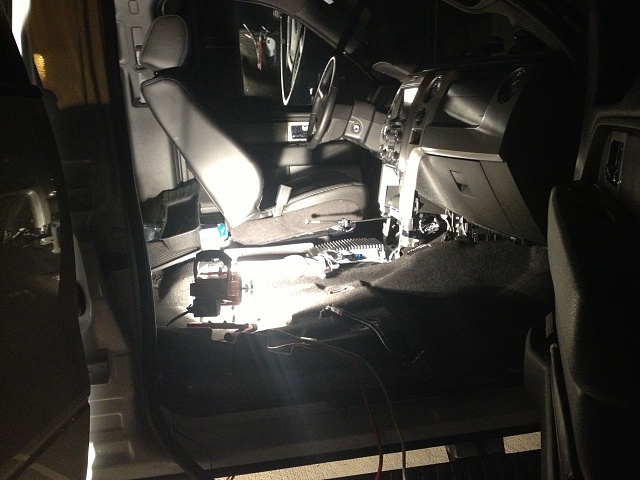
I got a few things done today...
I was able to make my adapters for the front door 6.5 in component and get the speaker wire run to an extent
Here are some pictures:
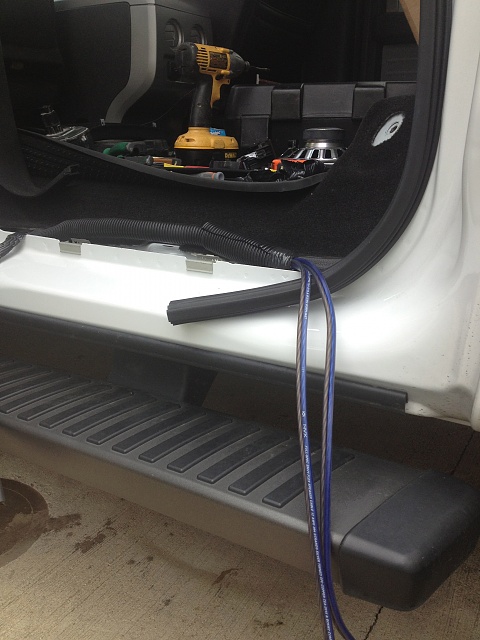

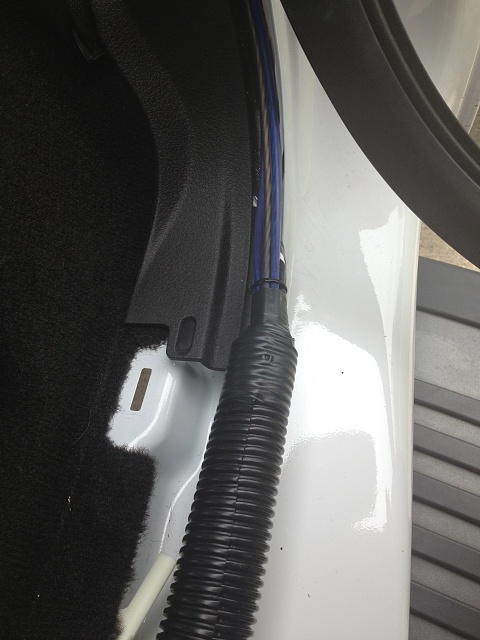
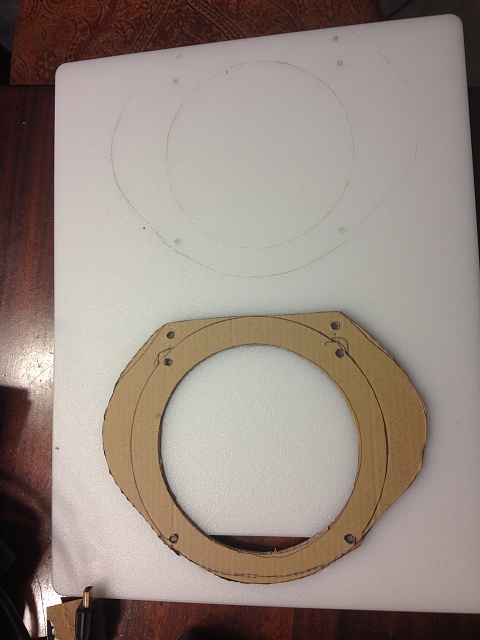
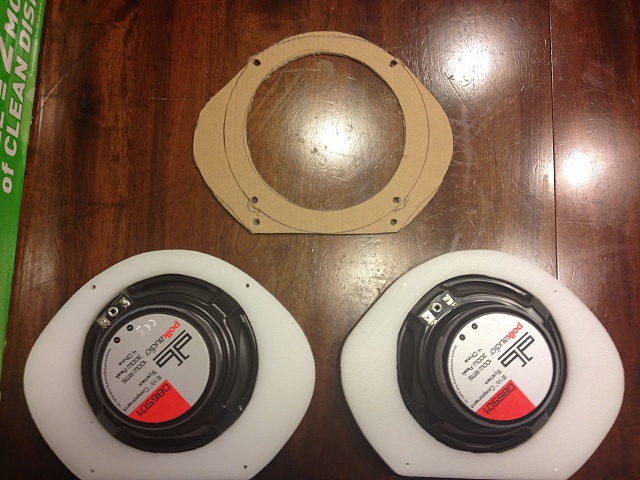
I was able to make my adapters for the front door 6.5 in component and get the speaker wire run to an extent
Here are some pictures:


 04-05-2014, 11:40 PM
#84
the wiring stopped at the molex connector....thing is difficult. I ended up taking off the emergency brake assembly to gain access to the back of the molex. It just won't budge so I'm just gonna make a separate run from the cab. I bought my grommet and wire cover for the element exposure. My plan is to cut into and run the wire to the existing grommet on the door. Had I done this from the start, I would have completely finished.
04-06-2014, 10:54 PM
#85
Well....Molex Connectors are so bad after all. The problem is that I couldn't find any instructions on how to remove the molex connector, the part that is inside....where the the male end connects into.
I had to do a few things first in order to even have access to the molex connector on the interior of the cab (on both sides of the truck).
Drivers side:
1. Removed the 3 bolts that hold the emergency brake on the driver side. (Then loosen the actual cable part).
2. Remove the bolt that holds the ground in place. It's in front of the access panel (insert). The access panel is a black insert that covers the hole where the molex connector is located.
3. Then remove the actual insert. You should be able to reach inside and feel the circular molex connector.
Passenger side:
1. Had to remove the the entire kick fuse panel. (It's held in by 2 bolts and piece that slides out on the opposite end)
2. Also had to remove the black box just above the fuse panel. (not sure what it actually is, but it was in the way) It was held in by another 2 bolts.
3. Remove the bolt that holds the ground in place. This one is also in front of the access panel or insert.
4. Remove the black insert (access panel) to gain access the molex. Again, you should be able to reach in and feel the circular molex.
In order to remove the actual Molex Connector:
There are 3 outer locking tabs that hold the circular molex in place. There is also a release botton. (I did this with a small flat head) Rotate the entire circular molex to where you have the bottom locking tab in the original position of the release button. From there, you should be able to pull it straight out. (Sorry, if that was confusing)
Anyway,
Here is what I did to the molex to run my 12 gauge wire to both front doors.
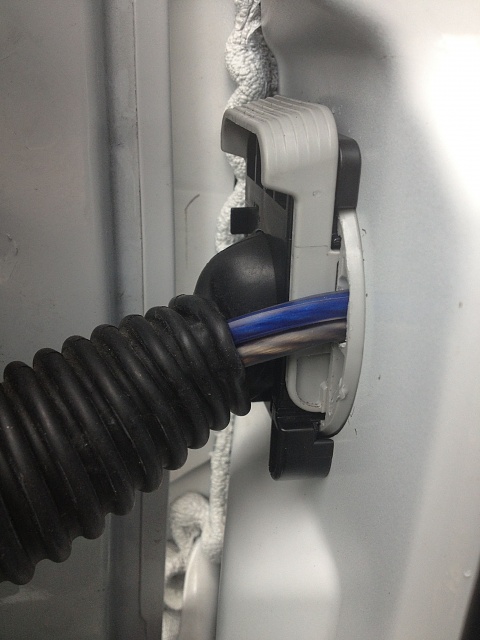
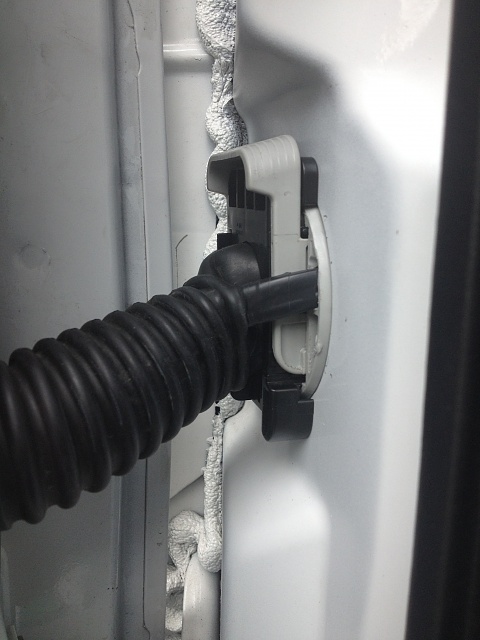
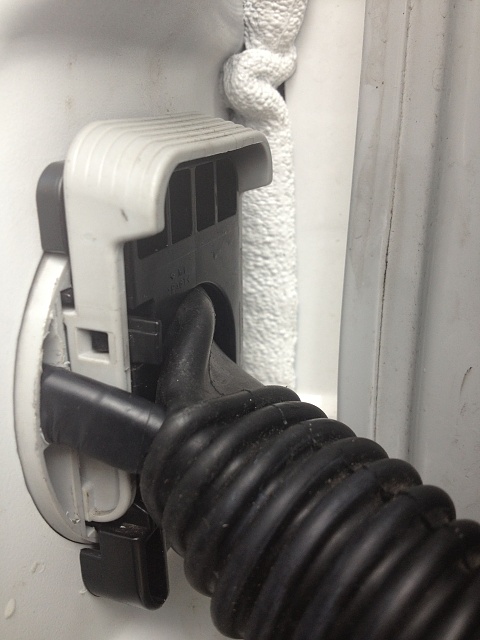
I made a small cut into the existing cover to push the speaker wire into and keep it out the elements. I then added electrical tape on the exposed wires.
I had to do a few things first in order to even have access to the molex connector on the interior of the cab (on both sides of the truck).
Drivers side:
1. Removed the 3 bolts that hold the emergency brake on the driver side. (Then loosen the actual cable part).

2. Remove the bolt that holds the ground in place. It's in front of the access panel (insert). The access panel is a black insert that covers the hole where the molex connector is located.
3. Then remove the actual insert. You should be able to reach inside and feel the circular molex connector.
Passenger side:
1. Had to remove the the entire kick fuse panel. (It's held in by 2 bolts and piece that slides out on the opposite end)

2. Also had to remove the black box just above the fuse panel. (not sure what it actually is, but it was in the way) It was held in by another 2 bolts.
3. Remove the bolt that holds the ground in place. This one is also in front of the access panel or insert.
4. Remove the black insert (access panel) to gain access the molex. Again, you should be able to reach in and feel the circular molex.
In order to remove the actual Molex Connector:
There are 3 outer locking tabs that hold the circular molex in place. There is also a release botton. (I did this with a small flat head) Rotate the entire circular molex to where you have the bottom locking tab in the original position of the release button. From there, you should be able to pull it straight out. (Sorry, if that was confusing)
Anyway,
Here is what I did to the molex to run my 12 gauge wire to both front doors.


I made a small cut into the existing cover to push the speaker wire into and keep it out the elements. I then added electrical tape on the exposed wires.

 04-14-2014, 10:47 PM
#87
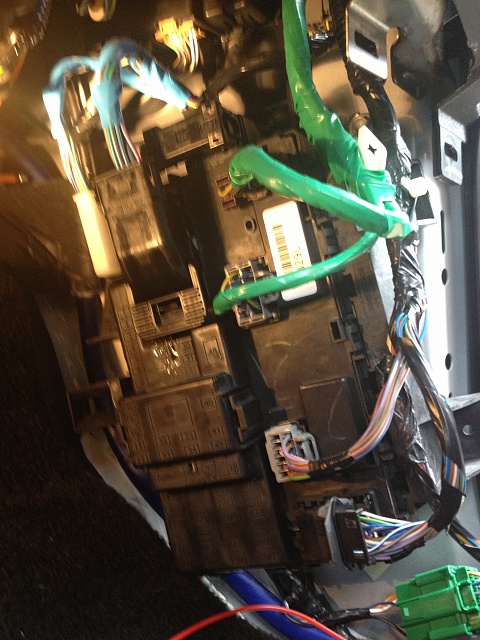
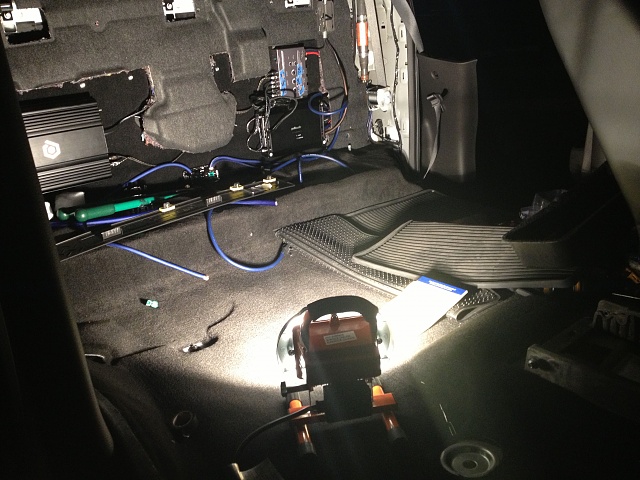
This weekend consisted mostly of electrical work (solder, crimping, ect..)
I finished up all the wire runs for the system. (Other than the speaker wire tap at the factory amplifier)
I ended running all the passenger speaker wires & the remote wires in the groove of the back cab; basically, just behind amp rack.

all the wires run do not have power run to them just yet.
The main power wire & fuse were crimped/soldered and permanently mounted. Here are a few pictures:
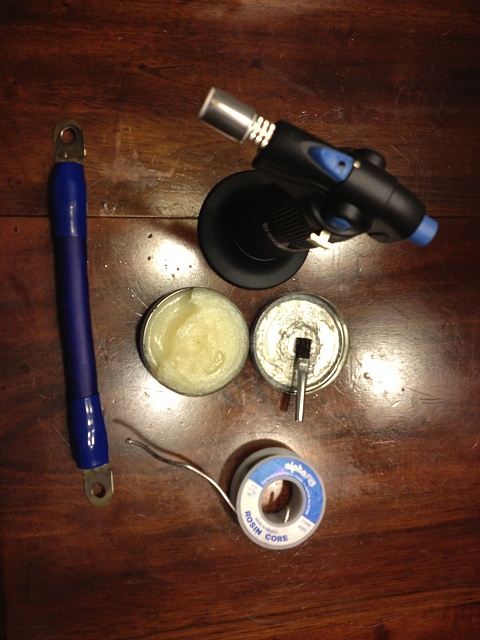
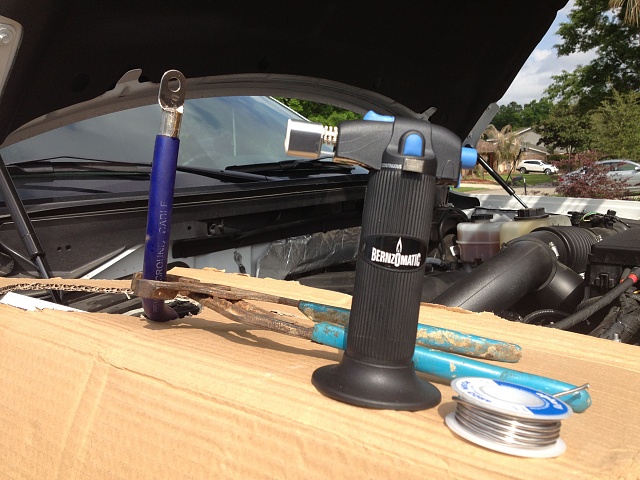
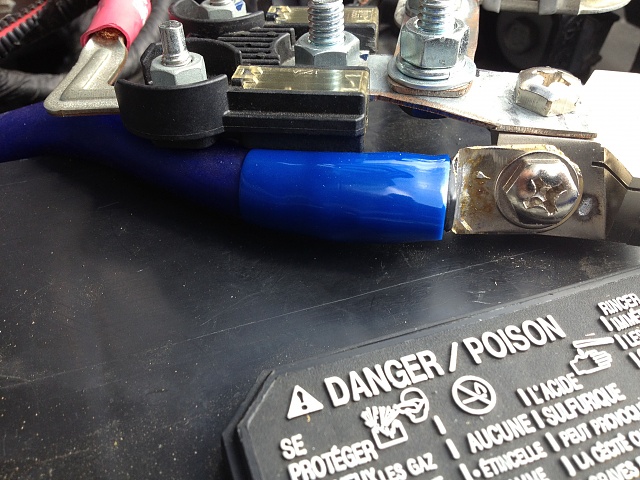
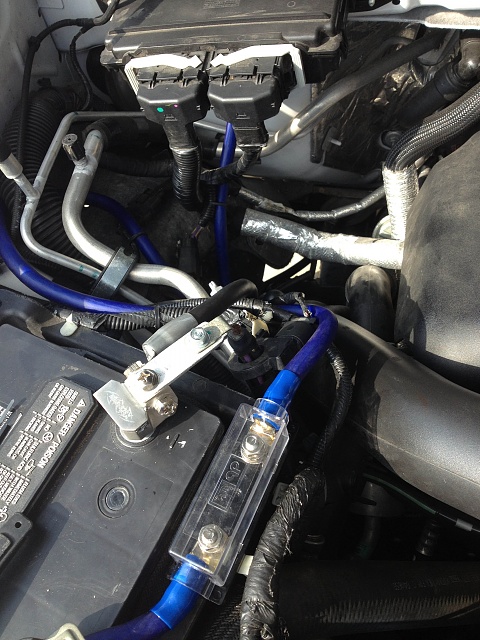
My first few tries with soldering didn't turn out the I planned. My bad experience led me to purchase all new products, and it definitely matters! I finally was able to get good strong solders. Before soldering any terminals, I used an angle grinder and took off about 1/4 inch of the actual terminal. This allows for good strong crimps all the way around the wire. The solder just solidifies the connections.
My next post will provide more info...I'm out of picture space on this post.
I finished up all the wire runs for the system. (Other than the speaker wire tap at the factory amplifier)
I ended running all the passenger speaker wires & the remote wires in the groove of the back cab; basically, just behind amp rack.

all the wires run do not have power run to them just yet.
The main power wire & fuse were crimped/soldered and permanently mounted. Here are a few pictures:


My first few tries with soldering didn't turn out the I planned. My bad experience led me to purchase all new products, and it definitely matters! I finally was able to get good strong solders. Before soldering any terminals, I used an angle grinder and took off about 1/4 inch of the actual terminal. This allows for good strong crimps all the way around the wire. The solder just solidifies the connections.
My next post will provide more info...I'm out of picture space on this post.
04-14-2014, 11:23 PM
#88
I also was able to run my grounds for the equipment hung on the amp rack (first, the polk audio & audio control processor in one ground) What I mean is that I connected 4 gauge (for polk amp) and 12 gauge (for AC signal processor) to a 0 gauge terminal connector.
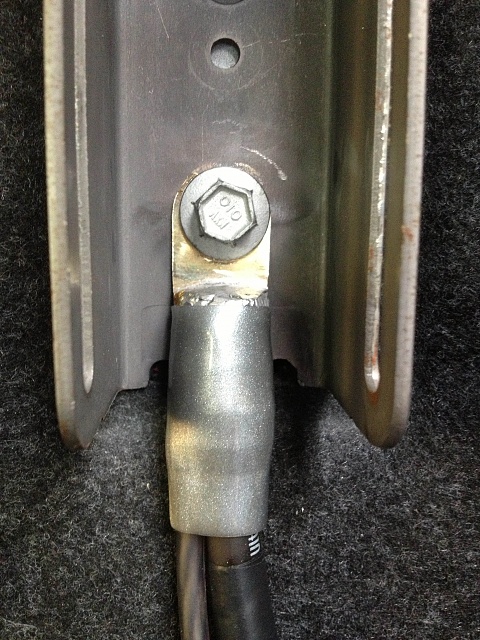
I removed the entire metal piece and used a dremel tool to completely grind down the metal (both sides). I also used the dremel tool and removed all the paint on the back wall where the metal connector sits. Hopefully, this provides less resistance.
The sub amp has a 4 gauge ground. I did all the same preparation as stated above.
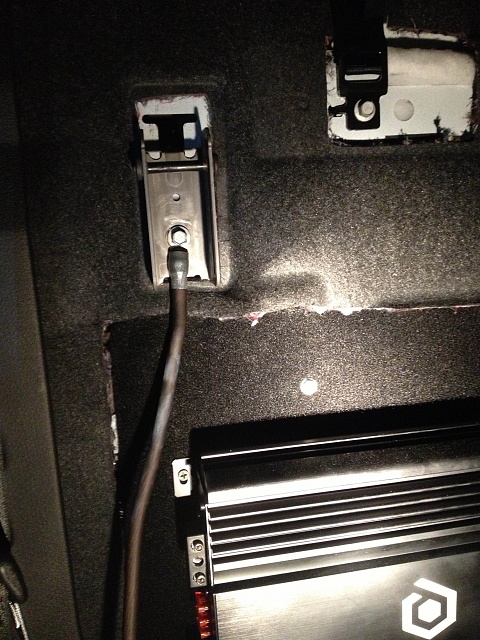
When I finally add the fuse for power, I'll go ahead and test the ground with the multi-meter.
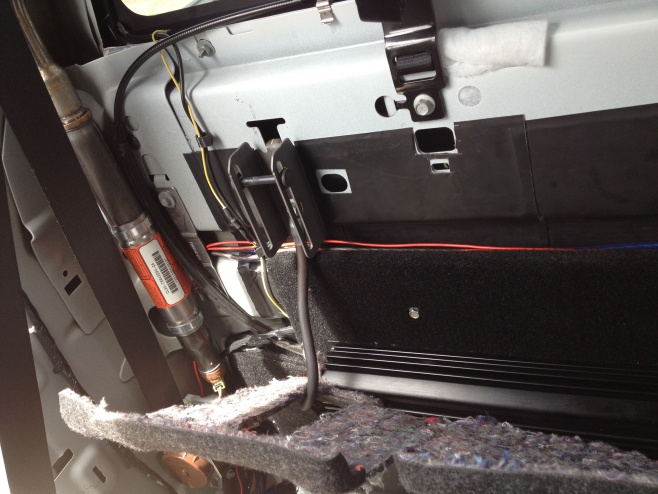
I also took a few shots while working at night. I ended up removing the passenger seat and the center console in order to tap into the speaker wire coming out of the factory amp. (I''ve attached 8 of the 12 wires I need to run). I ended up using speedwire (it's basically a 4 gauge wire with 9 18 gauge wires. I'm currently waiting for my other speedwire to be shipped so I can finish.
I did mess up, but was able to recover from the mistake. I ended up cutting the speaker wires wayyyyyy too close to the actual connector. The butt connectors had to be trimmed up in order to be able to get a good crimp.
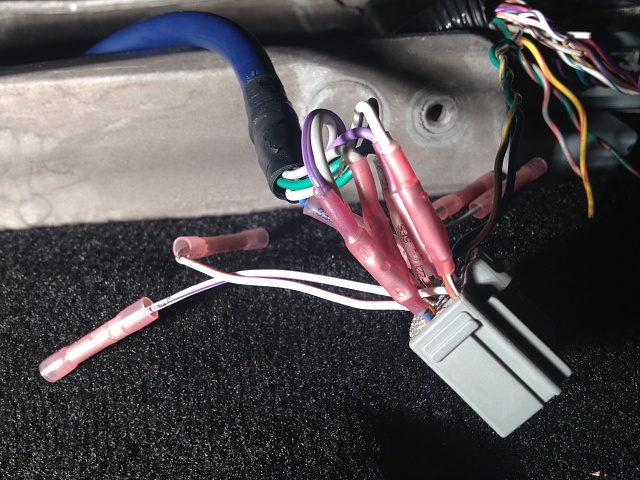
I ran the speedwire under the carpet and all the way to the amp on the driver side. You don't even know it's there so it looks like it going to work out well. As soon I'm able to finish up the wiring completely, I'll go ahead and put all of my truck back together and solder all my speaker wires to the new speakers.
One thing I realized....my front component speakers have the speaker wire run through the molex connector. The problem is that I have a crossover. If I put the crossover in the door, I have to make a run back through the door for the new tweeter. I'm thinking my best option is to keep the crossover in the cab and cut the wire run through the molex connector. This will allow the crossover power and use the other side of the cut wire for the speaker.

I removed the entire metal piece and used a dremel tool to completely grind down the metal (both sides). I also used the dremel tool and removed all the paint on the back wall where the metal connector sits. Hopefully, this provides less resistance.
The sub amp has a 4 gauge ground. I did all the same preparation as stated above.

When I finally add the fuse for power, I'll go ahead and test the ground with the multi-meter.
I also took a few shots while working at night. I ended up removing the passenger seat and the center console in order to tap into the speaker wire coming out of the factory amp. (I''ve attached 8 of the 12 wires I need to run). I ended up using speedwire (it's basically a 4 gauge wire with 9 18 gauge wires. I'm currently waiting for my other speedwire to be shipped so I can finish.
I did mess up, but was able to recover from the mistake. I ended up cutting the speaker wires wayyyyyy too close to the actual connector. The butt connectors had to be trimmed up in order to be able to get a good crimp.


I ran the speedwire under the carpet and all the way to the amp on the driver side. You don't even know it's there so it looks like it going to work out well. As soon I'm able to finish up the wiring completely, I'll go ahead and put all of my truck back together and solder all my speaker wires to the new speakers.
One thing I realized....my front component speakers have the speaker wire run through the molex connector. The problem is that I have a crossover. If I put the crossover in the door, I have to make a run back through the door for the new tweeter. I'm thinking my best option is to keep the crossover in the cab and cut the wire run through the molex connector. This will allow the crossover power and use the other side of the cut wire for the speaker.
04-15-2014, 09:04 AM
#89
Senior Member
Hey man,
I like the idea of the Cleansweep. I have done quiet a few installs with it and love it. Regardless what you go with you can just run a pair or 12awg from the 12+ and GND to the Cleansweep or Kicker.
Have you thought of a 5 Channel? JL makes the HD900/5 and the XD 700/5 and they save space and delivery amazing quality sound. There are other brands that do the same. Audison makes good ones also.

The following users liked this post:
jr07 (04-16-2014)
04-17-2014, 10:23 PM
#90
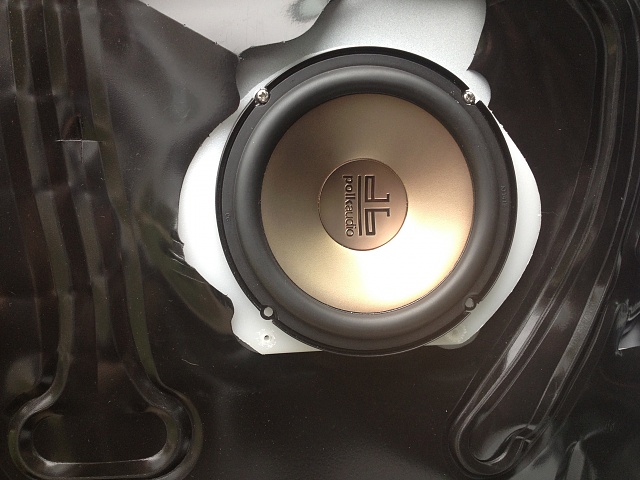
Back speakers (5x7 coaxial are installed 60 watts @ 4 ohms). Gotta admit, sounds pretty clean.
Can anyone with some experience with tuning a 4 channel amp provide some type of process?
Does a multi-meter do the job to determine the voltage (using ohms law watts x ohms= x ; square root of x =voltage
Can anyone with some experience with tuning a 4 channel amp provide some type of process?
Does a multi-meter do the job to determine the voltage (using ohms law watts x ohms= x ; square root of x =voltage