
How-to: Mini H1 Projector Retrofit
 09-02-2011, 02:56 PM
#1
Senior Member
Thread Starter

Ok all, here is what I have of the guide so far. I dont have pictures from the aiming and re-sealing portions, but hopefully the text is enough to walk you through it. I will post the pictures as soon as I can, but I won't be able to for at least a couple of weeks when I get ahold of my dad's truck again.
How-to: Mini H1 Projector Retrofit
Many of you recently purchased the MiniH1 kit from TRS through the group-buy that was held on a few F150 sites. This should give you guys an idea of what to expect when installing it and hopefully will help lead you to success.
The victim in this example is my dad’s 2008 F150 King Ranch. I have already retro-fitted my 2004 Lariat with FXR projectors in the headlights and MiniH1 in the foglamps. I used aftermarket headlights for my install, so I will be using the leftover OEM lights off my 2004 for the retro-fit. This way my dad has no down-time on his truck without lights. For more on how to install the FXR, see here:
http://www.f150online.com/forums/200...-retrofit.html
As for the MiniH1, it is a much easier install that requires little to no cutting of the reflector, and shouldn’t be too hard to complete if you are even only slightly mechanically inclined.
Materials needed:
-MiniH1 complete kit from theretrofitsource.com
-oven
-large flathead
-1 tube of high temp. Epoxy
-large roll of butyl tape sealant
-small hex screw driver (T20 i believe)
-clamps or very large zip-ties
-4mm socket
-4 to 6 hours of free time and some beer!
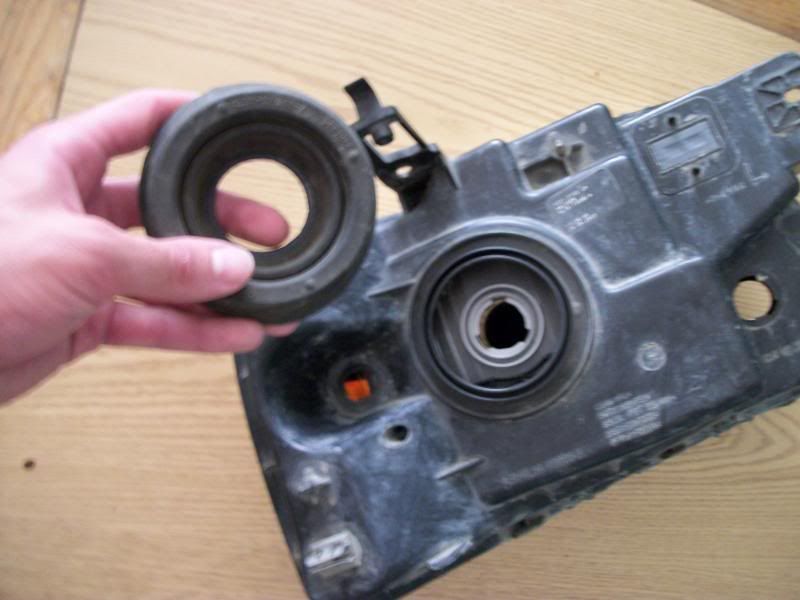
Before beginning, remove the OEM headlights and wash them off thoroughly of dust and bugs, make sure its nice a clean and the lens is clear. Also remove the 3 bulbs (parking lamp, turn signal, headlight) as well as the rubber trim ring around the headlight bulb hole.
STEP 1: SEPARATE LENS FROM HEADLIGHT
If you are using OEM headlights, this can be a PITA but just go slow and you’ll get it (lots of OEM lights use permaseal). If using aftermarket lights with crappy sealant, this step should be cake. Stick the headlight in a pre-heated oven with these temperatures:
OEM lights: 12 minutes @ 220 degrees
Aftermarket lights: 7 minutes @ 250 degrees
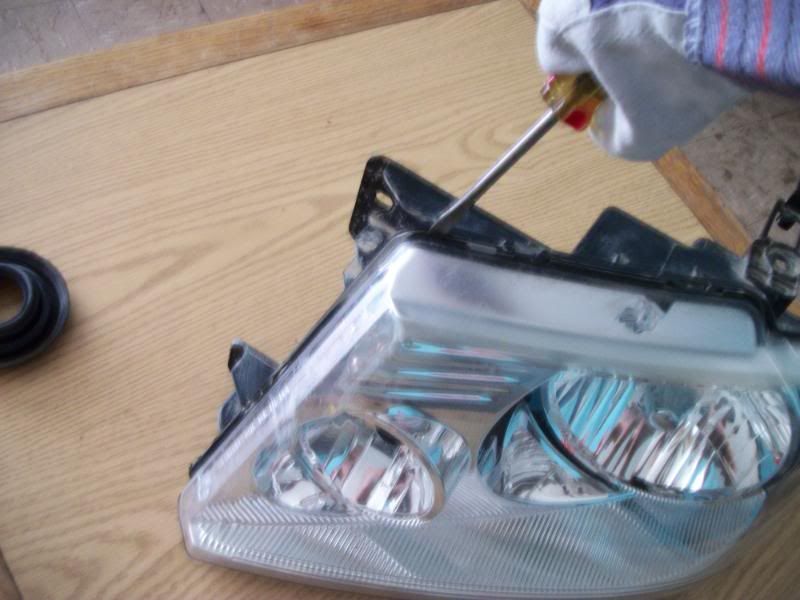
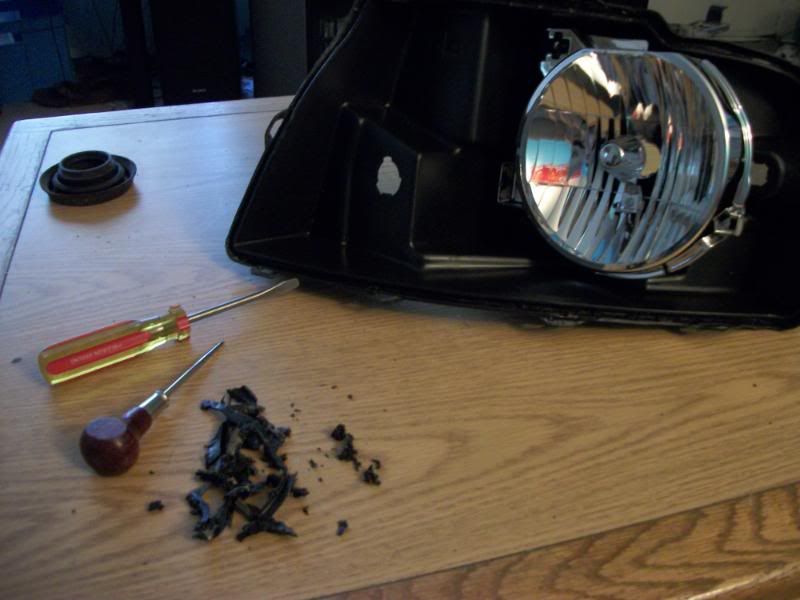
Put on some working gloves and remove the light from the oven and quickly get to work while it is still hot. Start from one corner with the flathead and slowly but firmly separate the lens from the bucket. For the OEM lights, you may need to stick it back in the over a couple times to get the sealant warm again since its much slower going. Aftermarket lights should split in 30 seconds to a minute, but still take your time so you don’t break the tabs or crack the lens. Once separated, remove as much of the sealant as possible since we won’t be using it to re-seal at the end (might need to be re-heated for this too).
How-to: Mini H1 Projector Retrofit
Many of you recently purchased the MiniH1 kit from TRS through the group-buy that was held on a few F150 sites. This should give you guys an idea of what to expect when installing it and hopefully will help lead you to success.
The victim in this example is my dad’s 2008 F150 King Ranch. I have already retro-fitted my 2004 Lariat with FXR projectors in the headlights and MiniH1 in the foglamps. I used aftermarket headlights for my install, so I will be using the leftover OEM lights off my 2004 for the retro-fit. This way my dad has no down-time on his truck without lights. For more on how to install the FXR, see here:
http://www.f150online.com/forums/200...-retrofit.html
As for the MiniH1, it is a much easier install that requires little to no cutting of the reflector, and shouldn’t be too hard to complete if you are even only slightly mechanically inclined.
Materials needed:
-MiniH1 complete kit from theretrofitsource.com
-oven
-large flathead
-1 tube of high temp. Epoxy
-large roll of butyl tape sealant
-small hex screw driver (T20 i believe)
-clamps or very large zip-ties
-4mm socket
-4 to 6 hours of free time and some beer!
Before beginning, remove the OEM headlights and wash them off thoroughly of dust and bugs, make sure its nice a clean and the lens is clear. Also remove the 3 bulbs (parking lamp, turn signal, headlight) as well as the rubber trim ring around the headlight bulb hole.
STEP 1: SEPARATE LENS FROM HEADLIGHT
If you are using OEM headlights, this can be a PITA but just go slow and you’ll get it (lots of OEM lights use permaseal). If using aftermarket lights with crappy sealant, this step should be cake. Stick the headlight in a pre-heated oven with these temperatures:
OEM lights: 12 minutes @ 220 degrees
Aftermarket lights: 7 minutes @ 250 degrees
Put on some working gloves and remove the light from the oven and quickly get to work while it is still hot. Start from one corner with the flathead and slowly but firmly separate the lens from the bucket. For the OEM lights, you may need to stick it back in the over a couple times to get the sealant warm again since its much slower going. Aftermarket lights should split in 30 seconds to a minute, but still take your time so you don’t break the tabs or crack the lens. Once separated, remove as much of the sealant as possible since we won’t be using it to re-seal at the end (might need to be re-heated for this too).
Last edited by mSaLL150; 09-02-2011 at 03:00 PM.
 09-02-2011, 02:59 PM
#2
Senior Member
Thread Starter
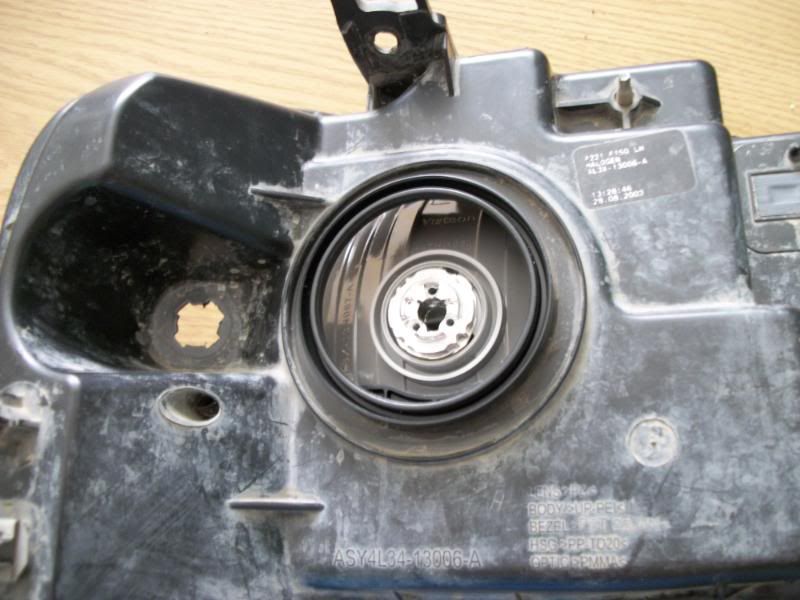
STEP 2: MOUNTING THE PROJECTOR
First, you must remove the bulb-shield using the hex screw-driver.
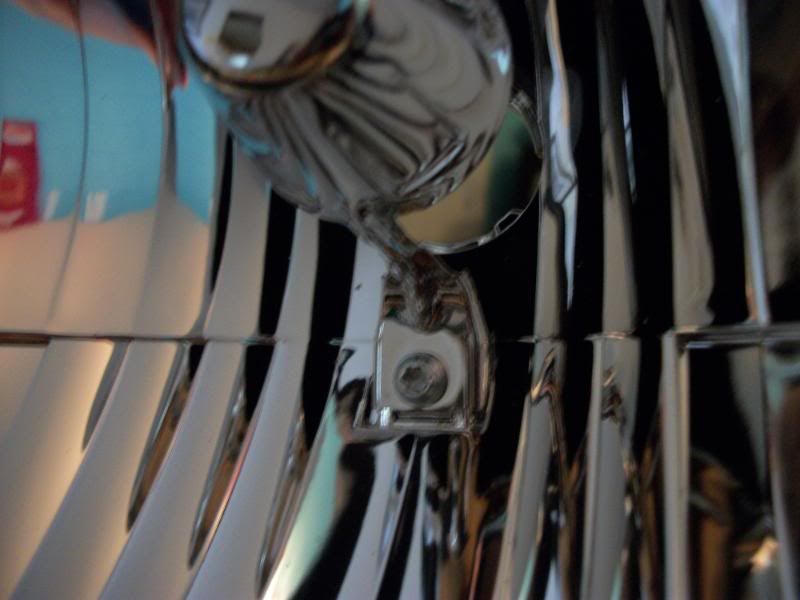
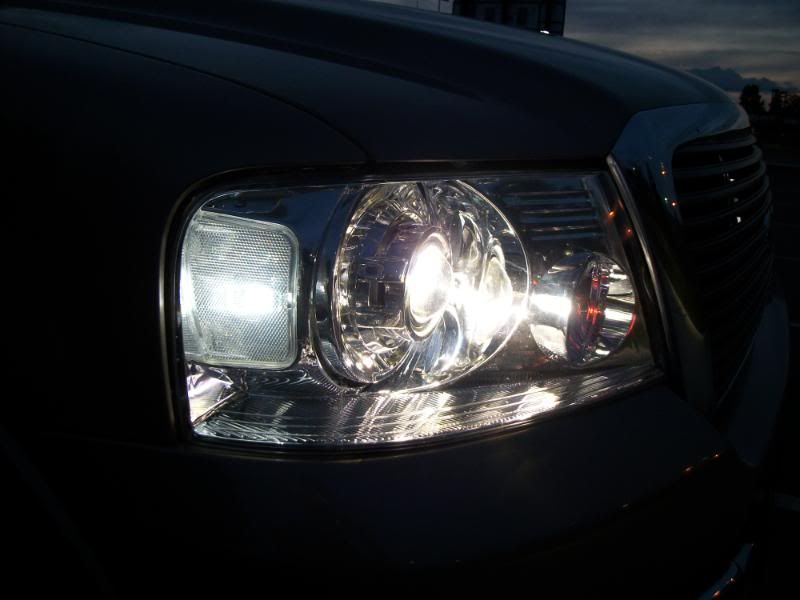
Once its off, grab the projector and fit it into the bulb hole. It should be pretty obvious how it works. Now, I found that the H13 adapter is somewhat useless. So I took the thinish metal washer that came with the kit, trimmed it down with shears, and use it to mount the projector with the provided nut. It must be trimmed so you can slide it on, get the nut on tight, and get the bulb holder (thingy with 3 little screws) back on the projector securely. If you cant get the bulb holder on flush, the bulb wont sit right in the projector and you won’t get the full output of light. Once mounted, it looks like this:
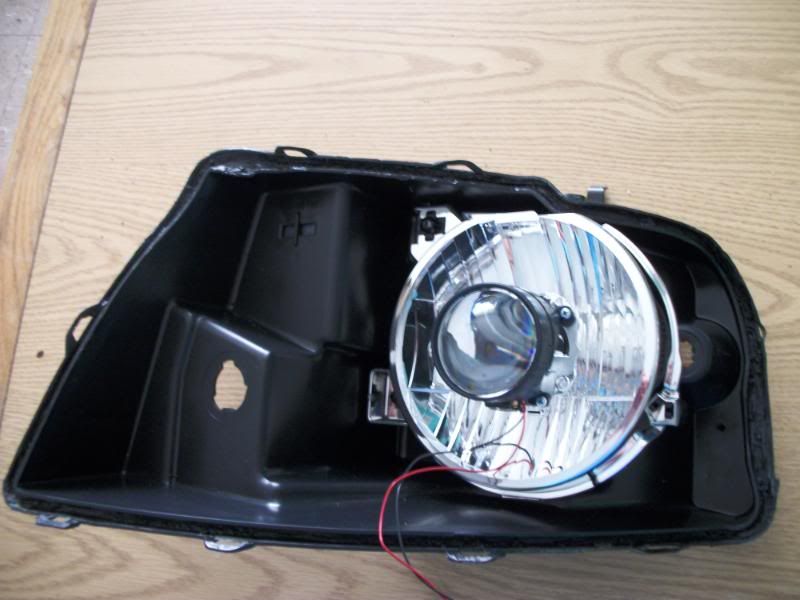
You must also drill a tiny hole I in the reflector to put the high-beam wires through. They will also need to be put through the headlight bucket, also through a small drilled hole.
STEP 3: WIRING UP BALLASTS
There are other guides on how to do this with provided pictures, and it is pretty idiot proof. Simply string the wiring harness across the truck and secure it to other harnesses using zip-ties. Mount the ballasts using the provided bolt-on accessories, or by using high strength glue or cement ontop of the frame (I mounted ballasts for my fogs this way).
STEP 4: AIMING PROJECTORS
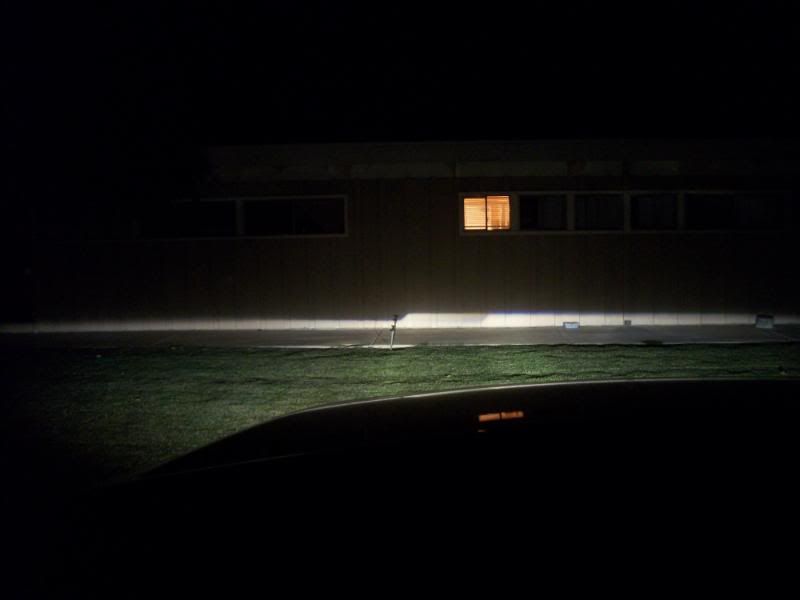
This is the most important step, do not rush this. Take the headlight bucket that you have mounted the projectors to and install it back onto your truck. You need to be on a completely flat surface with a wall of some sort in front of you and it should be somewhat dark out. To start, install the HID bulbs into the projector and hook them up to the ballasts. Turn on the headlights, make sure both bulbs fire up. Wait about 30 seconds for them to warm up. Pull the truck up as close to the wall as you can get. Now, shift the projectors so that cutoff lines are perfectly flat (rotational alignment).Put tape on the wall along the cutoff lines of both projectors (maybe 12-15” of tape per side) and also put a small vertical piece of tape where the “step” in the cutoff is. Now reverse the truck so you are 25ft from the wall. The cutoff will be in different spots, and the goal is to get them aimed 2-3” below the tape line (lifted guys should do 4” drop since the truck is higher). You want the steps to be on the vertical tape lines to insure the projectors are pointed straight, and the cutoff lines should be FLAT and 3” below your tape. Shift the projectors rotationally to adjust the rotation, and use the 4mm bolt on the back of the headlight bucket to shift them up or down.
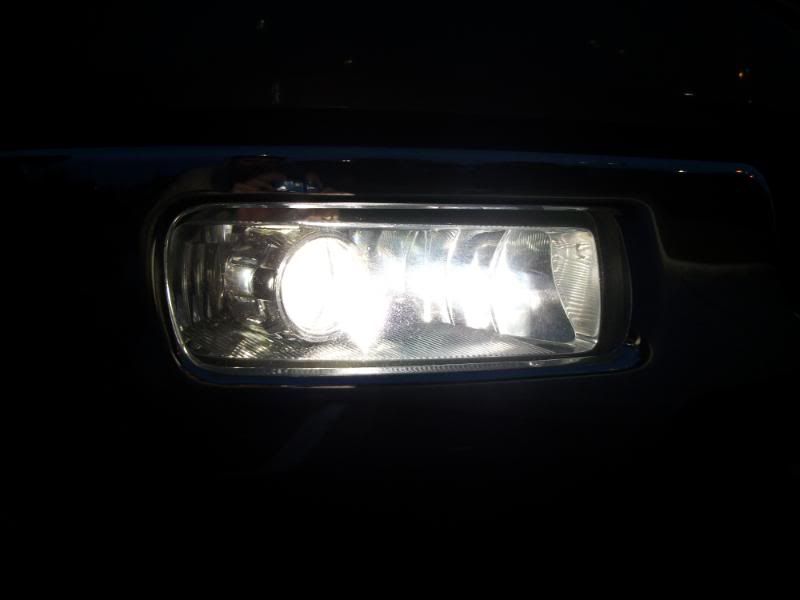
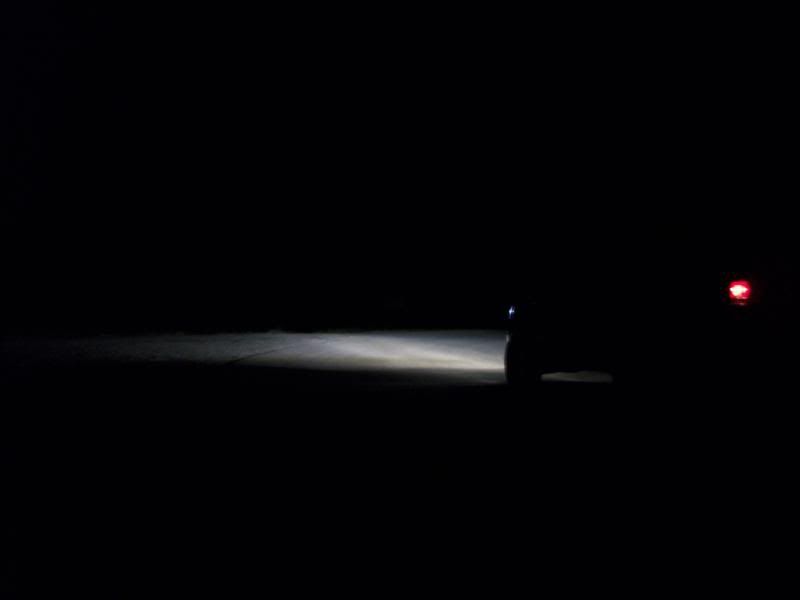
Here is what the Mini H1 output will look like (this is my fogs, your headlights will obviously be aimed higher):
First, you must remove the bulb-shield using the hex screw-driver.
Once its off, grab the projector and fit it into the bulb hole. It should be pretty obvious how it works. Now, I found that the H13 adapter is somewhat useless. So I took the thinish metal washer that came with the kit, trimmed it down with shears, and use it to mount the projector with the provided nut. It must be trimmed so you can slide it on, get the nut on tight, and get the bulb holder (thingy with 3 little screws) back on the projector securely. If you cant get the bulb holder on flush, the bulb wont sit right in the projector and you won’t get the full output of light. Once mounted, it looks like this:
You must also drill a tiny hole I in the reflector to put the high-beam wires through. They will also need to be put through the headlight bucket, also through a small drilled hole.
STEP 3: WIRING UP BALLASTS
There are other guides on how to do this with provided pictures, and it is pretty idiot proof. Simply string the wiring harness across the truck and secure it to other harnesses using zip-ties. Mount the ballasts using the provided bolt-on accessories, or by using high strength glue or cement ontop of the frame (I mounted ballasts for my fogs this way).
STEP 4: AIMING PROJECTORS
This is the most important step, do not rush this. Take the headlight bucket that you have mounted the projectors to and install it back onto your truck. You need to be on a completely flat surface with a wall of some sort in front of you and it should be somewhat dark out. To start, install the HID bulbs into the projector and hook them up to the ballasts. Turn on the headlights, make sure both bulbs fire up. Wait about 30 seconds for them to warm up. Pull the truck up as close to the wall as you can get. Now, shift the projectors so that cutoff lines are perfectly flat (rotational alignment).Put tape on the wall along the cutoff lines of both projectors (maybe 12-15” of tape per side) and also put a small vertical piece of tape where the “step” in the cutoff is. Now reverse the truck so you are 25ft from the wall. The cutoff will be in different spots, and the goal is to get them aimed 2-3” below the tape line (lifted guys should do 4” drop since the truck is higher). You want the steps to be on the vertical tape lines to insure the projectors are pointed straight, and the cutoff lines should be FLAT and 3” below your tape. Shift the projectors rotationally to adjust the rotation, and use the 4mm bolt on the back of the headlight bucket to shift them up or down.
Here is what the Mini H1 output will look like (this is my fogs, your headlights will obviously be aimed higher):
09-02-2011, 03:02 PM
#3
Senior Member
Thread Starter
STEP 5: SECURING PROJECTOR AND SHROUDS
If you are not completely sure on step 4, go back and double, triple check the aiming. This is the point of no return folks. Once they are perfectly aimed and you are 100% SURE, turn them off and wait 10 minutes for them too cool…then, the point of no return…put liberal amounts of high-temp epoxy between the projector and reflector. This will insure the projectors don’t budge at all when driving on bumpy roads or potholes. Wait at least 3 hours for the cement to become solid (probably wait overnight if you can) then put small amount of epoxy on the outer rim of the projector and GENTLY slide the shroud onto it.
STEP 6: RESEALING THE LENSES
We are almost done! This part is easy. Simply tape the butyl tape, and put a VERY healthy bead of it in the outer gutter of the headlight bucket. Put the lens back on, and push hard. There should be butyl oozing out all around, you want plenty to make sure there are no leaks (condensation in headlights sucks). Once they are on firmly, use some long zipties or clamps to hold the lenses on there sturdy and let it sit for a couple hours. Also be sure to seal up the small hole where your high-beam wires go through the headlight bucket. Once those hours pass, you are DONE. Go install them on your truck, wait until night time, and go light up the roads of your town with a fatty smile on your face. Make sure you hook up the high beams as well using the adapters and harness provided in the kit.
-mSaLL
09-02-2011, 03:09 PM
#4
Member

Join Date: Aug 2011
Posts: 54
Likes: 0
Received 0 Likes
on
0 Posts
Great write up same thing i did..
But...
h13 apadapter plate doesnt work on newer trucks 09-11.
And. my harness for some odd reason opens my high beam flap but doesnt ignite the high beam just turns off
But...
h13 apadapter plate doesnt work on newer trucks 09-11.
And. my harness for some odd reason opens my high beam flap but doesnt ignite the high beam just turns off
09-06-2011, 09:33 PM
#5
BAMF Club

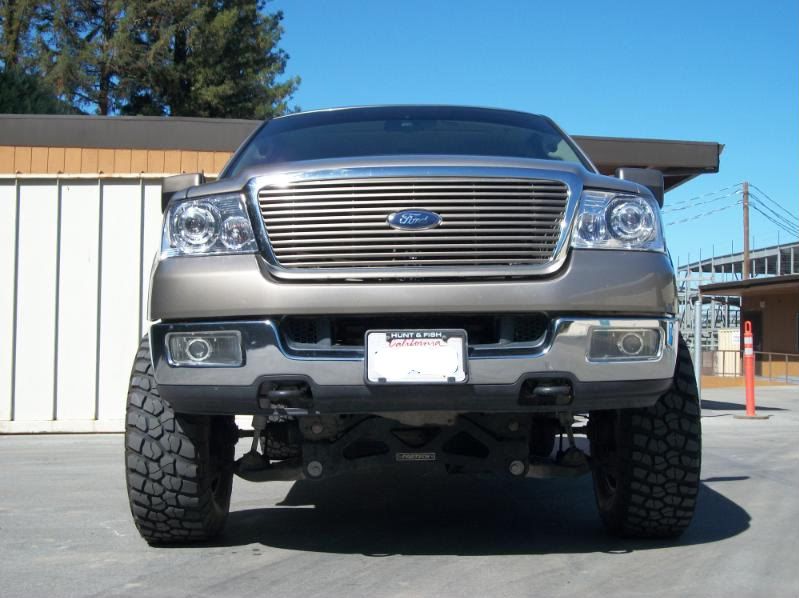
Nice write-up mSall. Any pics of them installed in your dads truck?
09-06-2011, 10:11 PM
#7
Senior Member
Thread Starter
Trending Topics
09-06-2011, 11:08 PM
#9
yep.
theretrofitsource.com will do it all for you. expect to add another 250-300 for their labor.