How to replace tie rods on most vehicles.
 08-06-2014, 01:00 PM
#1
Resident Worm Drowner
Thread Starter

I found that I needed new inner and outer tie rods on my truck last weekend, so I figured it would be a prime time to do a "how to" write up for those that may need it. You can save a little bit of money by doing it yourself, and it's not a bad job if you're mechanically inclined.
This "how to" is for the passenger side, but the driver side is essentially the same.
Tools needed:
Tie rod separator
Hammer
Sockets/Ratchet
Wrenches
Pliers
Tape measure
Grease gun
New tie rod ends, and if your adjusting sleeve is bad, replace it as well. Mine was fine, so I reused it.
Also, I had the parts store write down which was inner and which was outer. They look mostly the same, but there ARE subtle differences. You may want to mark them so you don't get them mixed up.
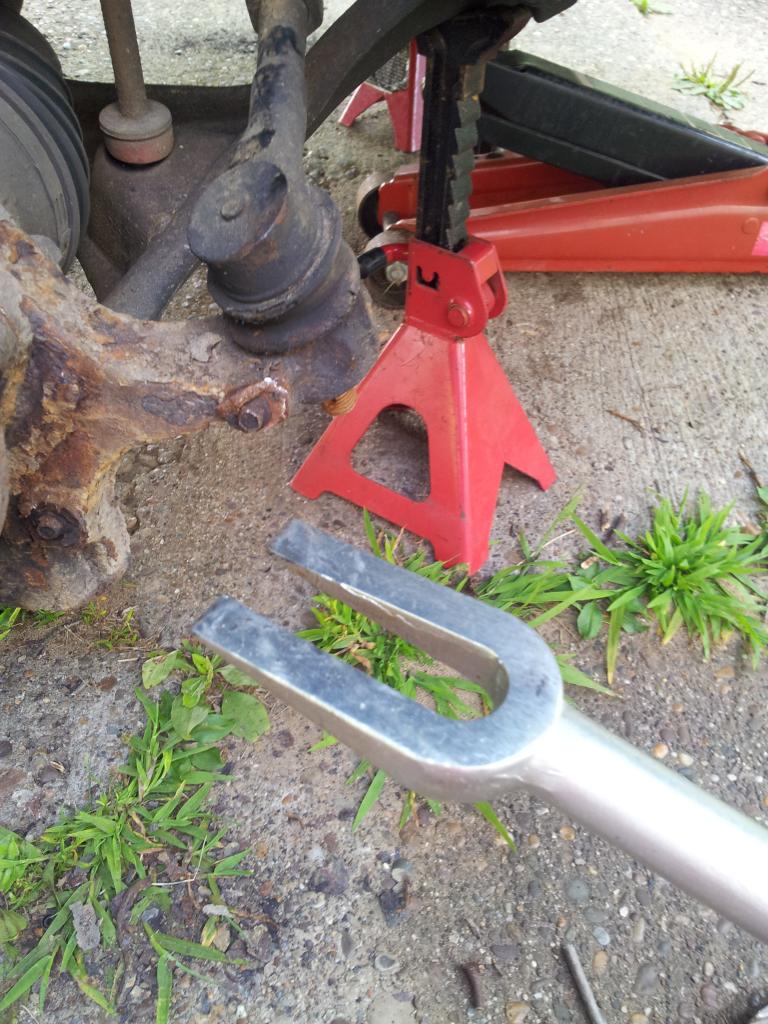
Start by blocking the rear tire on the opposite side of which you are working. Raise the front and remove the tire. Jack stands are a good idea, just to be safe.
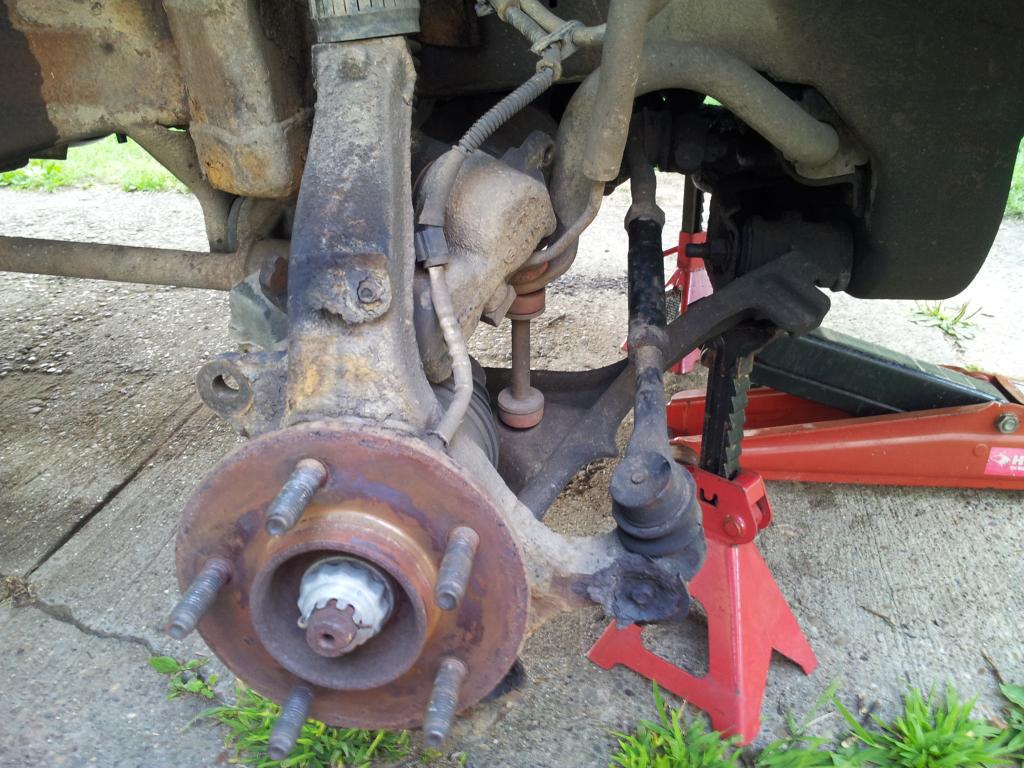
Remove the caliper and place it out of the way. Hang it with zip ties or something...don't let it hang by the brake line. I just tucked mine above the axle, which worked out fine. Also remove the caliper mounting bracket and rotor. I'm not going into how to remove these things. Basically, if you can't remove those things, you probably shouldn't be changing your tie rods yourself anyway.
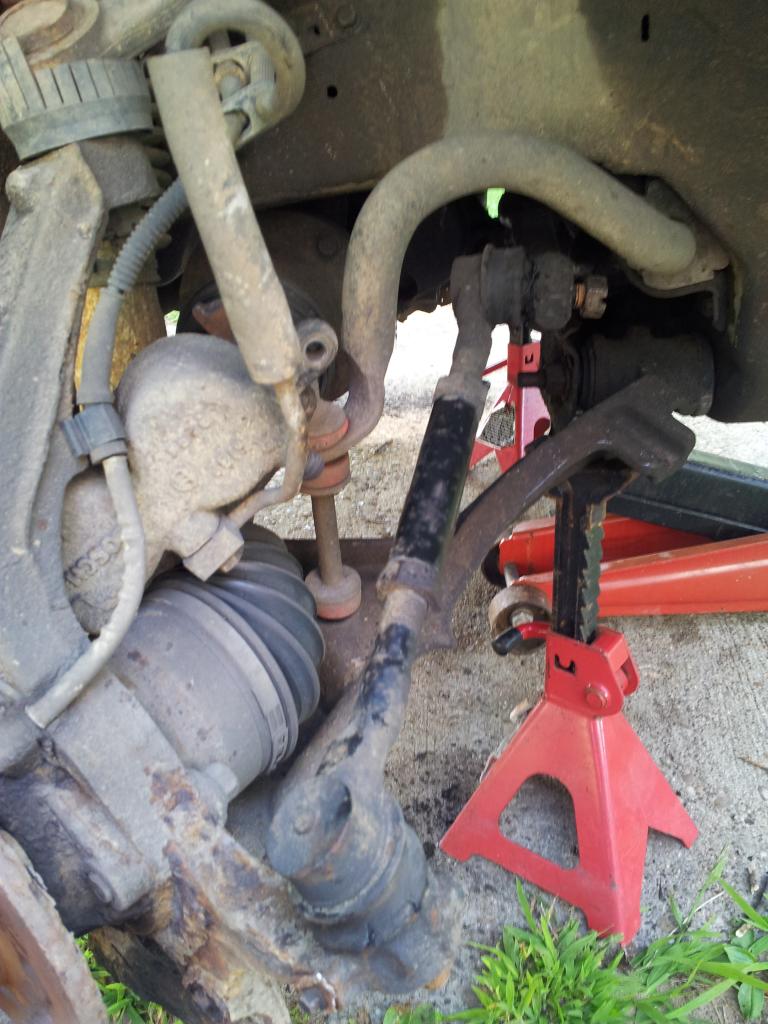
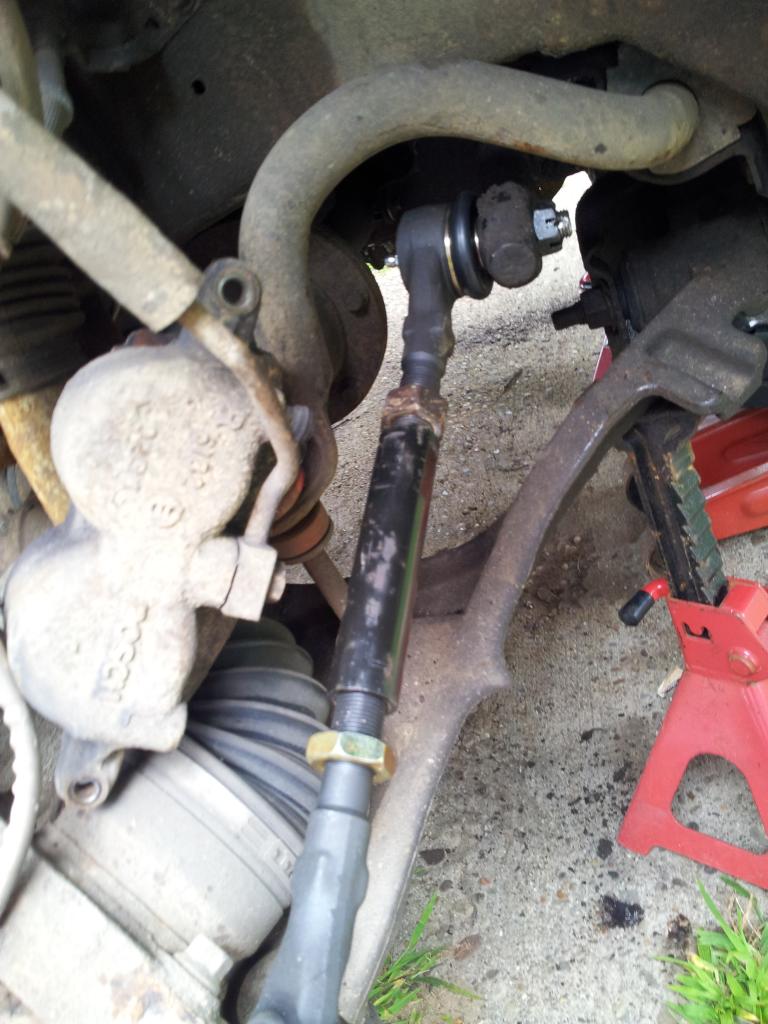
The tie rods are on the right of the picture, attached to the knuckle.
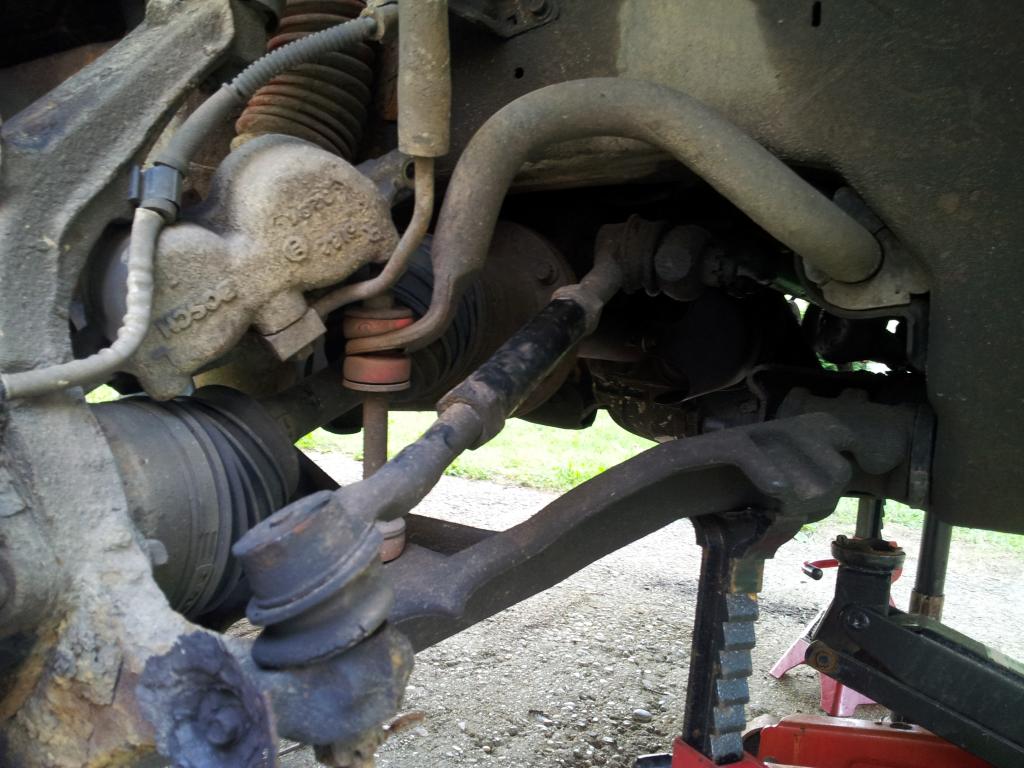
Here you see the outer tie rod attached to the knuckle, the adjusting sleeve in the center, and the inner tie rod attaching to the center link.
Two things you can notice here:
First, the boots on the ends of the tie rods are cracked and no longer contain any grease. I honestly don't know how they hadn't separated yet. It was scary to see how badly the joints were worn out.
Second, my brake dust shield is completely gone. All you can see are the bolts and a little bit of rust around them. Since I couldn't get the bolts out, I removed as much of the rusted metal around them as my pliers would get, then hammered the rest down so nothing scraped or cut me.
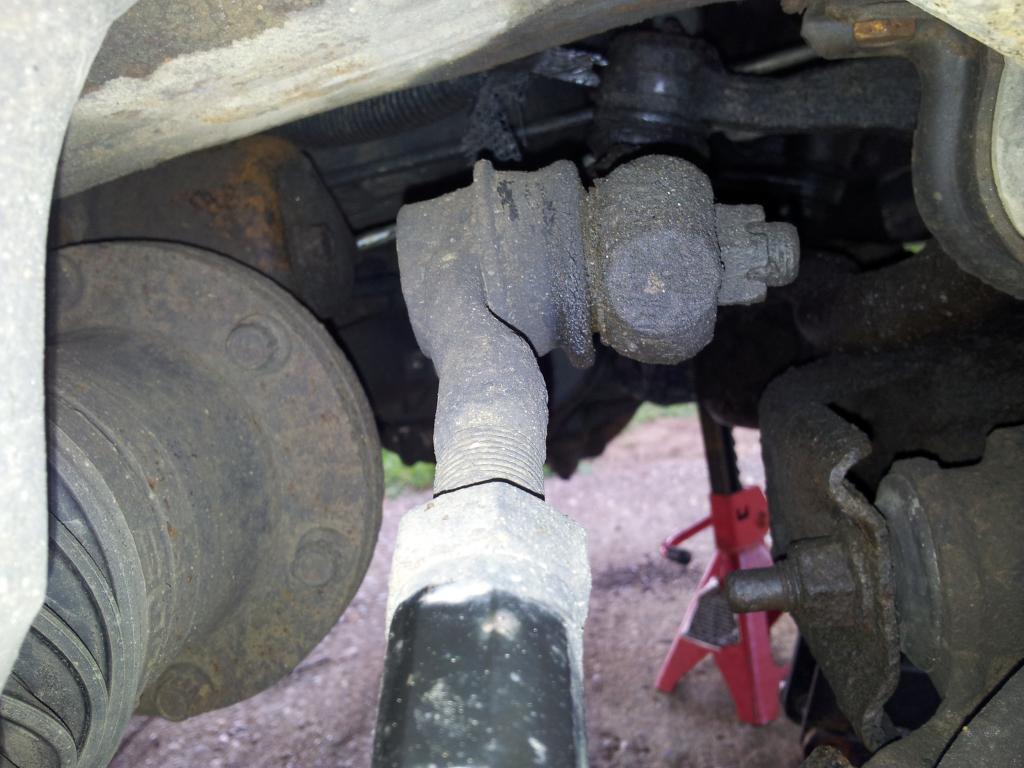
Inner tie rod:
Outer tie rod:
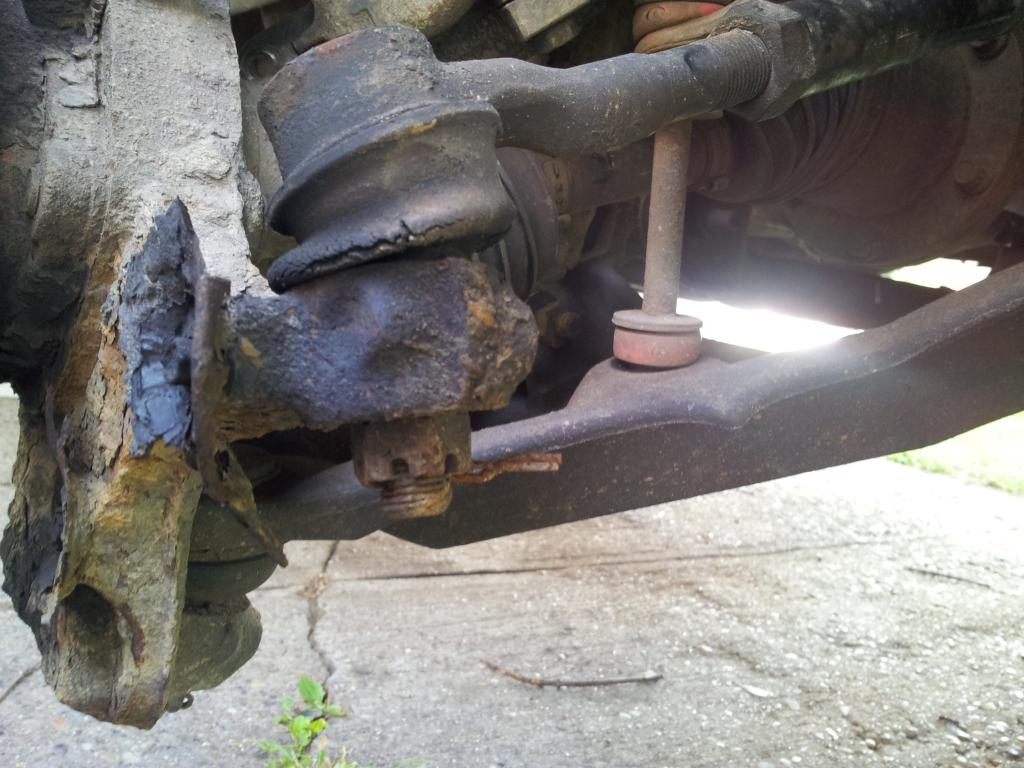
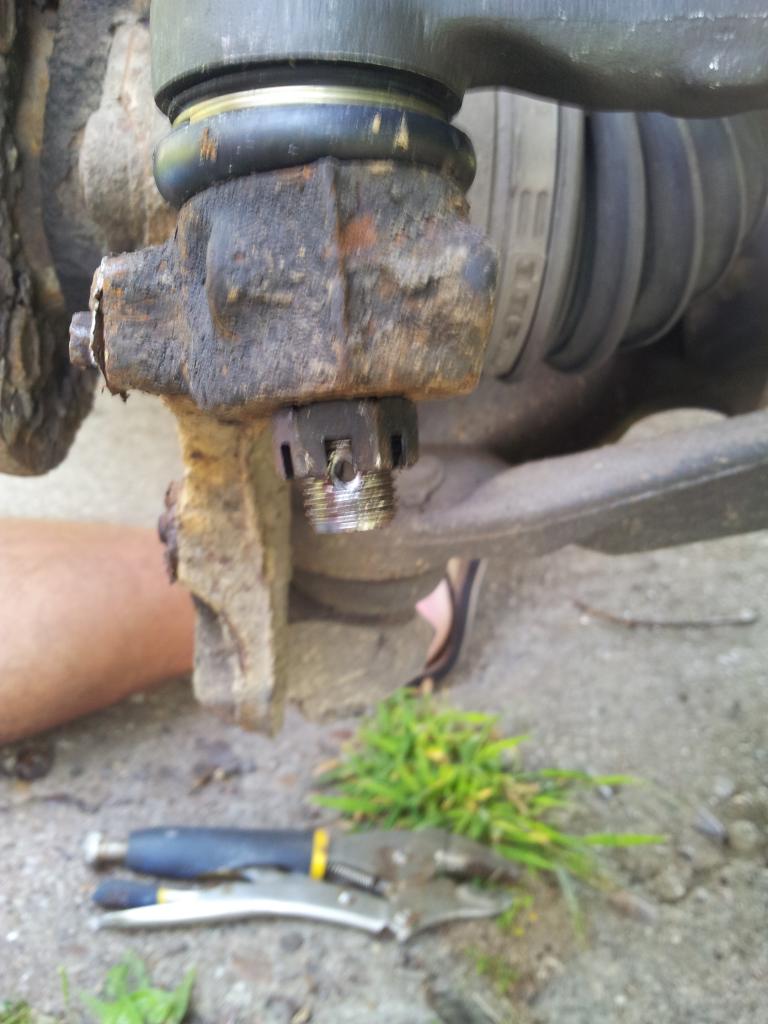
In the above picture you'll see a rusted cotter pin through the bolt holding the outer tie rod to the knuckle. You'll want to remove this pin then take the nut off the tie rod. The cotter pin is installed there to keep the nut from backing off. You'll see later in the photos how the pin holds the nut.
This "how to" is for the passenger side, but the driver side is essentially the same.
Tools needed:
Tie rod separator
Hammer
Sockets/Ratchet
Wrenches
Pliers
Tape measure
Grease gun
New tie rod ends, and if your adjusting sleeve is bad, replace it as well. Mine was fine, so I reused it.
Also, I had the parts store write down which was inner and which was outer. They look mostly the same, but there ARE subtle differences. You may want to mark them so you don't get them mixed up.
Start by blocking the rear tire on the opposite side of which you are working. Raise the front and remove the tire. Jack stands are a good idea, just to be safe.
Remove the caliper and place it out of the way. Hang it with zip ties or something...don't let it hang by the brake line. I just tucked mine above the axle, which worked out fine. Also remove the caliper mounting bracket and rotor. I'm not going into how to remove these things. Basically, if you can't remove those things, you probably shouldn't be changing your tie rods yourself anyway.
The tie rods are on the right of the picture, attached to the knuckle.
Here you see the outer tie rod attached to the knuckle, the adjusting sleeve in the center, and the inner tie rod attaching to the center link.
Two things you can notice here:
First, the boots on the ends of the tie rods are cracked and no longer contain any grease. I honestly don't know how they hadn't separated yet. It was scary to see how badly the joints were worn out.
Second, my brake dust shield is completely gone. All you can see are the bolts and a little bit of rust around them. Since I couldn't get the bolts out, I removed as much of the rusted metal around them as my pliers would get, then hammered the rest down so nothing scraped or cut me.
Inner tie rod:
Outer tie rod:
In the above picture you'll see a rusted cotter pin through the bolt holding the outer tie rod to the knuckle. You'll want to remove this pin then take the nut off the tie rod. The cotter pin is installed there to keep the nut from backing off. You'll see later in the photos how the pin holds the nut.
Last edited by Ringleader; 08-06-2014 at 02:31 PM.
 08-06-2014, 01:01 PM
#2
Resident Worm Drowner
Thread Starter
With the nut removed, grab your tie rod separator. I got mine from Autozone through their loan-a-tool program. You'll see that one side is flat and one is tapered. I always put the tapered side toward whichever part I'm replacing.
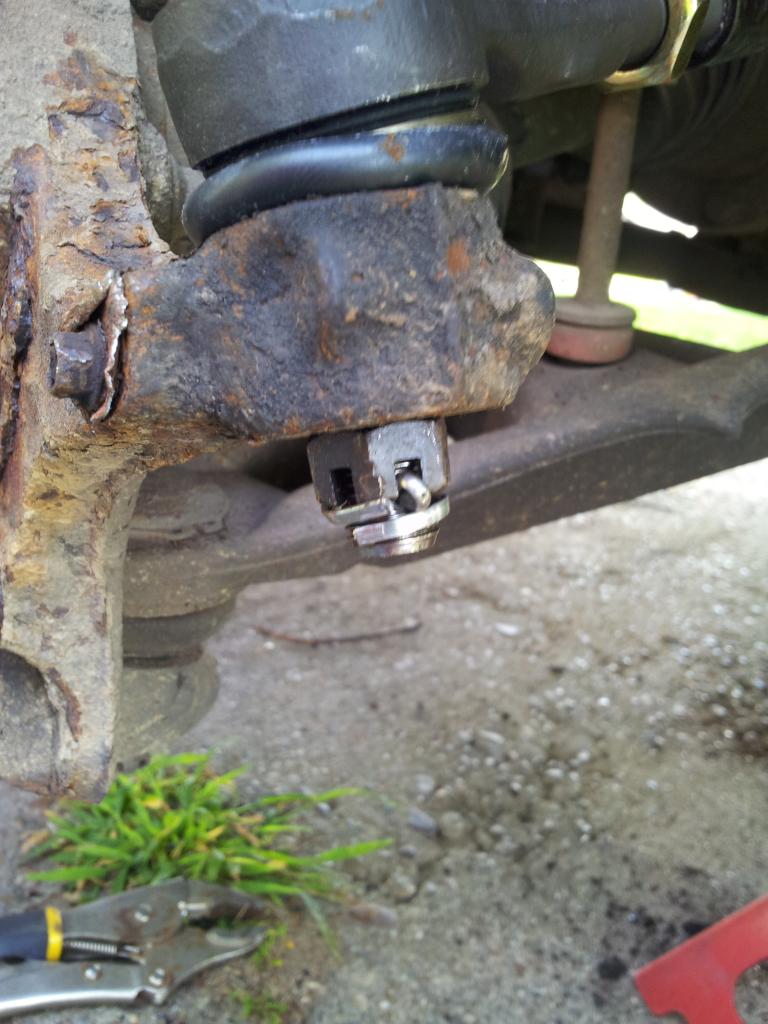
Insert the tie rod separator onto the rubber boot between the tie rod end and the knuckle, like so:
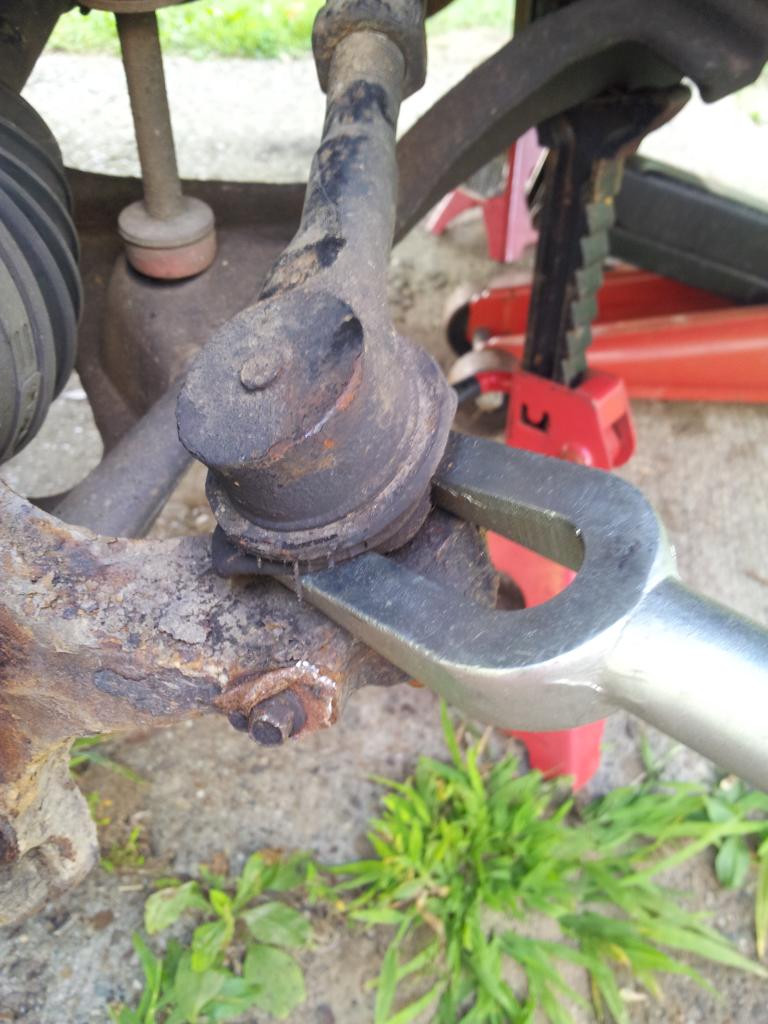
Use your hammer and hit the end of the tie rod separator several times to break the tie rod loose. It's in there tight, so it may take some work. Usually once the tool is driven far enough into the space, the tie rod will just pop loose, then you can pull it out of the knuckle.
Insert the tie rod separator onto the rubber boot between the tie rod end and the knuckle, like so:
Use your hammer and hit the end of the tie rod separator several times to break the tie rod loose. It's in there tight, so it may take some work. Usually once the tool is driven far enough into the space, the tie rod will just pop loose, then you can pull it out of the knuckle.
Last edited by Ringleader; 08-06-2014 at 01:38 PM.
08-06-2014, 01:02 PM
#3
Resident Worm Drowner
Thread Starter
Now that the outer is loose, move to the inner tie rod.
Same basic process: remove the cotter pin, remove the nut, use the separator to remove the inner tie rod.
Here's where mine got a little irritating. The inner tie rod joint wanted to pull apart instead of coming out of the center link. I had to thread the nut back onto the shaft a little, turn the steering wheel all the way to the right, and use a BFH to drive the tie rod loose. Don't get too carried away if you have to do the same, because the idler arm isn't far away from the tie rod, and you could do damage to it or the center link.
Now that the tie rod assembly is loose, I measured from center-to-center of the existing piece so that I could get the new one as close as possible upon installation.
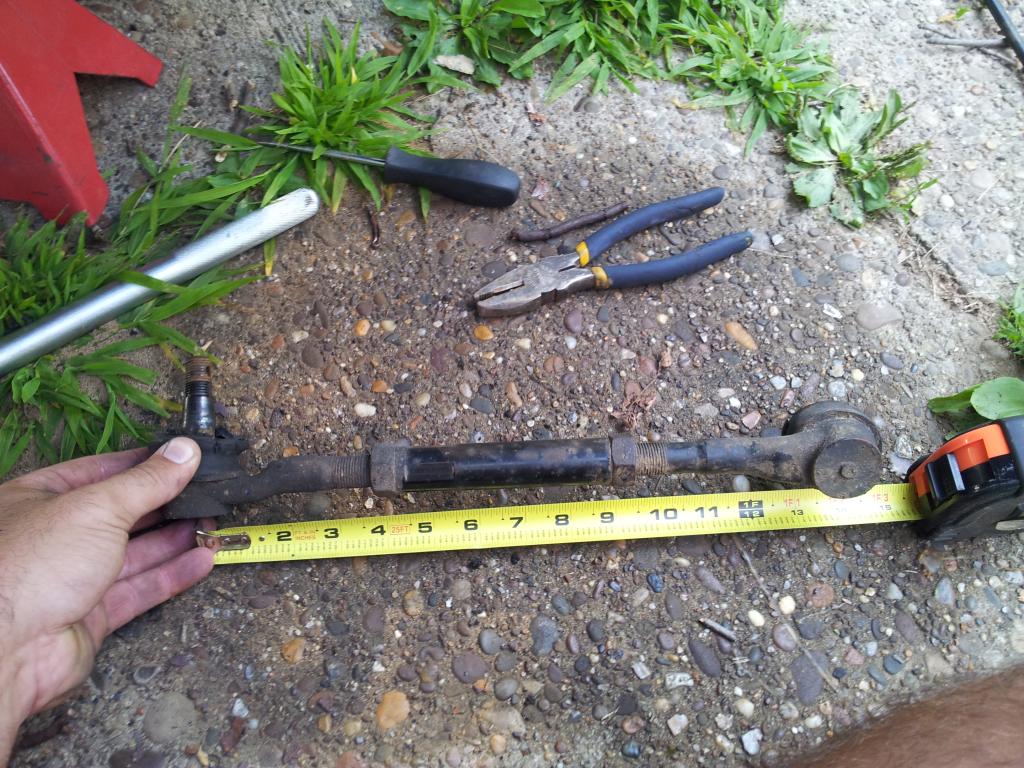
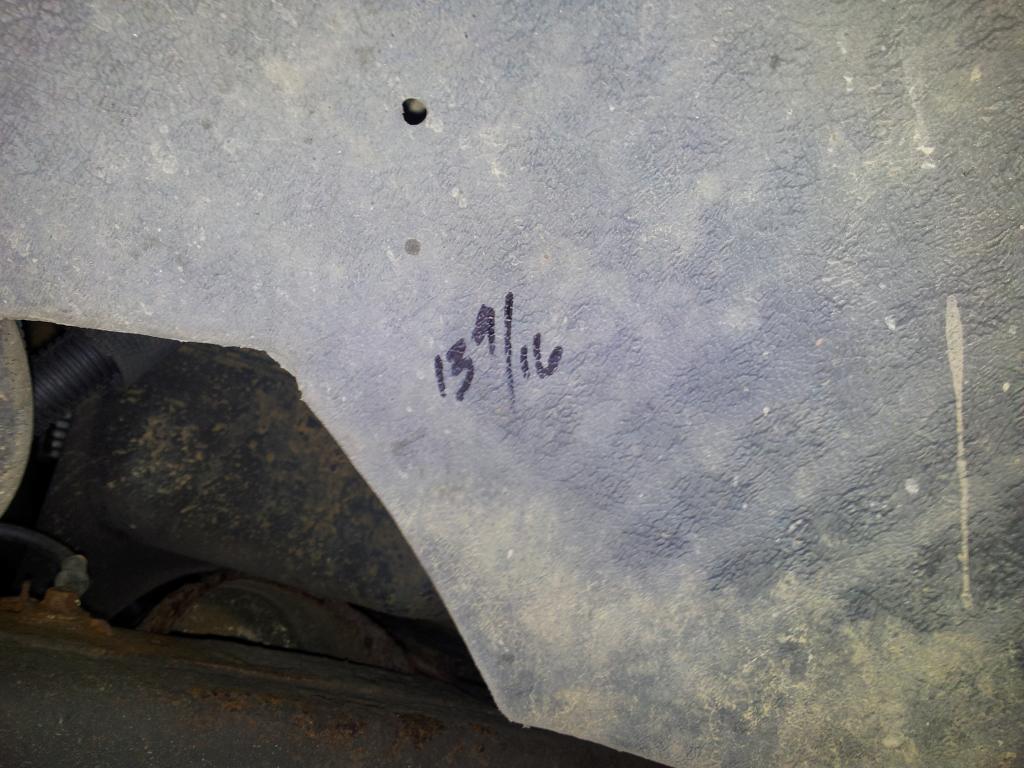
Then I wrote my measurement down in a handy spot so I wouldn't forget it. Yes, that's inside my fenderwell.
Same basic process: remove the cotter pin, remove the nut, use the separator to remove the inner tie rod.
Here's where mine got a little irritating. The inner tie rod joint wanted to pull apart instead of coming out of the center link. I had to thread the nut back onto the shaft a little, turn the steering wheel all the way to the right, and use a BFH to drive the tie rod loose. Don't get too carried away if you have to do the same, because the idler arm isn't far away from the tie rod, and you could do damage to it or the center link.
Now that the tie rod assembly is loose, I measured from center-to-center of the existing piece so that I could get the new one as close as possible upon installation.
Then I wrote my measurement down in a handy spot so I wouldn't forget it. Yes, that's inside my fenderwell.
Last edited by Ringleader; 08-06-2014 at 01:46 PM.
08-06-2014, 01:02 PM
#4
Resident Worm Drowner
Thread Starter
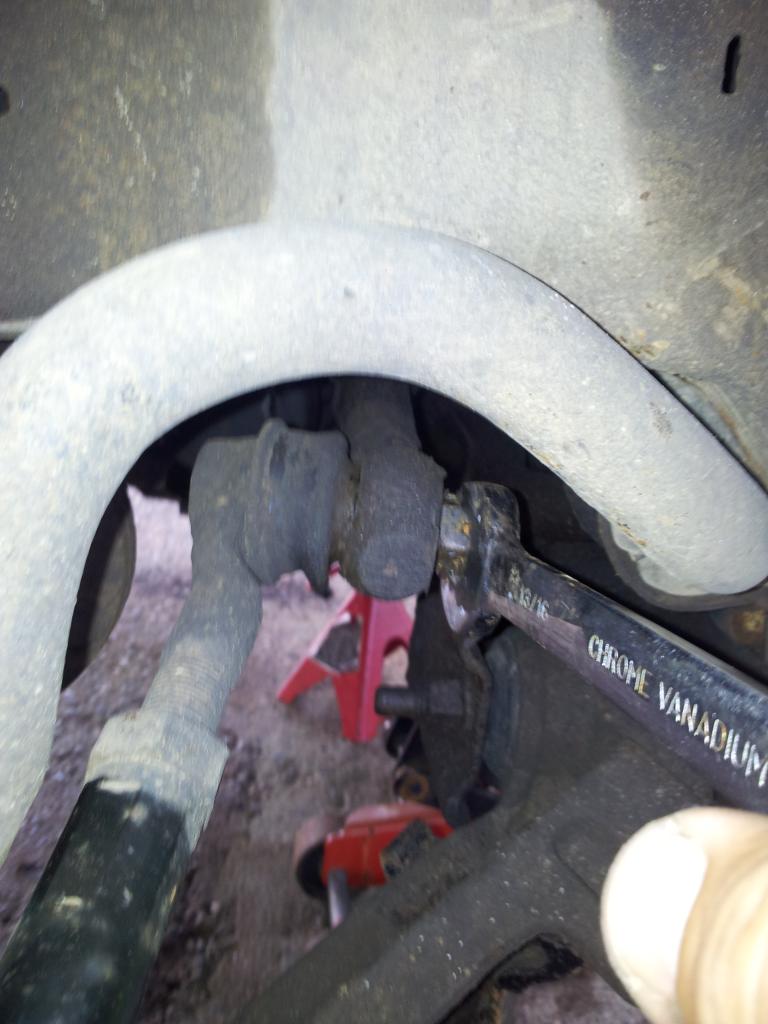
Since I reused my adjusting sleeve, I'll show how to disassemble it. You'll need two wrenches, NOT a crescent wrench and vice grips as in my pics. Do as I say, not as I do, lol.
The locking nuts on each side of the adjusting sleeve need to be broken loose and threaded away from the sleeve. The inner and outer tie rods are threaded oppositely, one right hand thread and one left hand thread.
Once those are moved out of the way, the tie rod ends can be unscrewed from the adjusting sleeve.
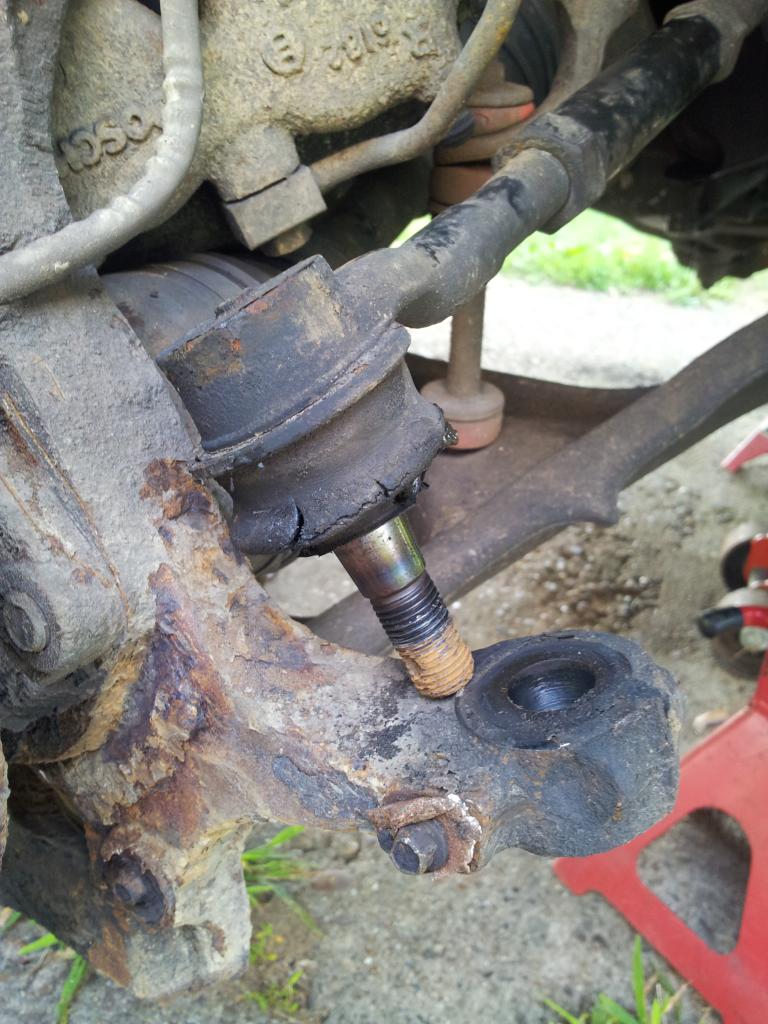
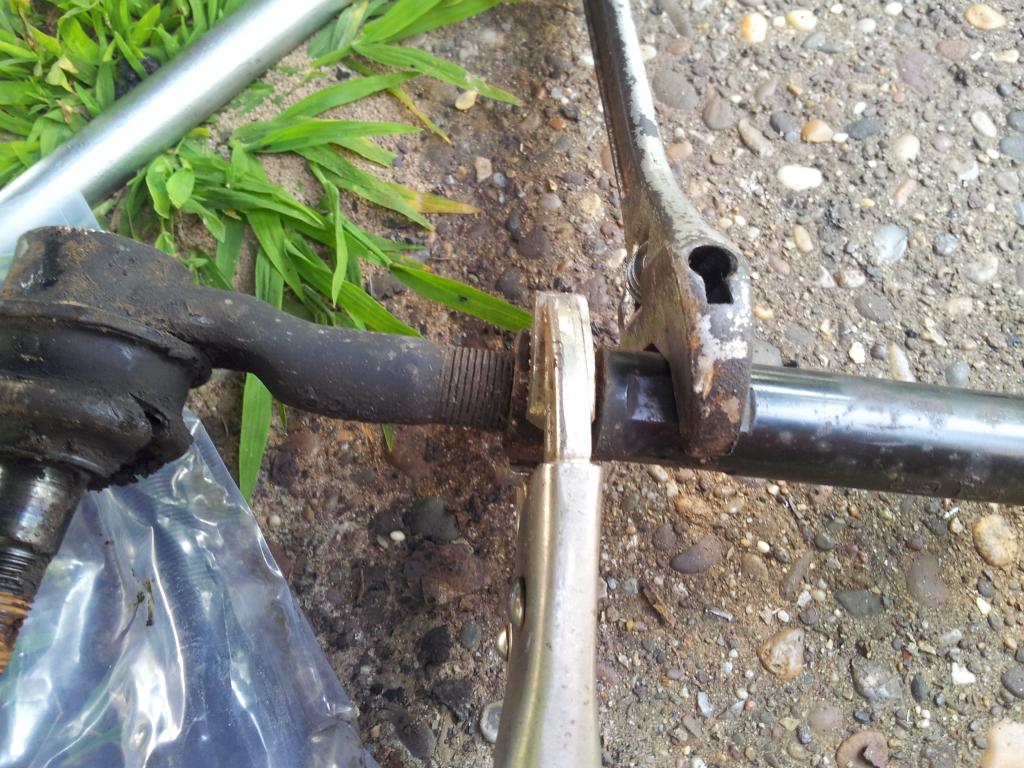
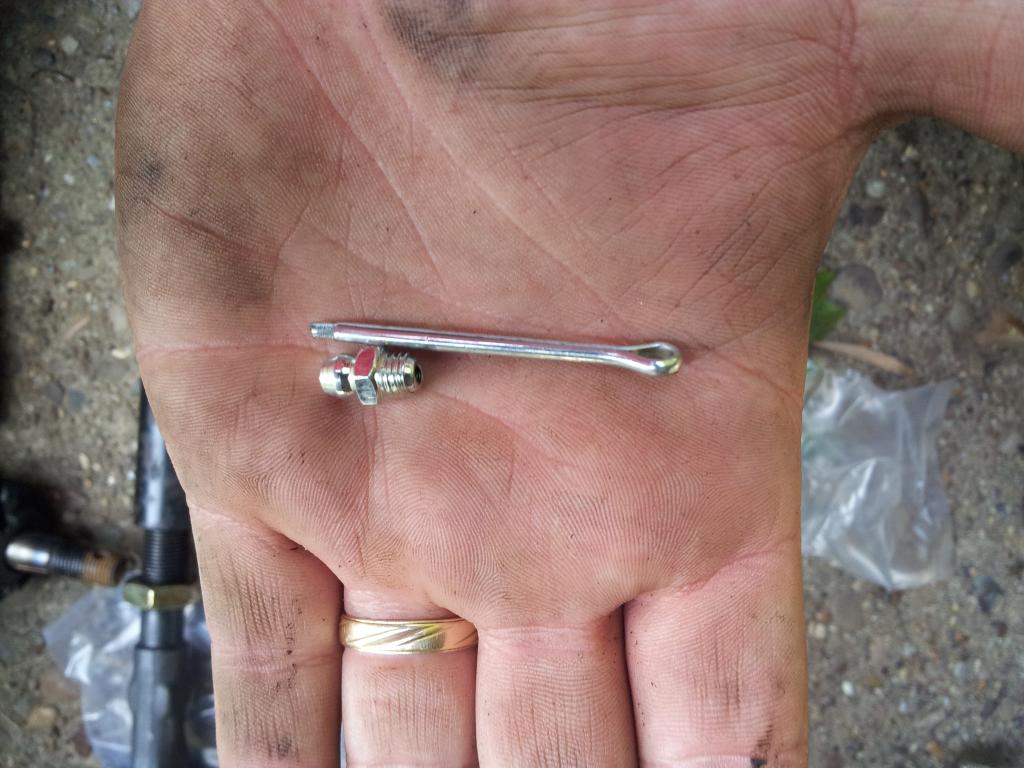
Next, thread your new/reused adjusting sleeve onto the new tie rod ends. Make sure you don't "bottom out" the sleeve when threading it onto them. You'll need room to adjust in both directions. You'll see in this pic that my new inner tie rod end did not come with a locking nut, so I had to reuse the old one...hence the reason for NOT using vice grips on it during disassemble. MAKE SURE you put the locking nuts on the ends BEFORE the adjusting sleeve.
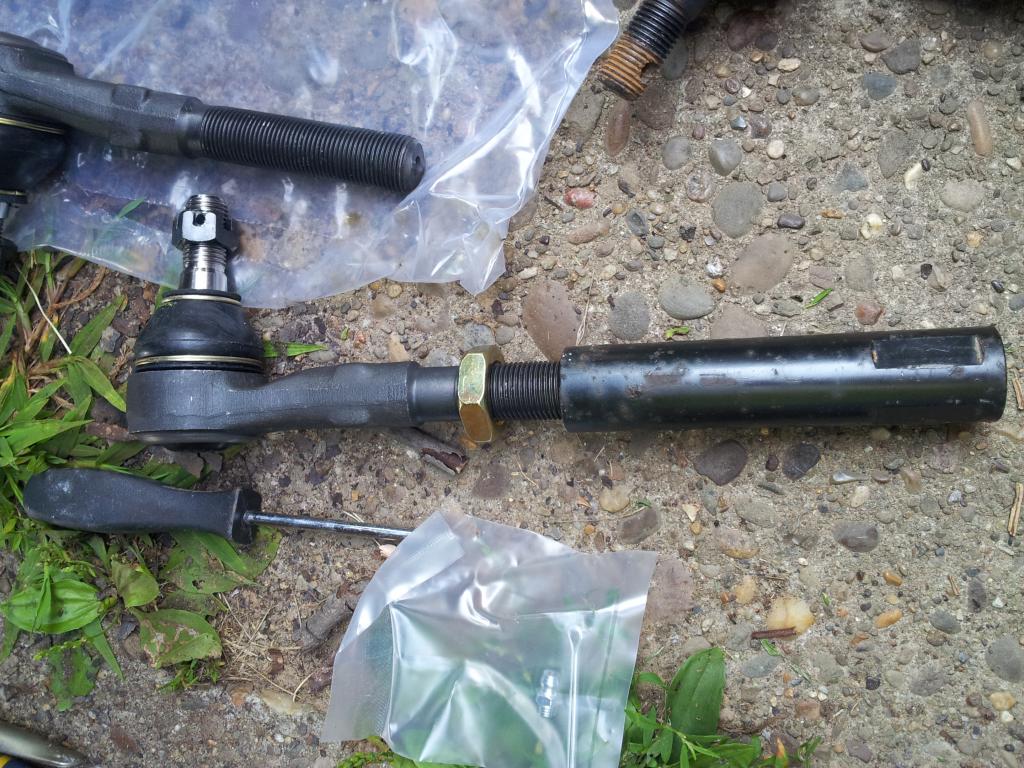
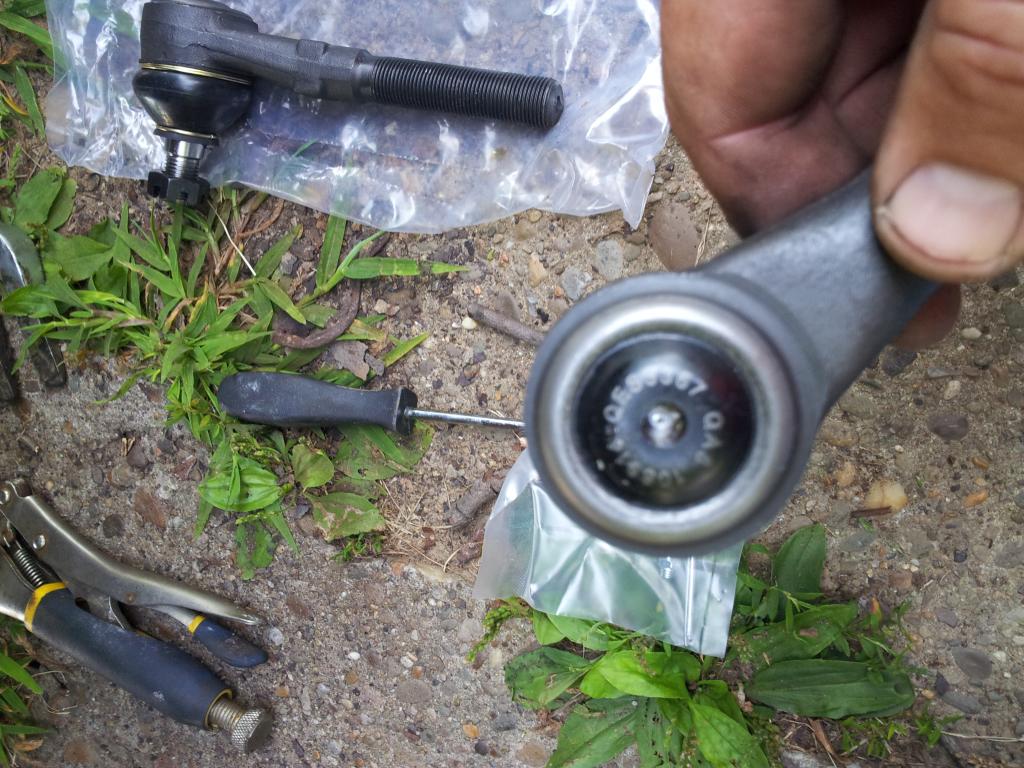
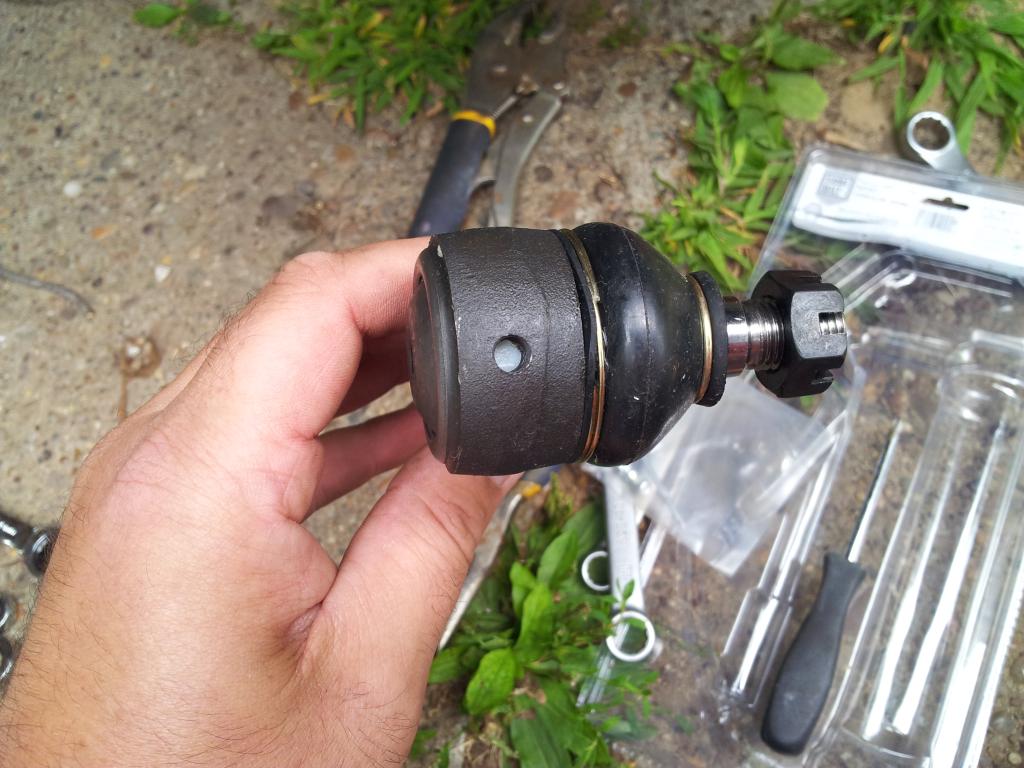
See this hole in the top of the new tie rod end? It wasn't on the original, sealed end. This hole is for a grease zerk. The new ends will come with zerks and cotter pins. Don't forget to install them!
The locking nuts on each side of the adjusting sleeve need to be broken loose and threaded away from the sleeve. The inner and outer tie rods are threaded oppositely, one right hand thread and one left hand thread.
Once those are moved out of the way, the tie rod ends can be unscrewed from the adjusting sleeve.
Next, thread your new/reused adjusting sleeve onto the new tie rod ends. Make sure you don't "bottom out" the sleeve when threading it onto them. You'll need room to adjust in both directions. You'll see in this pic that my new inner tie rod end did not come with a locking nut, so I had to reuse the old one...hence the reason for NOT using vice grips on it during disassemble. MAKE SURE you put the locking nuts on the ends BEFORE the adjusting sleeve.
See this hole in the top of the new tie rod end? It wasn't on the original, sealed end. This hole is for a grease zerk. The new ends will come with zerks and cotter pins. Don't forget to install them!
Last edited by Ringleader; 08-06-2014 at 02:18 PM.
08-06-2014, 01:03 PM
#5
Resident Worm Drowner
Thread Starter
Assembly is pretty much the reverse of removal. I put the outer on first.
Set the new outer tie rod end into the knuckle and thread on the nut. Tighten the nut down, then line up once it's tight, line up one of the channels in the nut with the hole through the threaded shaft. This is where you'll insert the new cotter pin.
Once tightened, insert the cotter pin and bend the pin around so it doesn't hit anything. The pin through the channels and the shaft will keep the tie rod from coming loose while driving.
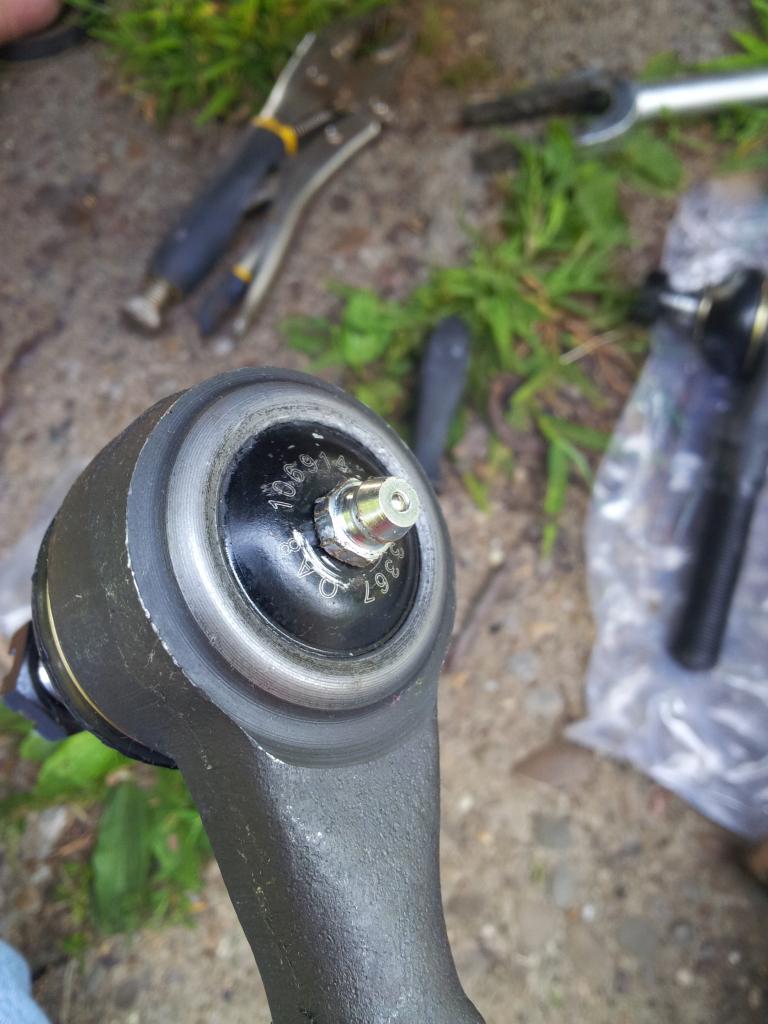
My inner tie rod end had two holes for the grease zerk. You can install it in the top or in the end, whichever is more convenient for you to get to when it needs grease. I put mine in the top, then put the provided plug into the unused end hole.

Now thread the inner tie rod end into the adjusting sleeve. Turn the adjusting sleeve and measure the center-to-center until you get the measurement you wrote down previously.
Then the same thing for the inner...insert, tighten, align channel with hole, insert cotter pin, bend pin over.
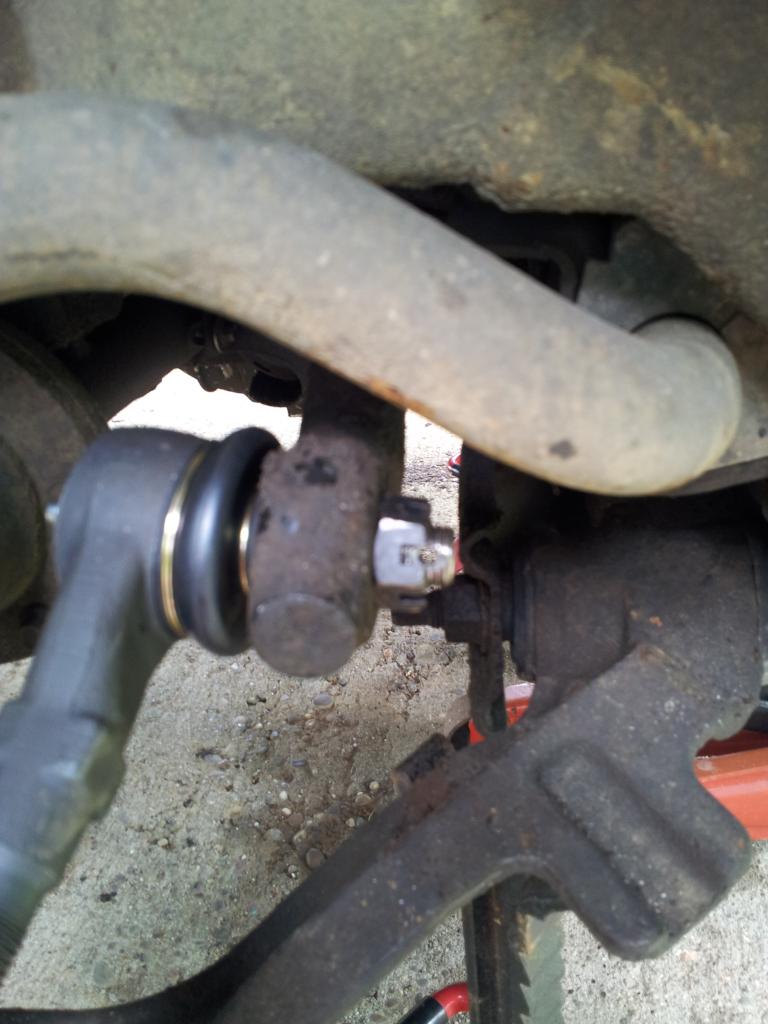
This is what you should have now. Notice the locking nuts are still not tightened to the adjusting sleeve.
Once you have the length matching the original, tighten the two locking nuts down onto the adjusting sleeve to keep it in that position. You will need an alignment after this, but you'll be close enough until you get to the shop.
Set the new outer tie rod end into the knuckle and thread on the nut. Tighten the nut down, then line up once it's tight, line up one of the channels in the nut with the hole through the threaded shaft. This is where you'll insert the new cotter pin.
Once tightened, insert the cotter pin and bend the pin around so it doesn't hit anything. The pin through the channels and the shaft will keep the tie rod from coming loose while driving.
My inner tie rod end had two holes for the grease zerk. You can install it in the top or in the end, whichever is more convenient for you to get to when it needs grease. I put mine in the top, then put the provided plug into the unused end hole.
Now thread the inner tie rod end into the adjusting sleeve. Turn the adjusting sleeve and measure the center-to-center until you get the measurement you wrote down previously.
Then the same thing for the inner...insert, tighten, align channel with hole, insert cotter pin, bend pin over.
This is what you should have now. Notice the locking nuts are still not tightened to the adjusting sleeve.
Once you have the length matching the original, tighten the two locking nuts down onto the adjusting sleeve to keep it in that position. You will need an alignment after this, but you'll be close enough until you get to the shop.
Last edited by Ringleader; 08-06-2014 at 02:27 PM.
08-06-2014, 01:03 PM
#6
Resident Worm Drowner
Thread Starter
Don't forget to put grease in the new tie rod ends. On new parts, I like to pump some grease in there, then use a small pick to push the ball valve down in the grease zerk to allow air out. Make sure not to overfill the joint. You can push/squeeze on the boot to feel how much pressure is on it.
Always check the grease after a little while to see if it needs more.
Reinstall your brackets, calipers, wheels, etc. and don't forget to check your lug nuts after 50 miles to be sure they're still tight.
If you have any additions, corrections, questions, or comments, please post! Hopefully this will help someone out.
Last edited by Ringleader; 08-06-2014 at 02:30 PM.