RX350 Retrofit into Spyder lights
 05-05-2016, 11:53 AM
#1
The shopping list:
2 x Lexus RX350 Bixenon Projectors (Non-AFS)
2 x STi-R Lens (A Stock)
2 x 50W: Morimoto XB55 Computer
2 x Morimoto XB Igniter (D2S)
OSRAM D2S CBI Cool Blue Intense Xenon HID Headlight Bulbs 5000K
MORIMOTO XC LED DEMON EYES (RGB)
2 x 80mm XSB 2.0 Switchback (V2)
4 x 3" XSB 2.0 Switchback (V2)
2 x 24" XSB 2.0 Switchback (V2)
VHT SP999 Nite-Shades Lens Cover Tint Translucent Black Paint Can - 10 oz.
4 x SVT Brake Caliper decals
Misc. hardware,metal,epoxy etc.
My biggest gripe with my last set of headlights were the switchback lights and there inability to stay amber constantly. Since I was after the amber look for night time driving, I was left a little disappointed when I finally figured out they could not run on amber continuously. I also wanted to do something with the side turn signal but overlooked it towards the end of the build.
This build I am sticking to the same concept but adding improvements based off the last build. I will be using the same aftermarket headlights as my base. Found All other parts were sourced from theretrofitsource.com
First things first, this time around I went ahead and baked the headlights for easy separation. 7 minutes @ 270�
While last time I did this with a heat gun and it was not too bad. This is definitely easier if you don't mind stinking up the house a little bit. Also given the fact it was 20-30� outside, I opted to work in the house.
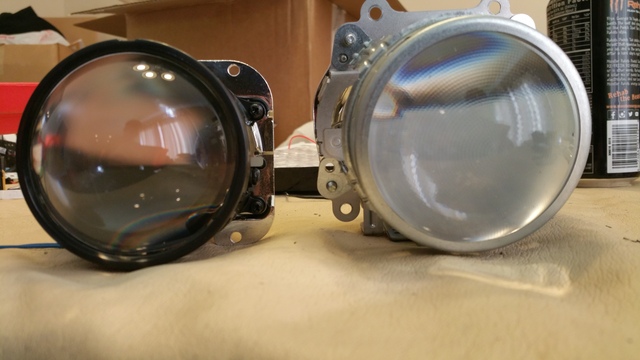
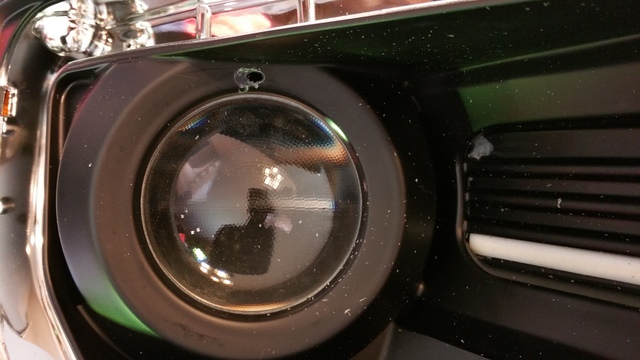
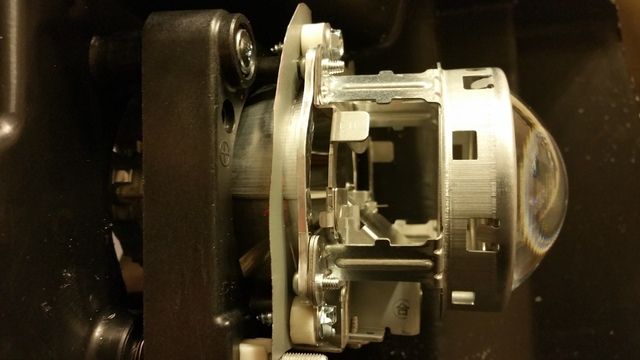
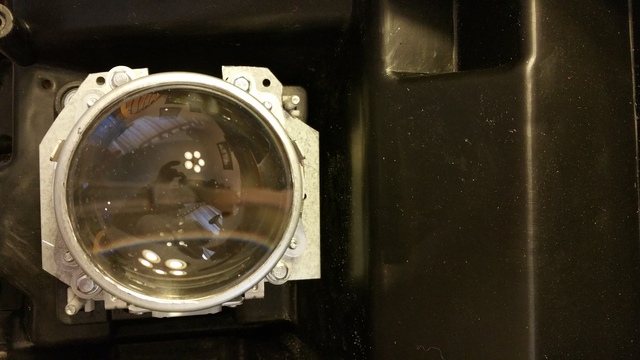
After taking the headlights apart I went and dismantled everything down to the shell. Here is a side by side of the projector the headlights comes with (left) and the RX350 projector to go in (right). They are both a 3" lens where as my last project I went with a 2.5" Mini H1. Definitely going to be a tight fit.
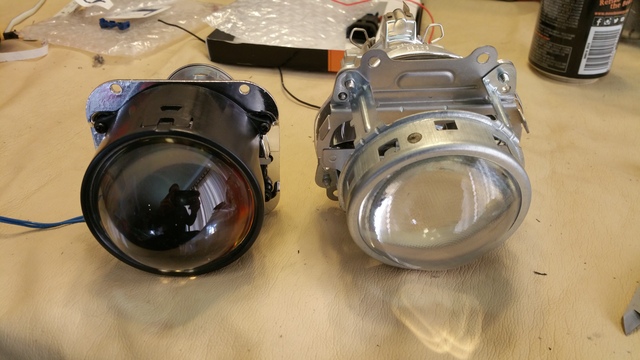
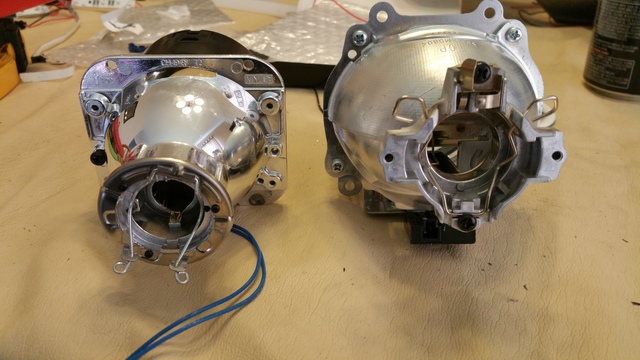
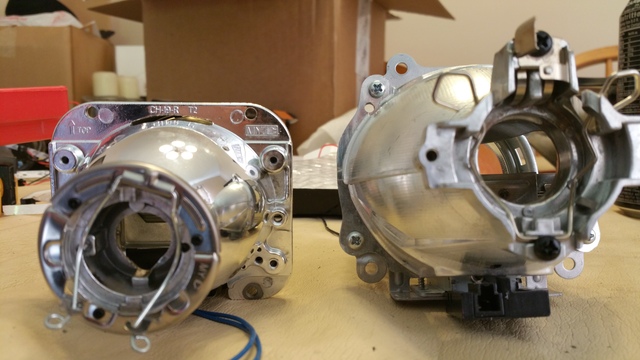
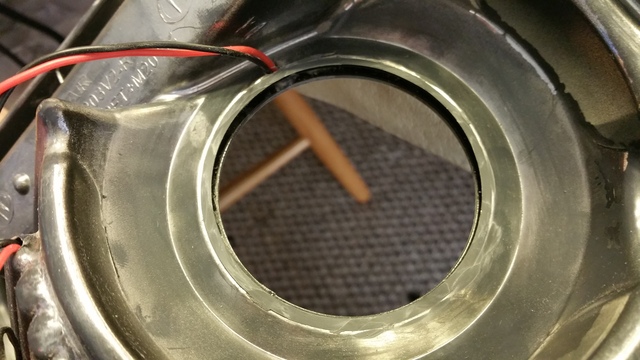
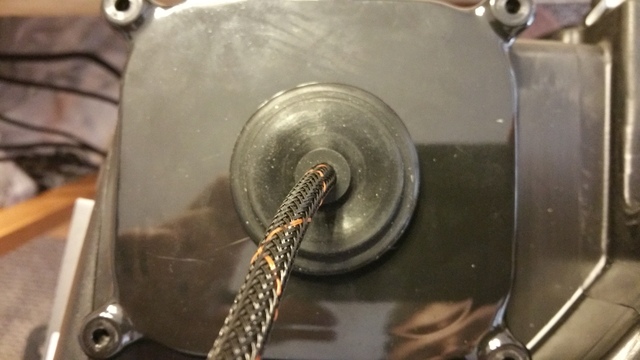
A view inside the RX350:
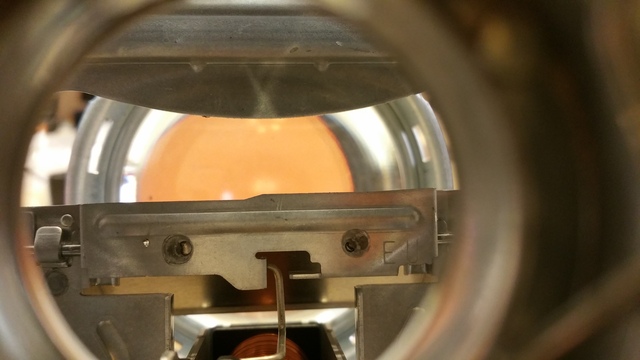
2 x Lexus RX350 Bixenon Projectors (Non-AFS)
2 x STi-R Lens (A Stock)
2 x 50W: Morimoto XB55 Computer
2 x Morimoto XB Igniter (D2S)
OSRAM D2S CBI Cool Blue Intense Xenon HID Headlight Bulbs 5000K
MORIMOTO XC LED DEMON EYES (RGB)
2 x 80mm XSB 2.0 Switchback (V2)
4 x 3" XSB 2.0 Switchback (V2)
2 x 24" XSB 2.0 Switchback (V2)
VHT SP999 Nite-Shades Lens Cover Tint Translucent Black Paint Can - 10 oz.
4 x SVT Brake Caliper decals
Misc. hardware,metal,epoxy etc.
My biggest gripe with my last set of headlights were the switchback lights and there inability to stay amber constantly. Since I was after the amber look for night time driving, I was left a little disappointed when I finally figured out they could not run on amber continuously. I also wanted to do something with the side turn signal but overlooked it towards the end of the build.
This build I am sticking to the same concept but adding improvements based off the last build. I will be using the same aftermarket headlights as my base. Found All other parts were sourced from theretrofitsource.com
First things first, this time around I went ahead and baked the headlights for easy separation. 7 minutes @ 270�
While last time I did this with a heat gun and it was not too bad. This is definitely easier if you don't mind stinking up the house a little bit. Also given the fact it was 20-30� outside, I opted to work in the house.
After taking the headlights apart I went and dismantled everything down to the shell. Here is a side by side of the projector the headlights comes with (left) and the RX350 projector to go in (right). They are both a 3" lens where as my last project I went with a 2.5" Mini H1. Definitely going to be a tight fit.


A view inside the RX350:

 05-05-2016, 11:53 AM
#2
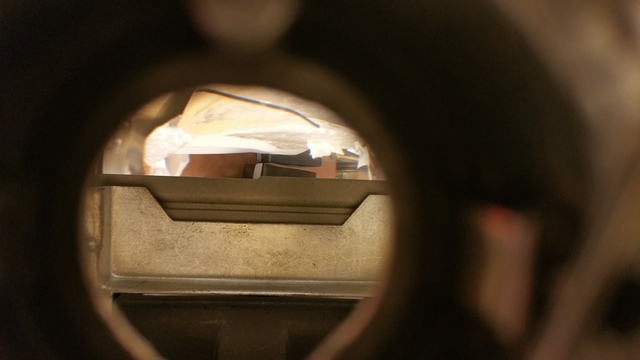
A view inside the stock projector:
Proceeded to drill holes for the led strips. Pretty much the same as the previous build.
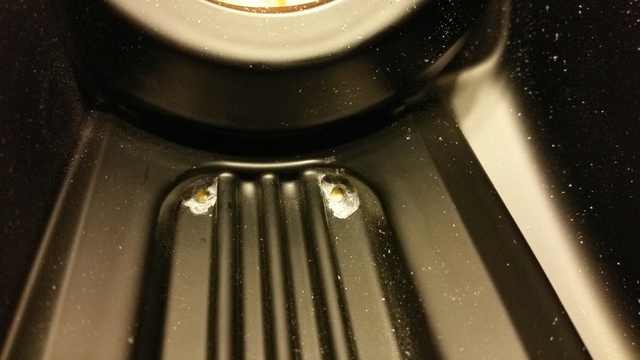
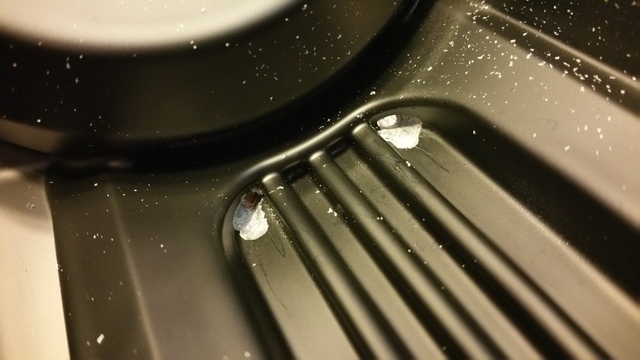
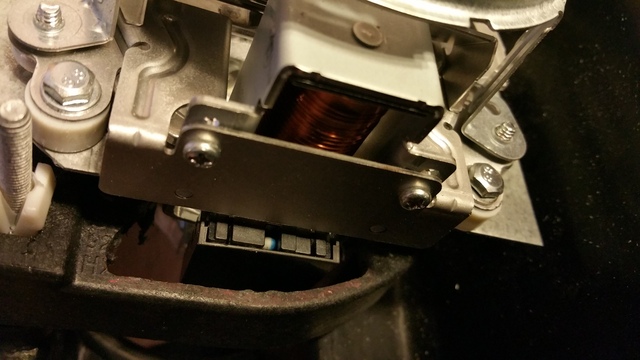
First thing that needs to happen to mount the projector is to make room for the high beam shield solenoid.
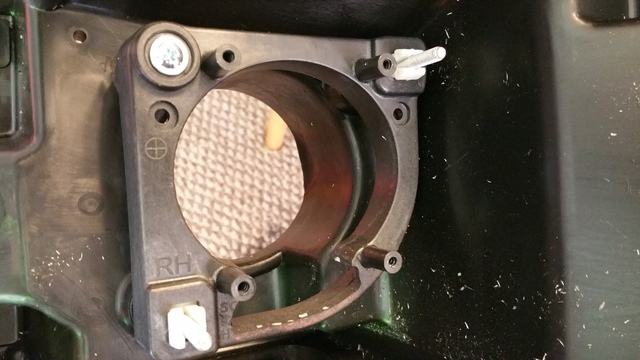

Proceeded to drill holes for the led strips. Pretty much the same as the previous build.


First thing that needs to happen to mount the projector is to make room for the high beam shield solenoid.
 05-05-2016, 11:54 AM
#3
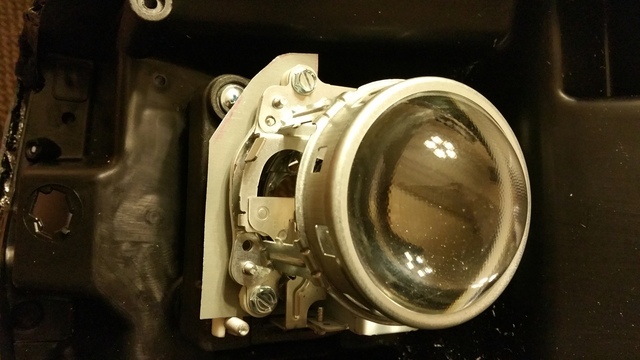
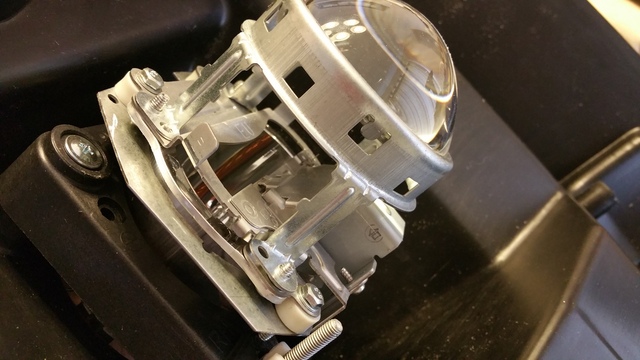
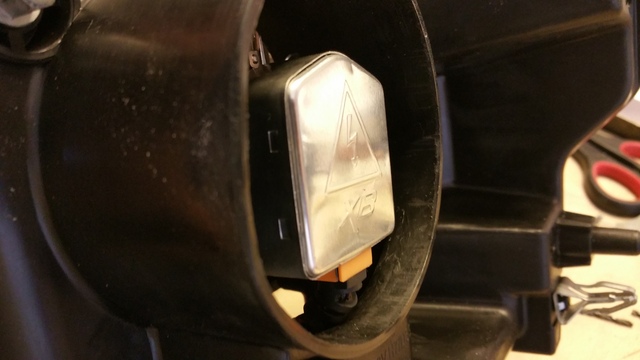
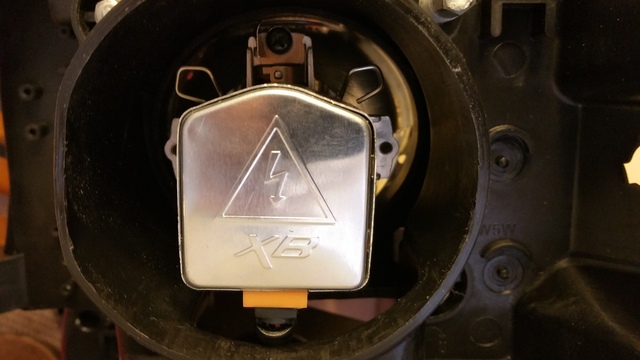
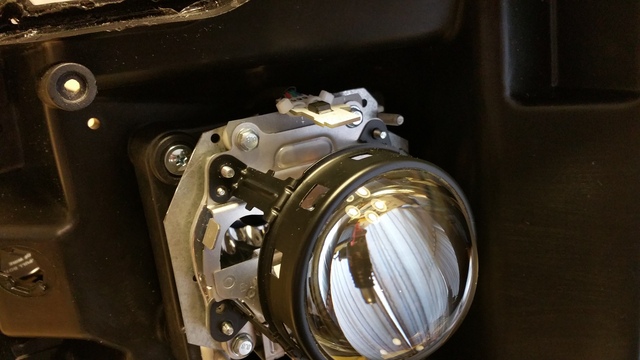
Test fitting the RX350. Things are going to get a little tricky here.
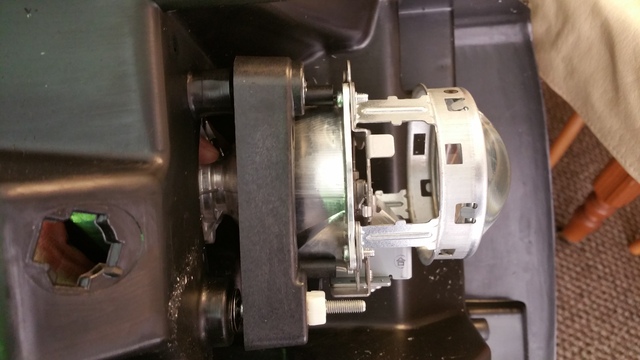
This guy is tight.
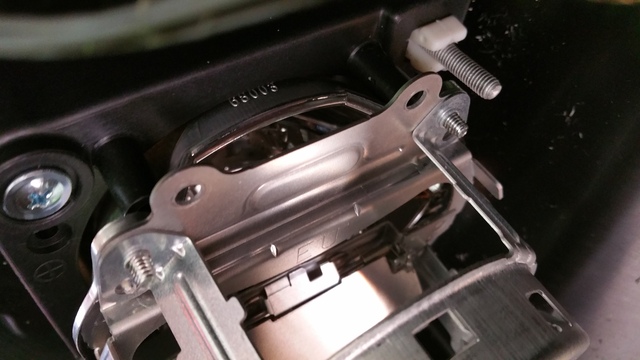
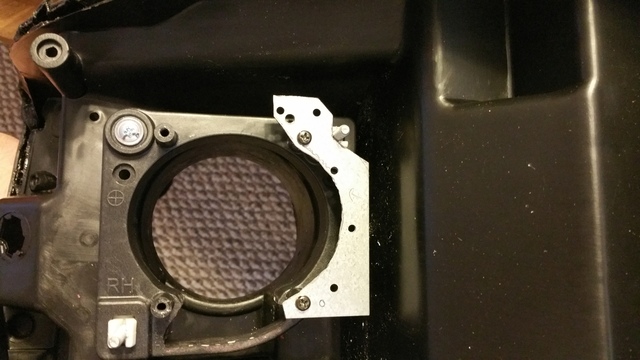
Next I mocked up some brackets out of thin sheet metal to get a template for the steel bracket later.

This guy is tight.

Next I mocked up some brackets out of thin sheet metal to get a template for the steel bracket later.


 05-05-2016, 11:55 AM
#4
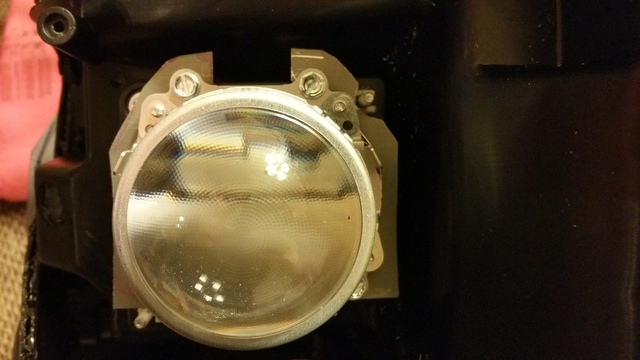
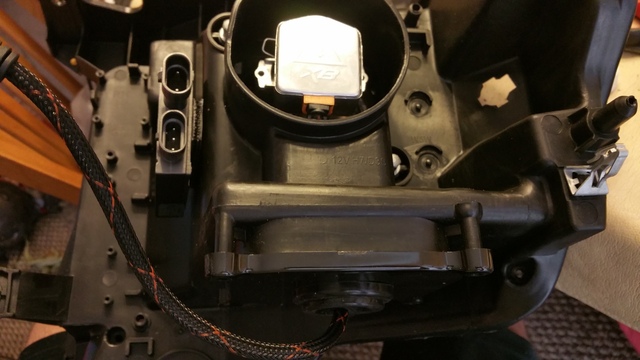
With the projector mocked up I went ahead and checked the clearance to the shroud. Just needs a little adjustment to center the projector in the shroud.(First pic) I also noticed here that the projector was going to possibly be a tad to long. I dialed back the stock mount with the adjustments screws and left a little bit of room to allow for alignment later on. This was probably going to work but I also went ahead and filed down the lip on the shroud. (Second pic)
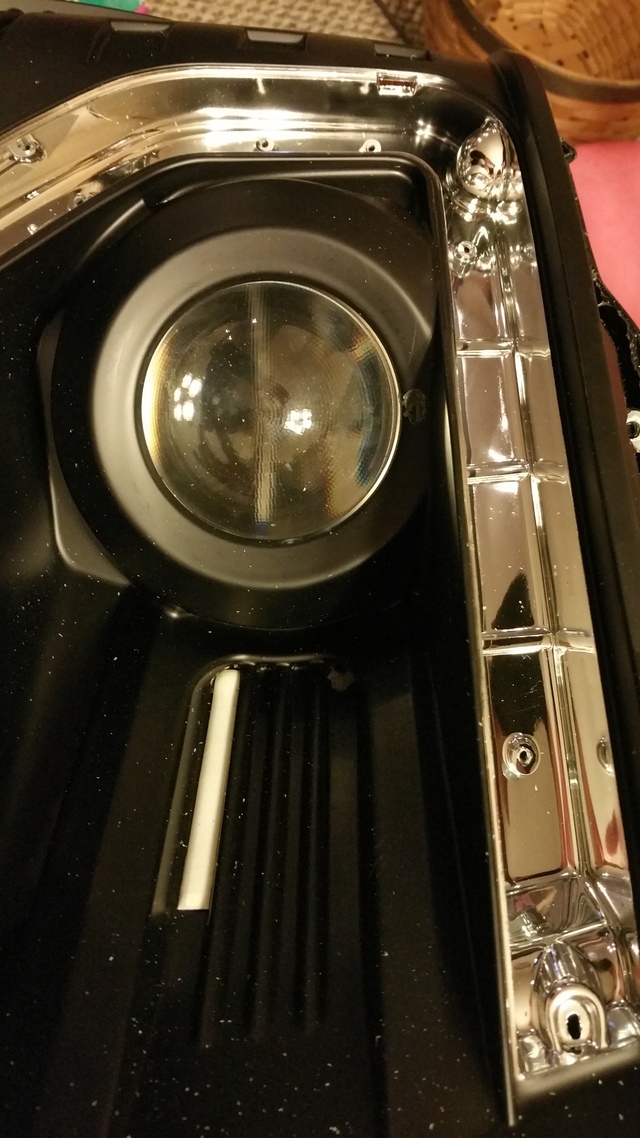
Shroud lip filed:
After the mock up was suitable I made the brackets out of steel.


Shroud lip filed:

After the mock up was suitable I made the brackets out of steel.
 05-05-2016, 11:56 AM
#5
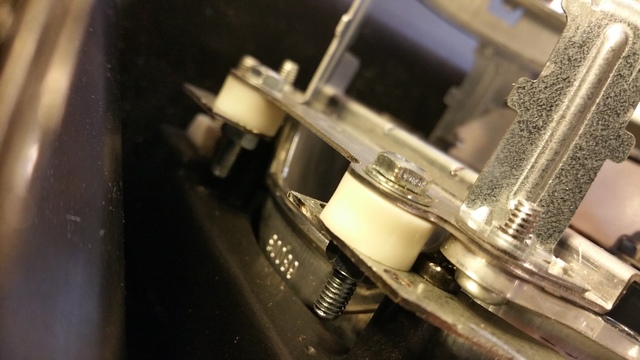
Here I had to get creative with hardware to fit this huge projector. After a few iterations I came to the final design of using nylon spacers with typical nuts and bolts.
Here is a good example of how tight clearances were.
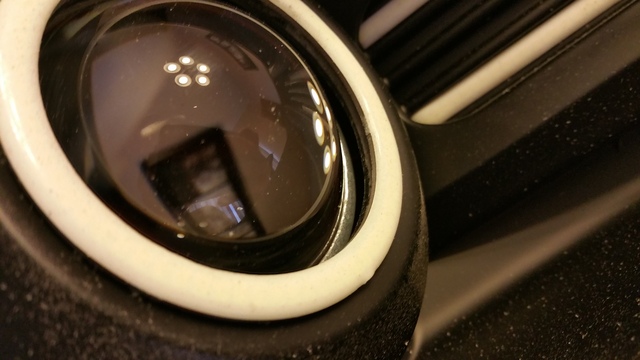
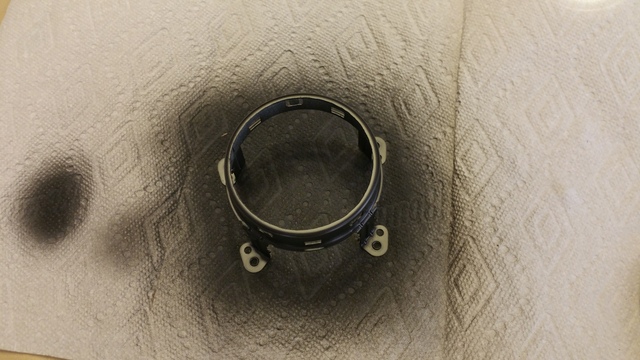
After the mounting portion was done I proceeded to modify the projector lens holder to install the STI-R lens. Since this is not a 1:1 part I had to slightly open the lens holder to accommodate the larger glass lens. If not modified, the lens would not lay flush in the holder and would distort the light cutoff. I could have spaced the lens and then space the holder to even it out but I did not have to room to make the projector an longer. I dont have any pictures yet of a side by side but you can see in the pictures above how the lens has changed. The stock one has a slight haze and dimples where as the STI-R is crystal clear.
After the lens holder was modified I sprayed the holder black to blend in better with the shroud after installation.
Installation of the D2S amp connector. Another tight fit.
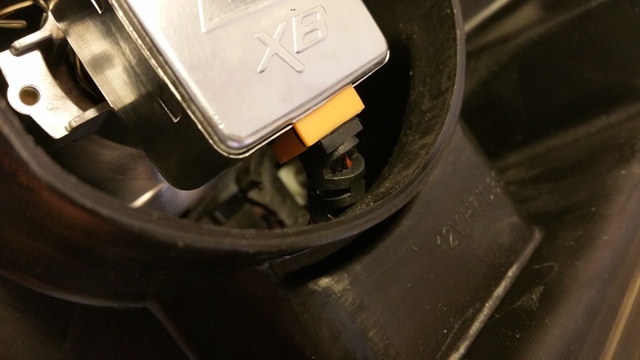


Here is a good example of how tight clearances were.

After the mounting portion was done I proceeded to modify the projector lens holder to install the STI-R lens. Since this is not a 1:1 part I had to slightly open the lens holder to accommodate the larger glass lens. If not modified, the lens would not lay flush in the holder and would distort the light cutoff. I could have spaced the lens and then space the holder to even it out but I did not have to room to make the projector an longer. I dont have any pictures yet of a side by side but you can see in the pictures above how the lens has changed. The stock one has a slight haze and dimples where as the STI-R is crystal clear.
After the lens holder was modified I sprayed the holder black to blend in better with the shroud after installation.

Installation of the D2S amp connector. Another tight fit.


 05-05-2016, 11:57 AM
#6
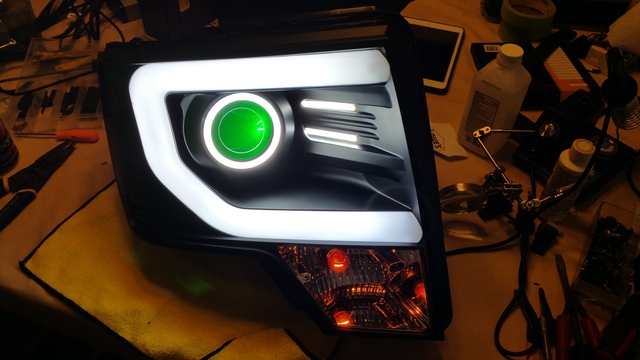
New to this build is a RGB demon eyes kit.
Just made a simple bracket with sheet metal and mounted it to the projector.
I was going to use some hardware here but the bolt was too close to the electrical components on the board so I opted to use the zip ties. This thing is not going to move.
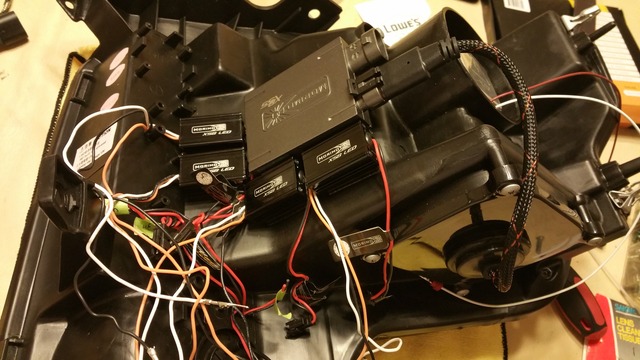
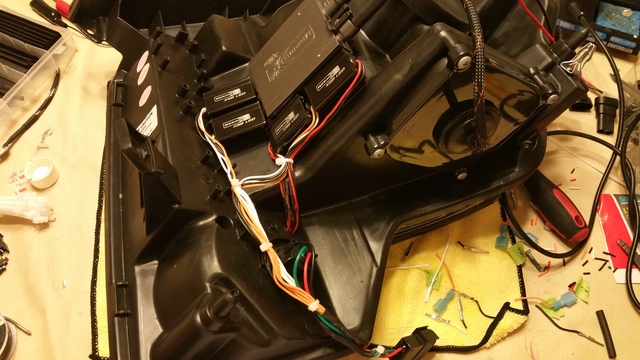
Here I mounted the ballast similar to my last build but had to rotate it for the amp to be able to reach. Also shown is the new switchback light power supplies. Once again, everything here was mounted with 3m dual-lock tape.
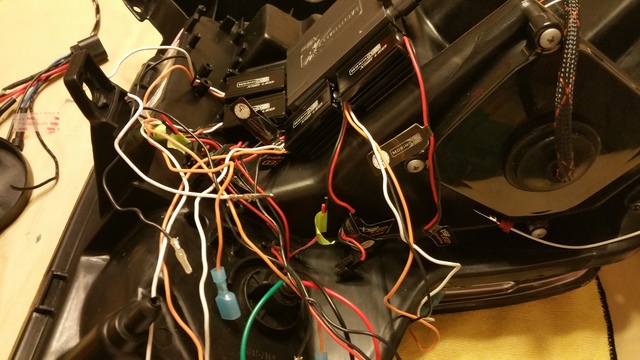
The mess of wires that need to be terminated.
After soldering:
Testing all the lights:

Just made a simple bracket with sheet metal and mounted it to the projector.
I was going to use some hardware here but the bolt was too close to the electrical components on the board so I opted to use the zip ties. This thing is not going to move.

Here I mounted the ballast similar to my last build but had to rotate it for the amp to be able to reach. Also shown is the new switchback light power supplies. Once again, everything here was mounted with 3m dual-lock tape.

The mess of wires that need to be terminated.

After soldering:

Testing all the lights:


 05-05-2016, 12:01 PM
#7

I also installed some LED turn signal bulbs after looking at various designs.
I like these bulbs as they have LEDs in all directions.


Here are a few shots of one headlights output.


Trending Topics
05-05-2016, 12:03 PM
#8
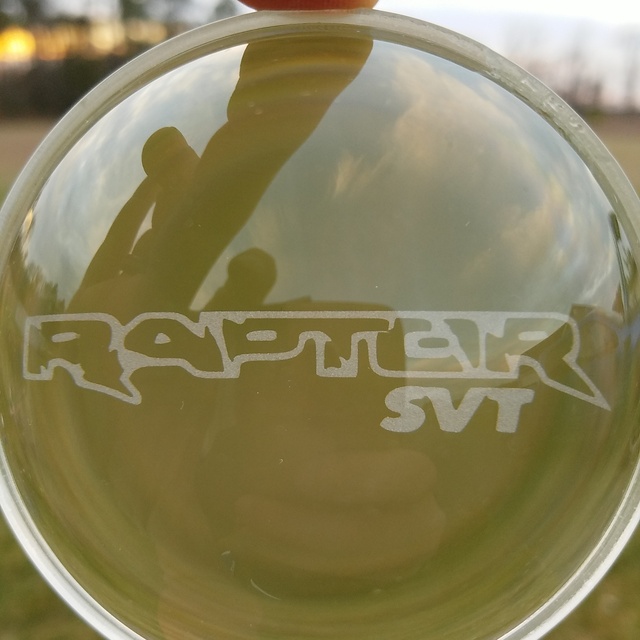
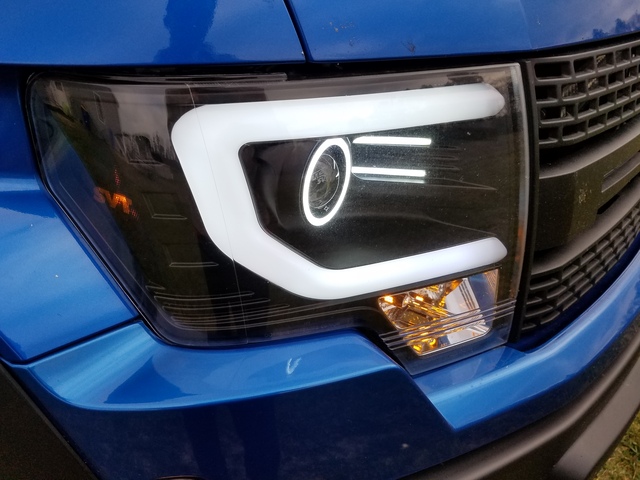
Custom etched lens which came out great.
Here is a little side by side with it lit.
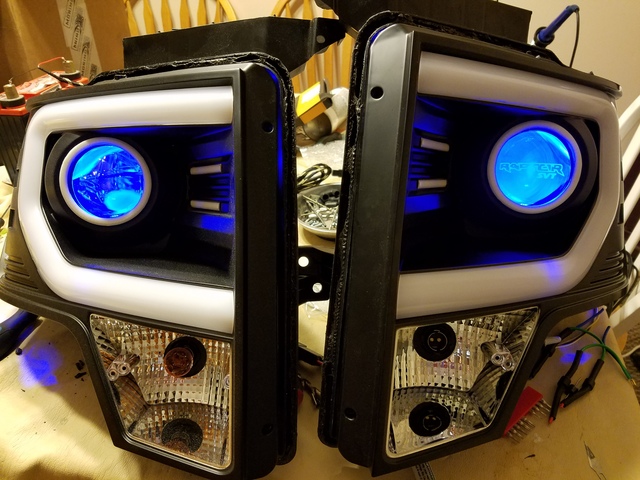
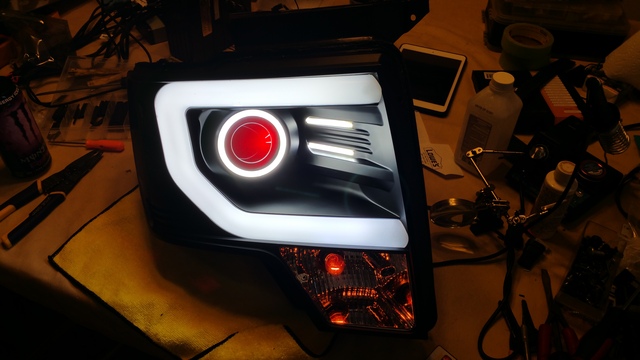
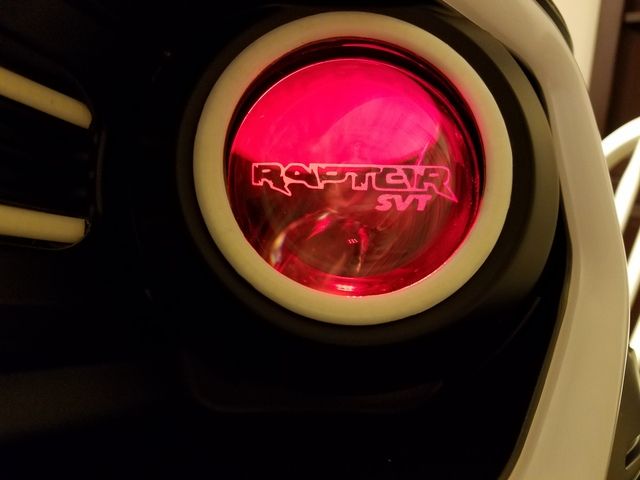
Lit with red. Don't mind the gap as the shroud is not installed.
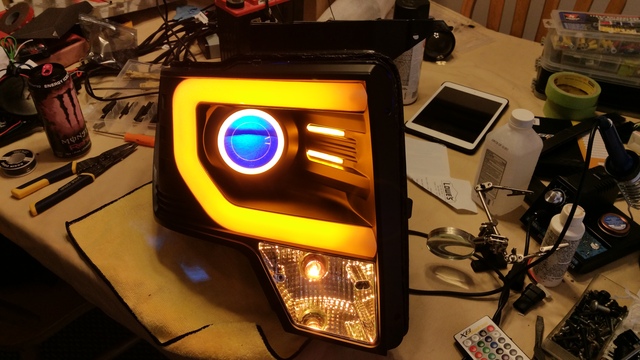
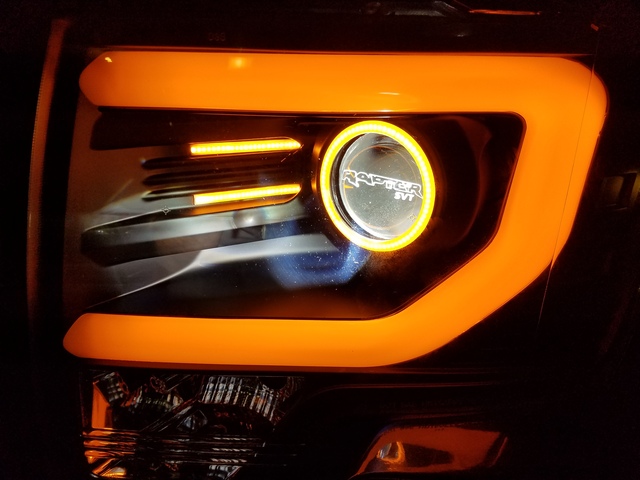
Close up of the headlights on and the accent lights on full amber.
And a shot showing them installed.

Here is a little side by side with it lit.

Lit with red. Don't mind the gap as the shroud is not installed.

Close up of the headlights on and the accent lights on full amber.

And a shot showing them installed.

Last edited by M3TOSVT; 05-05-2016 at 12:07 PM.
05-05-2016, 12:05 PM
#9
What really makes these projectors great are how wide of a beam they project. Back road driving is awesome when you just light up the entire side of the road and well beyond that.
Below is a shot I took with my phone on a back road.
The photo cant quite do the lights justice, but gives you an idea of their intensity.
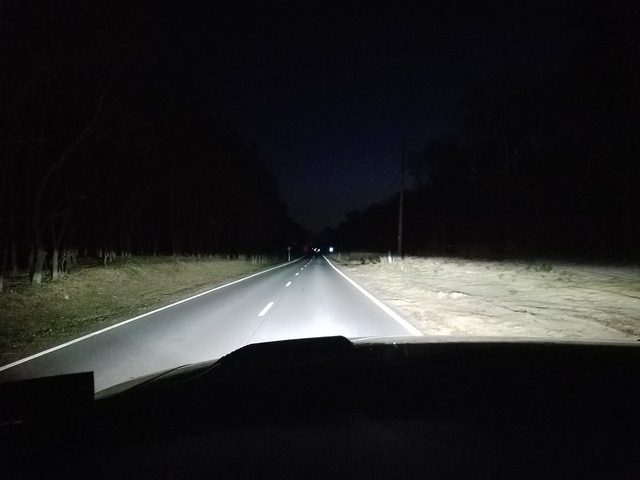
If I am ever to get some free time I will take some much better pictures with my DSLR and post them up.
Below is a shot I took with my phone on a back road.
The photo cant quite do the lights justice, but gives you an idea of their intensity.

If I am ever to get some free time I will take some much better pictures with my DSLR and post them up.
The following users liked this post:
rocketsurgeon (05-07-2016)
