HID review and how to
 10-29-2009, 10:43 AM
#1
Senior Member
Thread Starter

I had been thinking about making the switch to HIDs for a while now and when Jon was looking for test vehicles I jumped to the occasion. I sent the payment and within a day, I had a tracking number and confirmation of my purchase. My tracking number didn't go anywhere however, so I messaged Jon. He had contacted the USPS and found out they had lost my package. Jon took care of everything for me and two days later, I had my lights.
This installation went smoothly. I tried taking a bunch of pictures and I'll try to walk it through step by step, however my camera skills are not the greatest.
1. I started by reading the guidelines and diagram that came with the lights and hooking everything up on my living room floor to make sure all the connections were correct.
Here is the entire system set up. Keep the bulbs in the packaging until you put them in the headlights. DO NOT touch the bulbs.

Here is a closer look at the ballast and light hook up. The ballasts came with a bracket which was very nice when we get to the installation and seems well built.

2. Here are the tools you're going to need for the install:
-two flat screw drivers
-one 5/16 wrench
-two 10mm wrenches
- a drill and a small drill bit (if you decide to mount the driver's side ballast like I did)
- zip ties (the package did include these but I used extra)
- one to two hours of time
- electrical tape
- Philips head screw driver
3. First off, safety first. I know we're not working with high voltage/amp stuff here but it's always a good idea to disconnect the ground cable to the battery.

4. Now lets look at how to get some working room under the hood. You'll see a plastic cover that encloses the front of the radiator and goes around the headlights. This has to be removed to get to the stock harness and to mount the new harness. Start by taking out the spare tire crank that connects to this piece.

5. To take this cover off you will need to remove the tabs that hold it in place. There are several over the cover. They are black friction screws that hold it in place. To remove simply slide a flat screw driver under each side and gently pull up. There are also Phillips head screws around the bottom of the cover to remove.

6. Take this piece off and you will see the back of the headlights and the harness. The harness lays in front and up slightly of the radiator.
7. To take the headlights out, pull up on the two black pull tabs on either back side of the light. It will move so the rubber stoppers can slide through the hole and out.
8. Gently wiggle and pull until the headlight comes out. Disconnect the harness from each headlight.
9. To take the stock light out, turn counter clockwise on the black plastic collar that holds the bulb in place. I saved all my stock parts just in case.
10. Take the new HID bulb and lightly press it into the collar so it stays in place and put it into the headlight casing.


11. Now finding a place for the ballast. Each truck is going to be slightly different depending on engine for space. For my passenger side there was a bunch of holes next to the radiator. I bolted the top of the ballast bracket to the hole and the bottom I zip tied because no hole matched up. I seems very secure and is facing up so there's no way the ballast can fall out.


12. Now for the driver's side I had more problems to figure out where to put it. My CAI was in the way and also the coolant reservoir was in the way. I went under my front bumper and found a flat gray plastic piece that is directly below the headlight and has a small opening to get the wires snaked through.You can see the little spots (sorry I only had white paint marker) I made to know where to drill my holes.

and the finished after using the bolts they provided.
This installation went smoothly. I tried taking a bunch of pictures and I'll try to walk it through step by step, however my camera skills are not the greatest.
1. I started by reading the guidelines and diagram that came with the lights and hooking everything up on my living room floor to make sure all the connections were correct.
Here is the entire system set up. Keep the bulbs in the packaging until you put them in the headlights. DO NOT touch the bulbs.
Here is a closer look at the ballast and light hook up. The ballasts came with a bracket which was very nice when we get to the installation and seems well built.
2. Here are the tools you're going to need for the install:
-two flat screw drivers
-one 5/16 wrench
-two 10mm wrenches
- a drill and a small drill bit (if you decide to mount the driver's side ballast like I did)
- zip ties (the package did include these but I used extra)
- one to two hours of time
- electrical tape
- Philips head screw driver
3. First off, safety first. I know we're not working with high voltage/amp stuff here but it's always a good idea to disconnect the ground cable to the battery.
4. Now lets look at how to get some working room under the hood. You'll see a plastic cover that encloses the front of the radiator and goes around the headlights. This has to be removed to get to the stock harness and to mount the new harness. Start by taking out the spare tire crank that connects to this piece.
5. To take this cover off you will need to remove the tabs that hold it in place. There are several over the cover. They are black friction screws that hold it in place. To remove simply slide a flat screw driver under each side and gently pull up. There are also Phillips head screws around the bottom of the cover to remove.
6. Take this piece off and you will see the back of the headlights and the harness. The harness lays in front and up slightly of the radiator.
7. To take the headlights out, pull up on the two black pull tabs on either back side of the light. It will move so the rubber stoppers can slide through the hole and out.
8. Gently wiggle and pull until the headlight comes out. Disconnect the harness from each headlight.
9. To take the stock light out, turn counter clockwise on the black plastic collar that holds the bulb in place. I saved all my stock parts just in case.
10. Take the new HID bulb and lightly press it into the collar so it stays in place and put it into the headlight casing.
11. Now finding a place for the ballast. Each truck is going to be slightly different depending on engine for space. For my passenger side there was a bunch of holes next to the radiator. I bolted the top of the ballast bracket to the hole and the bottom I zip tied because no hole matched up. I seems very secure and is facing up so there's no way the ballast can fall out.
12. Now for the driver's side I had more problems to figure out where to put it. My CAI was in the way and also the coolant reservoir was in the way. I went under my front bumper and found a flat gray plastic piece that is directly below the headlight and has a small opening to get the wires snaked through.You can see the little spots (sorry I only had white paint marker) I made to know where to drill my holes.
and the finished after using the bolts they provided.
 10-29-2009, 10:45 AM
#2
Senior Member
Thread Starter

13. Now you're ready to attach the new harness. Set it over the truck and get everything squared away before you start attaching anything. I took and got it centered and loosely attached it to my stock harness first. Remember to tighten everything down when you're done.

14. There is a wire that has to go the the positive side of the battery and each side has to be grounded. I used the stock grounds and put the positive in the bolt that attaches the cable to the battery. Here is the ground being put in.

15. Tape up the driver's side stock plug. It is not needed and I didn't want dirt etc getting in the plug. For the passenger's side there is a blue plug that must be connected to the stock control. There is also the small black box that the positive wire came from. Zip tie it somewhere convenient and secure.
Here is what wires you should have coming from each place.


16. Plug all the wires in put the headlights loosely into the housings. Reattach the ground to the battery and ensure the lights are working. If not refer to the instructions on how the ballasts and everything are connected. There is only one way to plug everything in so don't try and force anything! Tighten all zip ties and wires. Ensure nothing is touching the radiator or anywhere that can get hot.
17. If everything is good to good put the headlights back in and put in the shield. You are probably going to have to adjust the lights so as not to blind other drivers.
Before:


After:


The pictures really don't do it justice to how much they help. These are bi xenon 5000k 35 watt HIDs. They do take a little to warm up to full strength, 5-10 minutes in 40 degree Fahrenheit weather. But even while they are cold they are still better than stock. The high/low transition is flawless, I had worries they would flicker but I have not had that trouble. For more info on this kit contact Jon_To on this forum. He said the website is still a work in progress for the company. Overall I'm very pleased. Jon was always quick to return a message and was very prompt in fixing the shipping troubles. Hope this helps everyone with their HID installations.
Last edited by otto457; 10-29-2009 at 01:01 PM.


Trending Topics
11-03-2009, 08:24 AM
#8
Administrator

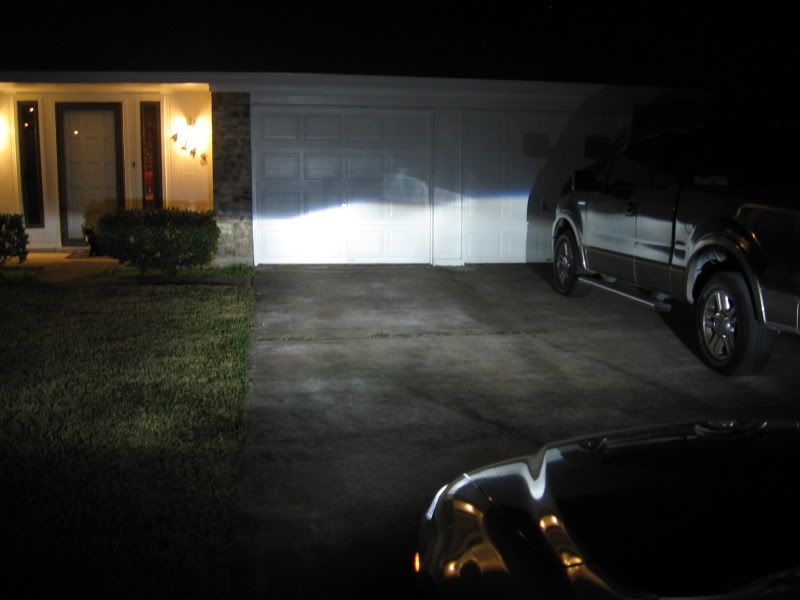
Just as a point of reference, here is the output I got from the installation of an Apexcone 35w 6000k HID system into my wife's 2007 Mazda6. Don't mind the glare off my garage door, it's from the running board on the truck.
11-04-2009, 07:02 AM
#10
Senior Member
Join Date: Oct 2008
Location: Lake Chares, La
Posts: 867
Likes: 0
Received 0 Likes
on
0 Posts

Any static problems when using the radio? I am thinking about picking up a set of these but the last set I bought gave me terrible static through my radio. Let me know