KevinMac's 2016 XLT Build
 08-21-2016, 08:33 PM
#21
Member
Thread Starter


The following users liked this post:
Fomocof150 (08-23-2016)
09-02-2016, 03:05 PM
#22
Member
Thread Starter
Found a few minutes this week to finish a few minor upgrades. First up, I found a used K&N filter on eBay. The seller had traded his 2015 in already so his loss was my gain! 
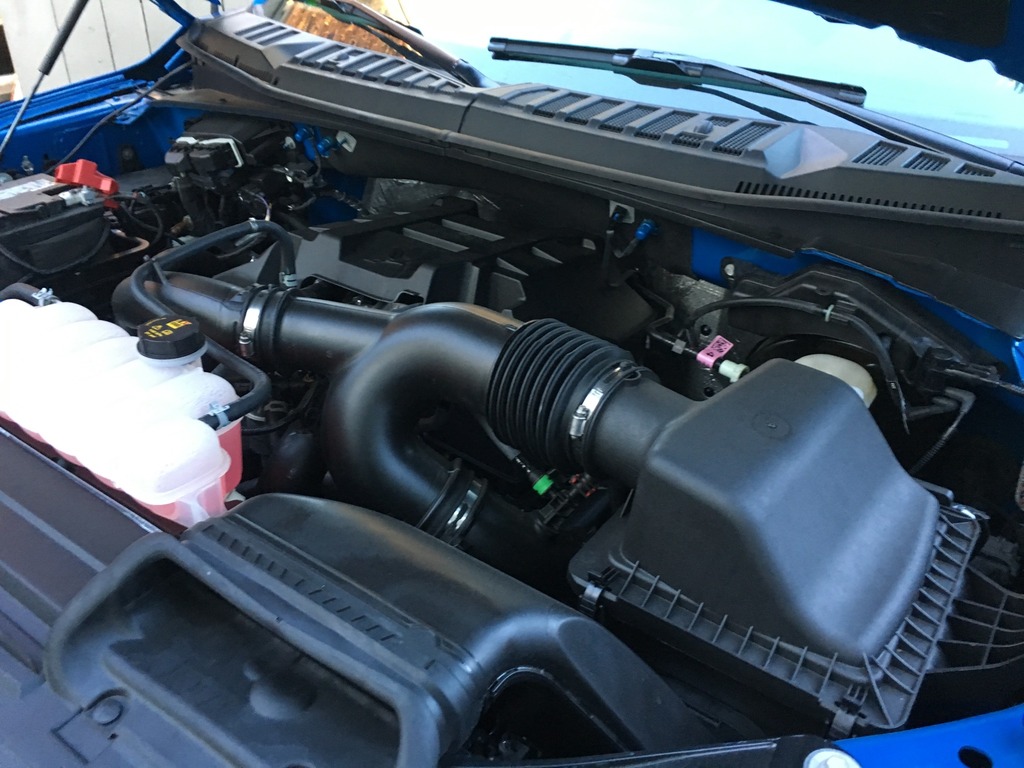
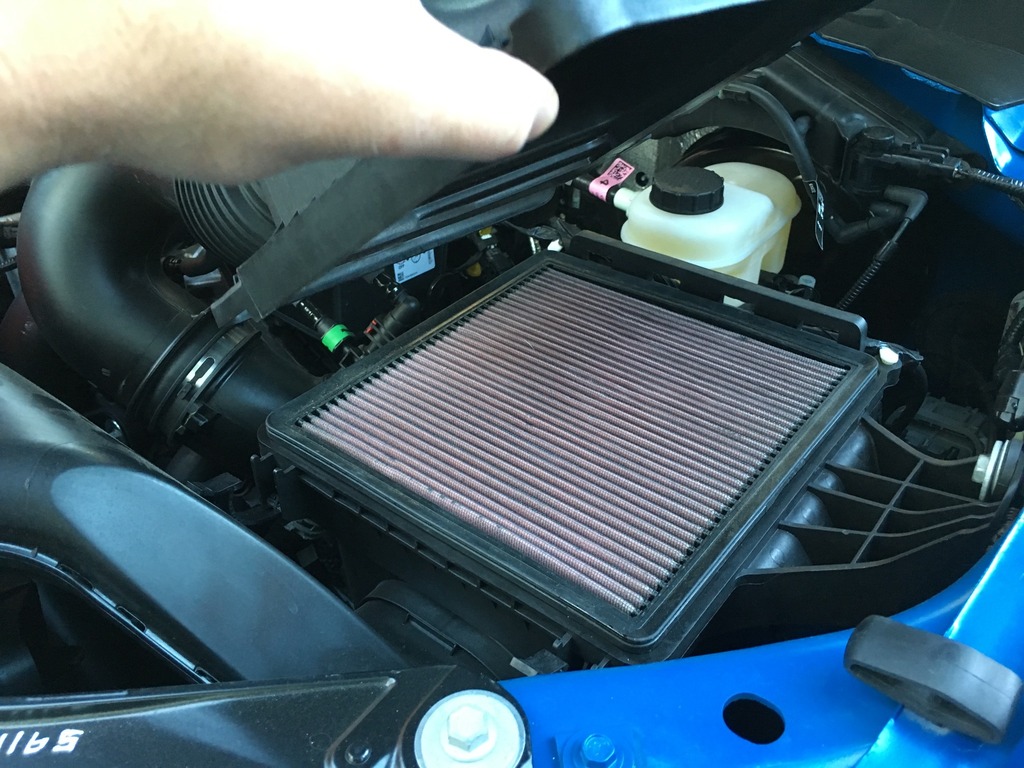
Cost: $30


Cost: $30

 09-02-2016, 03:19 PM
#24
Member
Thread Starter
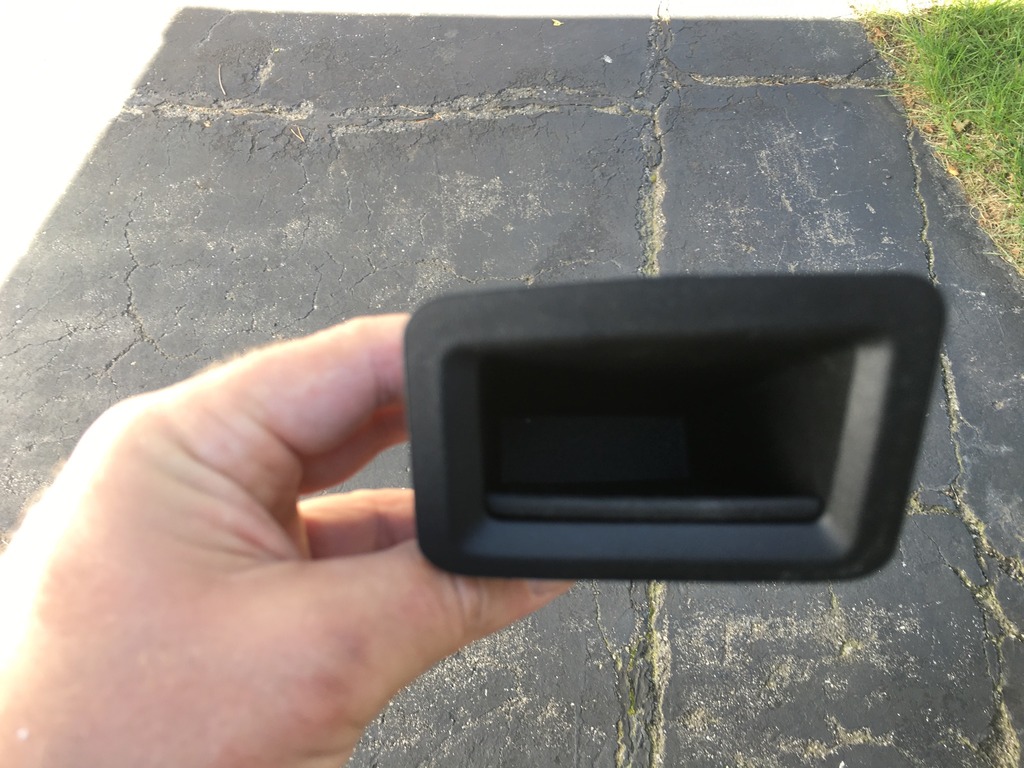
Last but not least, I installed the factory trailer brake controller (TBC). It replaces what is truly a USELESS cubby hole to the lower right of the steering wheel.
The install on this thing was a pain in the *** as lots of trim pieces need to be removed. Install time was probably about 45 minutes. There are a lot of videos on YouTube detailing how to disassemble the dash. In addition to that, the is a good thread with lots of input that can be found here:
https://www.f150forum.com/f118/trail...2015-a-309869/
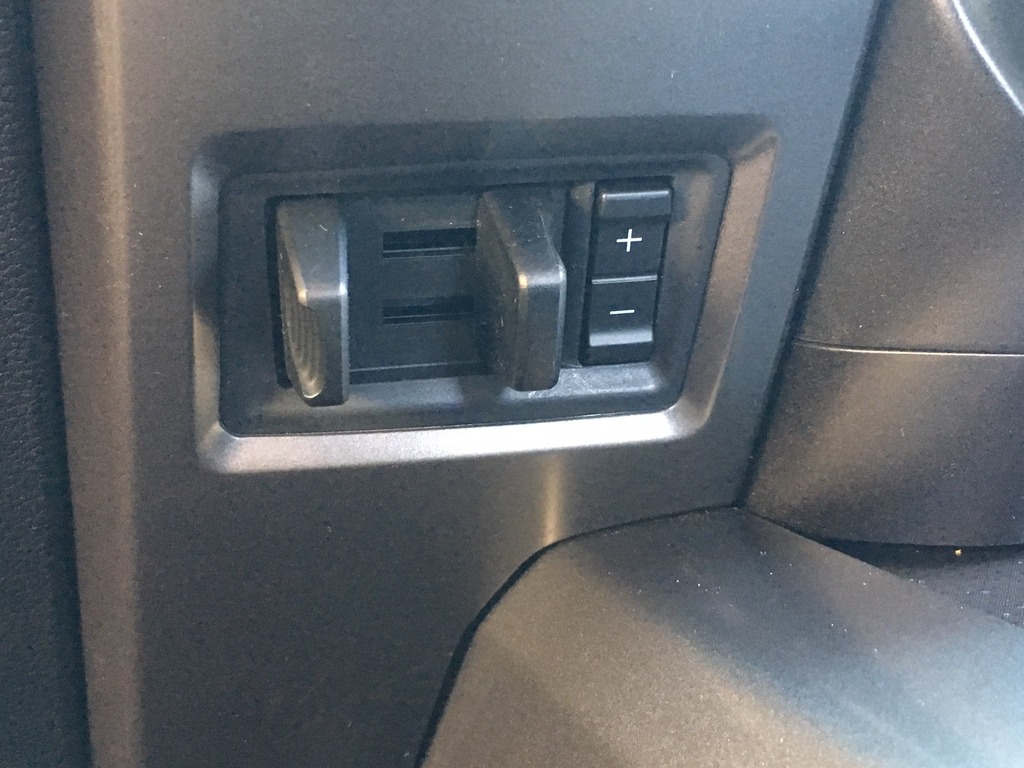
Important to note! Installing the TBC will not enable it. You must have the dealer flash your truck to enable the TBC, otherwise no voltage will be sent to the plug at the rear bumper and the brakes will not engage. If you have FORscan, you can also enable it and skip the trip to the dealer!
Cost: $84
The install on this thing was a pain in the *** as lots of trim pieces need to be removed. Install time was probably about 45 minutes. There are a lot of videos on YouTube detailing how to disassemble the dash. In addition to that, the is a good thread with lots of input that can be found here:
https://www.f150forum.com/f118/trail...2015-a-309869/


Important to note! Installing the TBC will not enable it. You must have the dealer flash your truck to enable the TBC, otherwise no voltage will be sent to the plug at the rear bumper and the brakes will not engage. If you have FORscan, you can also enable it and skip the trip to the dealer!
Cost: $84
09-05-2016, 02:59 PM
#25
Member
Thread Starter
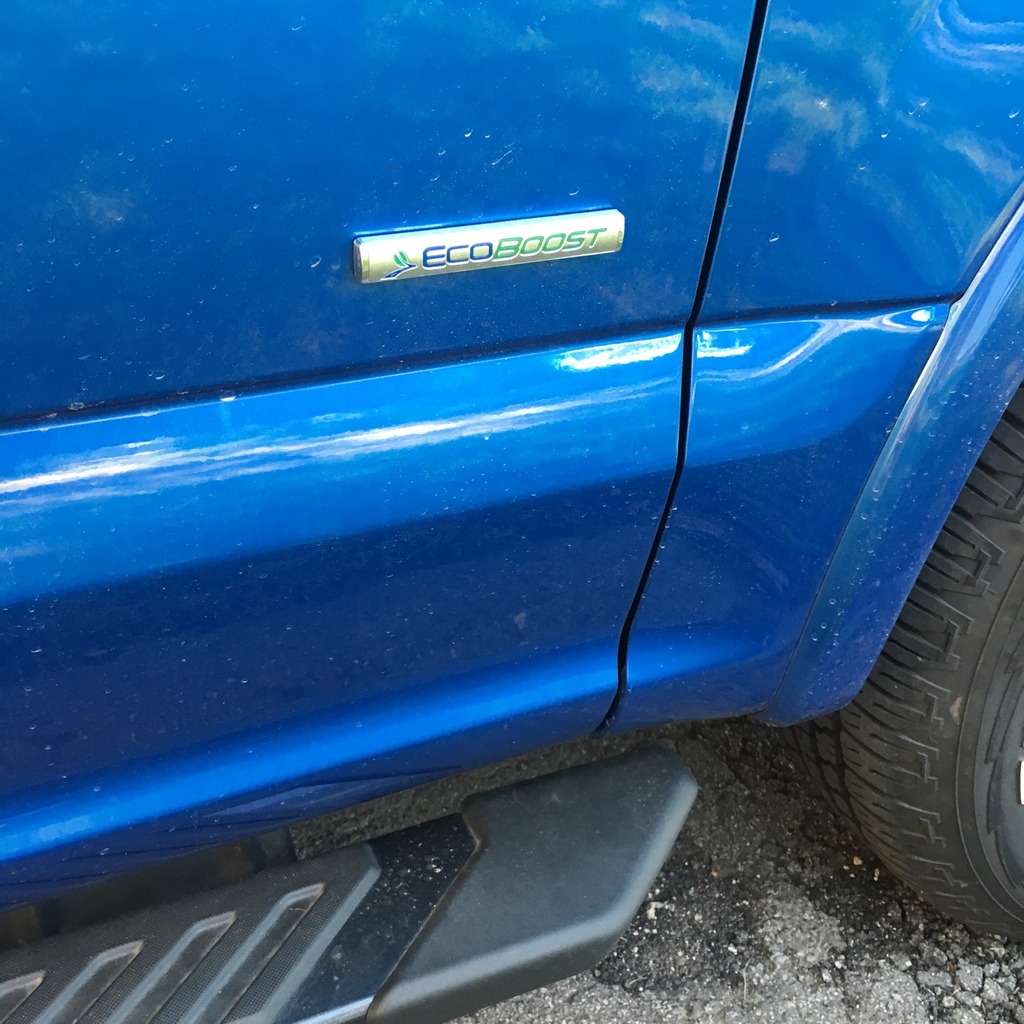
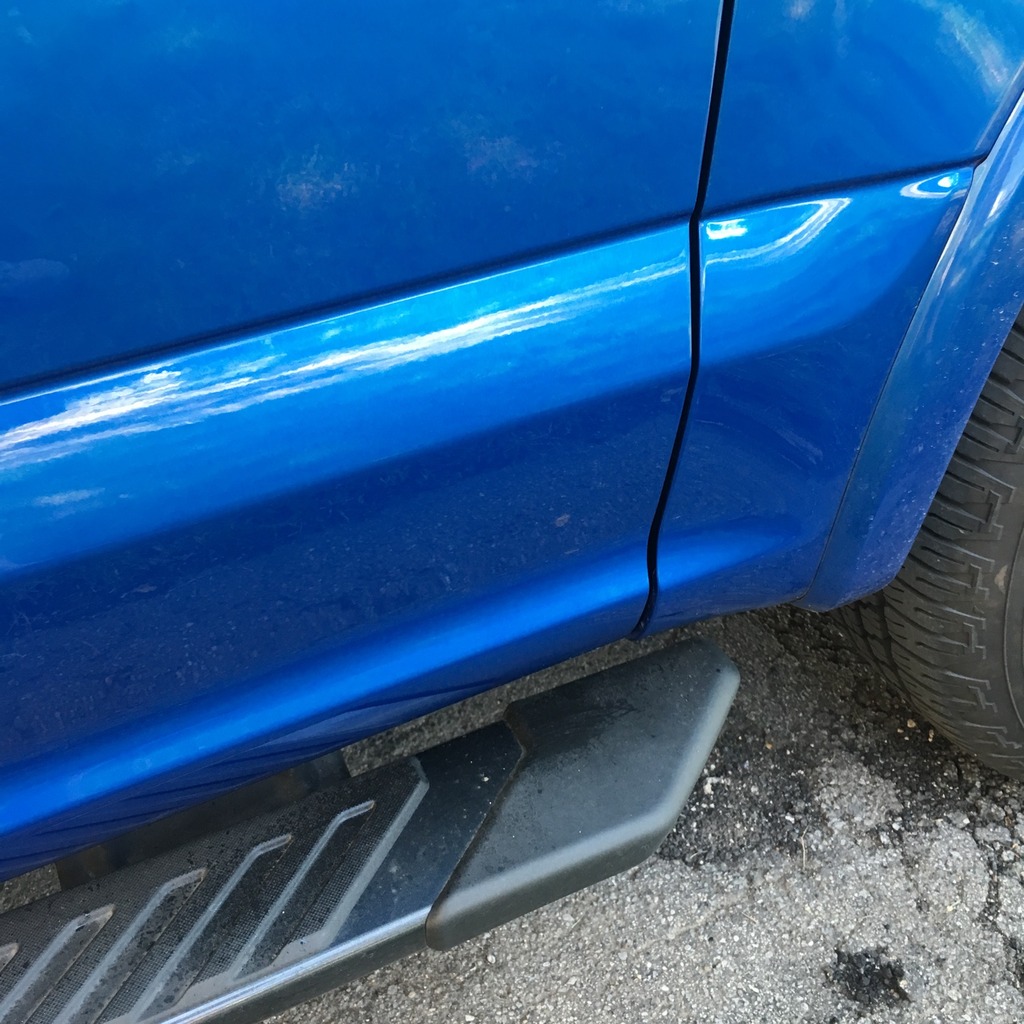
Happy Labor Day all! Before the BBQ activities start, I spent a few minutes on the truck today. I finished the last of the debadging with the removal of the "ECOBOOST" decals on the door. These were a bit difficult to get off.
I didn't want to chance a heat gun on the paint so I just parked it in the sun for a while, it is good and hot today. Then as I pried, I poked at the adhesive with a wood skewer to help pull it away, without damaging paint.
Cost: Freebie!
I didn't want to chance a heat gun on the paint so I just parked it in the sun for a while, it is good and hot today. Then as I pried, I poked at the adhesive with a wood skewer to help pull it away, without damaging paint.


Cost: Freebie!
09-05-2016, 03:21 PM
#26
Member
Thread Starter
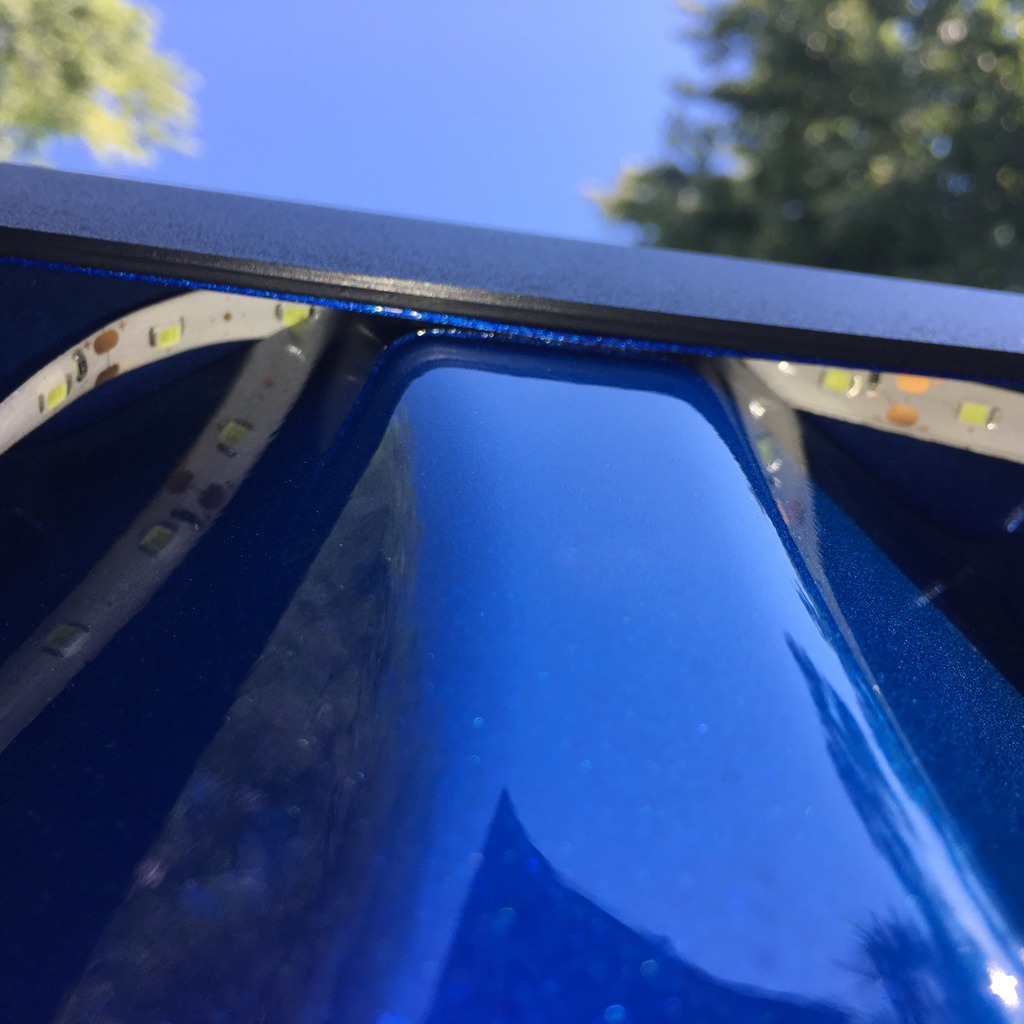
Next up, I started running the LED bedlights. My truck came with the LED pods on each side of the bed and it was a step up from my 2004 SCREW, which had no lighting. But, since the wiring is already there, why not add some additional lights?  The factory lights are OK but really don't illuminate the bed all that well.
I started with a roll of waterproof 12v LEDs that I got on eBay.
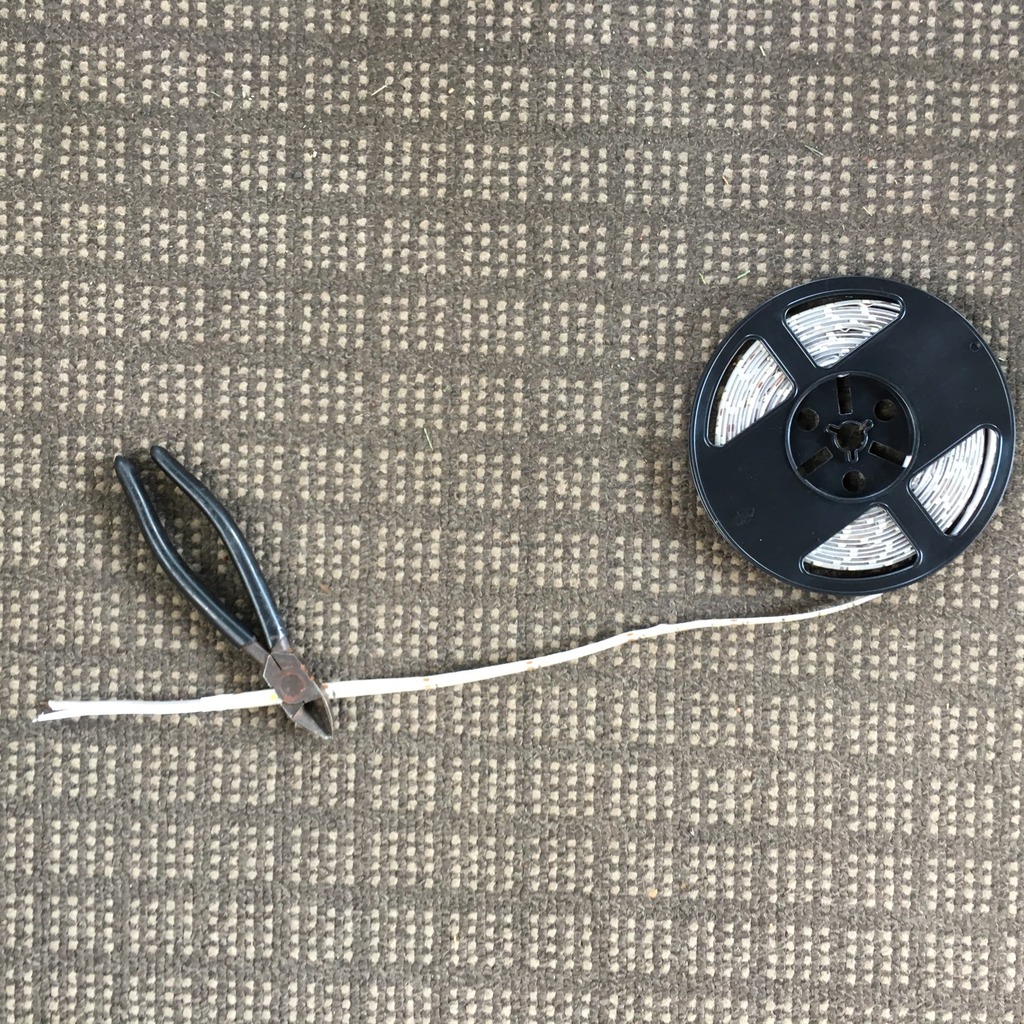
I then soldered some 18ga wire that I will use to tap into the stock bedlight circuit. As you can see next, I ran the LED's up under the bed rail and then snaked the wire into the bed through a factory hole.
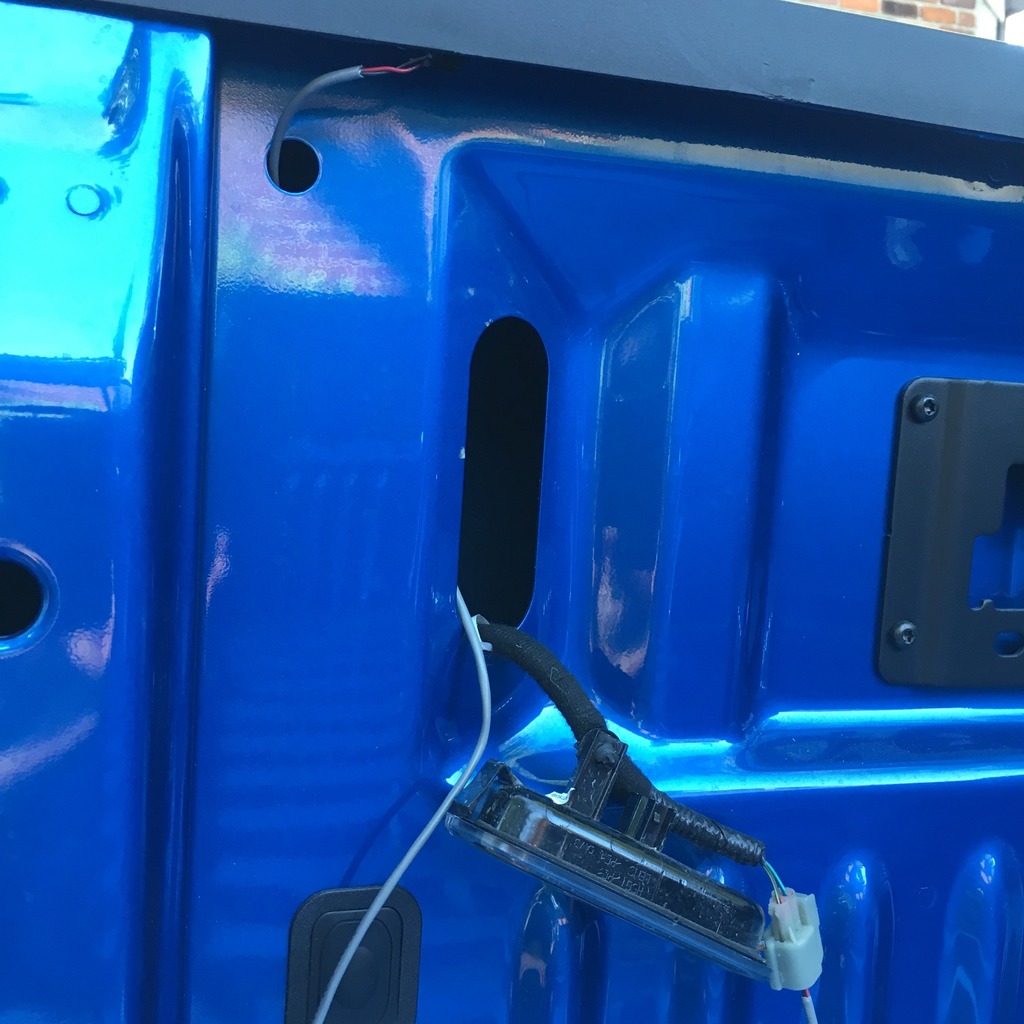
The underside of the bed rail has (2) forms that were a challenege to work around. Instead of trying to get the LED's to go over these bumps in the rail, I was able to snake the LED's under it. It was a tight fit but they did go.
Just to make sure I was on the right track, I unplugged the factory LED pod and wedged my new wires into the connector. The amount of light was a huge improvement!

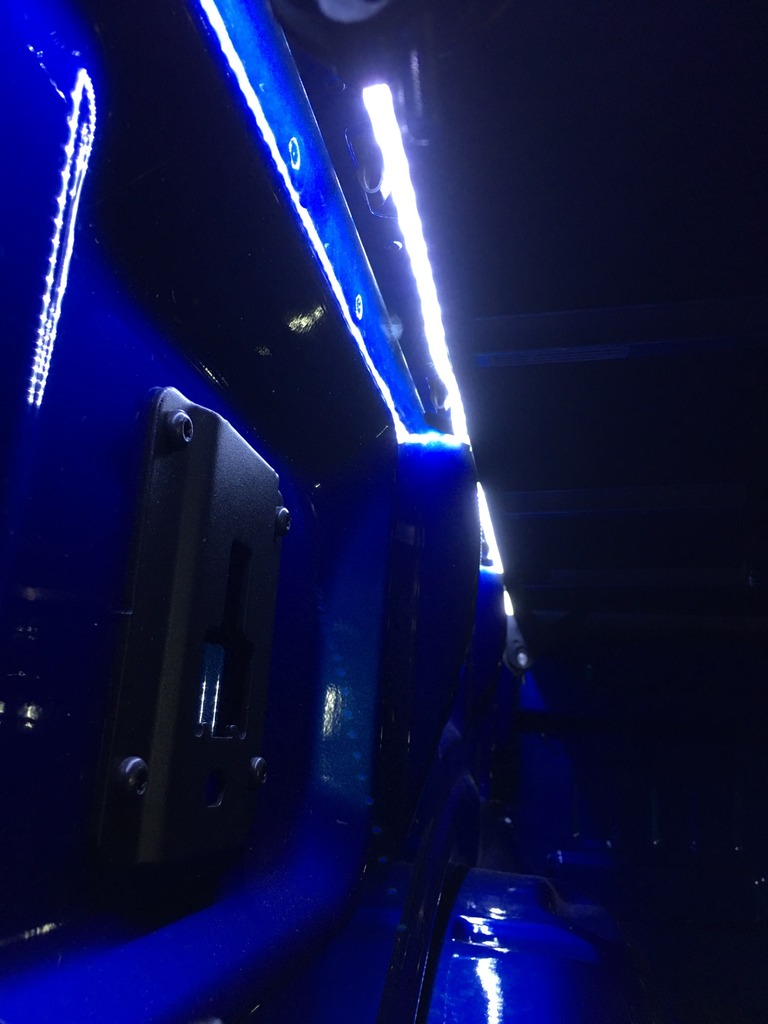
Once I get everything were it belonged, I went ahead and pulled the protective cover off of the adhesive backing on the LED strip and finally stuck it into place under the bed rail. It's pretty hot out today so some of the adhesive released about 30 minutes later. Luckily, this was an easy fix as I just used some clear silicone and painters tape up under there to hold the LED's in place while the silicone dried. A few hours later and they seem like they are holding (without the tape). Good stuff!
Costs:
LED strip: $14
The factory lights are OK but really don't illuminate the bed all that well. I started with a roll of waterproof 12v LEDs that I got on eBay.

I then soldered some 18ga wire that I will use to tap into the stock bedlight circuit. As you can see next, I ran the LED's up under the bed rail and then snaked the wire into the bed through a factory hole.

The underside of the bed rail has (2) forms that were a challenege to work around. Instead of trying to get the LED's to go over these bumps in the rail, I was able to snake the LED's under it. It was a tight fit but they did go.

Just to make sure I was on the right track, I unplugged the factory LED pod and wedged my new wires into the connector. The amount of light was a huge improvement!


Once I get everything were it belonged, I went ahead and pulled the protective cover off of the adhesive backing on the LED strip and finally stuck it into place under the bed rail. It's pretty hot out today so some of the adhesive released about 30 minutes later.
Luckily, this was an easy fix as I just used some clear silicone and painters tape up under there to hold the LED's in place while the silicone dried. A few hours later and they seem like they are holding (without the tape). Good stuff! Costs:
LED strip: $14
09-10-2016, 10:39 AM
#27
Member
Thread Starter
There is definitely a shift in the weather happening locally. No more 90F days, we are barely going to get to the 70s some days this week. So, with cold comes snow and the need for better floor mats!
I've always used Weathertechs but for some reason, they get real bad reviews on the new SCREWs. It appears the outside lip warps up over time. Husky, on the other hand, got great reviews. I've never used them but found a smoking deal on a used set. I troll eBay on a regular basis looking for the parts I need and came across a front set from a truck that was traded in. I don't plan to buy the rear seat mat, the thing is huge and gives a very "plastic-looking" appearance to the vehicle.
Fit is great and they cover all the areas where snow/salt ruined the carpet in my 2004 SCREW.
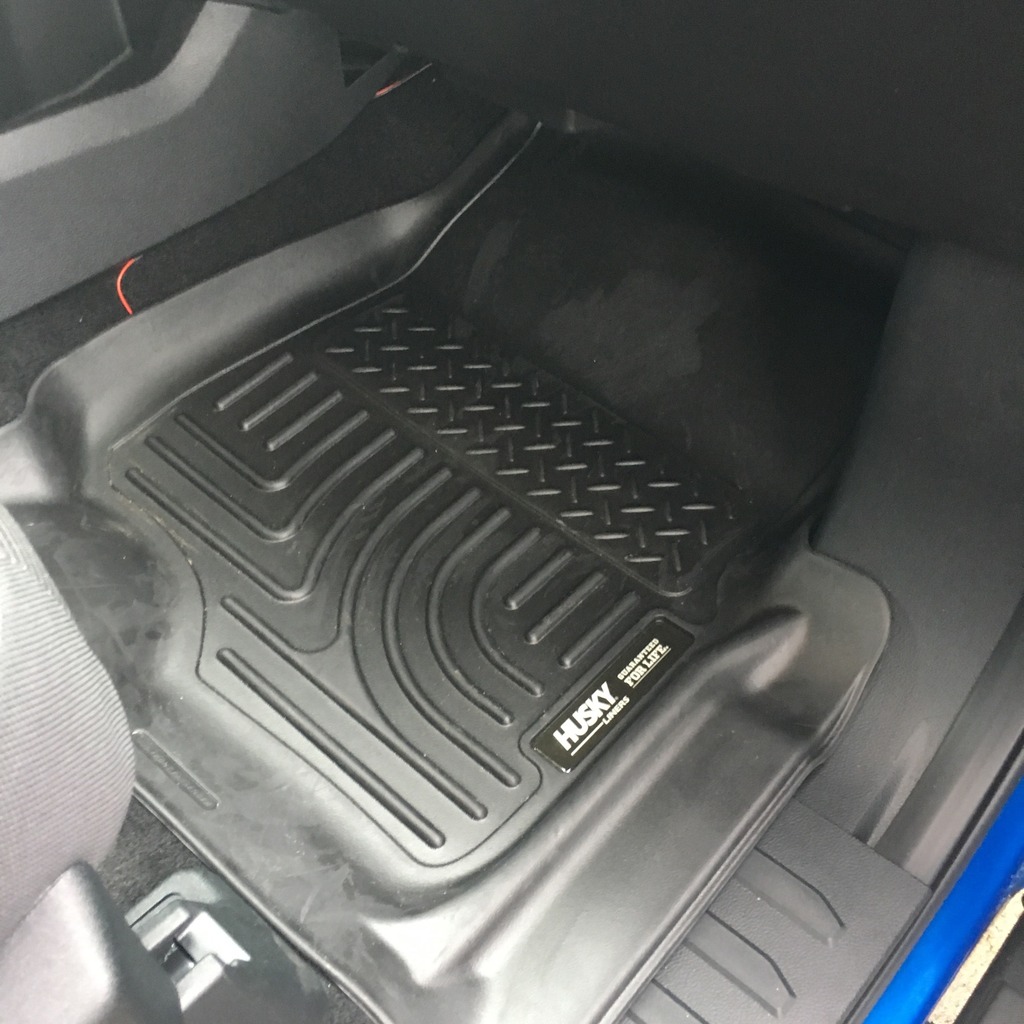
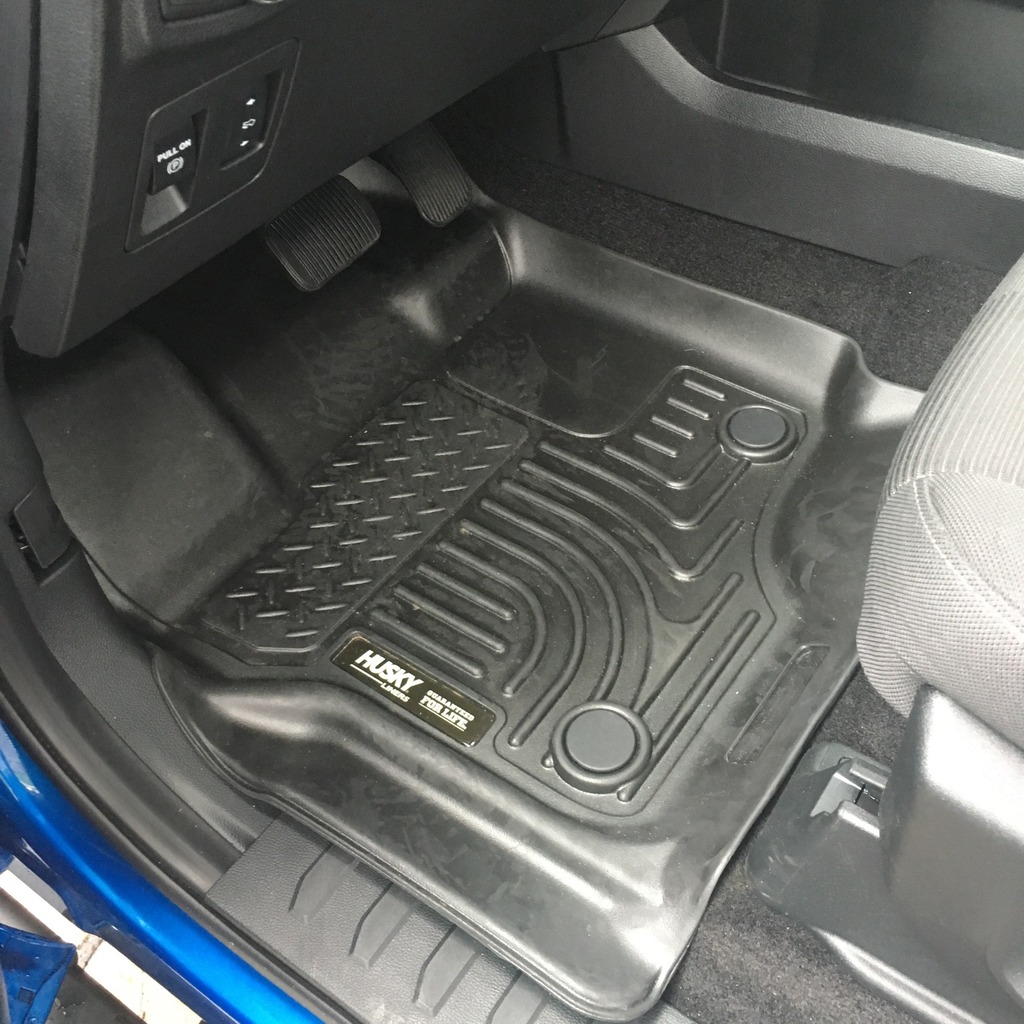
Cost: $35
09-10-2016, 01:25 PM
#28
Member
Thread Starter
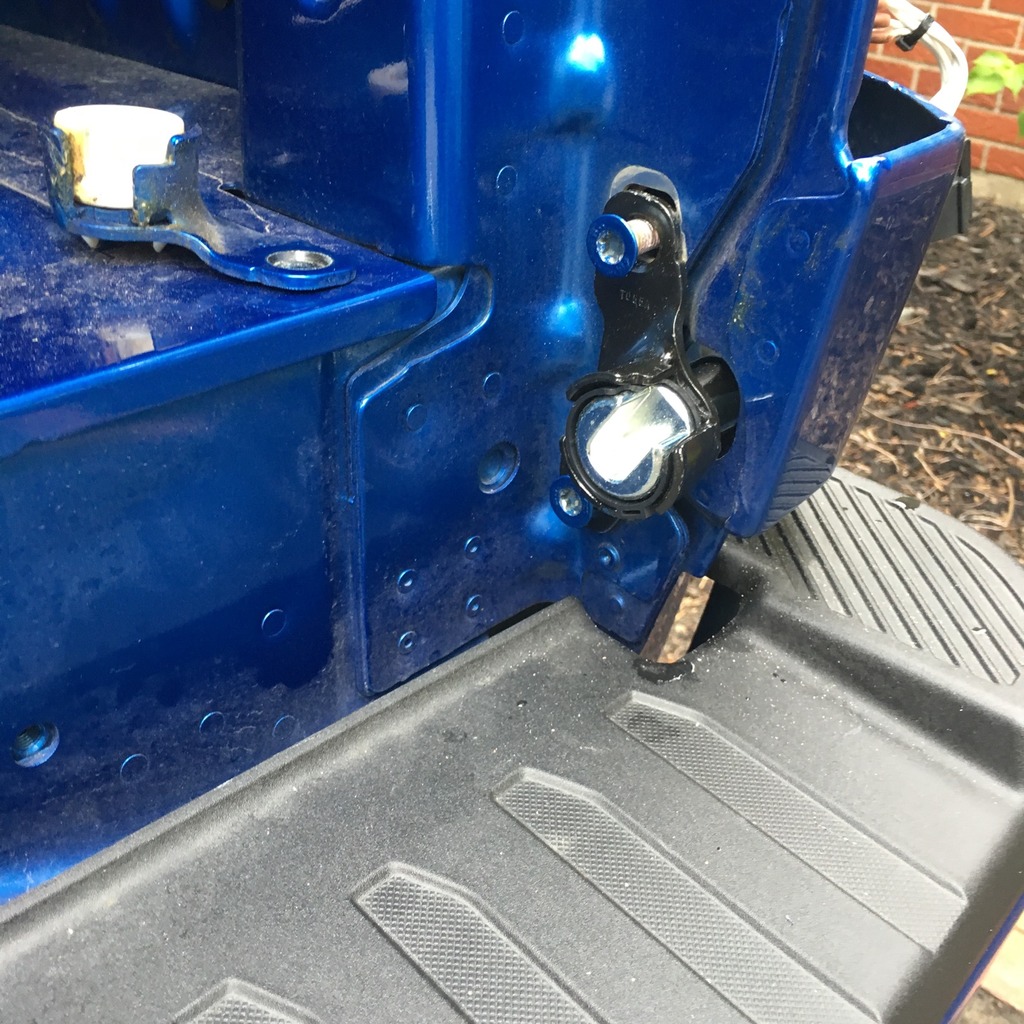
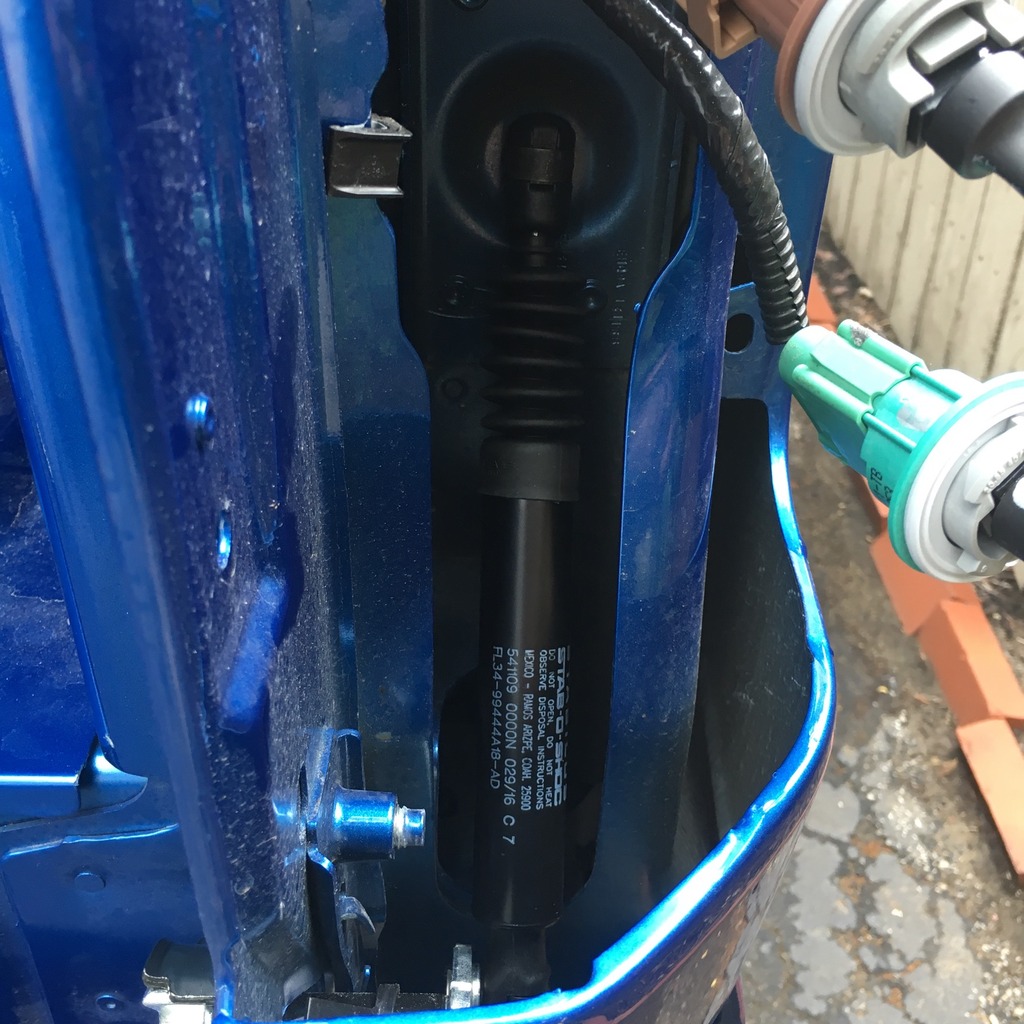
I got the tailgate lift assist installed today. A simple mod that makes it super easy to open the tailgate when your hands are full...and not have it slam down!
You need a new passenger side roller and the shock to go with it, both available direct from any Ford dealer. As for tools, you will need a GOOD T50 bit. The (2) roller bolts are in there really tight, so if your existing T50 is worn, get a fresh one or you risk stripping the bolt. Also, I used my 1/2" drive breaker bar until they were loose enough for me to use a ratchet. Once again, I didn't care to strip them out.
There are very clear instructions, with photos, found at this link: How to Install the OEM Tailgate Damper

Costs:
- Rollo FL3Z-83430B38-B - $13.13
- Shock FL3Z-99442A38-A - $19.44
You need a new passenger side roller and the shock to go with it, both available direct from any Ford dealer. As for tools, you will need a GOOD T50 bit. The (2) roller bolts are in there really tight, so if your existing T50 is worn, get a fresh one or you risk stripping the bolt. Also, I used my 1/2" drive breaker bar until they were loose enough for me to use a ratchet. Once again, I didn't care to strip them out.
There are very clear instructions, with photos, found at this link: How to Install the OEM Tailgate Damper


Costs:
- Rollo FL3Z-83430B38-B - $13.13
- Shock FL3Z-99442A38-A - $19.44
09-10-2016, 05:06 PM
#29
Member
Thread Starter
I'm a drag racer. As a racer, one of my very favorite sounds is that off a blow-off valve on a turbo car. Stage 3 Motorsports developed a cheap alternative to adding an aftermarket blow off valve to the EcoBoost engines.
They simply created an aluminum plug that goes into the eBOV off the intercooler. Yes, it is a total novelty and adds no performance value what so ever. However, it's fun...and easily reversible should I get tired of it.
Does it work? Yes, you totally get that "whoooosh" sound when you get off the boost.
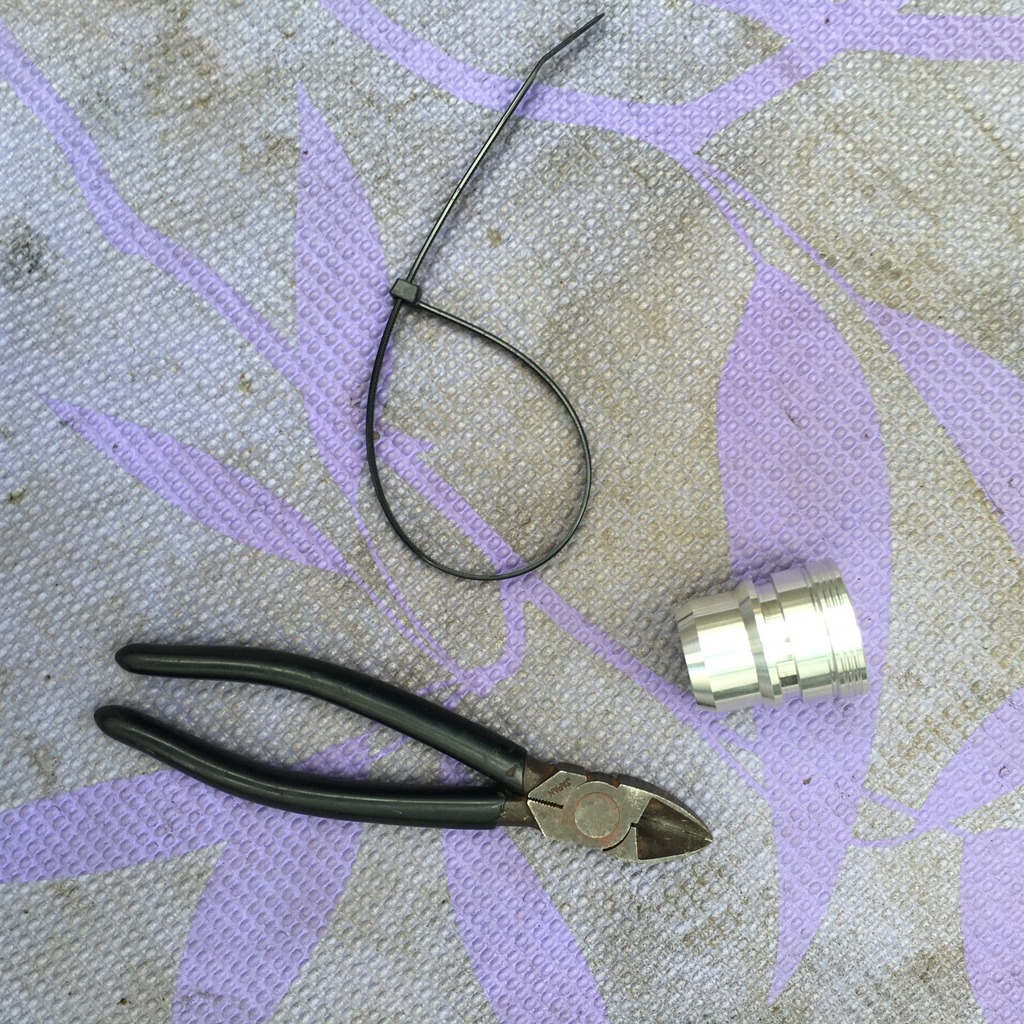
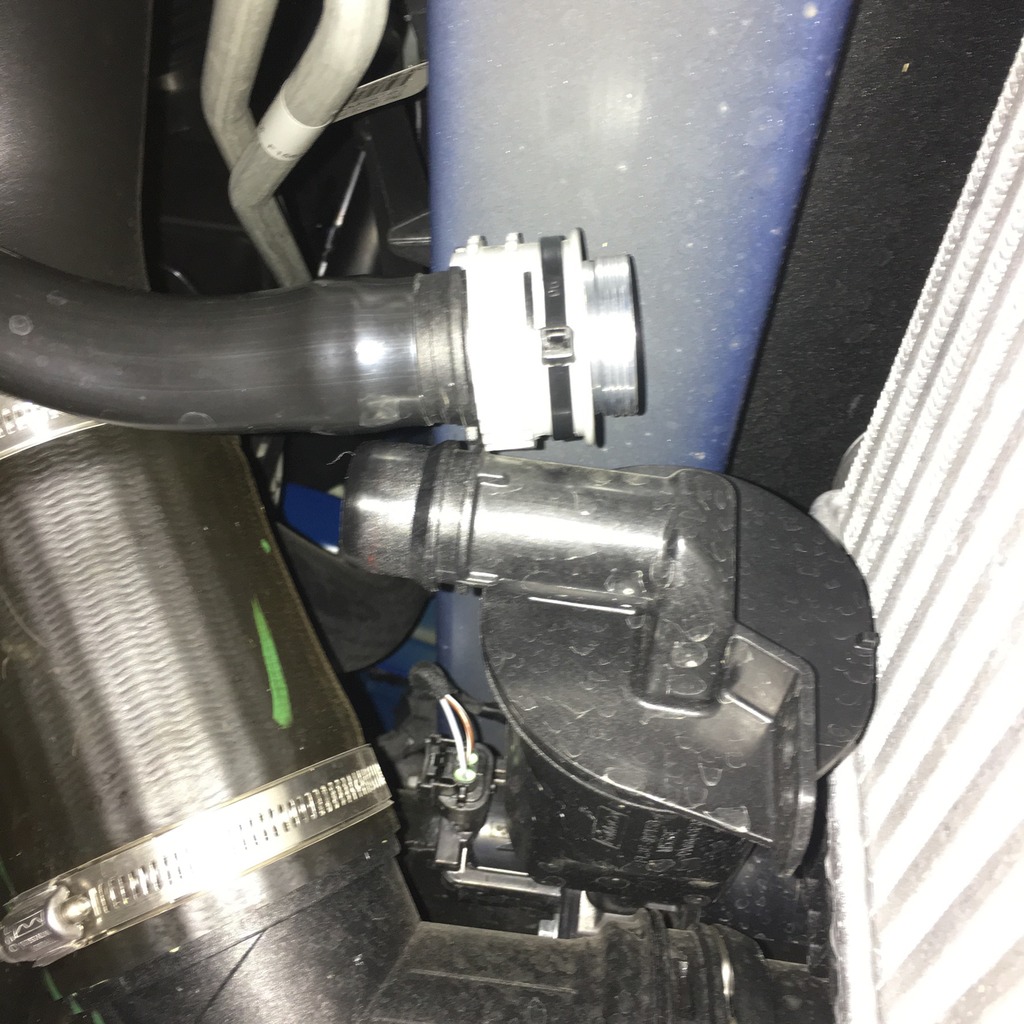
- Cost: $35
