Topic Sponsor
Members Builds See any build threads created by members to track progress of their projects.
Sponsored by:
Sponsored by:

1998 F-150 XLT Restoration

Old 06-16-2014, 07:37 PM
  #1  
Member
Thread Starter
 
bill3422's Avatar
 
Join Date: Jun 2014
Location: Bowie, MD
Posts: 41
Received 4 Likes on 4 Posts
Default 1998 F-150 XLT Restoration

I am beginning the process of restoring a new acquired 1998 F-150 XLT, Supercab

Name:  IMG_2322_zps0d134a48.jpg
Views: 4531
Size:  129.0 KB

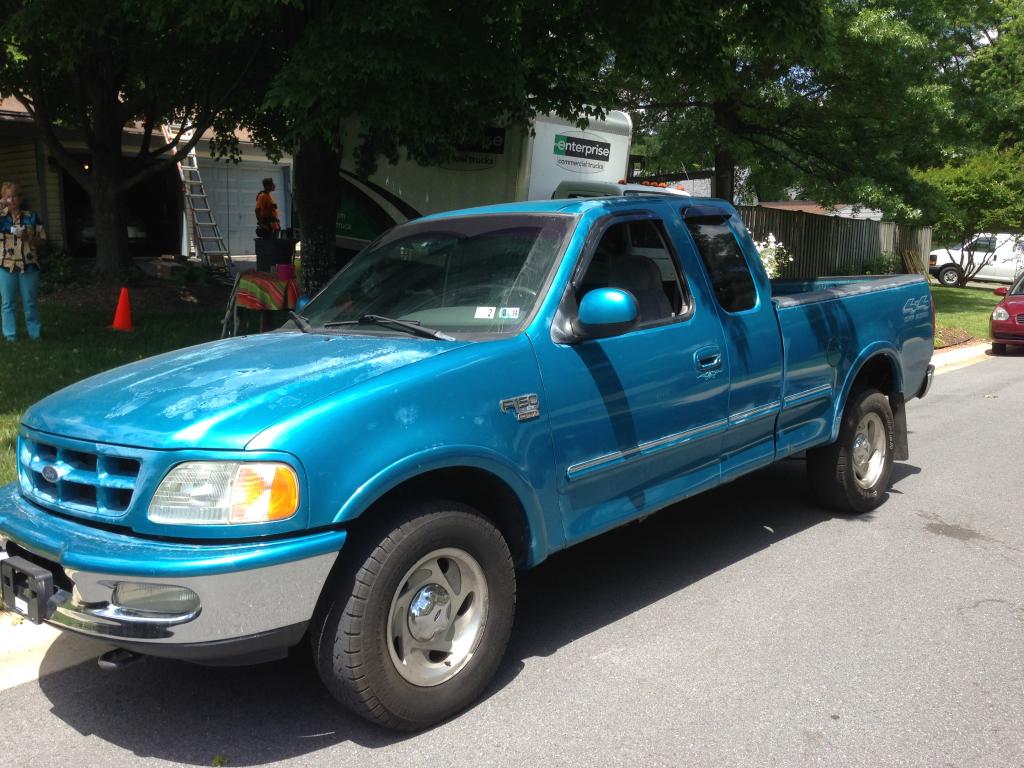
At first glance it looks pretty good. Mechanically it is in great shape. about 120,000 miles, 5.4 Liter, Automatic, 4x4

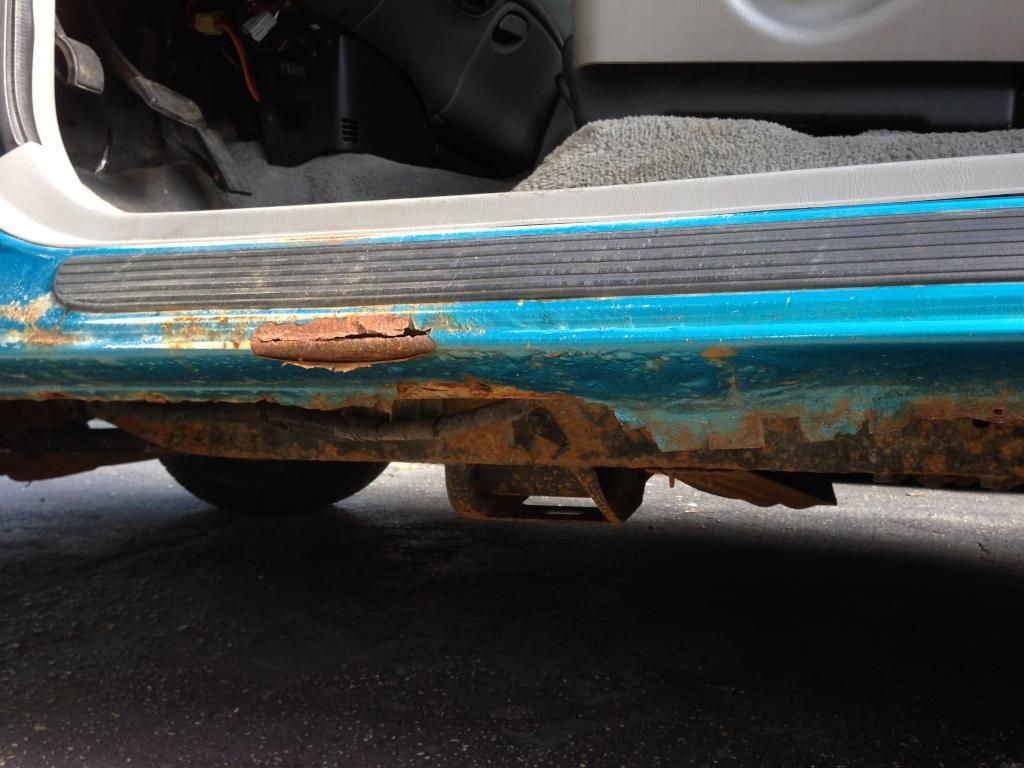
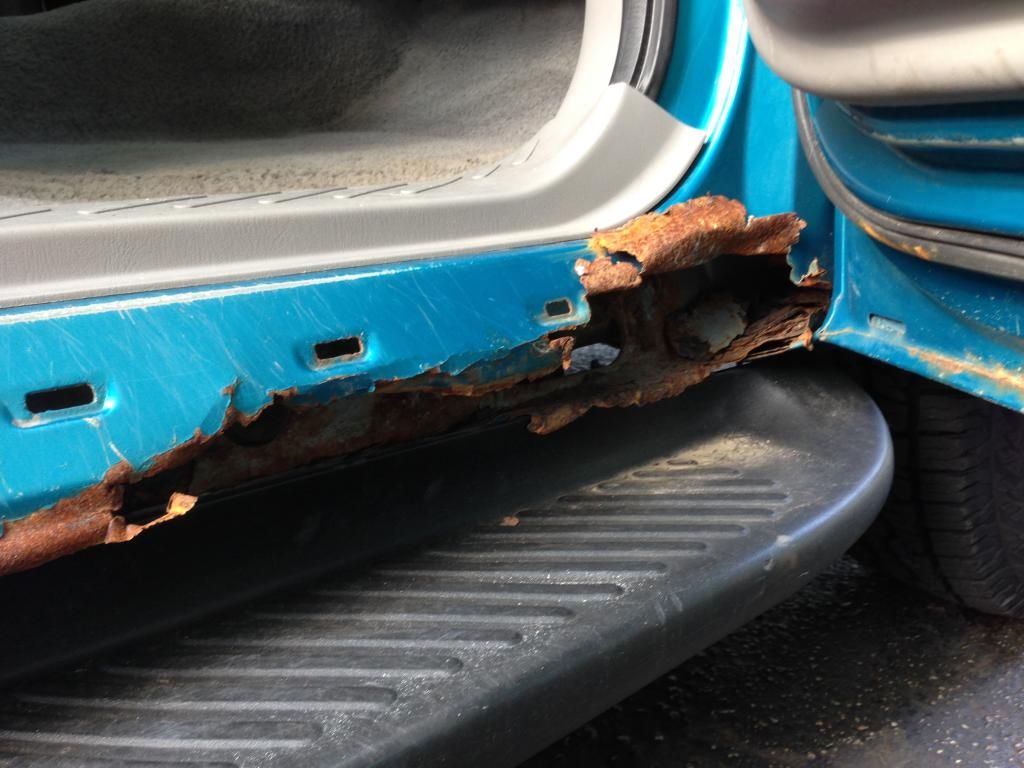
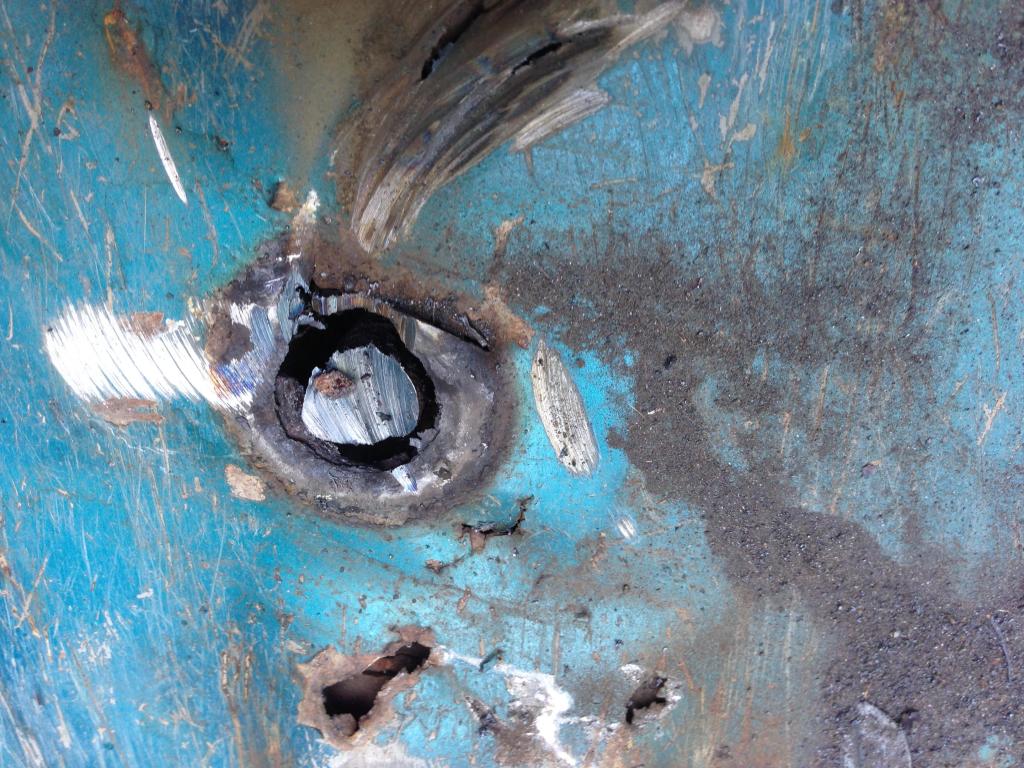
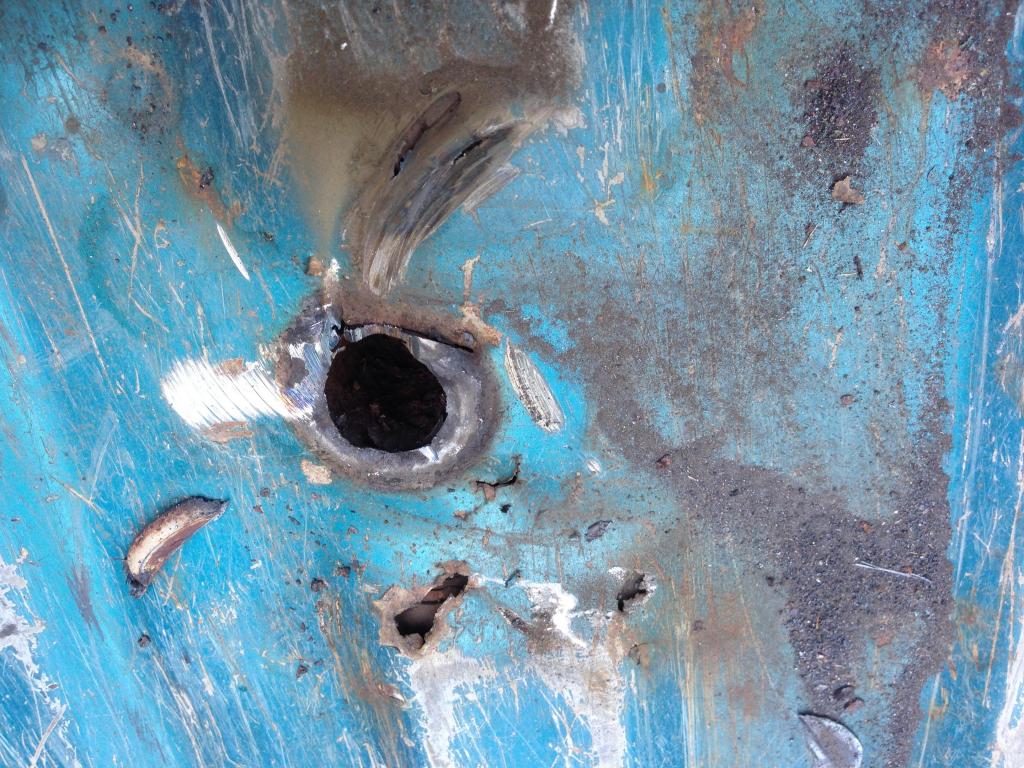
The truck came from the Philadelphia, PA area and like their football team, its pretty rusted out.

Name:  IMG_2357_zps0b79ed75.jpg
Views: 1744
Size:  163.2 KB


Name:  IMG_2359_zpsf41cb2e9.jpg
Views: 1801
Size:  129.2 KB

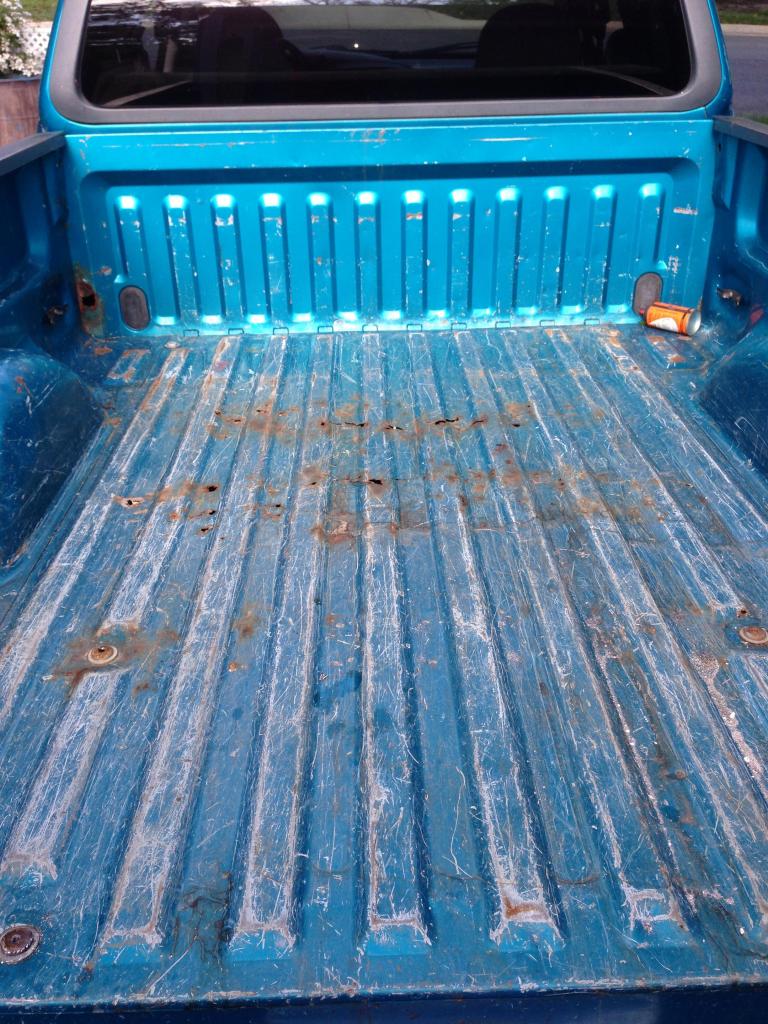
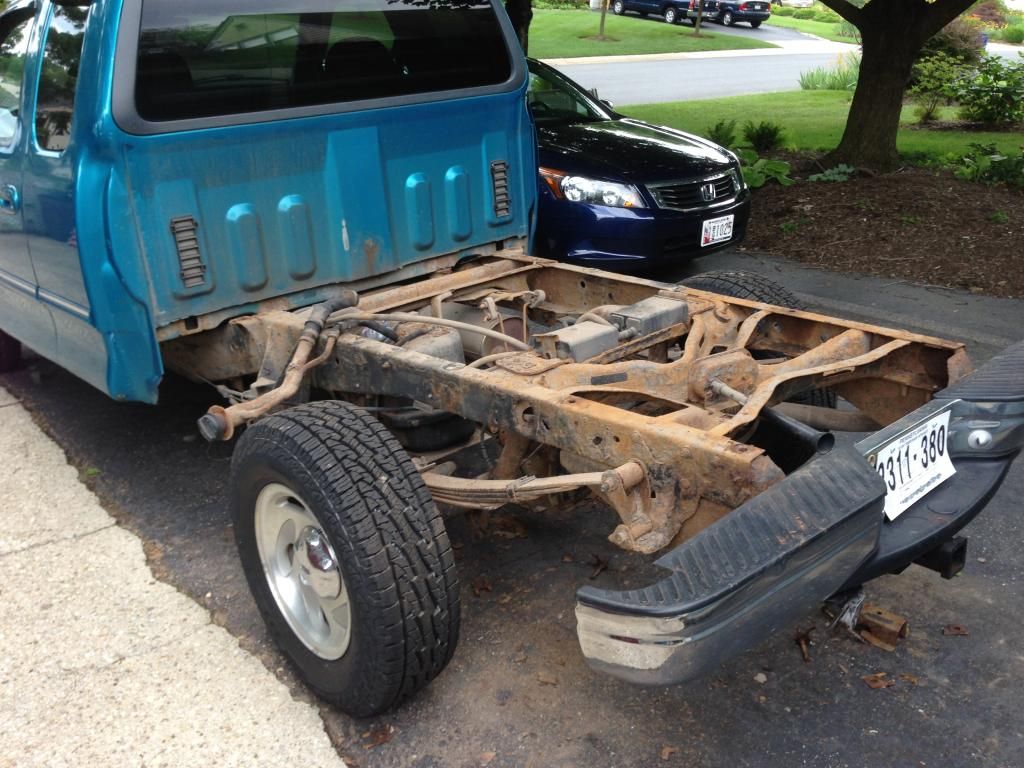
I decided to first replace the bed
So I ground off the bolt heads and punched the bolts through the frame
Name:  IMG_2366_zps06eec650.jpg
Views: 1603
Size:  172.2 KB
Name:  IMG_2367_zpsa247e143.jpg
Views: 1615
Size:  158.2 KB
Name:  IMG_2368_zpsd06ed5f0.jpg
Views: 1624
Size:  170.3 KB
Old 06-16-2014, 08:02 PM
  #2  
Southern 4 Life
 
BlackThundah's Avatar
 
Join Date: Apr 2013
Location: Georgia
Posts: 1,278
Received 96 Likes on 94 Posts
Default

That's a butt load of rust, I give you props for taking on all that. Love the color though, that's one of the more rare colors of our trucks.
The following users liked this post:
bill3422 (06-16-2014)
Old 06-16-2014, 08:08 PM
  #3  
Member
Thread Starter
 
bill3422's Avatar
 
Join Date: Jun 2014
Location: Bowie, MD
Posts: 41
Received 4 Likes on 4 Posts
Default

Originally Posted by BlackThundah
That's a butt load of rust, I give you props for taking on all that. Love the color though, that's one of the more rare colors of our trucks.
I kind of backed into it. Really did not know all that rust was there when I started. The color happens to be the wife's favorite. It is pretty nice and not one I've seen before
Old 06-16-2014, 08:13 PM
  #4  
Senior Member
 
nfldfordman's Avatar
 
Join Date: Aug 2012
Location: New Harbour, NFLD
Posts: 58,828
Received 1,180 Likes on 1,070 Posts

Default

sub'd, cool, love seeing this stuff done
Old 06-17-2014, 05:49 PM
  #5  
Junior Member
 
the_duke124's Avatar
 
Join Date: Jun 2014
Location: OKC, OK
Posts: 3
Likes: 0
Received 0 Likes on 0 Posts
Default

Cool! Sub'd also. I'm redoing a 99 F-150 xlt, but mine is white with a flareside and not so much rust and more mechanical issues. lol
Old 06-17-2014, 06:16 PM
  #6  
Super Moderator

 
03f15012's Avatar
 
Join Date: Jan 2013
Location: North Charleston, SC
Posts: 13,490
Received 548 Likes on 427 Posts

Default

Reminds me of Capri Debris's build. That thing turnd out real nice, so I'm looking forward to this one!
The following users liked this post:
nfldfordman (06-17-2014)
Old 06-19-2014, 04:03 PM
  #7  
Member
Thread Starter
 
bill3422's Avatar
 
Join Date: Jun 2014
Location: Bowie, MD
Posts: 41
Received 4 Likes on 4 Posts
Default

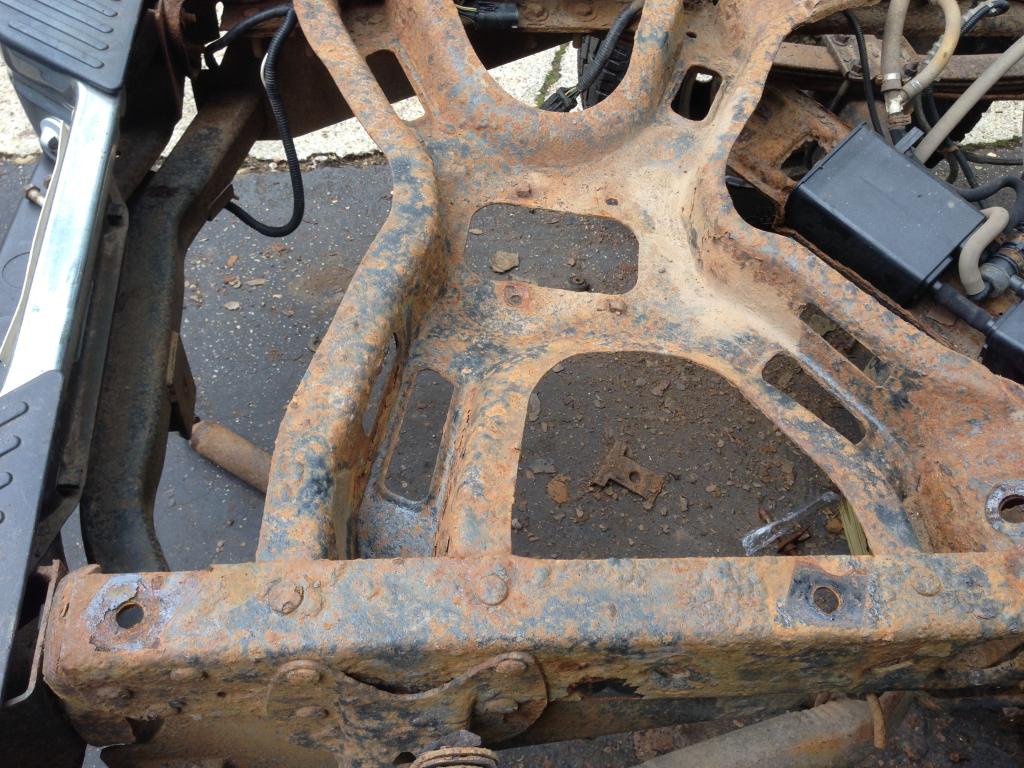
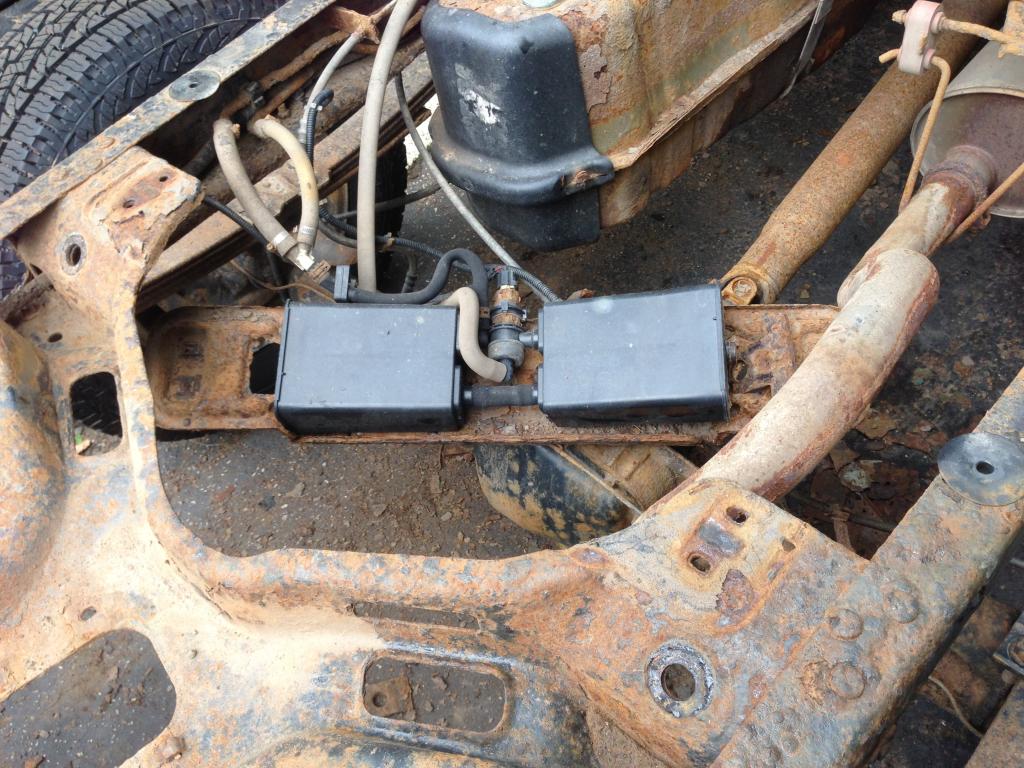
Finally got a little help getting the bed off.

Name:  8F4314B9-E61D-4CE6-9F24-F5F0E01A8F8A_zpsd9uhlzda.jpg
Views: 2048
Size:  115.4 KB

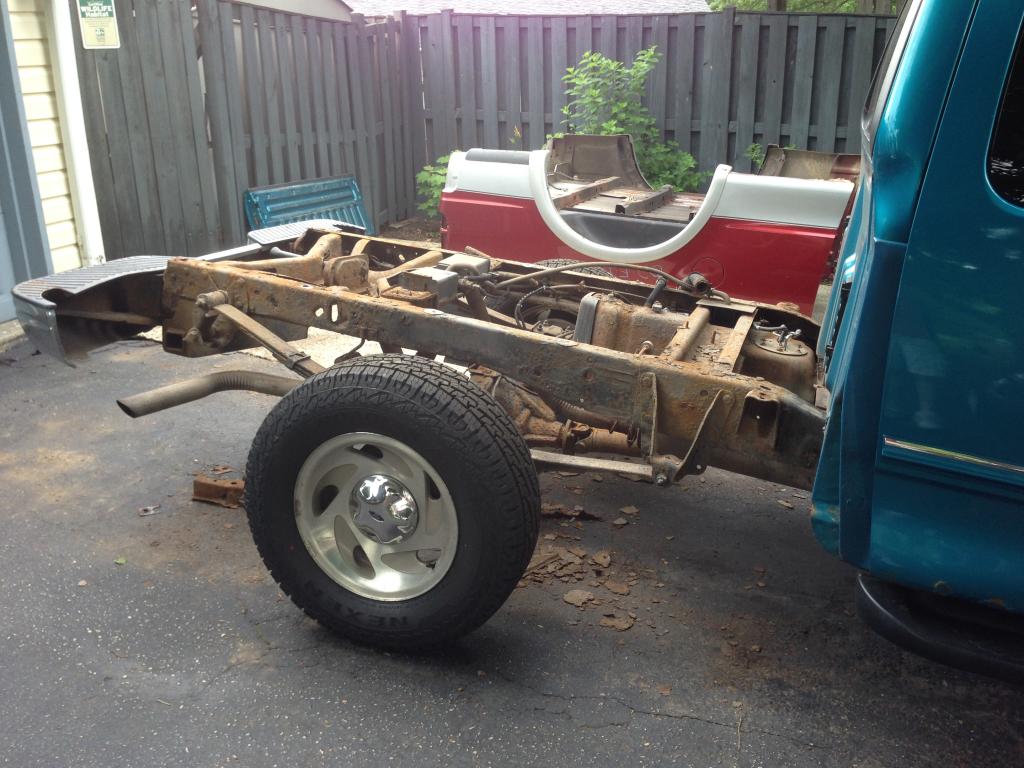
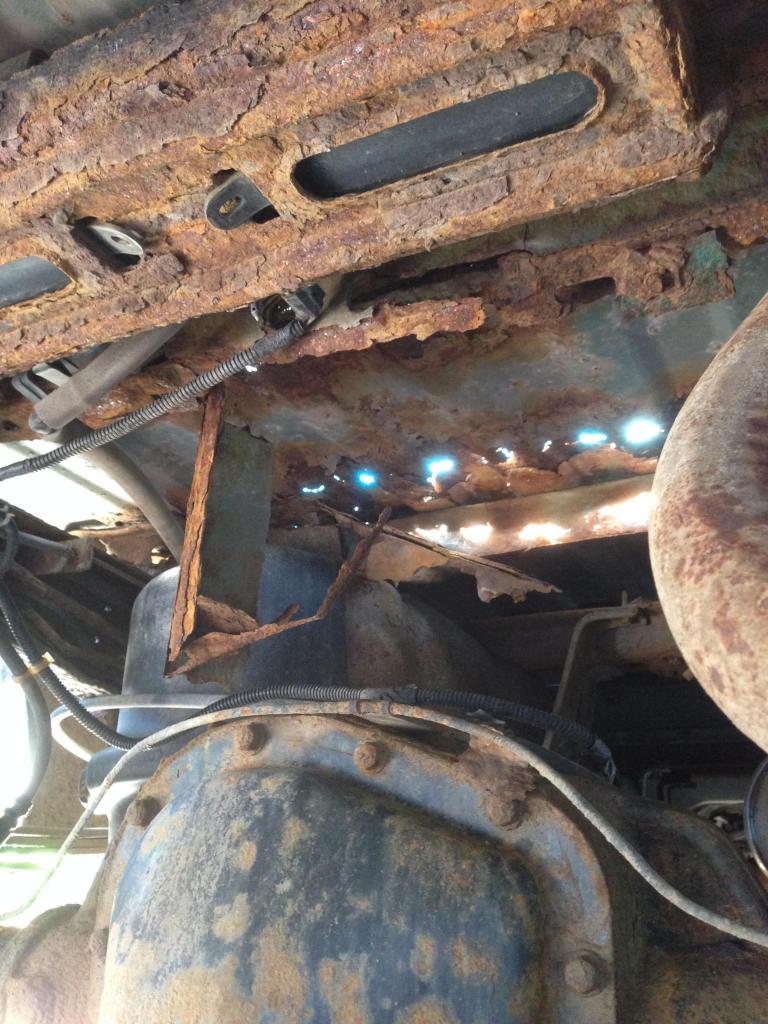
Looked pretty good underneath. I will scrape or wire brush some. Plan on spraying CRC Rust Converter on everything and then a coat of CRC Zink It, unless someone has a better idea for me.

Oh by the way, while I have it off, I will be replacing the gas tank. The fill tube had corroded almost all the way off.
Name:  036C87DB-0097-47A1-9F03-A01CE2058AC7_zpsuvublkyu.jpg
Views: 1540
Size:  151.9 KB

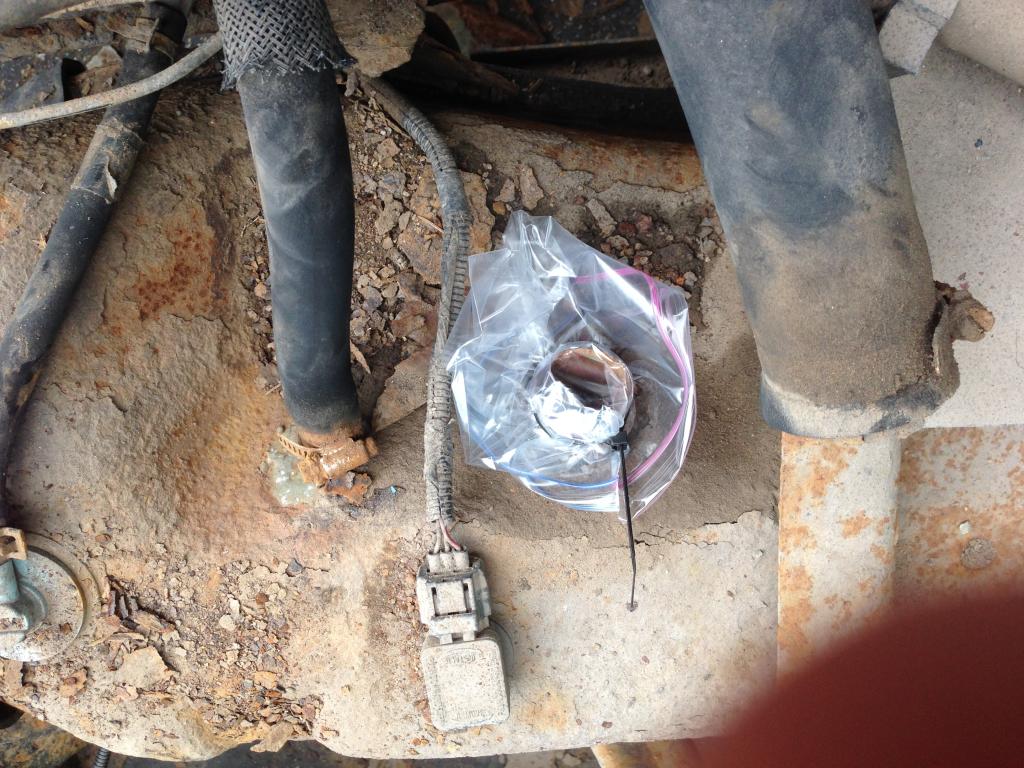
Also plane on replacing the spare tire wench while I am there as well.
Name:  320C08F7-F85F-4C98-AD2D-7507347D8FF6_zpsacdngv63.jpg
Views: 1597
Size:  143.4 KB

My other question is how important are the side brackets on the fuel vents?
Name:  17AF9642-72C8-4021-8CE0-110F17A8CB64_zpslwb8v81u.jpg
Views: 1579
Size:  148.7 KB
the closest one is pretty much gone too.
Old 06-21-2014, 05:08 PM
  #8  
Member
Thread Starter
 
bill3422's Avatar
 
Join Date: Jun 2014
Location: Bowie, MD
Posts: 41
Received 4 Likes on 4 Posts
Default

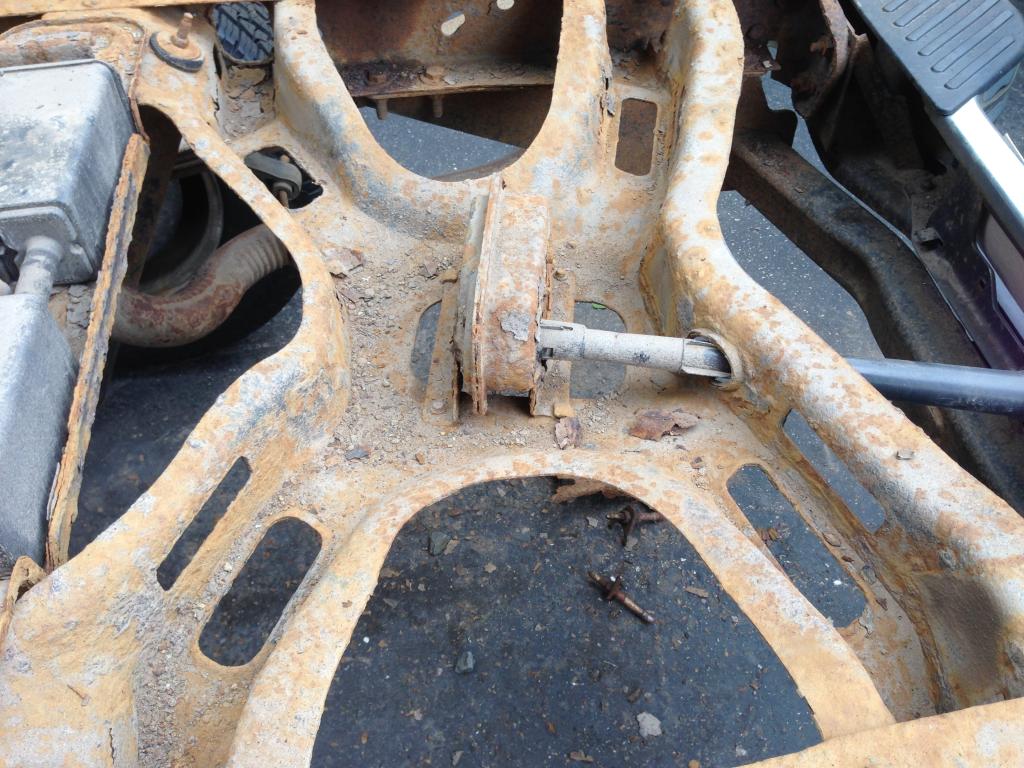
Worked on removing parts from the from that are going to be replaced before painting. Removed the broken spare tire wench and the frame member that holds the charcoal filter vents.
Name:  EF5B7151-B455-4FDE-98E6-6B45DC1DC83C_zps2xbogr2n.jpg
Views: 2632
Size:  145.8 KB
Name:  0C7D9F44-E555-4AAE-B3FD-57178BE4FCAB_zpsknljov02.jpg
Views: 1753
Size:  152.3 KB
Old 06-21-2014, 05:09 PM
  #9  
Member
Thread Starter
 
bill3422's Avatar
 
Join Date: Jun 2014
Location: Bowie, MD
Posts: 41
Received 4 Likes on 4 Posts
Default

Also removed the guard protecting the gas tank, (only on the 4x4 models).
Name:  2A9D81F1-DB8D-42D3-9635-1C213AE2C813_zpsvw96ce1r.jpg
Views: 1526
Size:  165.4 KB
Old 06-21-2014, 05:10 PM
  #10  
Member
Thread Starter
 
bill3422's Avatar
 
Join Date: Jun 2014
Location: Bowie, MD
Posts: 41
Received 4 Likes on 4 Posts
Default

Lastly, we put on some new working boots and some exterior decor.
Name:  2622DD27-4627-4443-8107-725DAE937F7E_zpsrih3bysp.jpg
Views: 1658
Size:  149.1 KB
Name:  4D05A515-BC07-44D6-A62C-E13D682F558A_zps4s7zq9fu.jpg
Views: 1533
Size:  63.6 KB

Thread Tools
Search this Thread
Quick Reply: 1998 F-150 XLT Restoration


All times are GMT -4. The time now is 02:22 AM.