How to: Replace camber bushings on an 8th Gen F150 ('87-'91)
 07-13-2011, 02:37 PM
#1
Just call me sean. Really
Thread Starter

This is the first how-to I've ever done, hopefully it helps out some of the '87+ crowd.
This became necessary for me after I put on my 2.5inch leveling kit. My camber was off, with the tires tires leaning out at the top, and I needed these to get them back into whack.
Materials needed:
PB Blaster
WD40
Hammer (Sledge or normal, doesn't matter)
Flat head screw driver
Chisel (not a deal breaker if you don't have one, it just speeds things up)
1 15mm socket (Don't quote me on that, I can't remember exactly, but it's metric)
1 11/16ths wrench
Breaker bar
I soaked the bolts in PB Blaster for a day and a half before I started this to make things easier on myself
First off, you need to jack the front of the truck up, support the frame with a jack stand, and remove the tire. You want the suspension at full sag so you have as much work space as possible. After you do that, behind your brakes you'll see what you need. Unluckily I had to do this twice because the first set of bushings wasn't right, so you guys get to see a nice shiny bushing
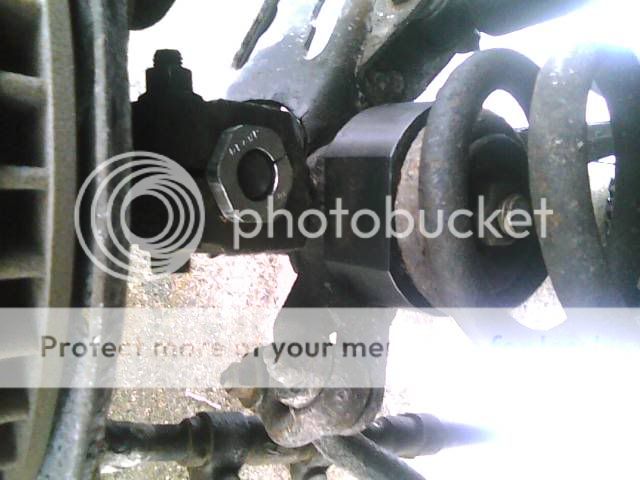
Now that you've found, you need to find the pinch bolt. It's the only bolt down there, if you can read this how-to, you can find it. Hook up your 15mm socket to the bolt head, and then put your 11/16th wrench on the nut at the end of the pinch bolt. 11/16ths isn't the proper size for that nut, it's something metric that's micrometers different. I just hammered the wrench onto the bolt, and it was tight enough that I never had to worry about it slipping off

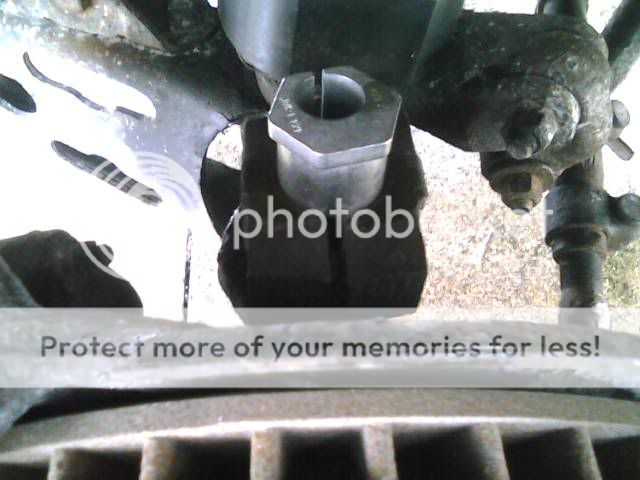
Now, Put the breaker bar on your socket, hold the wrench on the other side of the nut, and start loosening things up. After the nut came off, I had to lightly hammer the bolt the get it to come all the way out. Don't leave the bolt in there, just being there keeps things tight. I learned that the hard way
Pinch bolt removed

Next, pull out the flat head. It needs to be hammered under the collar on the bushing. Just keep switching sides and working it up. It's not hard, just time consuming.
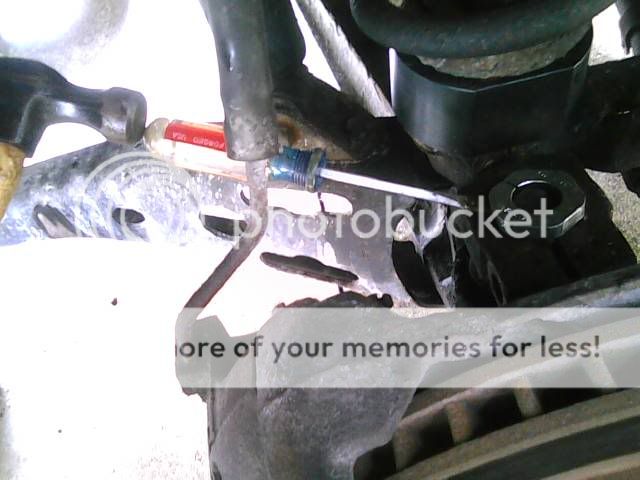
Once you've worked it up far enough, you can use a thicker chisel to move it faster. The screw driver keeps it moving, but try to get to the chisel or something quickly, it speeds up the process a lot

Halfway there!

Bushing out

Now, put the new bushing in there, and just hammer the thing down in there.
You're going to need an alignment afterwards, but with the new adjustables bushings, just by turning them you can do a bit yourself to make it driveable if it's that bad.
And that, is how to replace camber bushings on an 8th gen. Probably holds true for most I-Beam trucks, as long as they don't have king pins.
This became necessary for me after I put on my 2.5inch leveling kit. My camber was off, with the tires tires leaning out at the top, and I needed these to get them back into whack.
Materials needed:
PB Blaster
WD40
Hammer (Sledge or normal, doesn't matter)
Flat head screw driver
Chisel (not a deal breaker if you don't have one, it just speeds things up)
1 15mm socket (Don't quote me on that, I can't remember exactly, but it's metric)
1 11/16ths wrench
Breaker bar
I soaked the bolts in PB Blaster for a day and a half before I started this to make things easier on myself
First off, you need to jack the front of the truck up, support the frame with a jack stand, and remove the tire. You want the suspension at full sag so you have as much work space as possible. After you do that, behind your brakes you'll see what you need. Unluckily I had to do this twice because the first set of bushings wasn't right, so you guys get to see a nice shiny bushing
Now that you've found, you need to find the pinch bolt. It's the only bolt down there, if you can read this how-to, you can find it. Hook up your 15mm socket to the bolt head, and then put your 11/16th wrench on the nut at the end of the pinch bolt. 11/16ths isn't the proper size for that nut, it's something metric that's micrometers different. I just hammered the wrench onto the bolt, and it was tight enough that I never had to worry about it slipping off
Now, Put the breaker bar on your socket, hold the wrench on the other side of the nut, and start loosening things up. After the nut came off, I had to lightly hammer the bolt the get it to come all the way out. Don't leave the bolt in there, just being there keeps things tight. I learned that the hard way
Pinch bolt removed
Next, pull out the flat head. It needs to be hammered under the collar on the bushing. Just keep switching sides and working it up. It's not hard, just time consuming.
Once you've worked it up far enough, you can use a thicker chisel to move it faster. The screw driver keeps it moving, but try to get to the chisel or something quickly, it speeds up the process a lot
Halfway there!
Bushing out
Now, put the new bushing in there, and just hammer the thing down in there.
You're going to need an alignment afterwards, but with the new adjustables bushings, just by turning them you can do a bit yourself to make it driveable if it's that bad.
And that, is how to replace camber bushings on an 8th gen. Probably holds true for most I-Beam trucks, as long as they don't have king pins.

 02-04-2012, 11:48 AM
#3
Just call me sean. Really
Thread Starter
Thanks man!
Take a look under your 4x4, the bushings are the same between 2 and 4 wheel drive, so it might still be the same. Only difference is the 4x4 has a little less adjustment than a 2wd
Take a look under your 4x4, the bushings are the same between 2 and 4 wheel drive, so it might still be the same. Only difference is the 4x4 has a little less adjustment than a 2wd
 04-22-2012, 08:42 PM
#5
Just call me sean. Really
Thread Starter
I used PB blaster to make things easy. Why would I want to use lube on the bushings, because they are adjustable ones. They move and my alignment goes off. If I were to lube them, they'd move easier...