How To: Swap cluster needles.
 02-27-2011, 10:29 PM
#11

Nice job.... you did yours a bit different than I didn mine and explained to ya, still looks good though...NOTE: If you have a FX2, FX4, or cluster with the rings around the needles the needles will have to be cut down @ 1/4 inch as the 90's model mirrors are longer. You used needles with plastic collars (what did they come off?) I use ones off cougars, explorers, f150's ect and they have the metal post you spoke of....
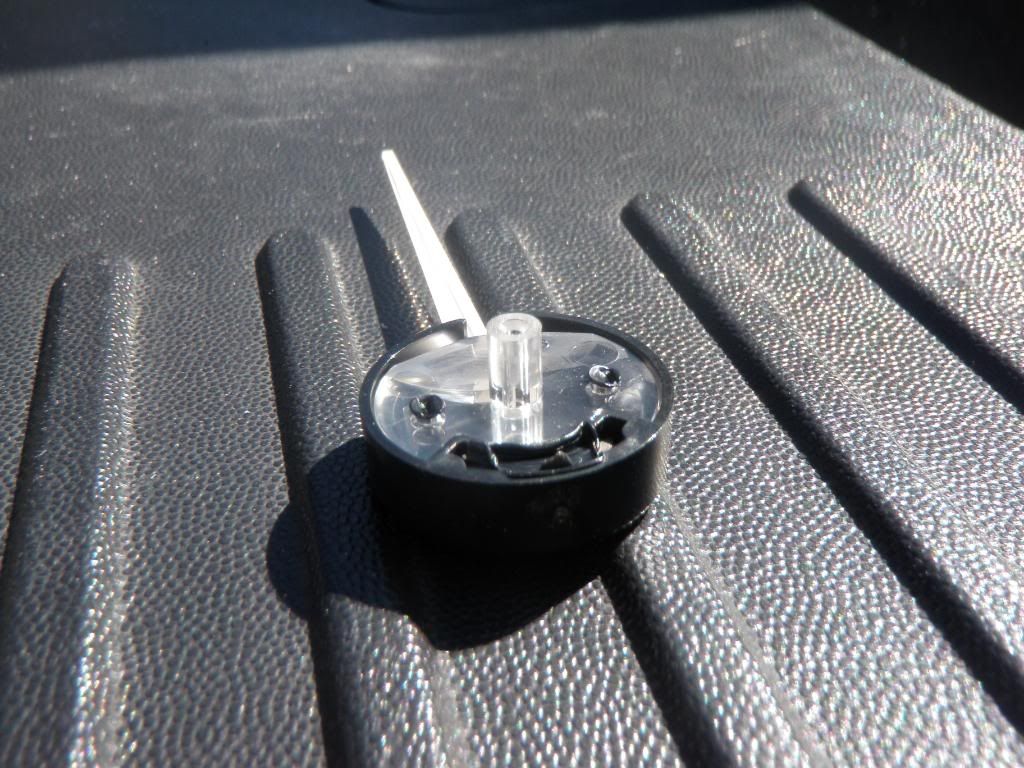
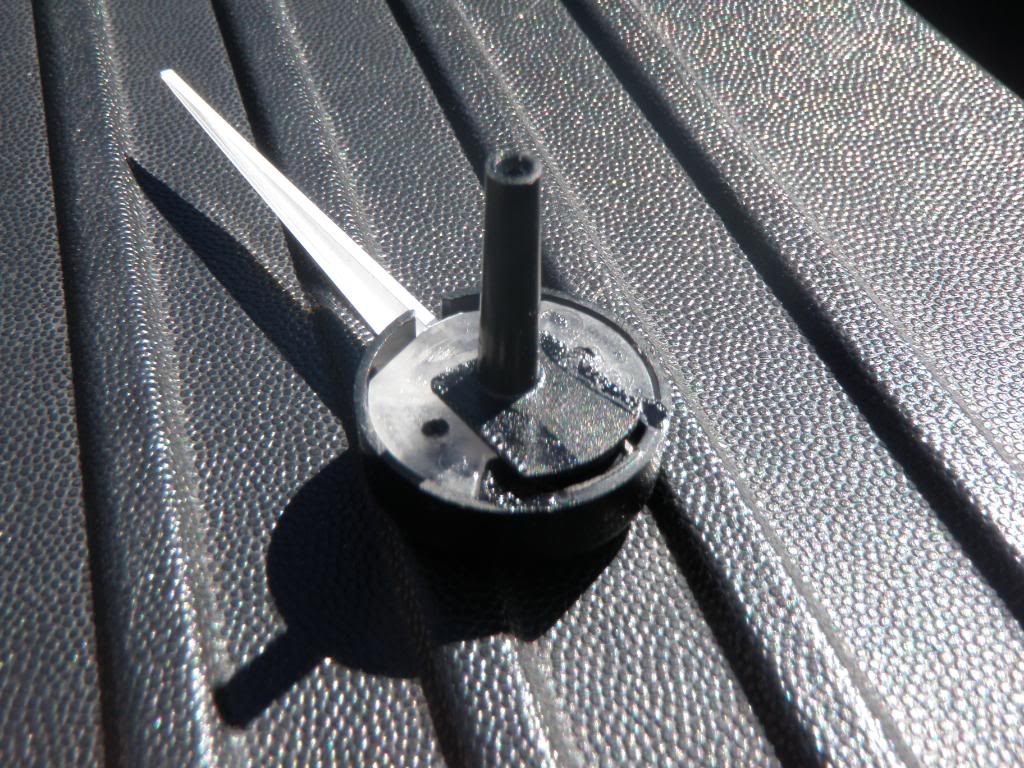
After you take the back of the stock needle off, drill the flat side 1 size smaller than the width of the 95 needle stem******DON'T GO TOO DEEP OR THE NEEDLE WONT GO BACK ONTO THE FATORY CLUSTER***** just enough for the 95 needle to press all the way in... before you press it all the way in, grind/cut off the extra flat material, this will let more light to the neele to let it shine brighter!
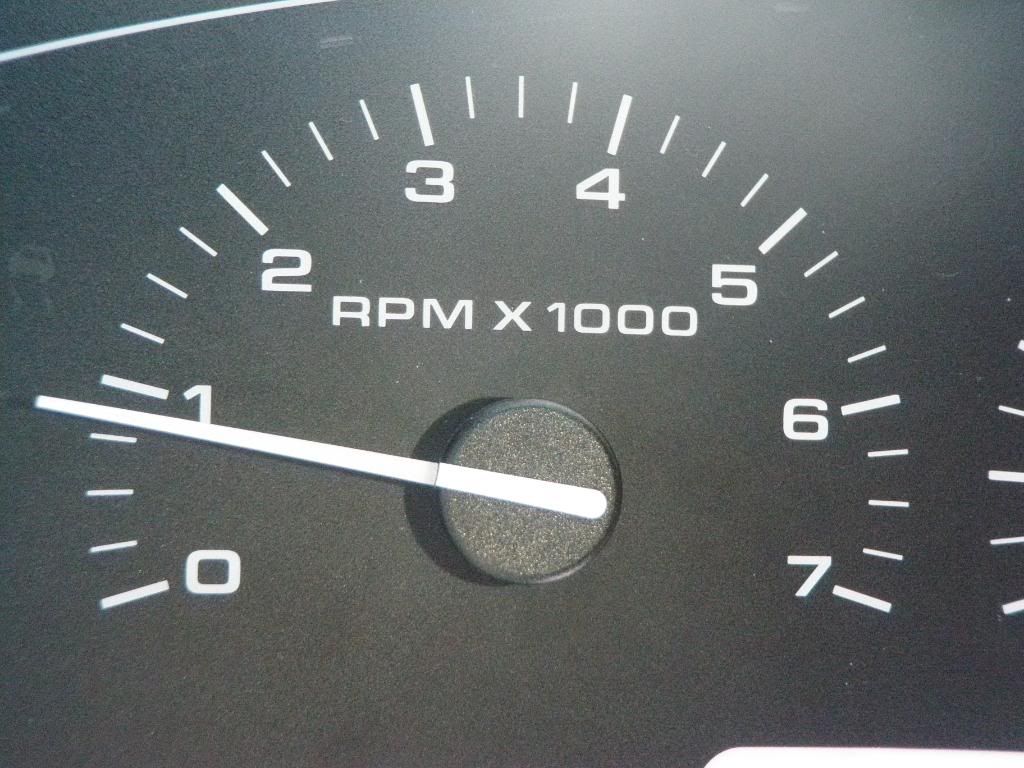
After your needles are assymbled, then match up with the length of the factory needle heads and take the extra off the 95 needles. Then installon the cluster.. place a fork under the needle to keep from pushing it down too far!! will look like this when done..but what ever color bulbs you installed

After you take the back of the stock needle off, drill the flat side 1 size smaller than the width of the 95 needle stem******DON'T GO TOO DEEP OR THE NEEDLE WONT GO BACK ONTO THE FATORY CLUSTER***** just enough for the 95 needle to press all the way in... before you press it all the way in, grind/cut off the extra flat material, this will let more light to the neele to let it shine brighter!
After your needles are assymbled, then match up with the length of the factory needle heads and take the extra off the 95 needles. Then installon the cluster.. place a fork under the needle to keep from pushing it down too far!! will look like this when done..but what ever color bulbs you installed
 05-08-2011, 12:09 AM
#12


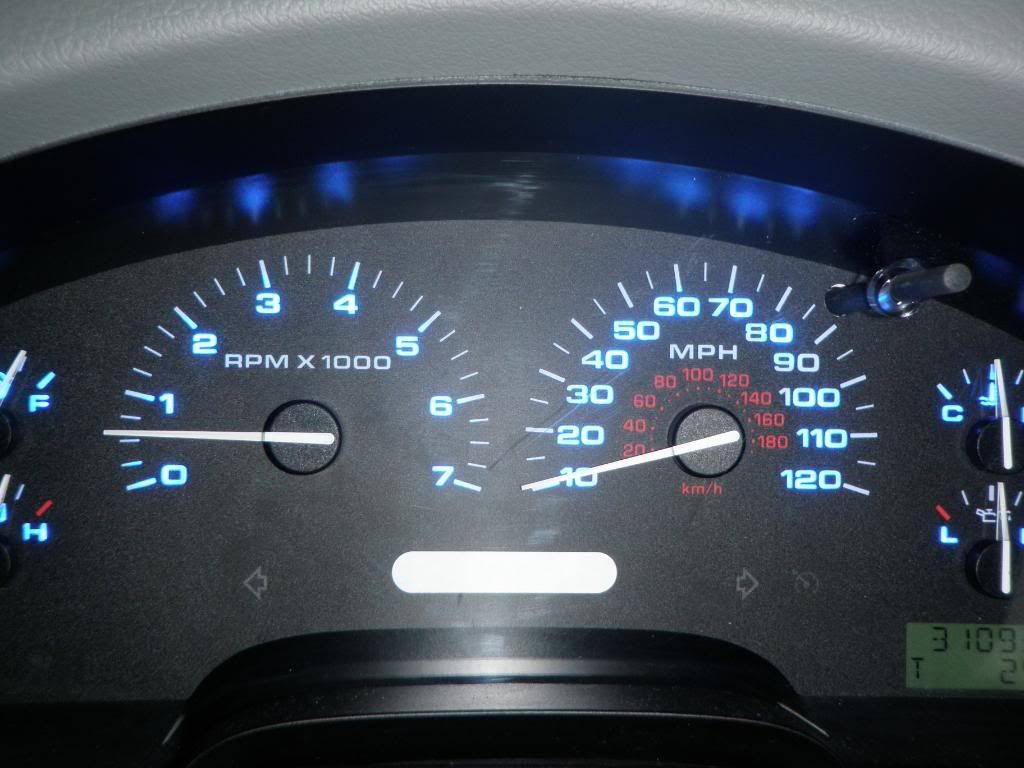
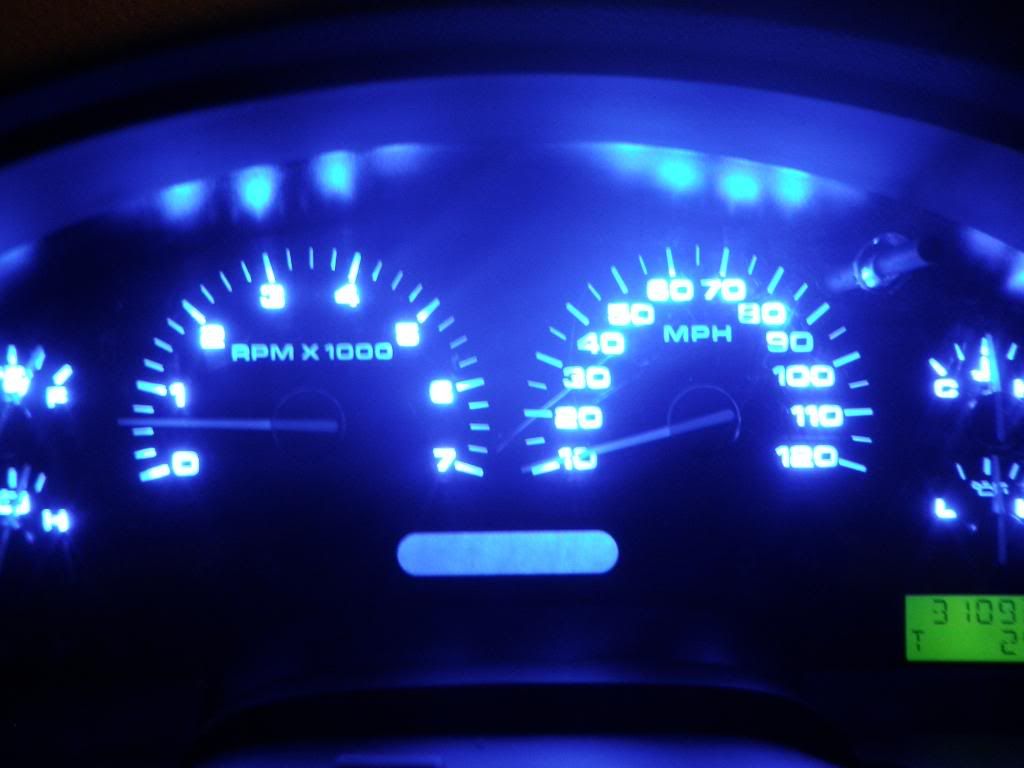
I posted a "how to" a while ago on how to put LED lighting into your dash cluster. It worked out great except for one thing... my orange needles wouldn't show up with my blue lighting no matter how many LEDs I put behind the cluster. So I came up with a solution.
It was suggested to me to find an old set of Ford cluster needles that were white and swap them into my cluster. Sounded easy enough so through Ebay I purchased a '97 Ford Explorer cluster for $25 and got to work. There was a lot more work than I thought...
So the cluster arrives and I take the dash apart to throw in these new needles. Problem #1. The stems on the new white needles are too short to connect up with my dash needles in my 07 f150.
So I had to get creative. I took out my factory needles and took them apart. I took the entire stem "assembly" (stem plus flat part which connects to orange needle part) and shaved it down so I could glue it to the new needles. In order to get this to work I first had to get rid of the stem on the white needles. The quickest and easiest way was to get out the ol' drill.
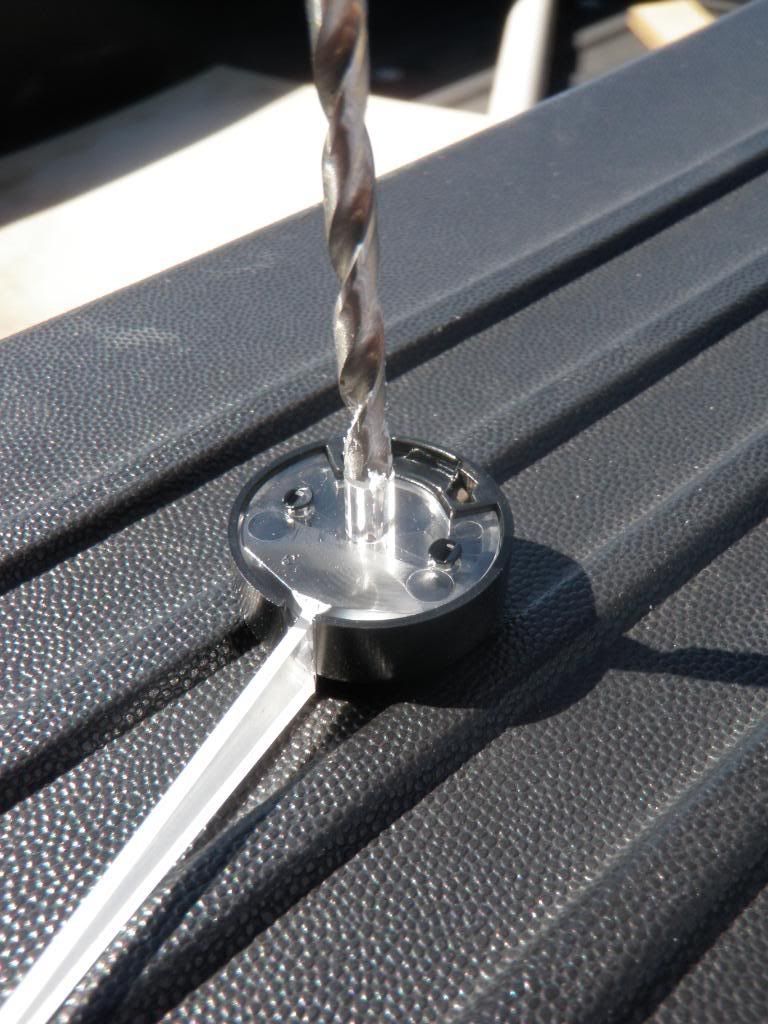
With the stems drilled out, I then sanded them down to make a smooth surface. With some trusty super glue I then attached my OEM stem to the 97 needle.
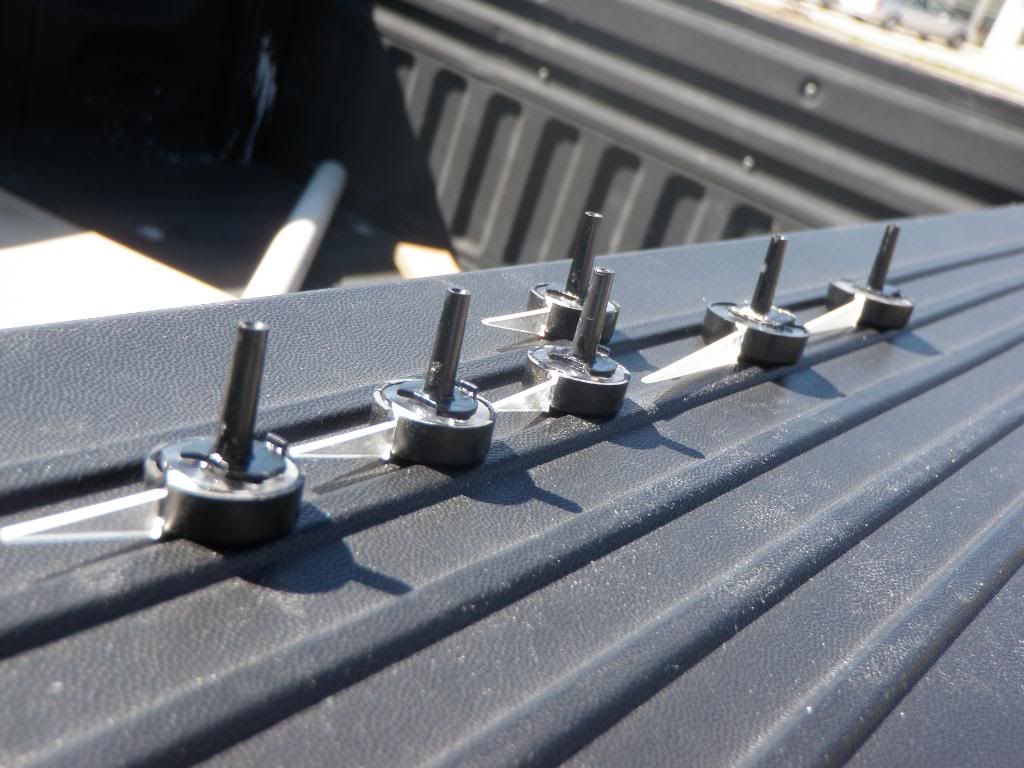
With all of this done, I let them dry for a few minutes and then reassembled the whole thing. Needles are finicky to reset and the cluster must be plugged in before you stick your needles back on. Try to remember where the needles sat before you took them off for easier placement. Minor adjustments can be made while the truck is running to move gauges to the appropriate places. These positions will be held until the cluster is unplugged again at which time you will have to reposition them again.
I put my needles on as a group moving from needle to needle and pushing down a small amount each time I move through the group. This makes sure you don't push a needle too hard or too far. Needles on, the truck looked fantastic. The cluster looks awesome now with those darn orange needles gone.
I just remembered there was one needle that came in my 97 cluster that had a metal stem on it. I tried to drill it out like the other ones but that didn't work so well so I just cut it off with a hack-saw and that made my life a lot easier.
In total, it probably took me 30 minutes to do this and the work was definitely worth it. It was a cheap alternative to buying a new cluster for my truck. Including the LEDs, I have spent ~$35 and now have a custom cluster.
It was suggested to me to find an old set of Ford cluster needles that were white and swap them into my cluster. Sounded easy enough so through Ebay I purchased a '97 Ford Explorer cluster for $25 and got to work. There was a lot more work than I thought...
So the cluster arrives and I take the dash apart to throw in these new needles. Problem #1. The stems on the new white needles are too short to connect up with my dash needles in my 07 f150.
So I had to get creative. I took out my factory needles and took them apart. I took the entire stem "assembly" (stem plus flat part which connects to orange needle part) and shaved it down so I could glue it to the new needles. In order to get this to work I first had to get rid of the stem on the white needles. The quickest and easiest way was to get out the ol' drill.
With the stems drilled out, I then sanded them down to make a smooth surface. With some trusty super glue I then attached my OEM stem to the 97 needle.
With all of this done, I let them dry for a few minutes and then reassembled the whole thing. Needles are finicky to reset and the cluster must be plugged in before you stick your needles back on. Try to remember where the needles sat before you took them off for easier placement. Minor adjustments can be made while the truck is running to move gauges to the appropriate places. These positions will be held until the cluster is unplugged again at which time you will have to reposition them again.
I put my needles on as a group moving from needle to needle and pushing down a small amount each time I move through the group. This makes sure you don't push a needle too hard or too far. Needles on, the truck looked fantastic. The cluster looks awesome now with those darn orange needles gone.
I just remembered there was one needle that came in my 97 cluster that had a metal stem on it. I tried to drill it out like the other ones but that didn't work so well so I just cut it off with a hack-saw and that made my life a lot easier.
In total, it probably took me 30 minutes to do this and the work was definitely worth it. It was a cheap alternative to buying a new cluster for my truck. Including the LEDs, I have spent ~$35 and now have a custom cluster.
 05-03-2012, 12:45 AM
#14
Senior Member

Know how to swap a blue/white cluster from a 2011 FX4 into a 2012 FX4? I want to ditch the red/white appearance of the 2012s.
Any advice would be awesome, thanks!
Any advice would be awesome, thanks!
 04-17-2013, 09:00 AM
#16
Senior Member
Well for the most part they are good... My fuel gauge no matter how many times I adjust it, when I turn the truck off then back on, it moves to a new location.
Question about the needles, instead of swapping them out to a white ones, do you think I could just paint my current ones to white and have the same result?
Question about the needles, instead of swapping them out to a white ones, do you think I could just paint my current ones to white and have the same result?
06-10-2018, 09:17 PM
#17
Junior Member

Join Date: Jun 2018
Location: milwaukee, wisconsin
Posts: 1
Likes: 0
Received 0 Likes
on
0 Posts
Nice job.... you did yours a bit different than I didn mine and explained to ya, still looks good though...NOTE: If you have a FX2, FX4, or cluster with the rings around the needles the needles will have to be cut down @ 1/4 inch as the 90's model mirrors are longer. You used needles with plastic collars (what did they come off?) I use ones off cougars, explorers, f150's ect and they have the metal post you spoke of....
After you take the back of the stock needle off, drill the flat side 1 size smaller than the width of the 95 needle stem******DON'T GO TOO DEEP OR THE NEEDLE WONT GO BACK ONTO THE FATORY CLUSTER***** just enough for the 95 needle to press all the way in... before you press it all the way in, grind/cut off the extra flat material, this will let more light to the neele to let it shine brighter!
After your needles are assymbled, then match up with the length of the factory needle heads and take the extra off the 95 needles. Then installon the cluster.. place a fork under the needle to keep from pushing it down too far!! will look like this when done..but what ever color bulbs you installed
i like the blue is there a write up on this i want to do all the green cluster lights white but is it the bulbs that are green or the overlay? also is there a way to do the same white on the center dash lights for the HVAC? thanks