Replacing Staked U Joints
 10-07-2012, 07:05 PM
#1
Toledo FX4
Thread Starter

Join Date: Oct 2012
Location: Oregon, Ohio
Posts: 5
Likes: 0
Received 0 Likes
on
0 Posts
Here is a how to on my 2004 FX4 SCREW. I found out that my year, and others, have "staked" u joints. After researching on this site I decided to buy the kit and do the replacement. In my search for info on these things, I didn't come across a How To with Pics, so I thought I'd give it a shot... here it goes.
Parts: Neapco 3-0488 U Joint Kit from Advance Auto Parts. $97.50
(there are cheaper kits, but I didn't have time to wait for shipping)
Tools: 12 point metric socket, Neapco cutting tool on a 1/2" ratchet, shop
press, fine wire brush, half round file, emery cloth, grinder with
cutting wheel and a rubber mallet to "nudge" parts with.
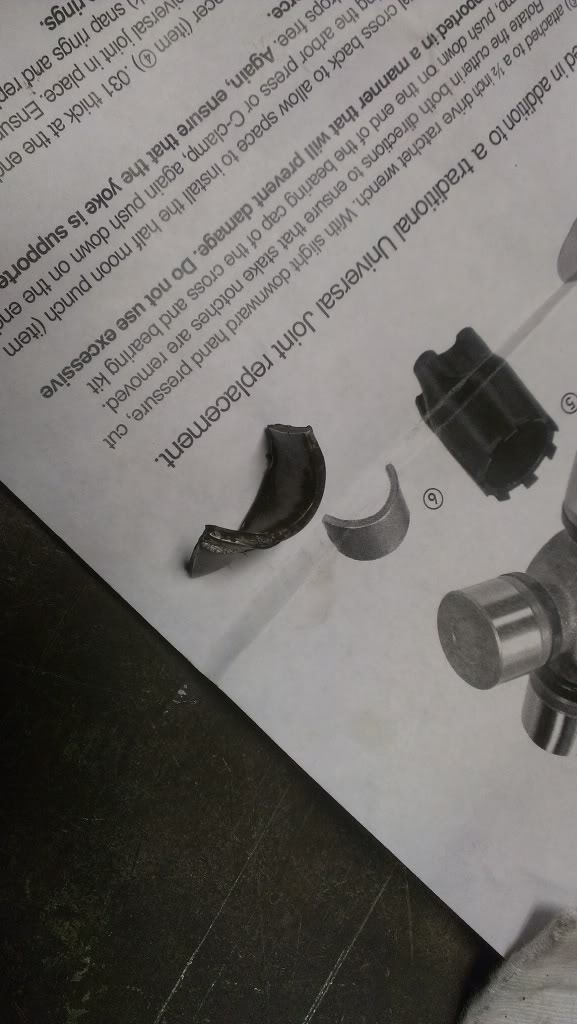
The Job: I had a broken cup on the rear U Joint to replace. I lifted up the rear of my truck on the bumper to give me more space under it. Marked the shaft and yoke (scribed them). Took out the four bolts at the yoke, and slide out the shaft from the tranny box. Once removed, I placed the shaft in a vice and used the tool to cut the dimples out of the yoke. NOTE- you need to use a good bit of force and work at this. It works well if you use short turn or bumps of the ratchet! Once all the stakes are cut out, use the press to press out the cups. The "sleeve" that is provided in the Neapco kit is used to press the cups the rest of the way out. BEWARE- this sleeve doesn't stay put to press them out. I used a wire tire to hold it in place on the first cup and it worked. Look at the pics of what happened to it! Take care to NOT destroy it. Once I had two cups out, I just used the cutting wheel to remove the rest, much easier. Ok, old joint out... Prep the yoke and shaft... I had to use a half round file to get the scabs of metal out of the yokes. The cutting tool removes enough to press them out, but leaves boogers behind. I then used emery cloth to smooth them out. Instal the joints like you would any other. I used a C Clamp to press the cups in flush to the yoke, then the press to finish them in. Once in the yoke to where the C Clips will fit, insert the spacers supplied in the Neapco kit, then the C Clips. Use the BLACK thicker ones if you can, if they are to tight, use the GREY ones. Insert shaft spline into tranny box, line up as it was before removal, bolts back in. ( No torque specs for you, sorry) DONE here comes some pics and comments. Hope this made sense and helps.
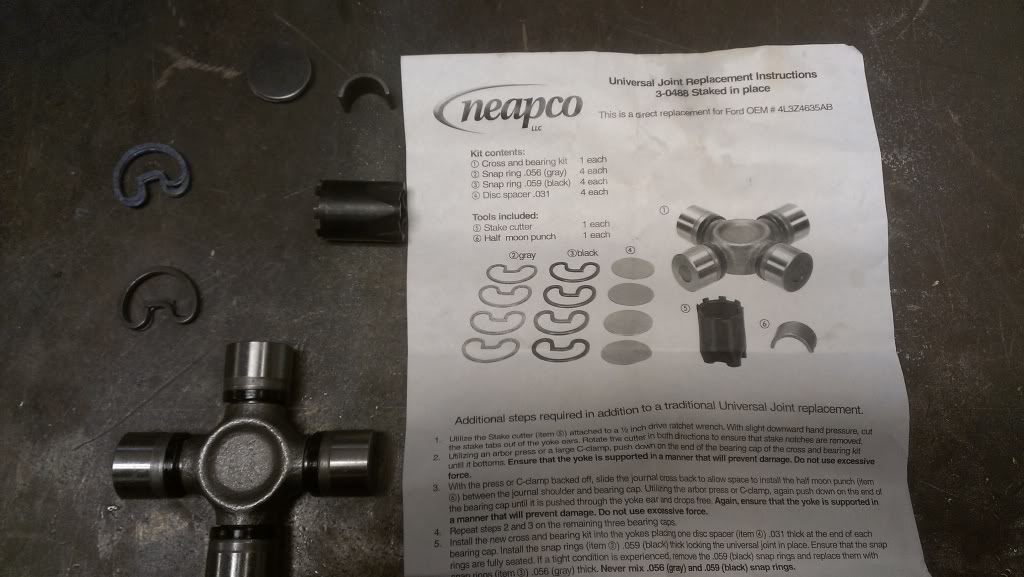 Neapco Kit
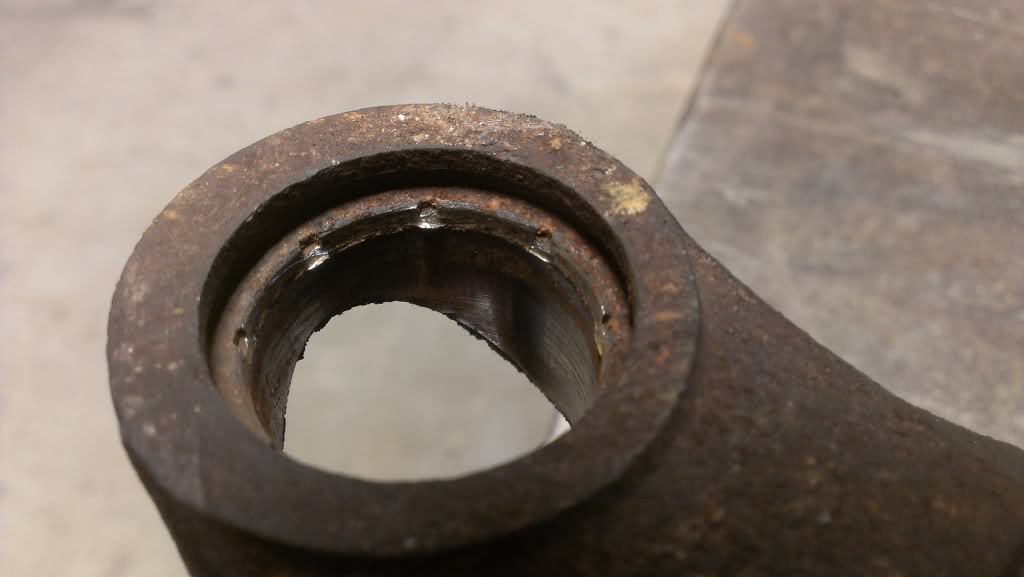
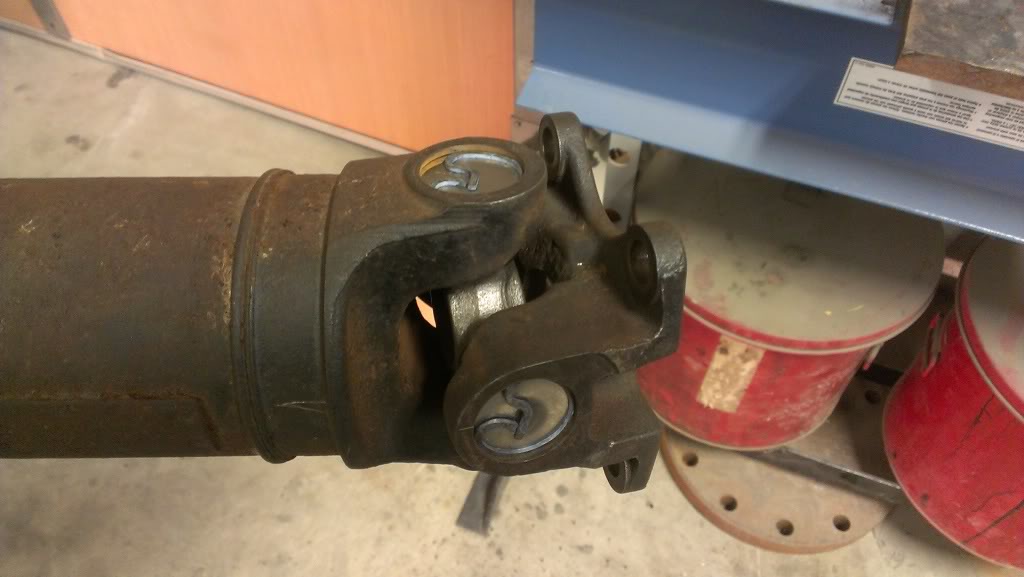
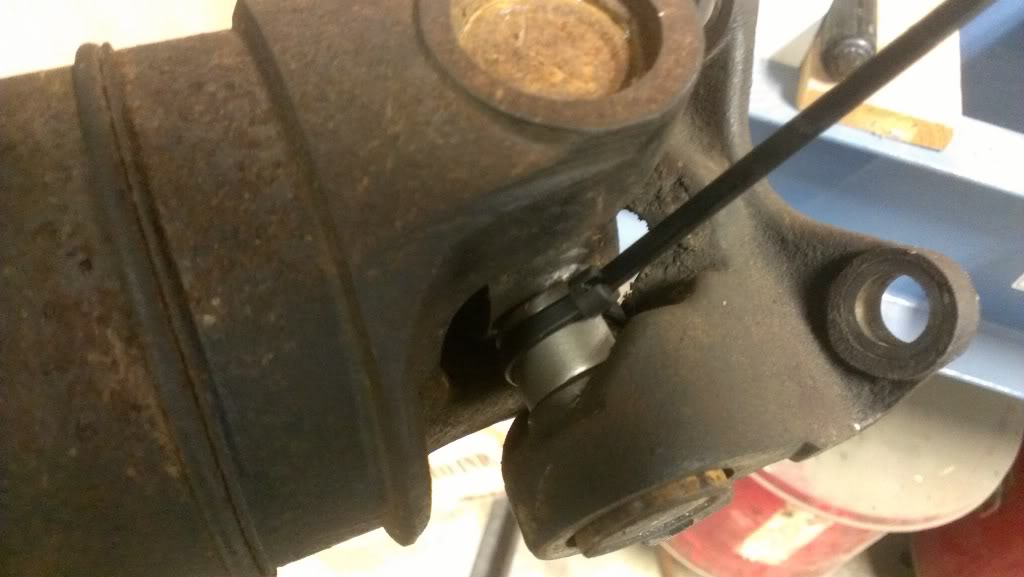
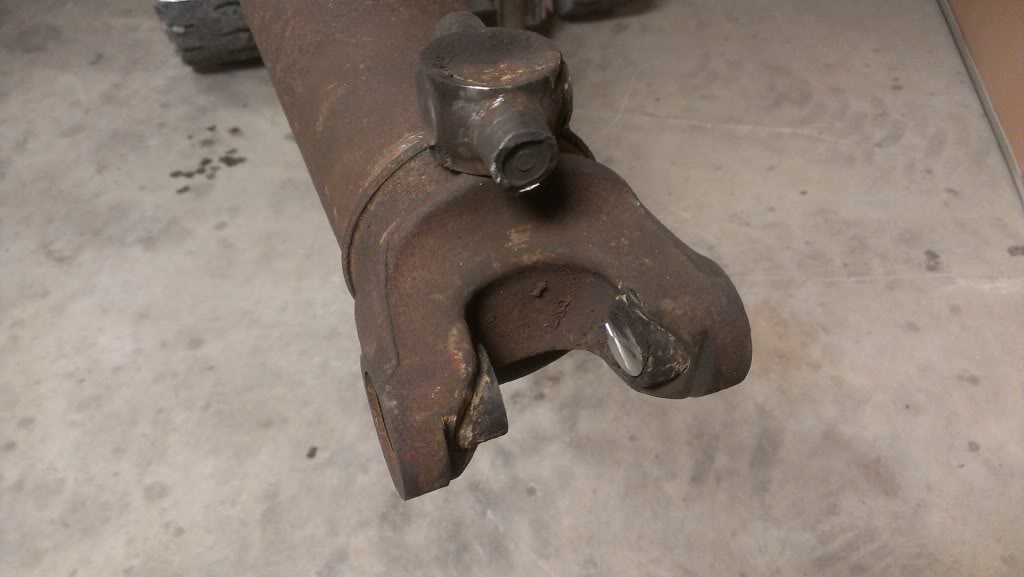
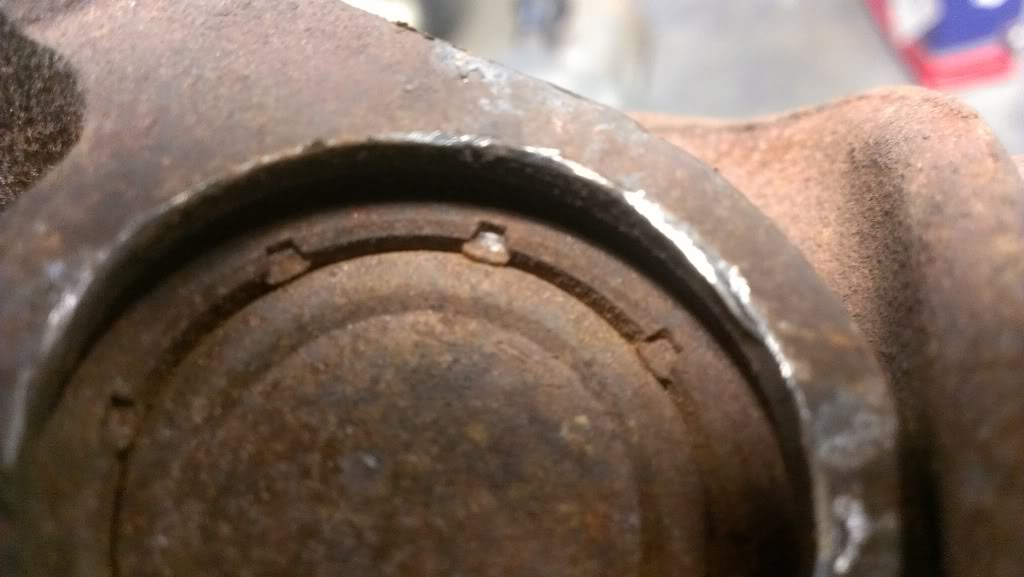 Staked Joint. Notice the dimpled steel to be cut out.
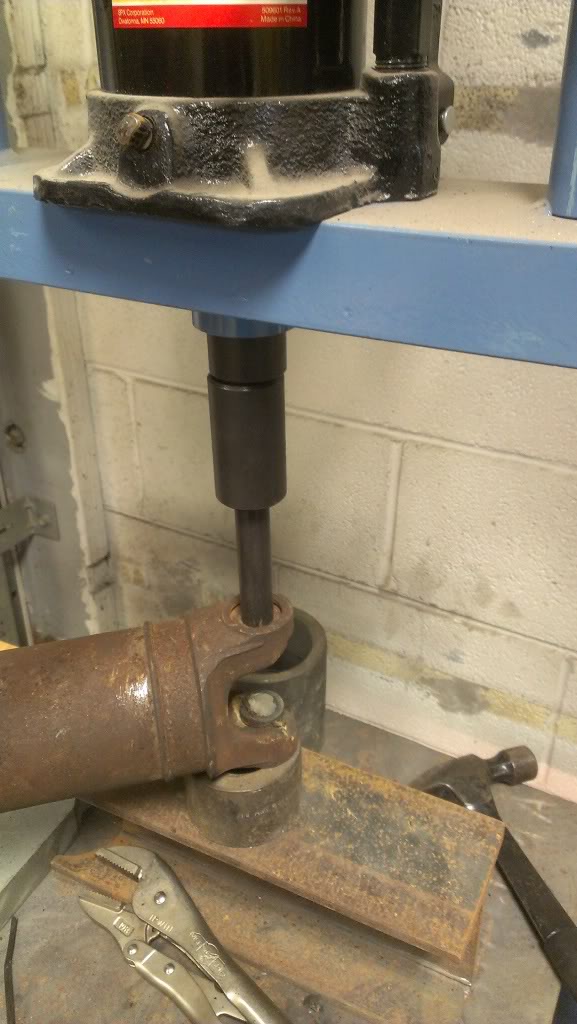
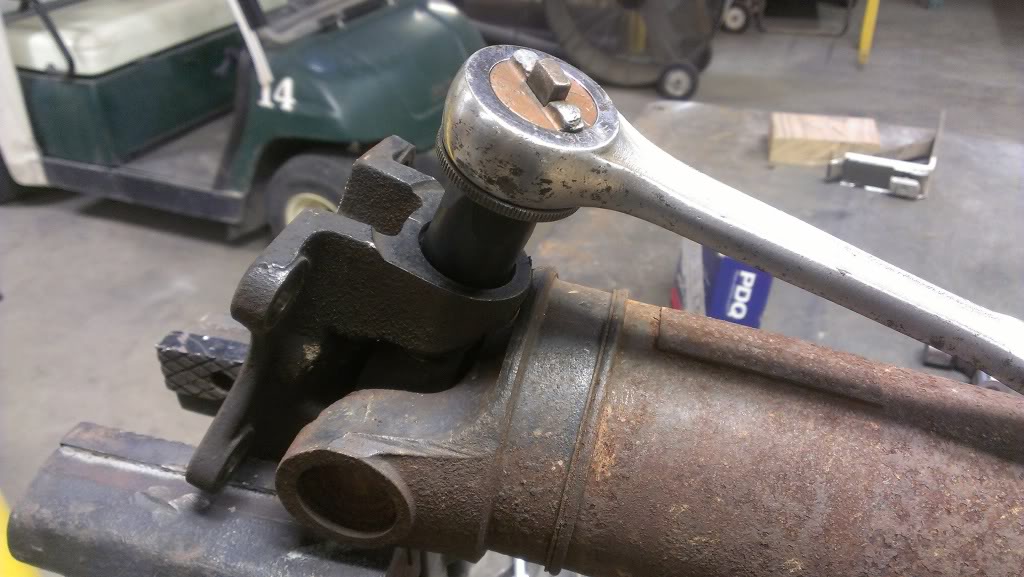 How to use the tool. USE FORCE
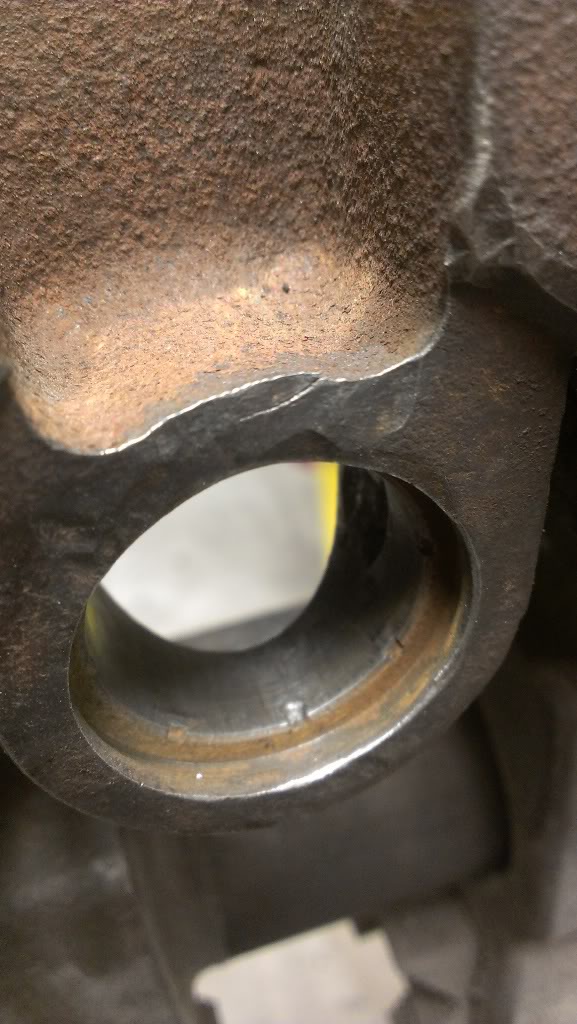
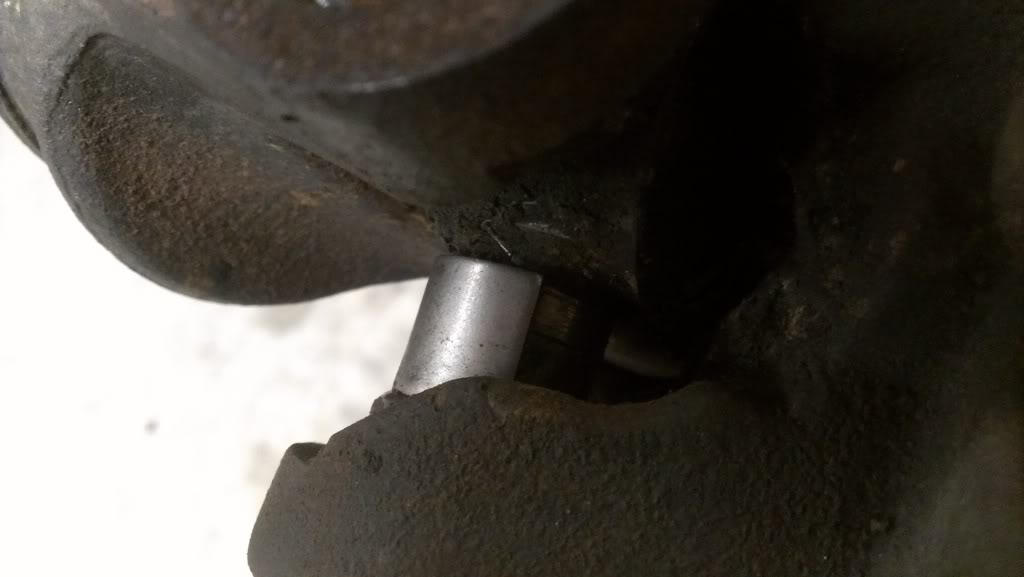
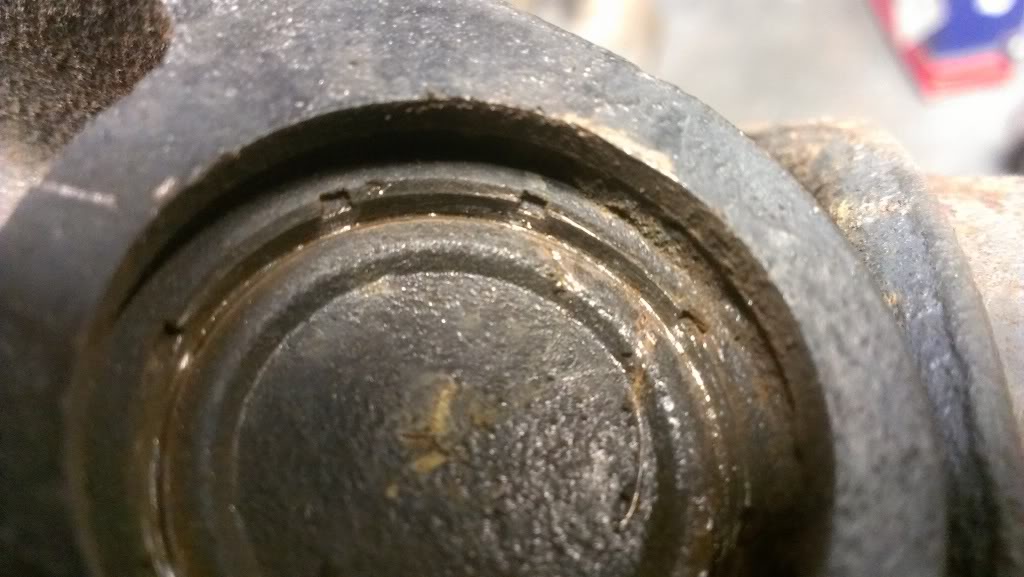 After cutting tool...
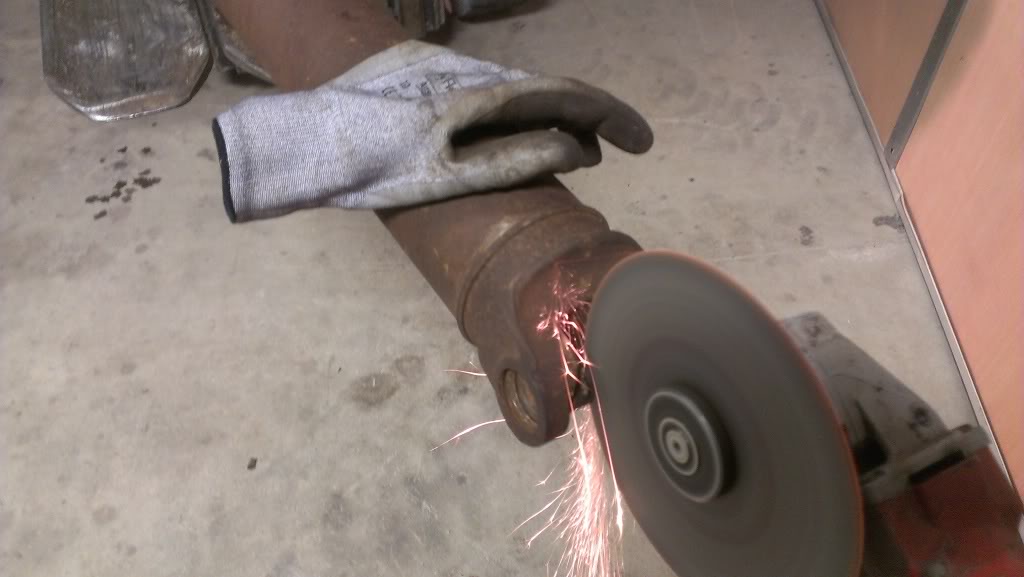 Cut rest out.
 Still burs in there, clean em up.
File and cloth worked great.
 Cleaned and ready to go.
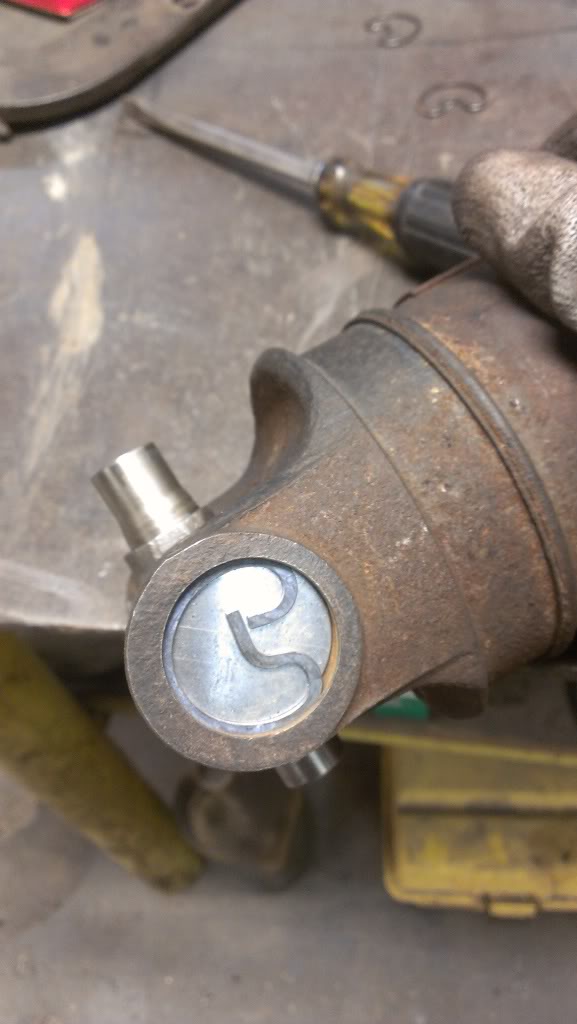 One side done. Notice the spacer disc...
 COMPLETED Now just install on truck!
Please comment if you can add to this. Torque specs, easier way to press etc. Thanks
Parts: Neapco 3-0488 U Joint Kit from Advance Auto Parts. $97.50
(there are cheaper kits, but I didn't have time to wait for shipping)
Tools: 12 point metric socket, Neapco cutting tool on a 1/2" ratchet, shop
press, fine wire brush, half round file, emery cloth, grinder with
cutting wheel and a rubber mallet to "nudge" parts with.
The Job: I had a broken cup on the rear U Joint to replace. I lifted up the rear of my truck on the bumper to give me more space under it. Marked the shaft and yoke (scribed them). Took out the four bolts at the yoke, and slide out the shaft from the tranny box. Once removed, I placed the shaft in a vice and used the tool to cut the dimples out of the yoke. NOTE- you need to use a good bit of force and work at this. It works well if you use short turn or bumps of the ratchet! Once all the stakes are cut out, use the press to press out the cups. The "sleeve" that is provided in the Neapco kit is used to press the cups the rest of the way out. BEWARE- this sleeve doesn't stay put to press them out. I used a wire tire to hold it in place on the first cup and it worked. Look at the pics of what happened to it! Take care to NOT destroy it. Once I had two cups out, I just used the cutting wheel to remove the rest, much easier. Ok, old joint out... Prep the yoke and shaft... I had to use a half round file to get the scabs of metal out of the yokes. The cutting tool removes enough to press them out, but leaves boogers behind. I then used emery cloth to smooth them out. Instal the joints like you would any other. I used a C Clamp to press the cups in flush to the yoke, then the press to finish them in. Once in the yoke to where the C Clips will fit, insert the spacers supplied in the Neapco kit, then the C Clips. Use the BLACK thicker ones if you can, if they are to tight, use the GREY ones. Insert shaft spline into tranny box, line up as it was before removal, bolts back in. ( No torque specs for you, sorry) DONE here comes some pics and comments. Hope this made sense and helps.
Neapco KitStaked Joint. Notice the dimpled steel to be cut out.How to use the tool. USE FORCE After cutting tool...Cut rest out.Still burs in there, clean em up.File and cloth worked great.
Cleaned and ready to go.One side done. Notice the spacer disc...COMPLETED Now just install on truck!Please comment if you can add to this. Torque specs, easier way to press etc. Thanks
Last edited by Junk13; 10-07-2012 at 07:11 PM. Reason: Spelling and comment

 10-17-2012, 04:28 AM
#3

Thank you man!! I approved and moved it!
 11-18-2012, 09:14 AM
#5

thanks for the post. if anyone does not have tools to do the job ie press etc. many driveline shops will change the u joint for you for for not much more than the price of the u joint if you take the drive shaft out and bring it to them
04-09-2013, 09:13 PM
#6

this is a very helpful write-up , thank you very much. I do have a question though. Is it safe to say that I should purchase 2 kits if I want to re-do both front and rear joints? I have a slight vibration and am unsure of the exact source, but since the pinion seal is seeping now, I believe it to be the drive shaft. 200.00 seems like a lot to replace two F$#%N U-joints, but what else is new.
05-27-2013, 04:49 PM
#7
Junior Member

Join Date: May 2013
Posts: 1
Likes: 0
Received 0 Likes
on
0 Posts
Hi,
Thanks Junk13 for the great pictures on the process, quick question for anyone out there.
My joints are staked, Can I buy regular ujoints(~$12) or do I have to buy the kit( http://www.drivetrainamerica.com/p-6...up-staked.aspx ) with the cutter? I'm sure I can find a way to remove those pinched edges.
Trending Topics
02-03-2017, 10:52 PM
#8
Junior Member

Join Date: Aug 2011
Posts: 1
Likes: 0
Received 0 Likes
on
0 Posts

Can someone post the correct dimensions for the u-joints for the rear of a 2004 f150 with staked joints? I can remove the stakes with a dremel tool and make the correct spacers from shim stock. Are the u-joints measured in metric or english measurements?
Thanks,
Sunwaterboy.
One of Ford's poorer ideas. Spark plugs not so bright either.
Thanks,
Sunwaterboy.
One of Ford's poorer ideas. Spark plugs not so bright either.
06-04-2017, 10:00 AM
#9
Junior Member

Join Date: Jun 2017
Posts: 1
Likes: 0
Received 0 Likes
on
0 Posts
Can someone post the correct dimensions for the u-joints for the rear of a 2004 f150 with staked joints? I can remove the stakes with a dremel tool and make the correct spacers from shim stock. Are the u-joints measured in metric or english measurements?
Thanks,
Sunwaterboy.
One of Ford's poorer ideas. Spark plugs not so bright either.
Thanks,
Sunwaterboy.
One of Ford's poorer ideas. Spark plugs not so bright either.
O'Reilly's part numbers 331 ujoint for clips
336 ujoint
Clips from the 336 are to small if your.lucky your parts supplier will give you the clips you need i had to buy both good luck
09-26-2017, 07:43 PM
#10

I just noticed the rear pinion seal leaking and from reading other posts think that the U Joint is the problem with the shaking/vibration in the rear end since I've replaced everything else (axle shafts, bearings, rotors etc). After looking at the U Joint and scratching my head I came here and found this thread. I just ordered the kit and am going to tackle it this weekend. Got the kit from Driveline for about $72 shipped.
Thanks for this how to.
Thanks for this how to.