Changing thermostat on 5.4 2V
 05-20-2013, 11:55 PM
#1

Earlier I had an issue with my enginge running slightly above normal and using up quite a bit of coolant (I used water to see if it would evaporate). After running a while my coolant level dropped drastically, and the temp gauge rose to about 3/4. I checked the fan/clutch, water pump, so finally I decided to change thermostats. My fan was kicking in and trying to cool the radiator, but the thermostat was locked up and would not let the coolant flow freely.
So here is my method for changing out a thermostat.
Materials:
New thermostat $20-30 at your local auto parts store
O-ring $3.00
Rag (for wiping and cleaning up)
Bucket to drain fluid
3 Gallons of anti-freeze (depending on enginge)
Channel Locks
8mm socket
10mm socket
Water hose (if you plan to flush, recommended) Cascade detergent helps!
Air hose/nozzle (for cleaning hoses and pipes)
*I always remove the negative battery terminal before doing any work to the truck*
Make sure the truck is cooled down quit a bit before proceeding.
First step is to remove all 3 bolts holding your plastic 5.4 cover (over the throttle body). These are all 8mm.
Removing air intake and accessories. (8mm socket/flat head)
Now we need to take the air intake off to have room to work.
1.) Pull out the two hoses at the top of the intake.
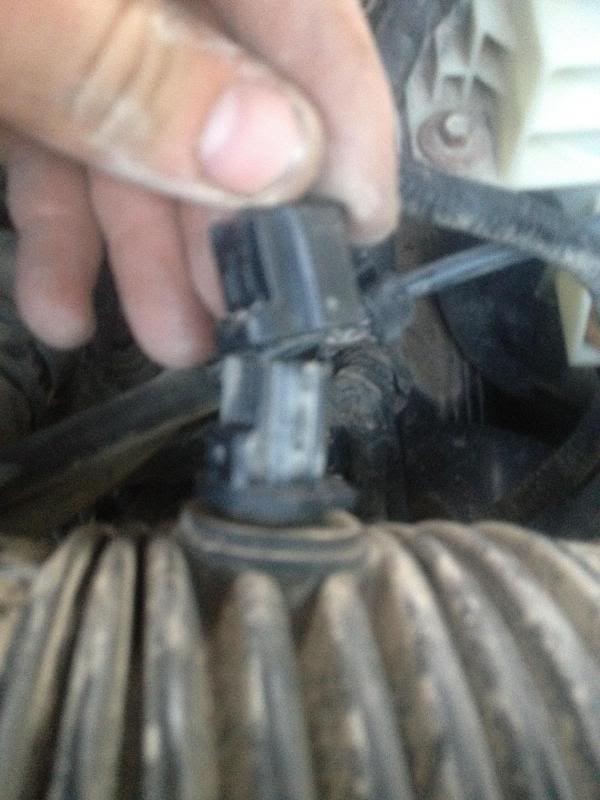
2.) Unplug the MAF (mass air flow sensor) plug
3) Then unclamp the clip that holds the air box/filter in.
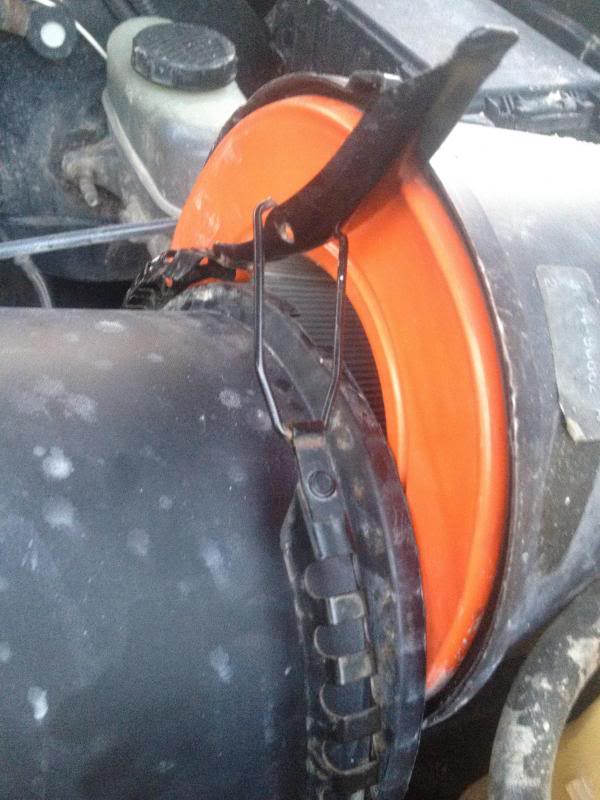
4) Finally loosen up the C-clamp attaching to the throttle body with an 8mm socket.
You can now lay the air intake up out of your way, it is not necessary to unplug the air filter sensor. But if you want to take the complete plastic intake off unplug the following plug below.
Laying it out of the way.
So here is my method for changing out a thermostat.

Materials:
New thermostat $20-30 at your local auto parts store
O-ring $3.00
Rag (for wiping and cleaning up)
Bucket to drain fluid
3 Gallons of anti-freeze (depending on enginge)
Channel Locks
8mm socket
10mm socket
Water hose (if you plan to flush, recommended) Cascade detergent helps!
Air hose/nozzle (for cleaning hoses and pipes)
*I always remove the negative battery terminal before doing any work to the truck*
Make sure the truck is cooled down quit a bit before proceeding.
First step is to remove all 3 bolts holding your plastic 5.4 cover (over the throttle body). These are all 8mm.
Removing air intake and accessories. (8mm socket/flat head)
Now we need to take the air intake off to have room to work.
1.) Pull out the two hoses at the top of the intake.

2.) Unplug the MAF (mass air flow sensor) plug

3) Then unclamp the clip that holds the air box/filter in.

4) Finally loosen up the C-clamp attaching to the throttle body with an 8mm socket.

You can now lay the air intake up out of your way, it is not necessary to unplug the air filter sensor. But if you want to take the complete plastic intake off unplug the following plug below.

Laying it out of the way.

 05-20-2013, 11:55 PM
#2
With the intake out of the way, we get a view of what we need to do.
I wanted to go ahead and flush the heater core and drain/flush the radiator. I wont get into all the details about this, but here are the hose's we are concerned with. I will just note and show a few pics of the hoses I removed and cleaned. They all come off by a simple hose clamp, use a pair of channel locks for easy removal.
Heater Core Hose and flush.
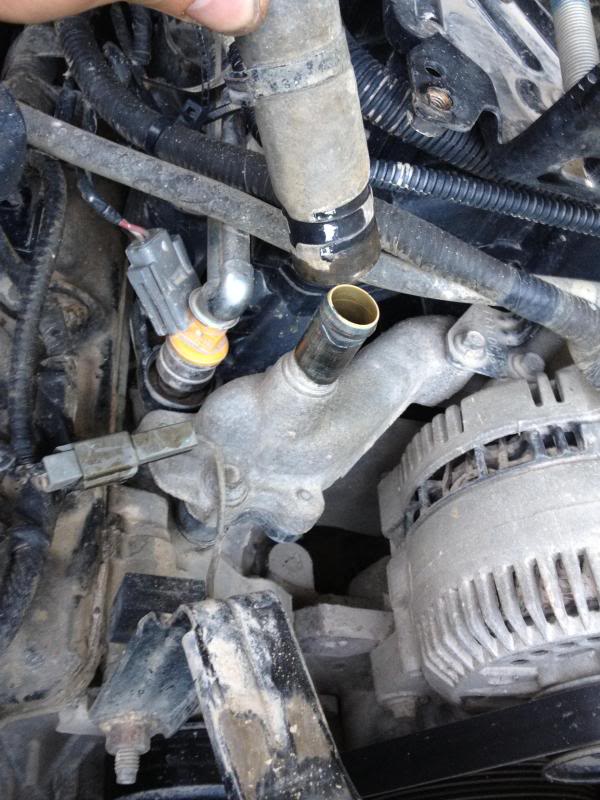
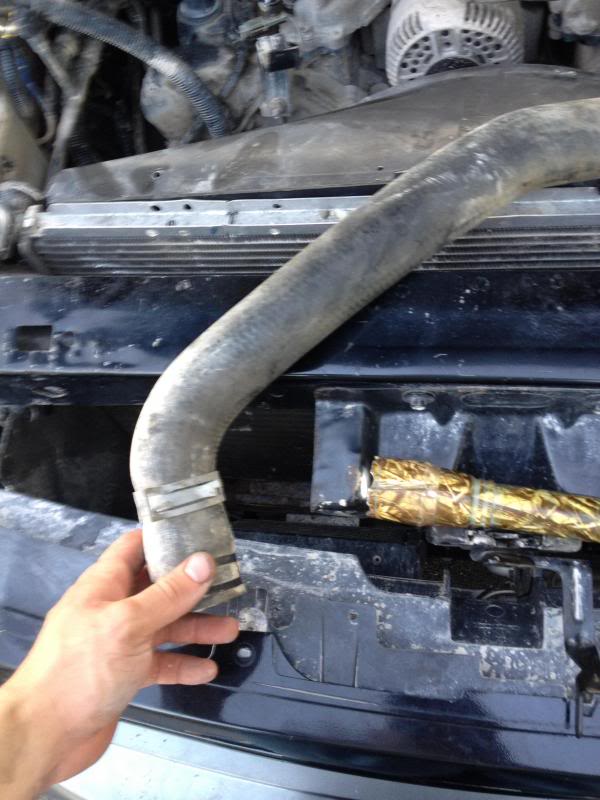
Radiator Hose (from engine to radiator)
Hose leading from thermostat to radiator.

MAKE SURE YOUR COOLANT HAS HAD TIME TO COOL OFF!!!!
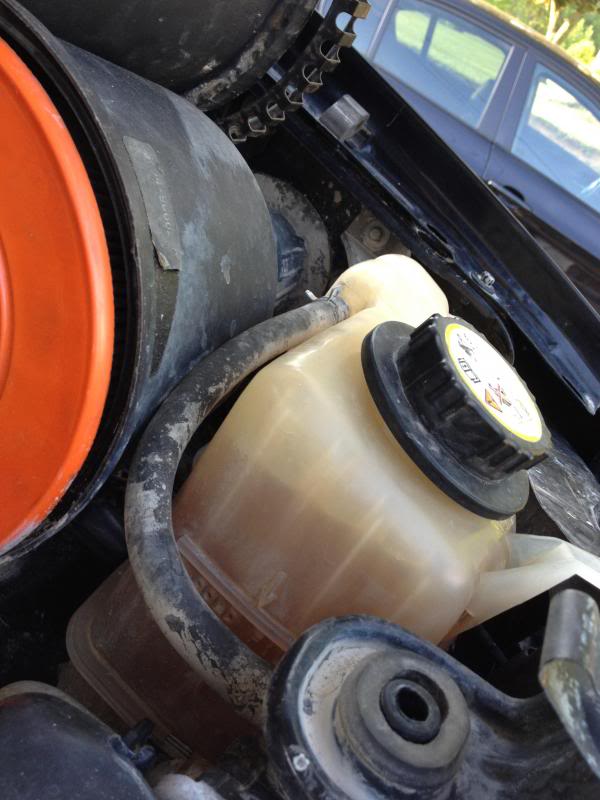
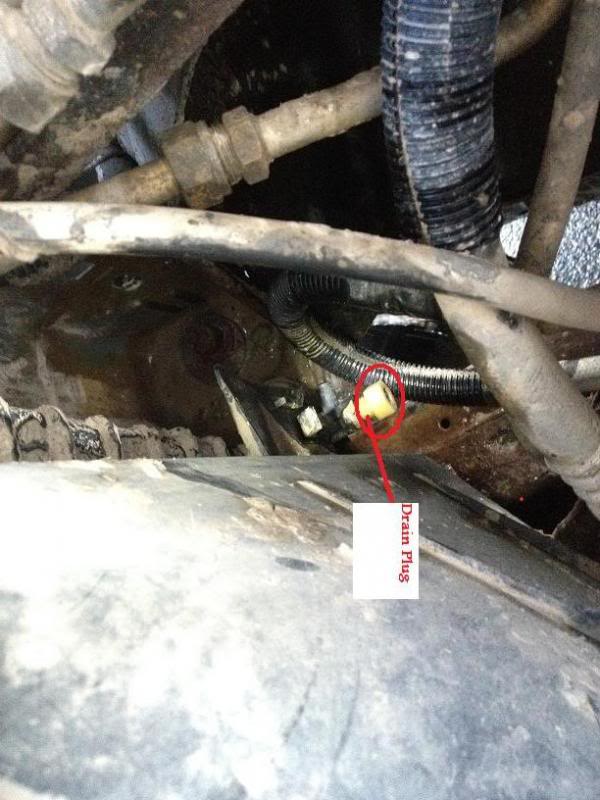
Now that we know where most of the main hoses are, it was time for me to drain the radiator. Its a small plastice piece at the bottom left corner of the radiator. I used a bucket to catch most of the drainage. Unscrewing the cap helps it to flow a little better.
Radiator hose removed.
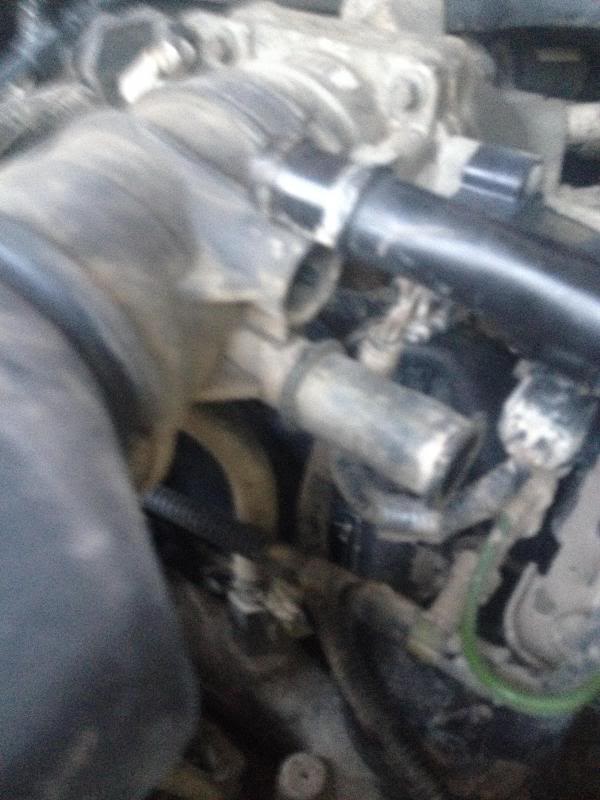
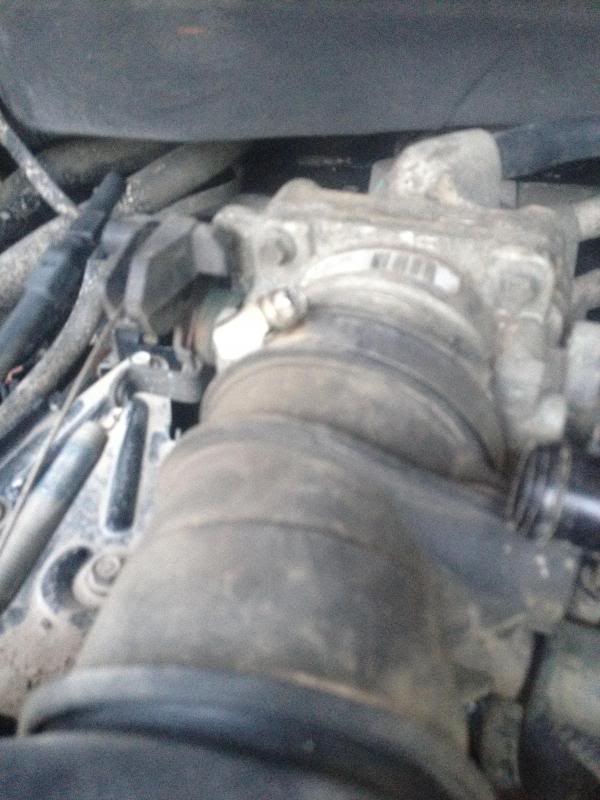
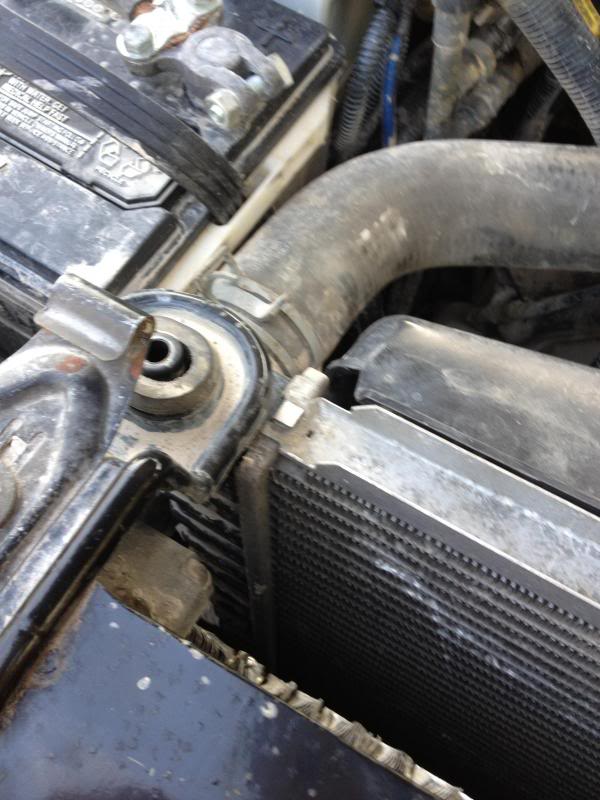
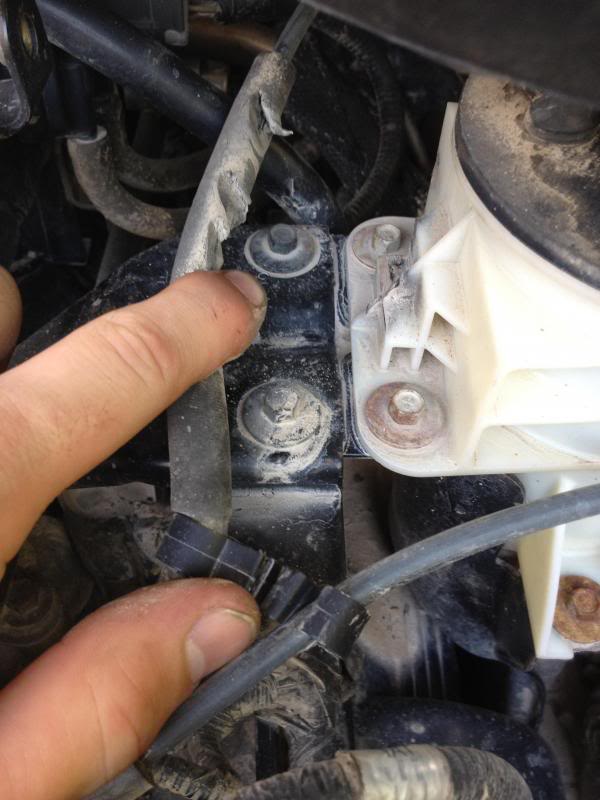
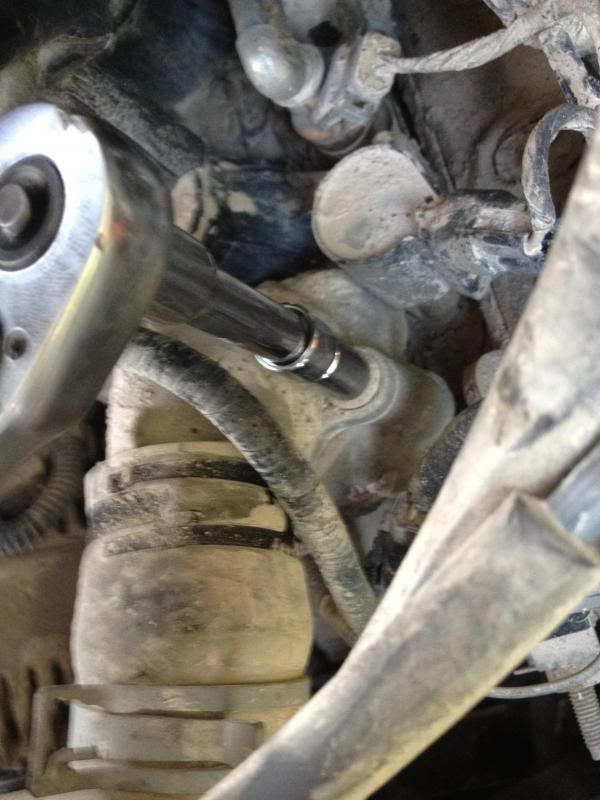
Getting to the thermostat (8mm socket and extension)
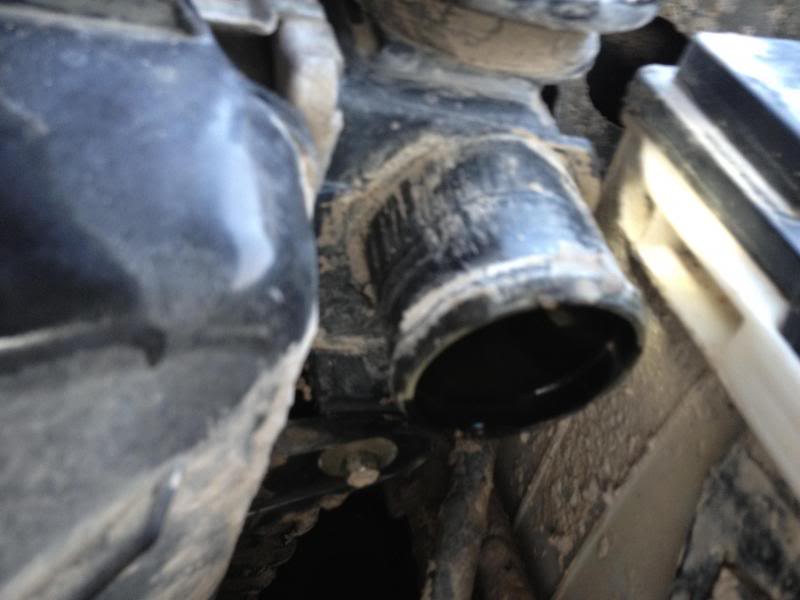
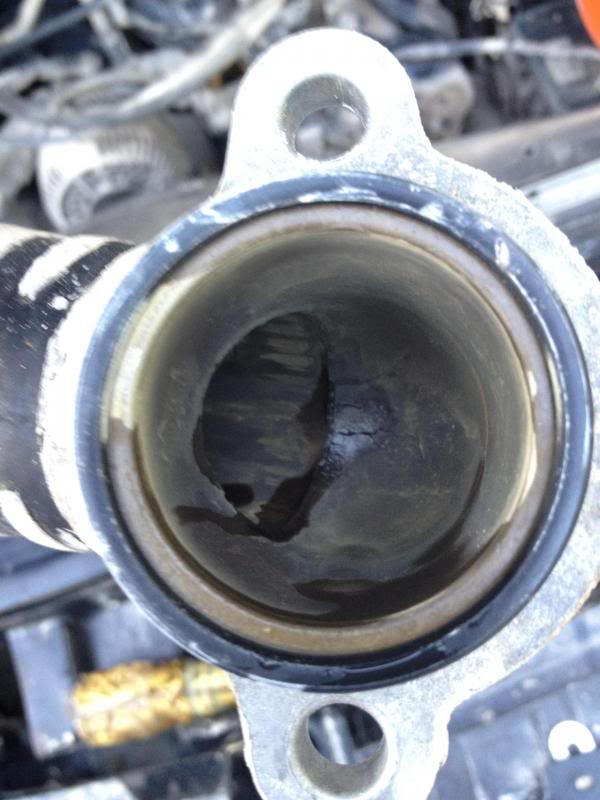
With most of my hose removal done, its time to check out the thermostat. The thermostat is located in a small housing at the end of the radiator hose (coming from the top of the radiator). This is the coolant return line to the radiator. So *BE CAREFUL* this line transfer hot coolant from the enginge to the radiator.
You will now need to use an 8mm socket to unbolt the metal support member. The left side (with 3 bolts) are the ones we are concerned with.

I wanted to go ahead and flush the heater core and drain/flush the radiator. I wont get into all the details about this, but here are the hose's we are concerned with. I will just note and show a few pics of the hoses I removed and cleaned. They all come off by a simple hose clamp, use a pair of channel locks for easy removal.
Heater Core Hose and flush.

Radiator Hose (from engine to radiator)

Hose leading from thermostat to radiator.

MAKE SURE YOUR COOLANT HAS HAD TIME TO COOL OFF!!!!
Now that we know where most of the main hoses are, it was time for me to drain the radiator. Its a small plastice piece at the bottom left corner of the radiator. I used a bucket to catch most of the drainage. Unscrewing the cap helps it to flow a little better.

Radiator hose removed.


Getting to the thermostat (8mm socket and extension)
With most of my hose removal done, its time to check out the thermostat. The thermostat is located in a small housing at the end of the radiator hose (coming from the top of the radiator). This is the coolant return line to the radiator. So *BE CAREFUL* this line transfer hot coolant from the enginge to the radiator.
You will now need to use an 8mm socket to unbolt the metal support member. The left side (with 3 bolts) are the ones we are concerned with.


 05-20-2013, 11:56 PM
#3
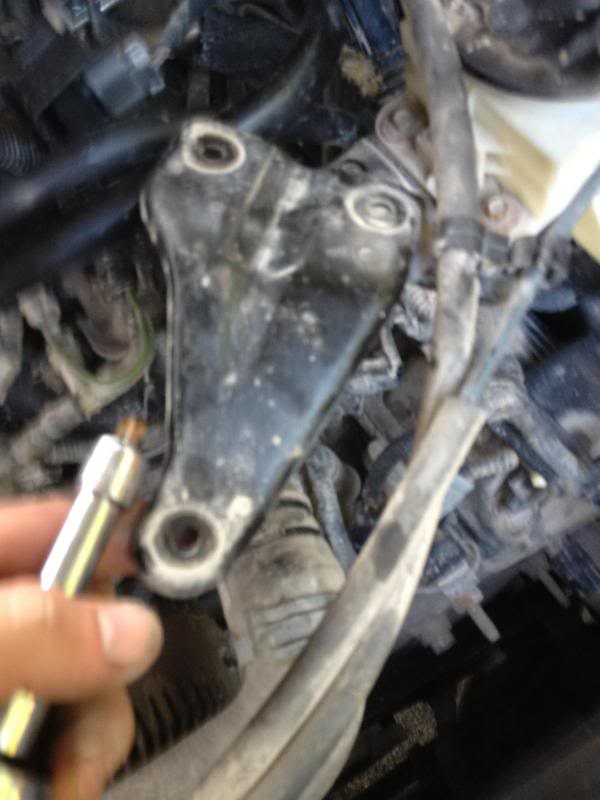
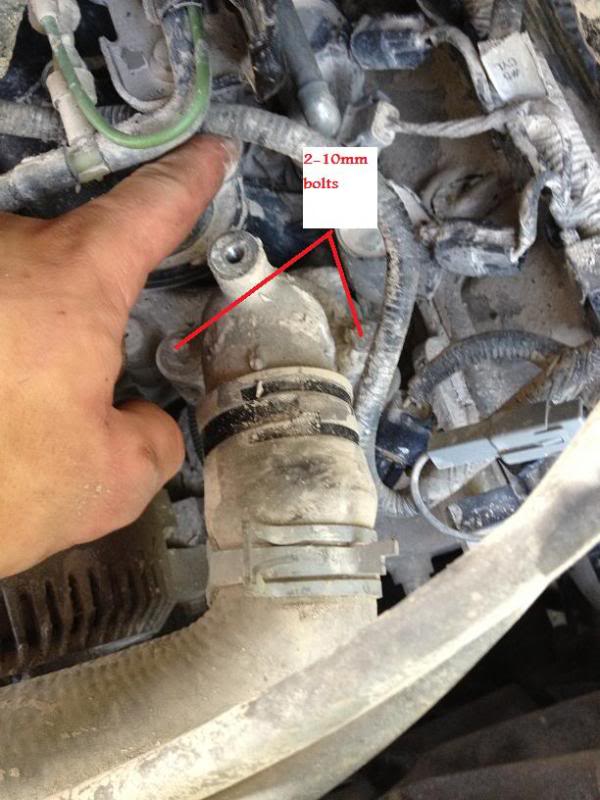
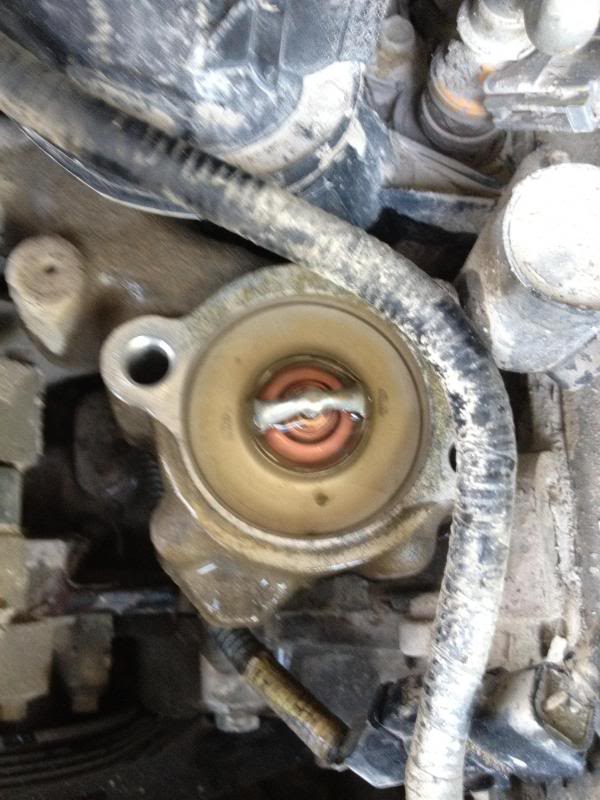
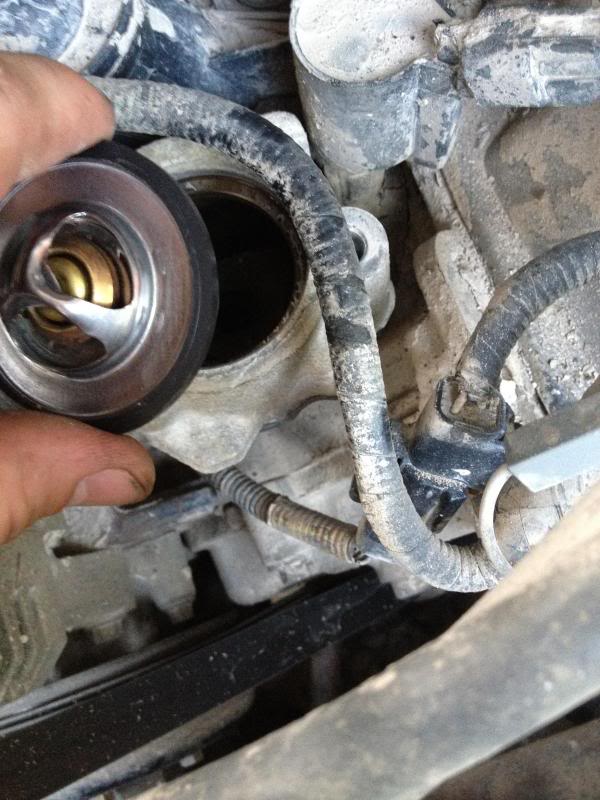
Once the metal piece is out of the way, you should have easy access to the two 10mm bolts housing the thermostat.
Accessing the thermostat (10mm socket)
Use a 10mm socket and extension to take out these two bolts. They are both grade 8 and around 4 inches long, so take your take.
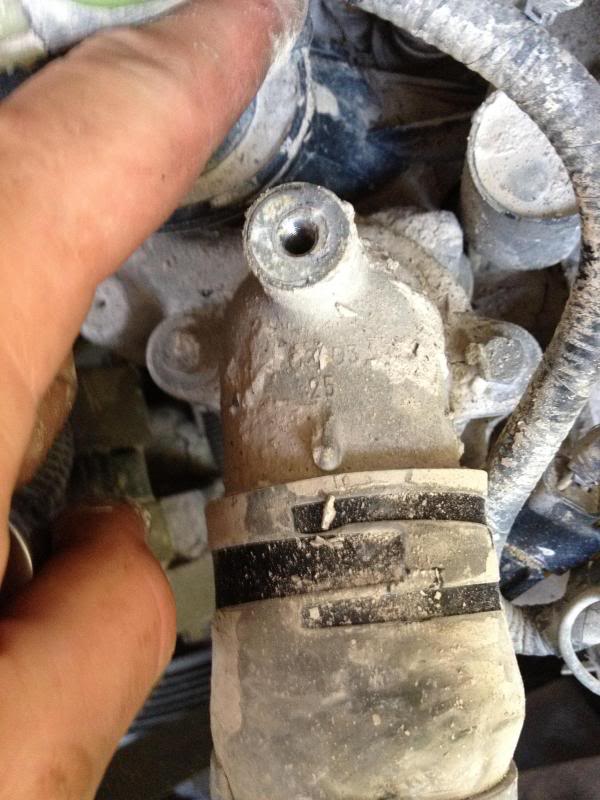
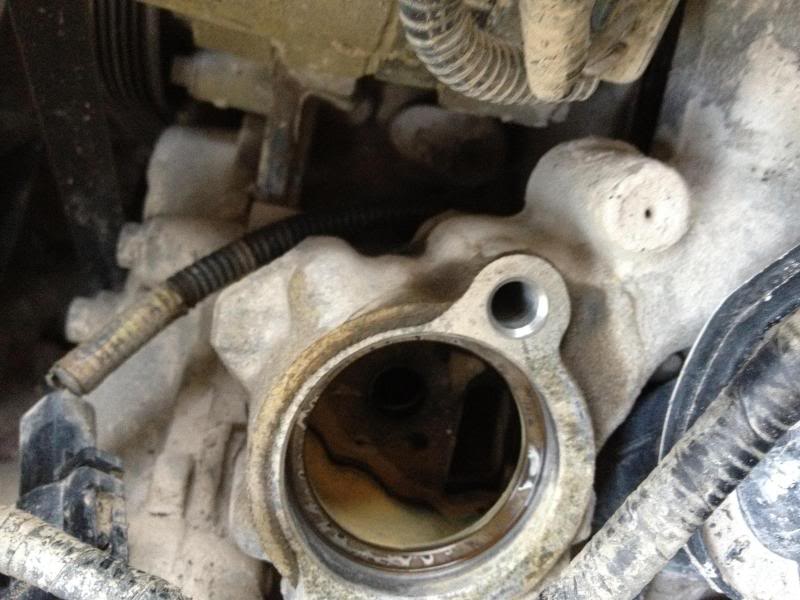
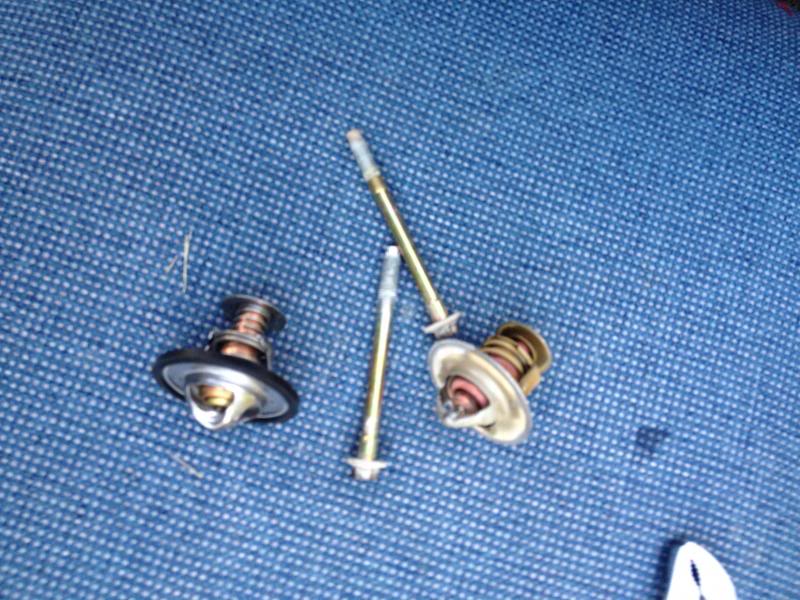
Checking out the thermostat and replacing it (Thermosat and 0-ring)
*NOTE* Some fluid will still be in this, so be cautious when unbolting. I didnt do a write up on the full flush, so proceed at your own risk.
Once the top is removed, you should see your thermostat.
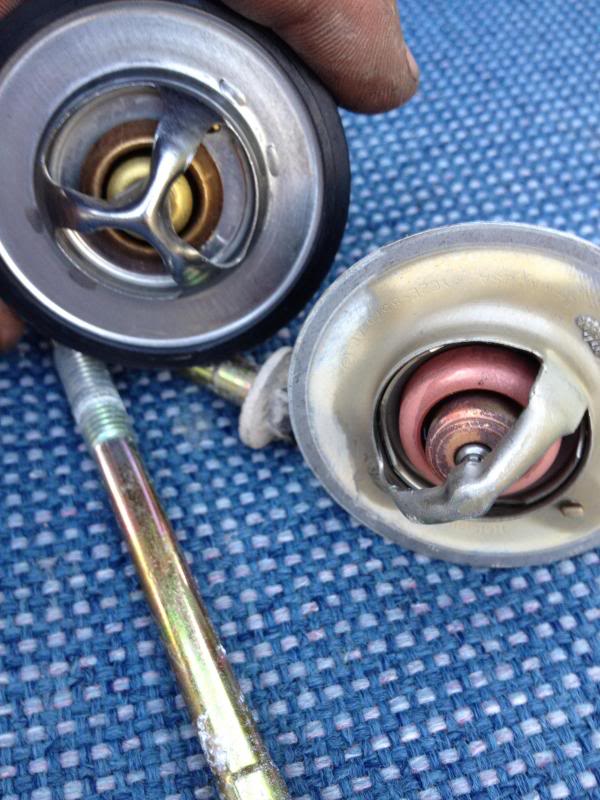
Use a pair of pliers to remove the theromstat incase the coolant is still hot. You can use a ligther to check the thermostat and sometimes get them to work, but for 20 bucks, I decided to completely replace mine.
I used a rag with some water to clean up the edges and make for a nice tight seal, so I suggest doing this with all your hoses and connections. My buddies took my truck "4 wheeling" so I had quite a hard time getting everything clean.
Old vs New
Installation.
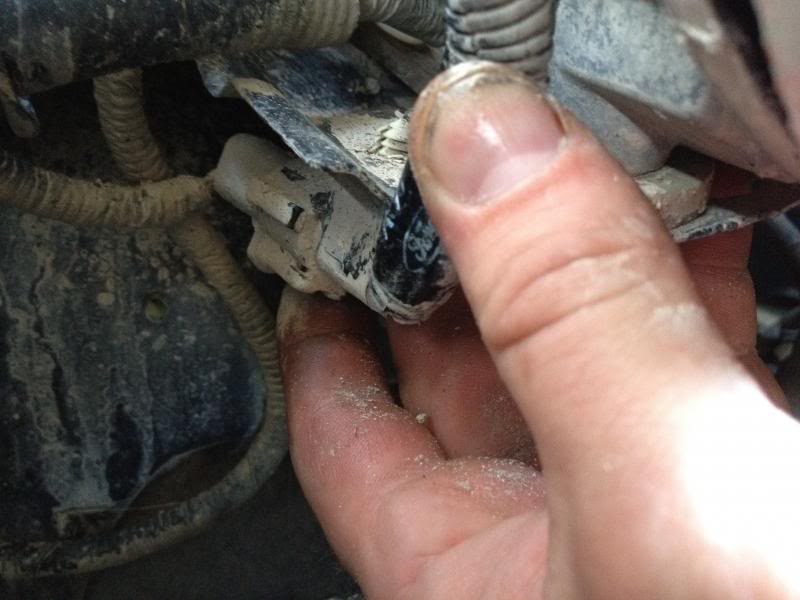
Remove the old 0-ring , mine was stuck to the end of the hose.
Place your new thermostat in, and put the 0-ring on top of it. The fitting at the end of the hose will seal around this, so dont worry.
Accessing the thermostat (10mm socket)
Use a 10mm socket and extension to take out these two bolts. They are both grade 8 and around 4 inches long, so take your take.


Checking out the thermostat and replacing it (Thermosat and 0-ring)
*NOTE* Some fluid will still be in this, so be cautious when unbolting. I didnt do a write up on the full flush, so proceed at your own risk.
Once the top is removed, you should see your thermostat.

Use a pair of pliers to remove the theromstat incase the coolant is still hot. You can use a ligther to check the thermostat and sometimes get them to work, but for 20 bucks, I decided to completely replace mine.

I used a rag with some water to clean up the edges and make for a nice tight seal, so I suggest doing this with all your hoses and connections. My buddies took my truck "4 wheeling" so I had quite a hard time getting everything clean.
Old vs New


Installation.
Remove the old 0-ring , mine was stuck to the end of the hose.
Place your new thermostat in, and put the 0-ring on top of it. The fitting at the end of the hose will seal around this, so dont worry.


 05-20-2013, 11:56 PM
#4

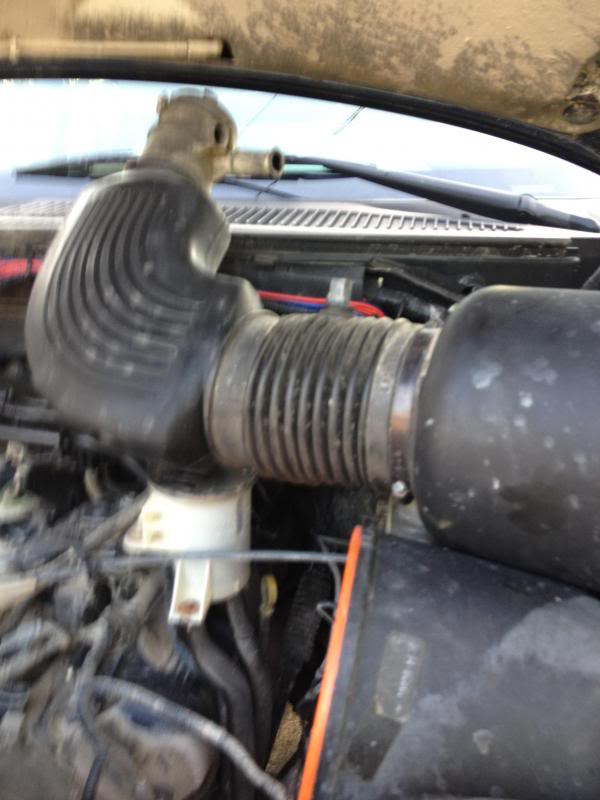
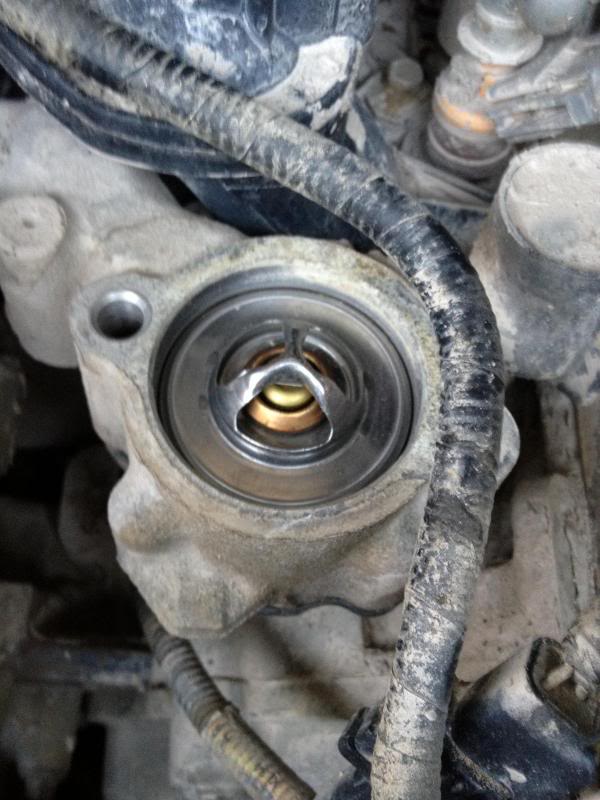
Once you have the thermostat in, and the 0-ring in place, bolt back the top piece with the two 10mm bolts. Make sure everything is good and clean!

Now its time to put back the metal bracket which helps hold the brake fluid. (NOTE: 2 bolts are the same size, the smallest goes into the the part we just installed). Use the 8mm bolts to do this.

Then reattach all hoses, and clamp them in place. Tighten up the radiator drain plug. Then refill with coolant.
Now reinstall all the air intake in revers order, making sure to plug all sensors and hoses up accordingly.
Crank the truck and install coolant as need. You guys can handle it from here.
*Disclaimer* This was my process and how I chose to do my install, I take no liability for any accident or harm caused to self or truck by my how too.
IBD
The following users liked this post:
hornychief (01-28-2014)

Trending Topics
 01-28-2014, 04:34 PM
#9
Member
Join Date: Dec 2013
Posts: 54
Likes: 0
Received 0 Likes
on
0 Posts

The 01 Navigator radiator fits what trucks and motors? I have heard this a good mod but not sure why since my temps are low in my truck.

