When you click on links to various merchants on this site and make a purchase, this can result in this site earning a commission. Affiliate programs and affiliations include, but are not limited to, the eBay Partner Network.
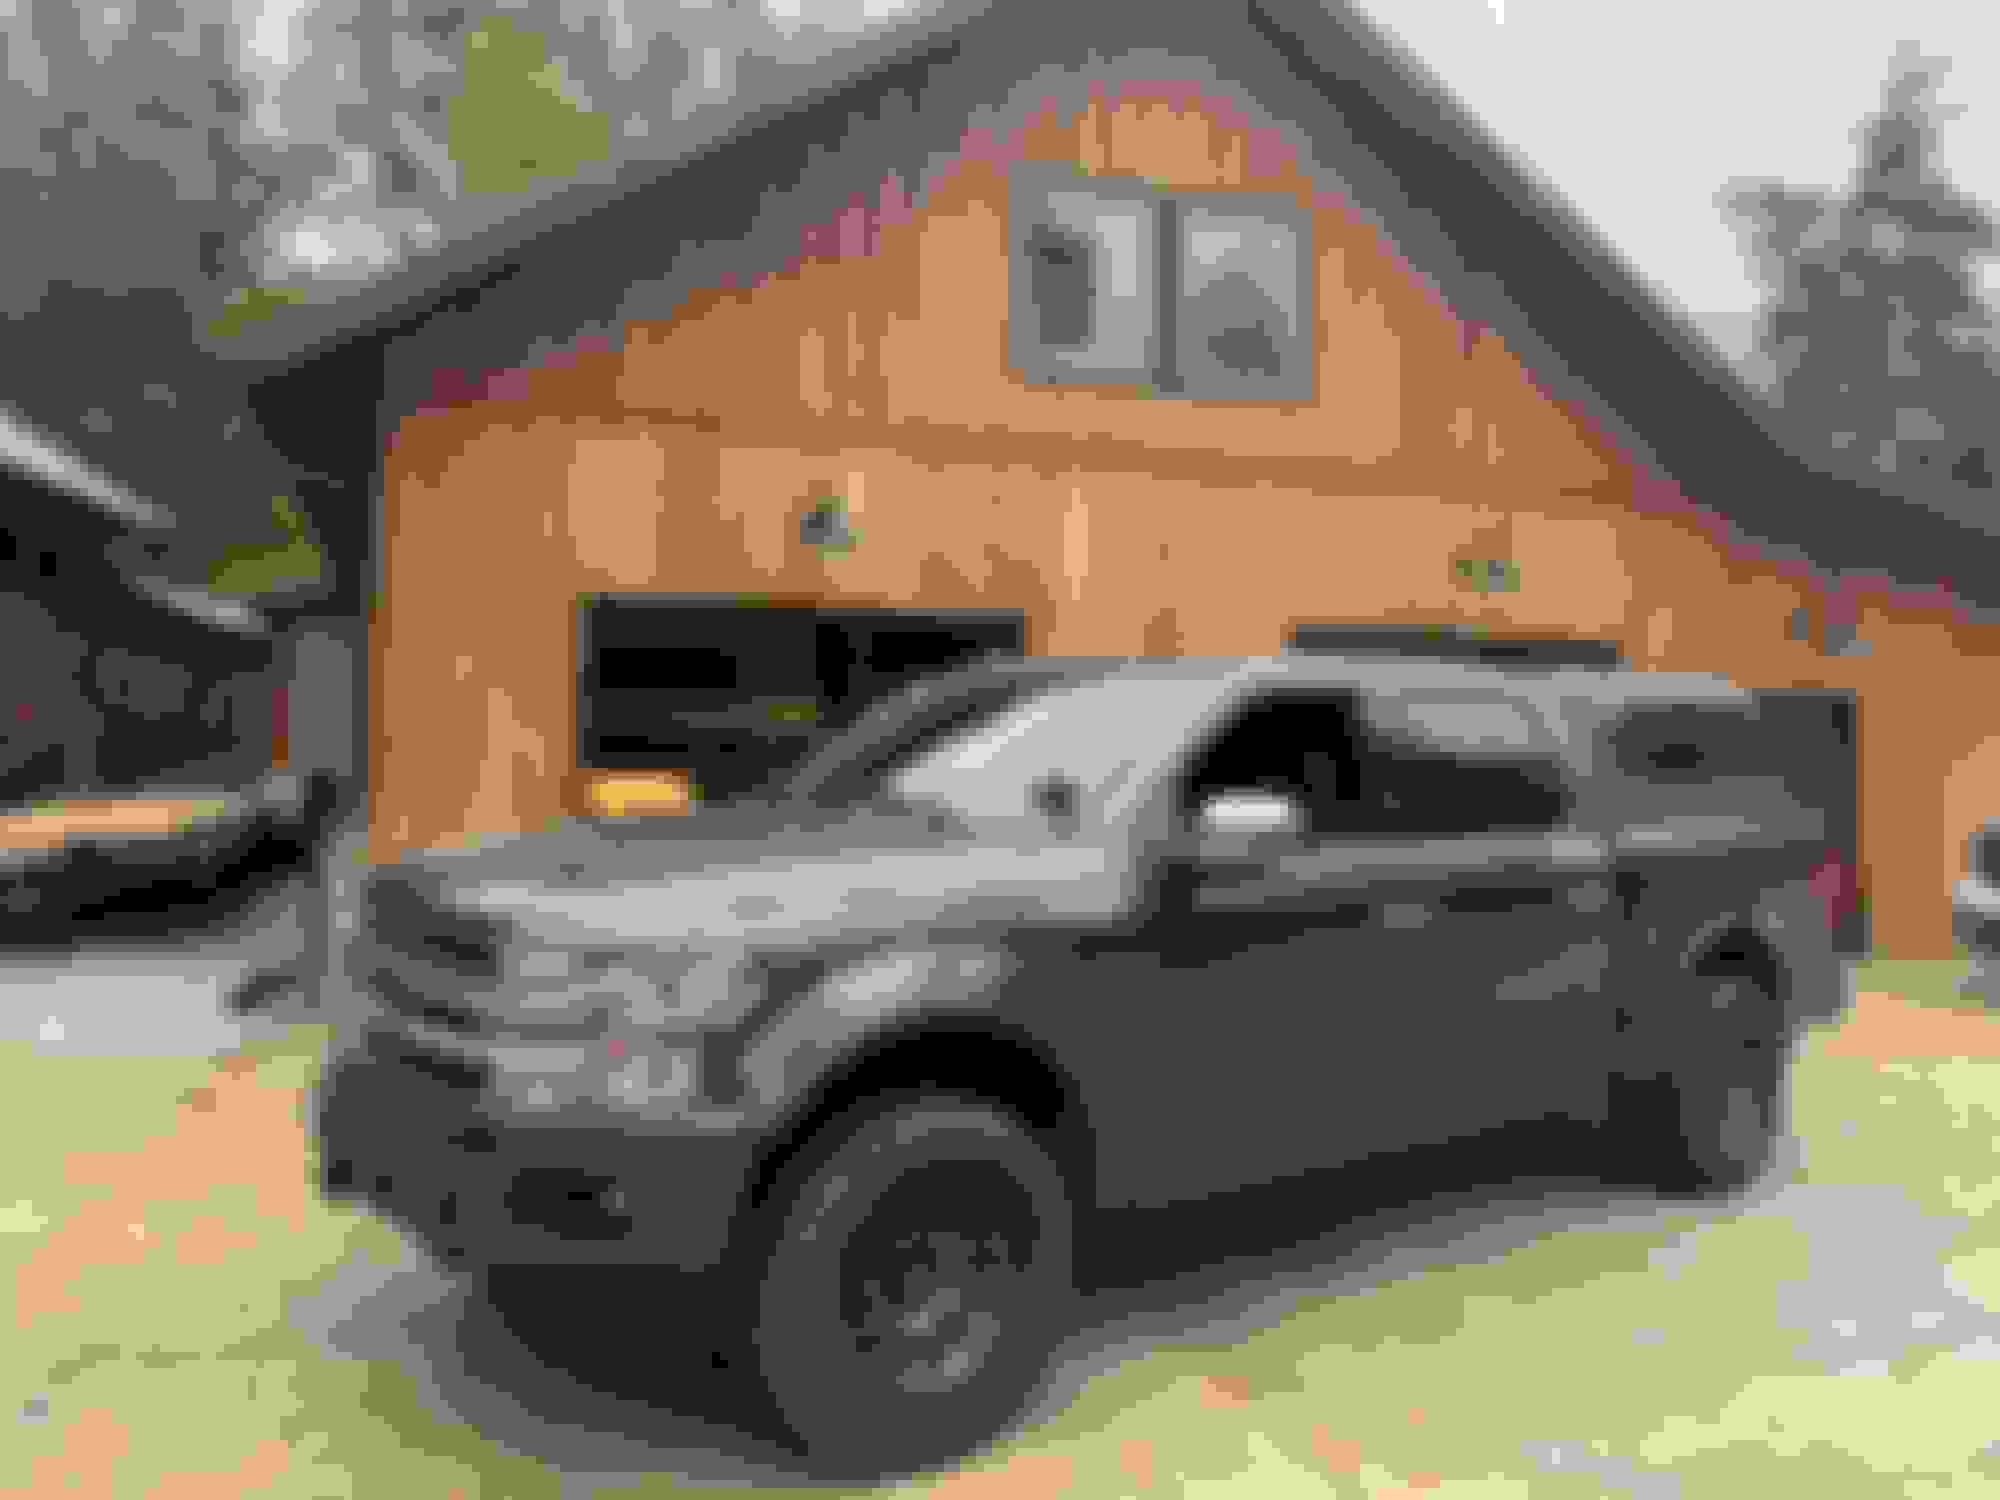
I recently purchased the RSI Smartcap Evo and wanted to provide an honest review since it is rather new to the US and the price tag is almost twice that of an ARE or LEER. My primary reason for purchasing this particular cap is that it allows for modular builds with half bin, full bin, kitchen, and table storage. Also, I purchased because it is full steel and looks way different than a fiberglass cover. Overall the cap weighs 160 lbs and holds 750 lbs of static weight on top. The rack rails are built in, both sides have opening windows on hydraulic shocks. The top has a positive airflow vent that pushes air into the bed and keeps dust from entering. There are 2 locks on each window except the front which only has a small window that opens allowing access to the truck cab.
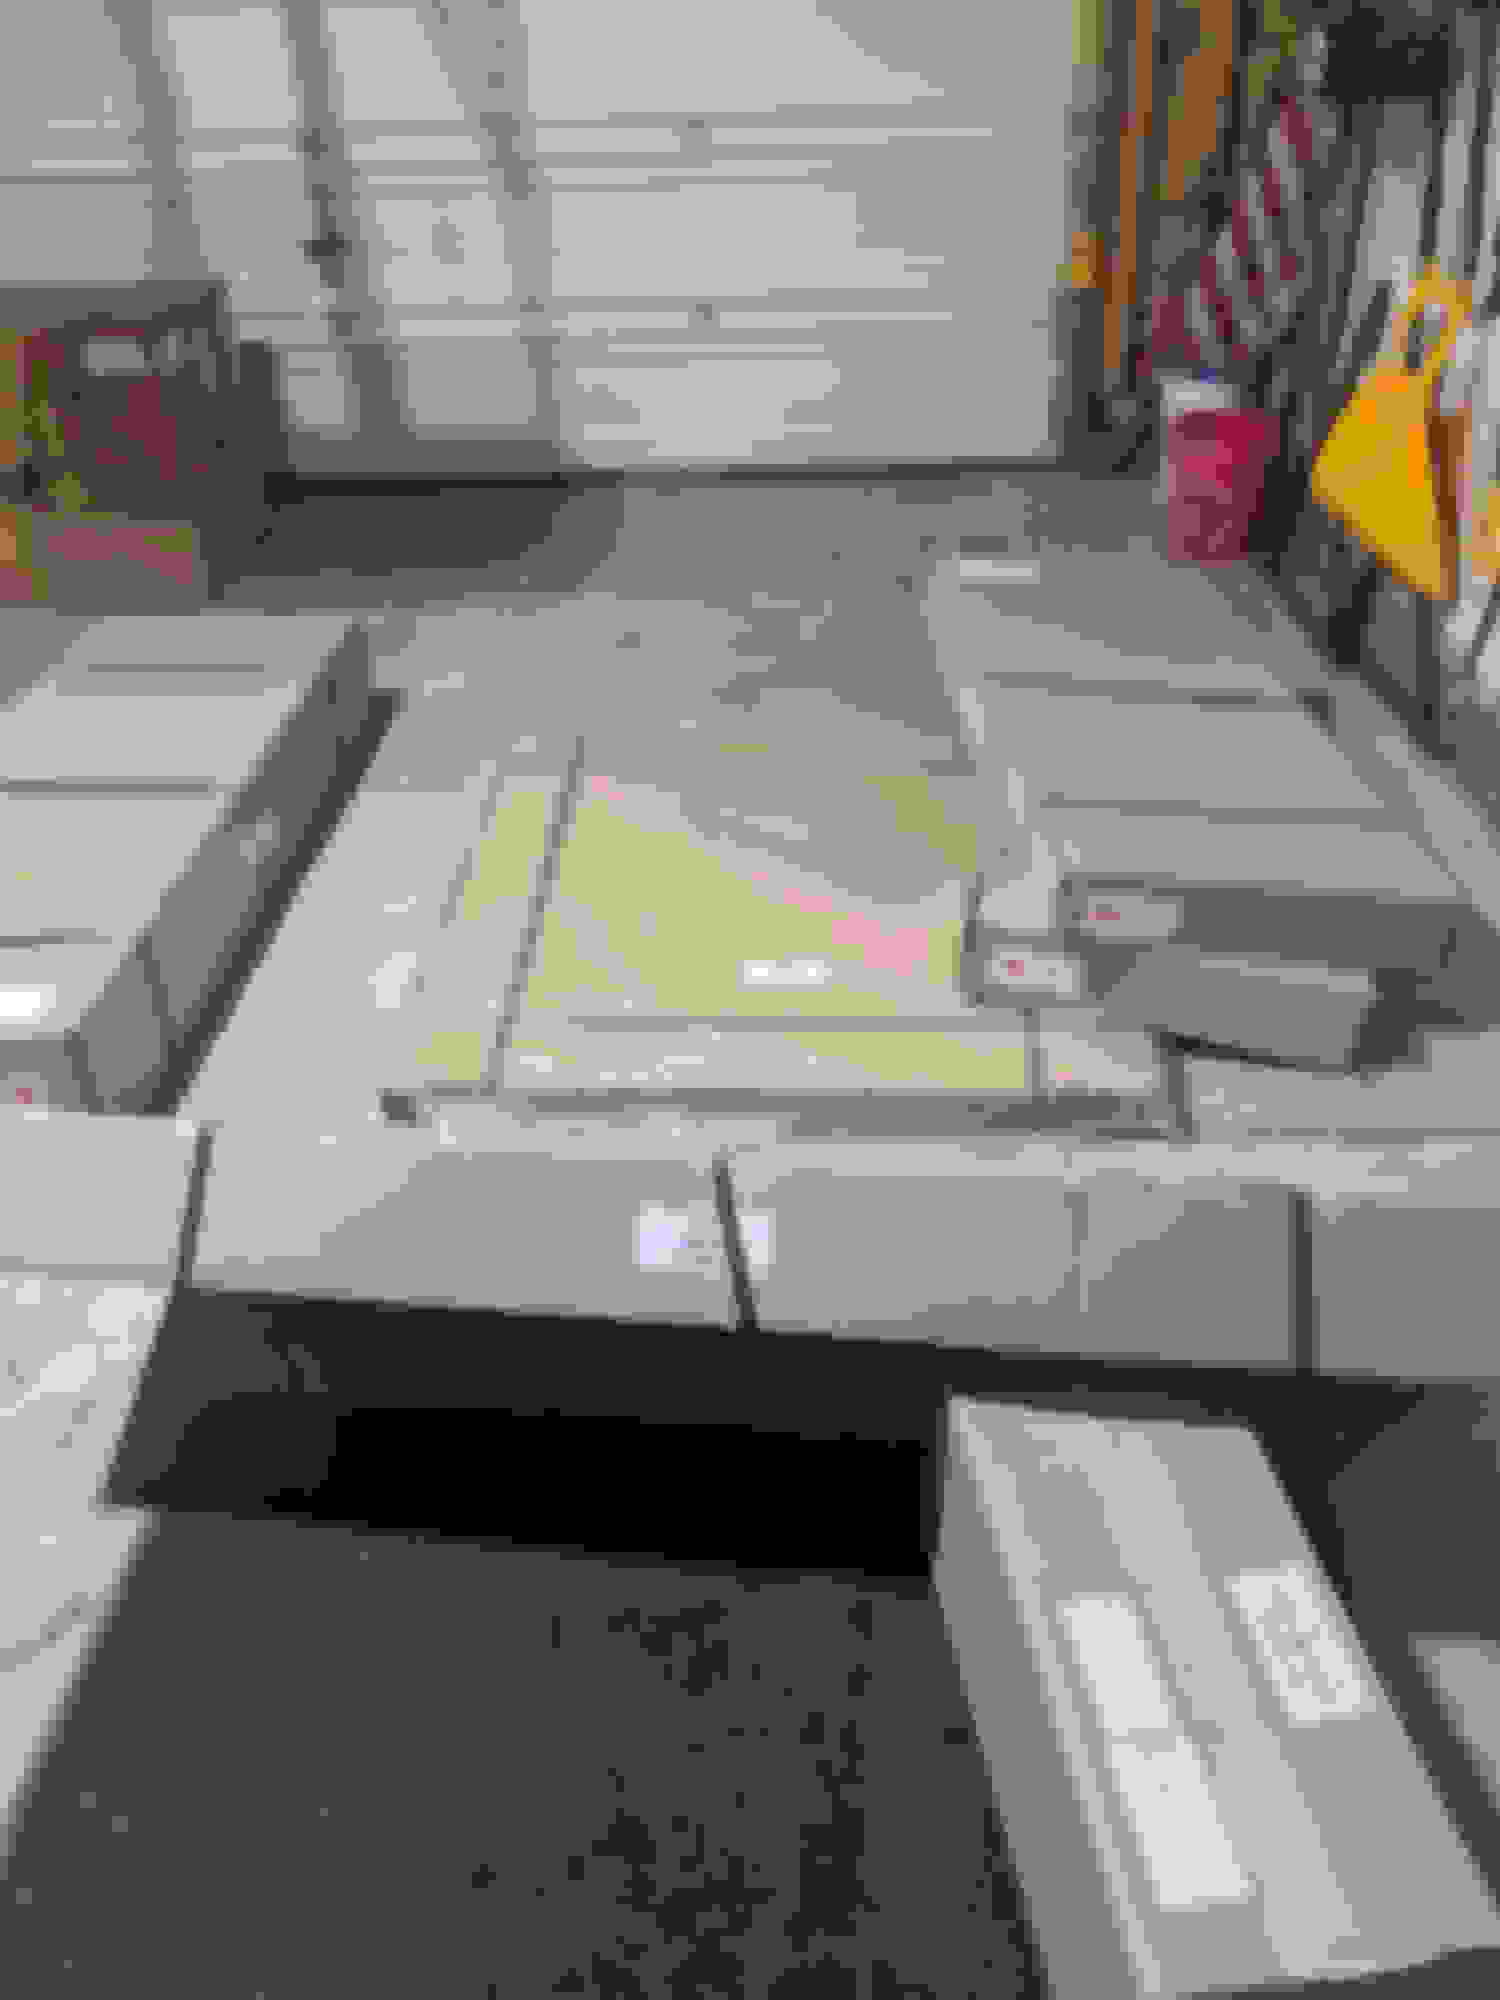
I purchased the cap on a Tuesday direct through the manufacturer's website and had it shipped to the nearest dealer to my house to avoid the $150 home delivery fee. I was shocked to receive a phone call the next day, Wednesday, to come pick up the cap. Apparently there is a distribution center in Atlanta, GA which is only 2 hours from my home so I'm sure that played a huge part in the quick delivery. The dealer loaded a large rectangle box that said 'minimum 4 people to lift' and 1 large flat, square box which contained the roof, with a forklift. I headed home to assemble and install.
I appreciated the no nonsense box labeled 'Be Smart Open Me First.' As a man, I am commonly guilty of bypassing directions but in this case it only made sense to read first. Inside the box were the instructions, keys, 6 clamps, thin rubber pads, 10mm rubber pads, foam seal tape and unfortunately, no wire harness for the center brake light. I quickly called RSI to determine why I was missing a harness only to find out that they didn't make it out of South Africa before COVID-19 locked everything down. They will send it to me as soon as shipping starts back up.
I quickly went to work following directions which really only included applying the foam strip to the front lip of the truck bed to even the seal between the plastic side covers, and pulling each cap side from their respective box and connecting them to the roof still securely resting in the cardboard box.
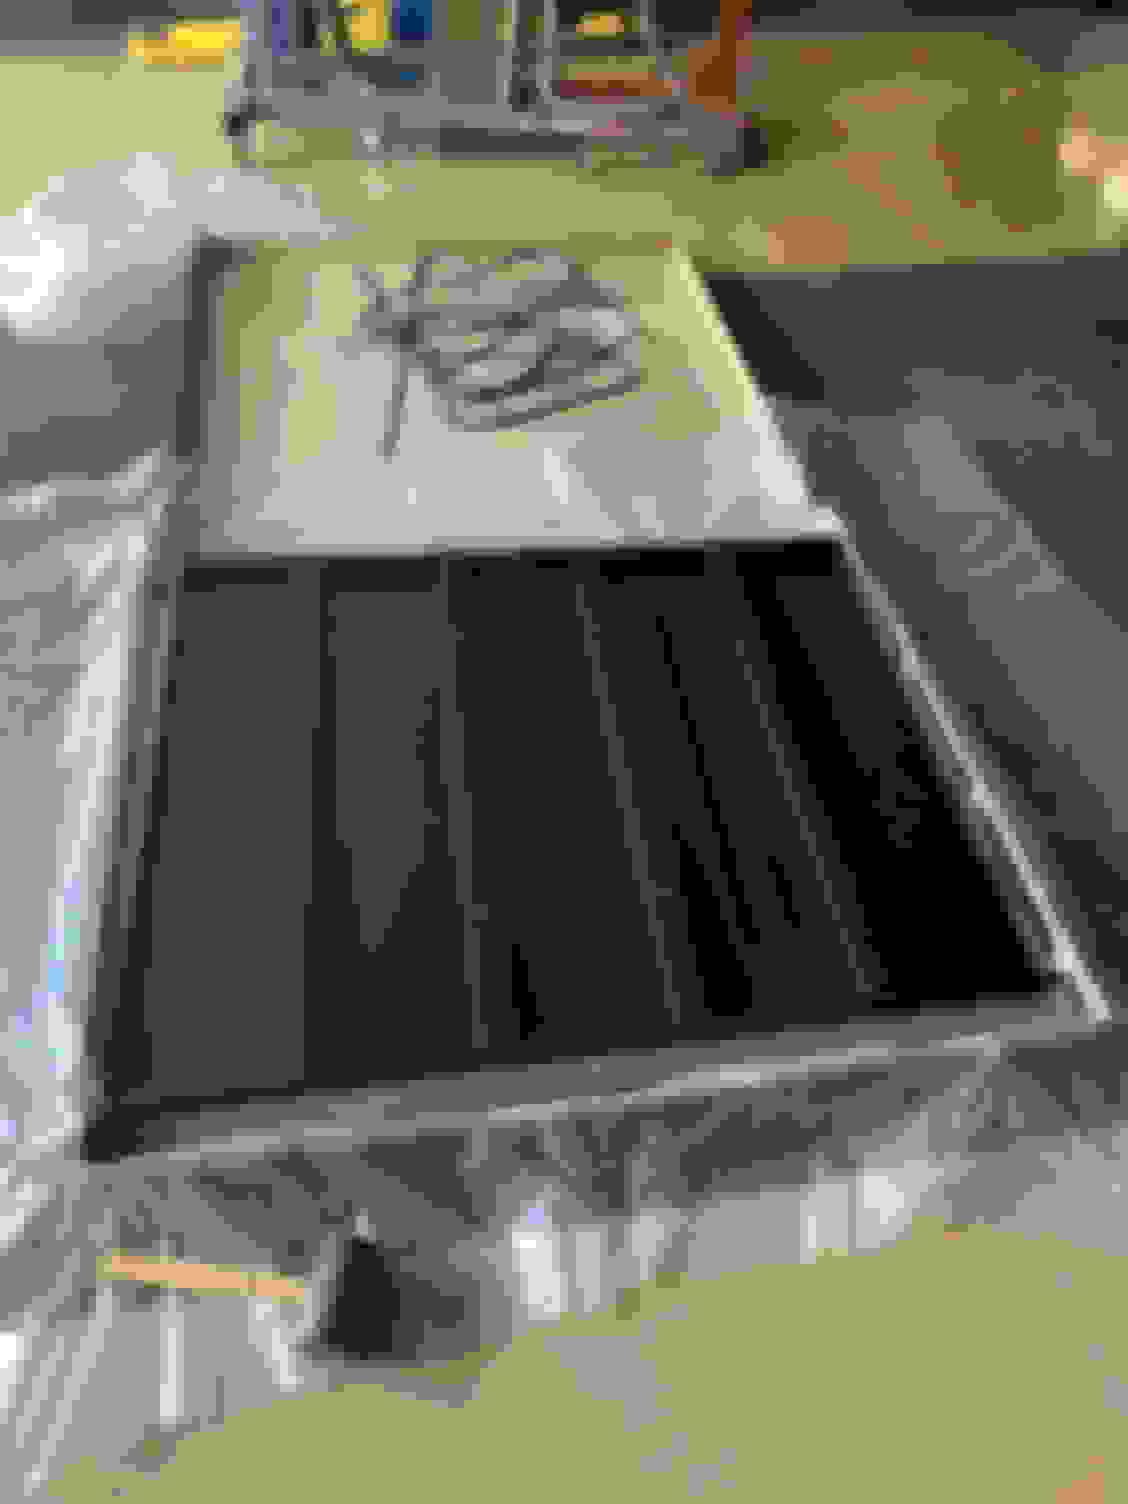
The rubber mallet is sitting there because I had to tap a few of the mount points straight again most likely due to shipping. It was hardly a thing and left no deformations in the steel. By myself I was able to unload both boxes and push the big box into the garage for assembly. Inside the big box are 4 long boxes containing the sides, front and back of the cap. Make sure you have the back of the roof facing the correct direction to ensure you don't put it together backwards. The positive airflow vent sits toward the back of the cap. Start with the left side and gently tap it into place on the roof and loosely tighten the 5 nyloc nuts on washers. Then move over and do the same with the right side. I'm not sure why they wasted their time putting each fastener clamp and screw into every front and back hole but you have to remove each one to continue. Now remember, just because you took them out a certain way doesn't mean you put them back in the same way. It is best to put the screw in from the middle of the cap because it gets pretty tight by the backdoor. I was not very happy with the fasteners although they do sandwich the cap pieces together tightly and includes a gasket already installed on each piece. Even though the instructions say to torque the fastener clamps to 9ft/lb which is 108 in/lb you can tell that you will most likely strip the plastic fastener if you go there. After stripping 1 clamp I determined the pressure needed to 'get there' without ever making it to 9ft/lb. I even backed the torque wrench down to 95 in/lb and still felt I was going to mess it up. The same holds true for the 6ft/lb recommended torque on the nyloc nuts for each side. I tried for 6 and got 8 of the 10 to get there. The other 2 nuts I went to 5ft/lb.
After I finished torquing down the nuts on the cap I had to install the included rubber seal starting at the back left side and working my way around to the back right. I was left with about 12 inches of seal. I used superglue to reinforce the gaskets closest to the back opening. I then called a friend for assistance installing the cap onto my 2018 F150. A quick 10 min later we were flipping the cap over and lifting the 160 lbs onto the back of the truck. Just be careful to continue lifting the cap all the way to the front. If you push it on the bed rails it will fold the rubber seal under and out of place. Ask me how I know. Luckily the seal is sticky enough that it went right back into place and didn't cut it at all. Don't start trying to test the backdoor because it does NOT sit flush with the tailgate and at this point you may start to worry, well don't! Once you install the 6 clamps and work back and forth tightening them down, it crushes the seal nicely and puts an awesome seal between the back door and tailgate.
I know it looks like water will hit the rear tailgate top and just walk right into the back of the truck but I can assure you that a combination of a good seal and the positive airflow vent will keep that from happening. I actually appreciate being able to open the tailgate without lifting the back window. The side windows and backdoor all have 2 locks each that open easily and allows full side access.
I don't know if anyone else uses the Larson antenna mount at the 3rd brake light but I do for two UHF/VFH antennas. I was super worried that I would have no choice but to move my antennas to the roof or attach to an eventual platform on the cap. Well no worries my friends! The cap sits approximately 1 inch from the back window of your truck and the antenna cables run perfectly down between truck and cap clearing by 1/4 inch. I LOVE IT!
I know the RSI Smartcap is no small investment but overall I have to say that the attention to detail, all the way down to the internal window slides being rounded at the edges to avoid sharp corners, is rather impressive. The welding is spot on and the fit is perfect. If I was to nitpick about anything it would be the small, square windows should open all the way instead of 90% just for a cleaner look. I'm excited for the future of RSI and to see what else they come up with for overlanding attachments.
This looks really nice. How do you still like it? I'm considering buying one in black to go on a flat grey F-150 with the XLT sport package. I think with black wheels it'll look neat, and I really like the idea of metal instead of fiberglass. I'm OK with spending a few more bucks for what I want since I typically keep vehicles for 8 or 10 years.
I'm really going back and forth on one of these. I have the same color truck but with the the 6.5 bed. If possible could you provide a few more photos from different angles? Are you still happy with the purchase. We would be getting it for mounting a rooftop tent and putting it through some pretty rigorous conditions here in Alaska. Thanks in advance.
I have been really curious about these caps. I hope the OP comes back and responds to some of the questions. I love the fiberglass Leep cap I have on my old truck. It kept my dogs warm in the winter and out of the sun in the summer, it also keeps my gear dry and provides some cover for whatever I have in the bed. The biggest issue I had with it was whenever I needed to have the bed open to move large objects like furniture, or picking up sod, or something like that, I needed to get a friend over to help me pick the thing up off of the truck. Then storing it while it was off was another issue.
With my new truck, I have been eyeing a Bestop 2, but then I recently saw these Smart Cap EVO cap, and got to thinking. I was hoping it's modular design made it so that taking it off of the truck would make it a one man job. But it doesn't look to be the case. Storing this cap would be much easier since it comes apart, but again, the OP says it weighs in at 160 lbs, you may still need to get a buddy over to help you take it apart or put it back up. Hoping the OP can elaborate on some of this.
Installed yesterday, initial quality is unreal compared to other top end LEER models I've previously owned. Feels like it belongs on an armored vehicle, and I like it! Will have no issue transporting a roof top tent.
Last edited by Chapman5.0; 08-29-2020 at 01:17 PM.
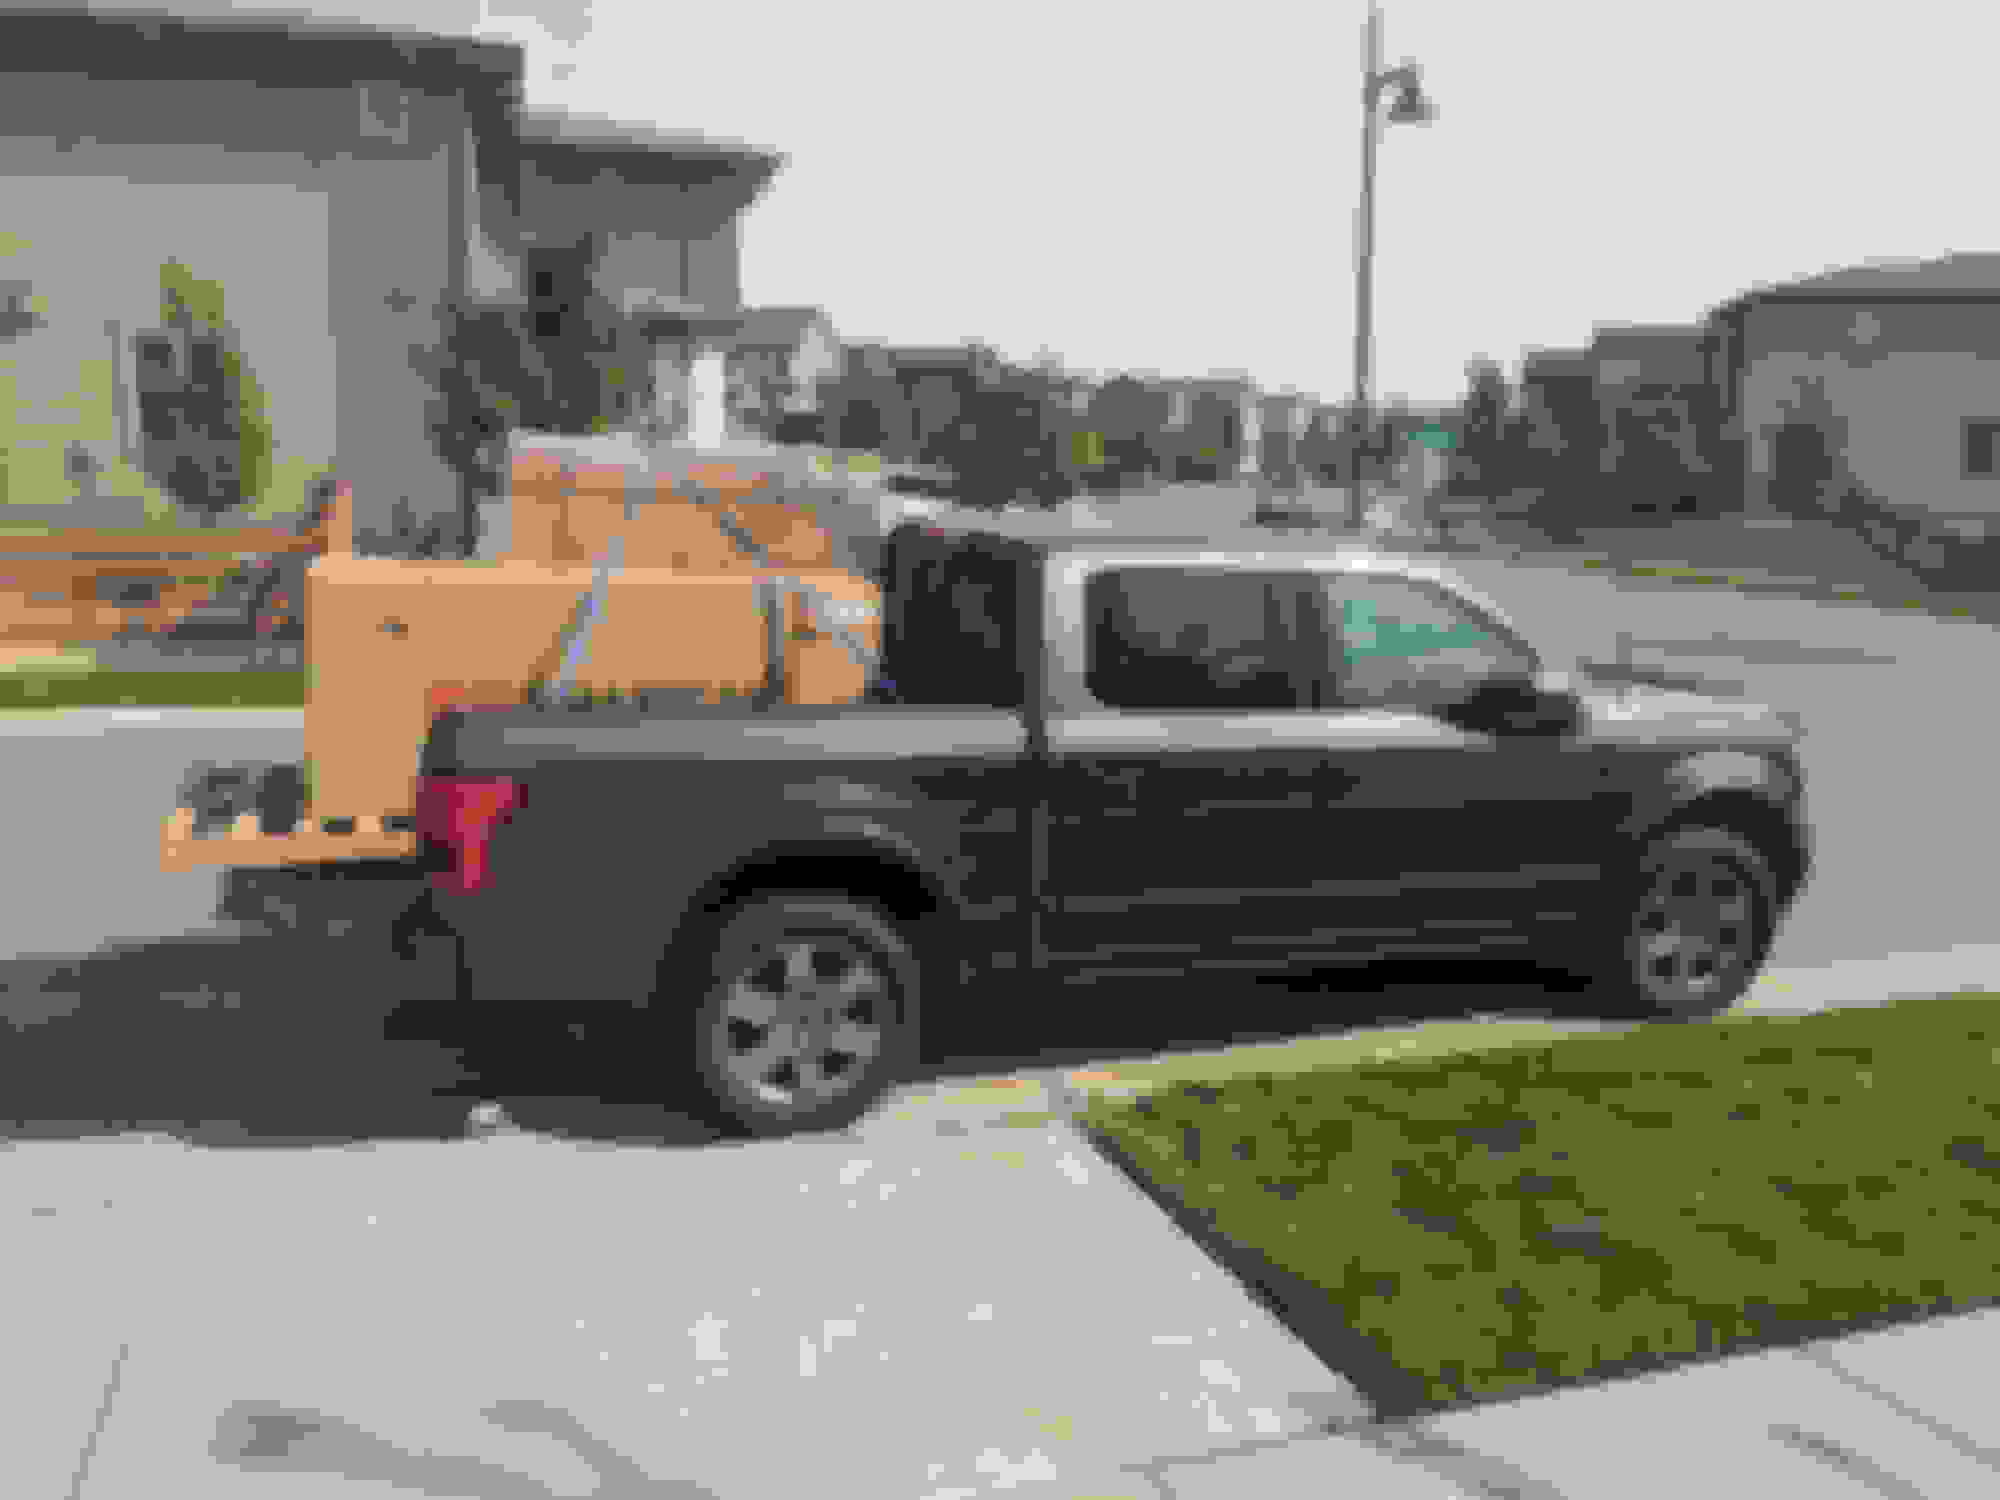
I ended up pulling the trigger. Like the oringinal post, it showed up next day. Saved the money and had it shipped to a local dealer. Called a buddy and we had at it. Engineering of this is incredible. Everything falls into place. Had it done in about 1.5hr. Like the original post, no fitment guide or 3rd brake light harness. Got ahold of support and they arranged a dealer to get it wired up at no charge. Just had to drive around for a week without a 3rd brake light. No more wet dogs in the cab
Installed yesterday, initial quality is unreal compared to other top end LEER models I've previously owned. Feels like it belongs on an armored vehicle, and I like it! Will have no issue transporting a roof top tent.
What�s your short term review? Love how it looks and very interested in putting one on my black 2021 I am waiting for.
After trying in vain to buy a Leer cap* I ordered one of these. Supposed to be at a local dealer on Monday- not sure how that works buying from the manufacturer directly- they must pay them a commision to handle it.
*Leer dealers must be rolling in business- did the online quote request on the Leer site and days later never heard from any of the several I submitted to.

 04-23-2020, 10:37 PM