
Bedside Rack System - MOLLE/PALS Panel Installation Guide w/ Photos
 09-19-2017, 09:19 PM
#1
Small Business Vendor
Thread Starter

This guide serves as installation procedure for the BuiltRight Industries Bedside Rack System for the 2015 to 2018 Ford F-150. The system can be purchased a full set of four panels or as individual panels. This guide will cover the installation of the passenger side panels, but the procedure will be mirrored on the driver's side.
This installation is very straight forward and shouldn’t take more than 15-20min. A cordless impact driver isn’t necessary, but might speed up the process. If you’re not installing the full kit, but only one or two panels, the procedure is very similar. Consider laying out the clamps and such that you intend to use with the MOLLE and slotted features and then mounting them to the panels prior to installation. This will be substantially easier than fishing nuts and bolts behind the panels after they’ve been installed!
NOTE:
If you’re using a topper or tonneau cover with your truck, you may find that you need to reposition the clamps to suit the Bedside Rack System. You might find it helpful to flip the clamp(s) so that the bolt is towards the outside of the vehicle for more clearance as shown below.

Materials List:

Procedure:
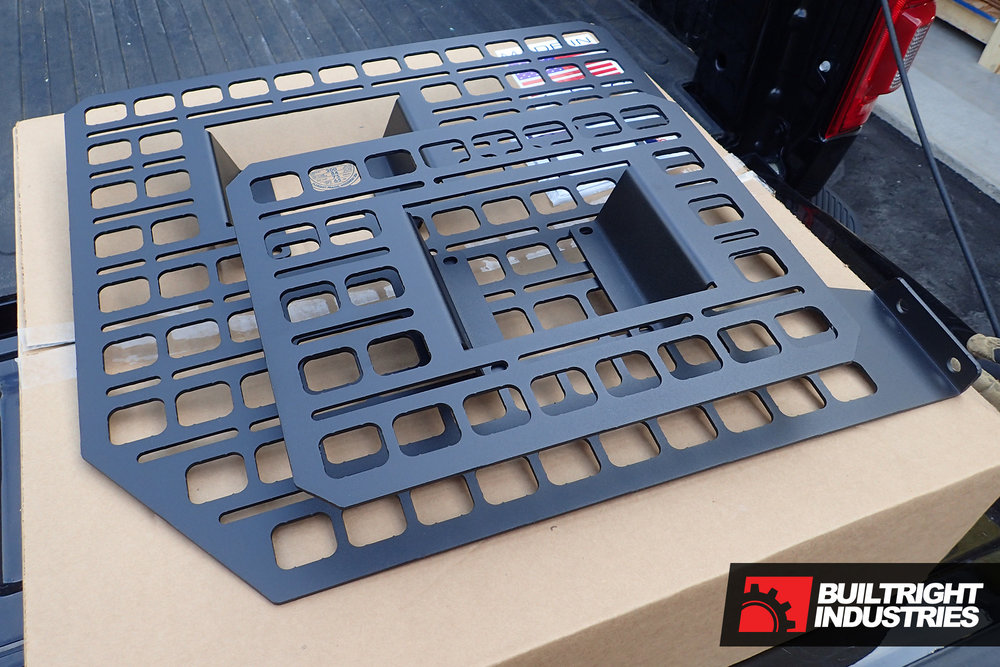
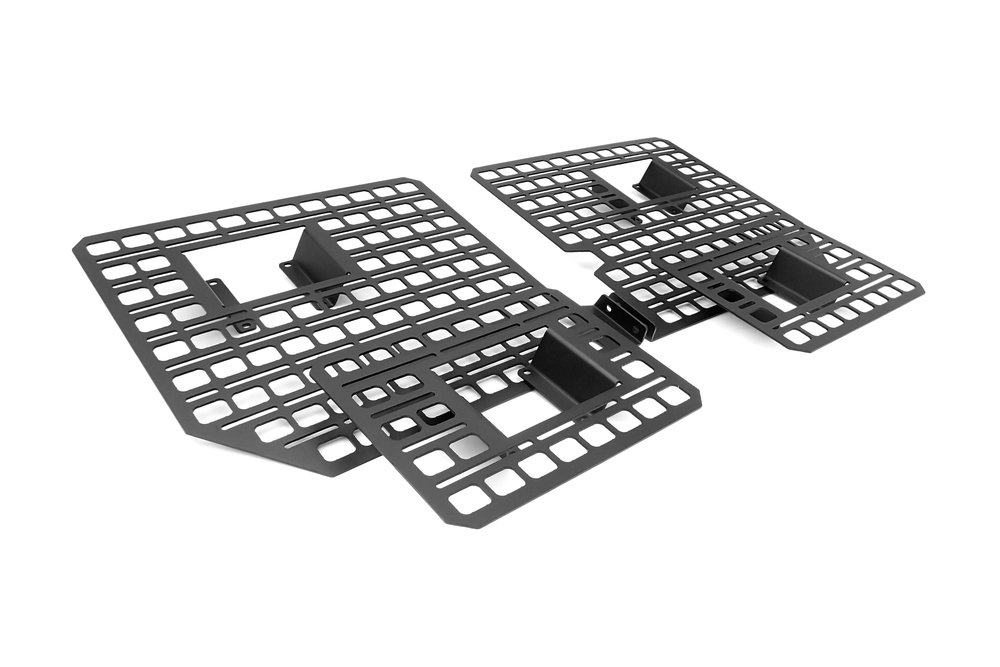
1. The first step is to unpack your Bedside Rack System kit and ensure that you have the panels that you ordered. In this case, we’ll be installing the passenger side panels, shown below.
2. The second step is to prep the larger panel(s) by installing the rubber bumper in the lower forward corner. This is an optional step, but is helpful if your panel is warped at all and makes slight contact with the bedside, or if you’re carrying heavier loads. The bumper is installed using the included hardware of either a nut and bolt or a push-in tree clip. Both are shown below.

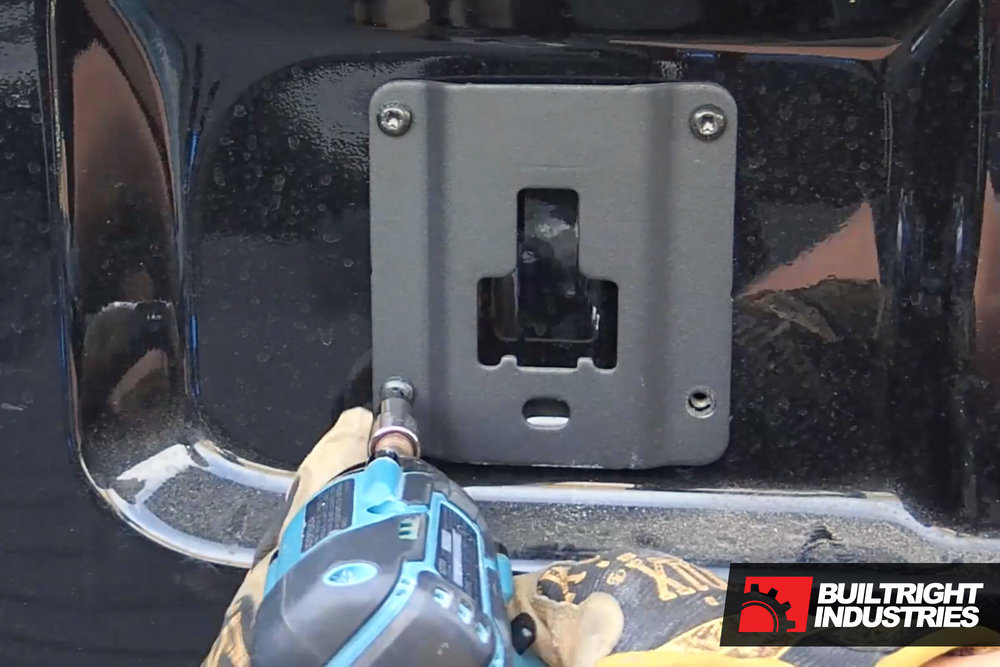
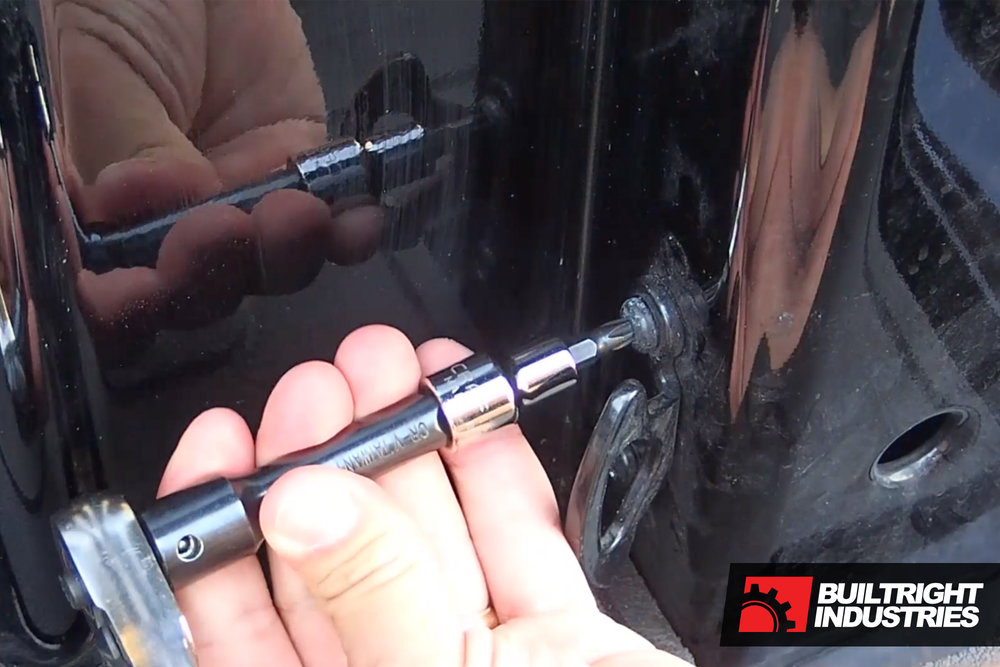
3. The next step is to remove the factory BoxLink brackets if equipped. Each of these brackets is held on by four (4) T30 Torx bolts. Remove these bolts and set them aside along with the brackets. We will reuse them all.

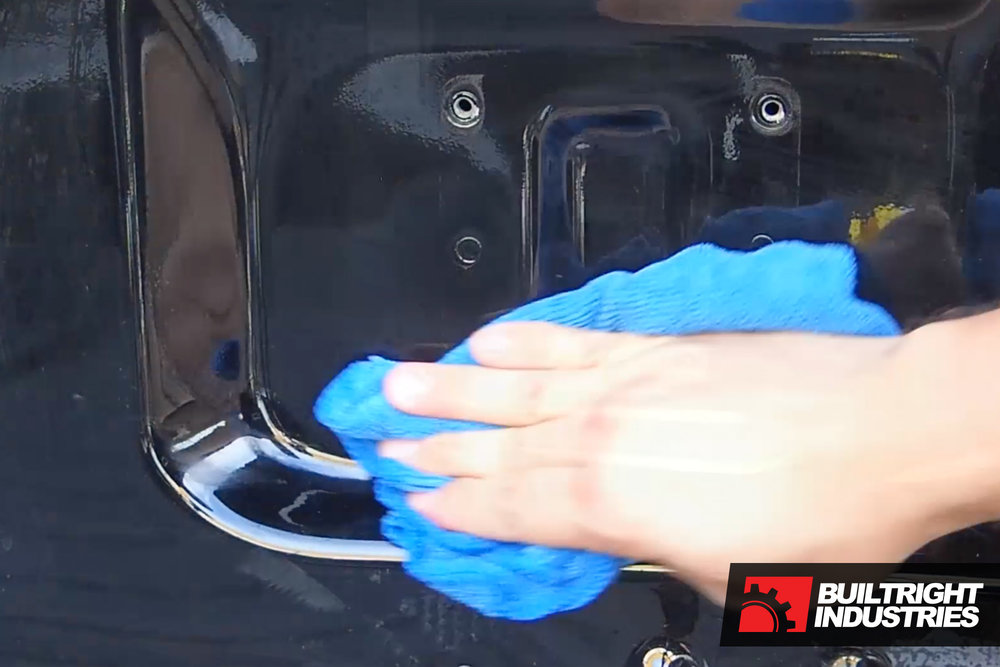
4. Wipe down the bedside where the racks will be mounted. Removing dirt and debris will ensure proper clamping force and a robust connection following installation.
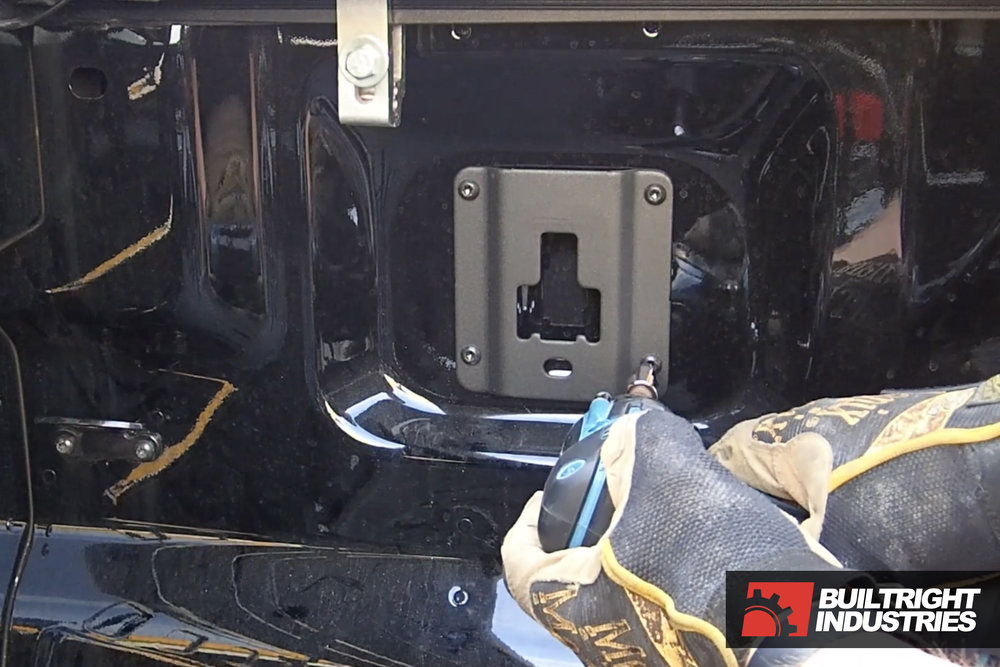
5. Remove the two (2) T30 Torx bolts securing the rear tie-down point and set aside.
BuiltRight Bedside Rack System Installation - 2015-2018 Ford F-150
https://www.builtrightind.com/produc...rs-fseries-kit
https://www.builtrightind.com/produc...rs-fseries-kit
This installation is very straight forward and shouldn’t take more than 15-20min. A cordless impact driver isn’t necessary, but might speed up the process. If you’re not installing the full kit, but only one or two panels, the procedure is very similar. Consider laying out the clamps and such that you intend to use with the MOLLE and slotted features and then mounting them to the panels prior to installation. This will be substantially easier than fishing nuts and bolts behind the panels after they’ve been installed!
NOTE:
If you’re using a topper or tonneau cover with your truck, you may find that you need to reposition the clamps to suit the Bedside Rack System. You might find it helpful to flip the clamp(s) so that the bolt is towards the outside of the vehicle for more clearance as shown below.
Materials List:
- 1x Bedside Rack Driver’s Side Panel
- 1x Bedside Rack Passenger’s Side Panel
- 2x Bedside Rack Small Panel
- 2x Rubber bumper kit
- T30 Torx Socket w/ Ratchet
- Cordless Impact for T30 (optional)
- Rag/cloth
Procedure:
1. The first step is to unpack your Bedside Rack System kit and ensure that you have the panels that you ordered. In this case, we’ll be installing the passenger side panels, shown below.
2. The second step is to prep the larger panel(s) by installing the rubber bumper in the lower forward corner. This is an optional step, but is helpful if your panel is warped at all and makes slight contact with the bedside, or if you’re carrying heavier loads. The bumper is installed using the included hardware of either a nut and bolt or a push-in tree clip. Both are shown below.
3. The next step is to remove the factory BoxLink brackets if equipped. Each of these brackets is held on by four (4) T30 Torx bolts. Remove these bolts and set them aside along with the brackets. We will reuse them all.
4. Wipe down the bedside where the racks will be mounted. Removing dirt and debris will ensure proper clamping force and a robust connection following installation.
5. Remove the two (2) T30 Torx bolts securing the rear tie-down point and set aside.
Last edited by BuiltRight Industries; 09-19-2017 at 09:22 PM.

The following users liked this post:
UncleFester (09-23-2017)
09-19-2017, 09:19 PM
#2
Small Business Vendor
Thread Starter
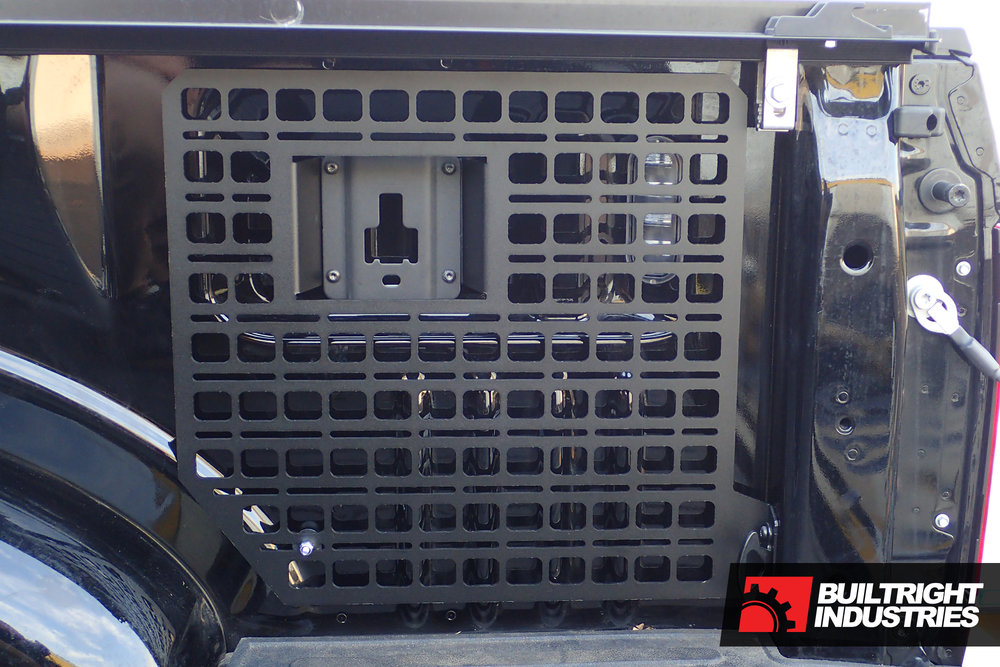
6. Position the first large panel in place and using the original bolts, loosely mount it and the BoxLink bracket to the bedside. Do not tighten at this point.

7. Replace the tie-down bracket and use the two original bolts to secure it. You may tighten these.

8. Position the smaller Bedside Rack panel along with the BoxLink bracket and use the original hardware to secure in place. Get all four bolts started before tightening.

9. Finally, you are free to proceed with mounting whatever accessories you may wish to use! The sky is the limit!

7. Replace the tie-down bracket and use the two original bolts to secure it. You may tighten these.
8. Position the smaller Bedside Rack panel along with the BoxLink bracket and use the original hardware to secure in place. Get all four bolts started before tightening.
9. Finally, you are free to proceed with mounting whatever accessories you may wish to use! The sky is the limit!
As always, please feel free to contact us via builtrightind.com with questions!
Last edited by BuiltRight Industries; 09-19-2017 at 09:27 PM.
09-19-2017, 09:21 PM
#3
Small Business Vendor
Thread Starter
Reserved for post with installation of accessories.
09-21-2017, 09:33 PM
#4

Bad azz.. I Also await final pics of accessories installation. Was thinking seriously of making a custom bed-bar mount system specifically for the Roto-Pax system, living in Florida, and going through Irma.
Love this thread.
Love this thread.
09-24-2017, 12:14 PM
#6
Small Business Vendor
Thread Starter

Matt Beenen
Engineering
09-26-2017, 06:32 AM
#7
I've mounted the smaller panel. I have dual swing away tool boxes and will have to modify the larger panels to fit. Will post pics when I'm done.
Ordering and shipping was super fast. Almost as fast as LaRue Tactical. :thumbs:
Patiently awaiting the next innovative product from Builtright Industries.
Ordering and shipping was super fast. Almost as fast as LaRue Tactical. :thumbs:
Patiently awaiting the next innovative product from Builtright Industries.
Trending Topics
 09-26-2017, 08:39 AM
#9
Small Business Vendor
Thread Starter
I've mounted the smaller panel. I have dual swing away tool boxes and will have to modify the larger panels to fit. Will post pics when I'm done.
Ordering and shipping was super fast. Almost as fast as LaRue Tactical. :thumbs:
Patiently awaiting the next innovative product from Builtright Industries.
Ordering and shipping was super fast. Almost as fast as LaRue Tactical. :thumbs:
Patiently awaiting the next innovative product from Builtright Industries.

Matt


