Spark Plug Change Info.
 02-04-2014, 01:54 AM
#1

I know otto457 did a great write up on this, but I wanted to add a few things and go a little more in-depth. All rights to Otto457 for his write up, I used alot of his information and procedures.
Disclaimer: A lot of the info in this thread is updated from time to time by FORD. Make sure you double check your own specifications in regard to your model year and engine size. Spark plug gap and torque settings can vary greatly, and are very important when do this, so do your research. Mine was an 03, so I used the specifications I listed.
Good things to do during a spark plug change:
Change O-rings on injectors
Replace COP's
Check injectors for resistance
Check COP's for resistance
Before doing any spark plug change there are several things you need to know;
1) Spark plug type (Motorcraft is the preferred) and gap.
Please notice the 01-03 gap is .045 vs .054 in the previous years. I know alot of the retail auto parts dealers don't get these exactly right. Typically, when you give them your trucks information they pull up the general spark plug. Most autolite, NGK, etc's will be gaped at .054" for 97-03. So double check and make adjustment as necessary.
The names of these plugs have been discontinued, but ask for the appropriate match at the dealership and they will hook you right up.
1997
4.2L V6 Motorcraft AWSF-42EG or equivalent 0.054 inch
4.6L V8 Motorcraft AWSF-32PG or equivalent 0.054 inch
5.4L V8 Motorcraft AWSF-22EE or equivalent 0.054 inch
1998 through 2000
4.2L V6 Motorcraft AGSF-34EE or equivalent 0.054 inch
4.6L V8 Motorcraft AWSF-32PP or equivalent 0.054 inch
5.4L V8 Motorcraft AWSF-22E or equivalent 0.054 inch
2001 and later models
4.2L V6 Motorcraft AGSF-34EE or equivalent 0.054 inch
4.6L V8 Motorcraft AWSF-32P or equivalent 0.054 inch
5.4L V8 Motorcraft AWSF-22W or equivalent 0.054 inch
2001 through 2003 Motorcraft ASWF-22 or equivalent 0.045 inch
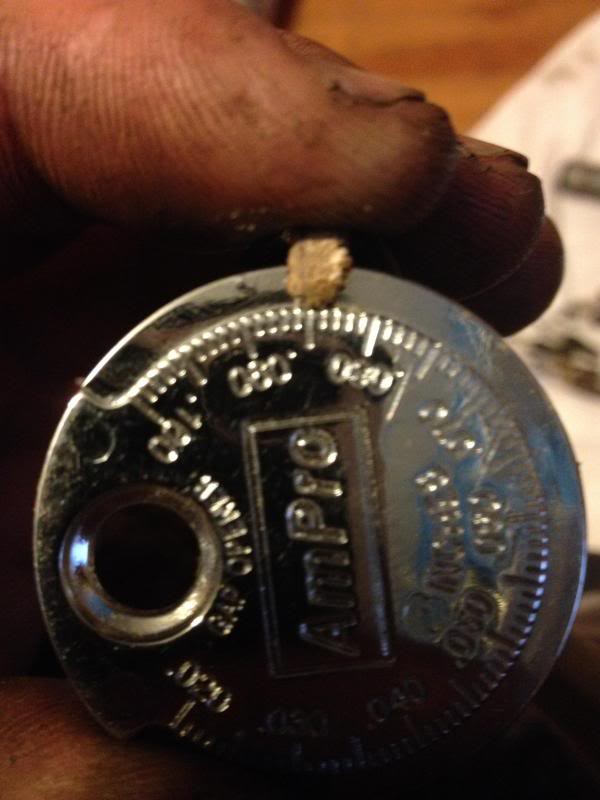
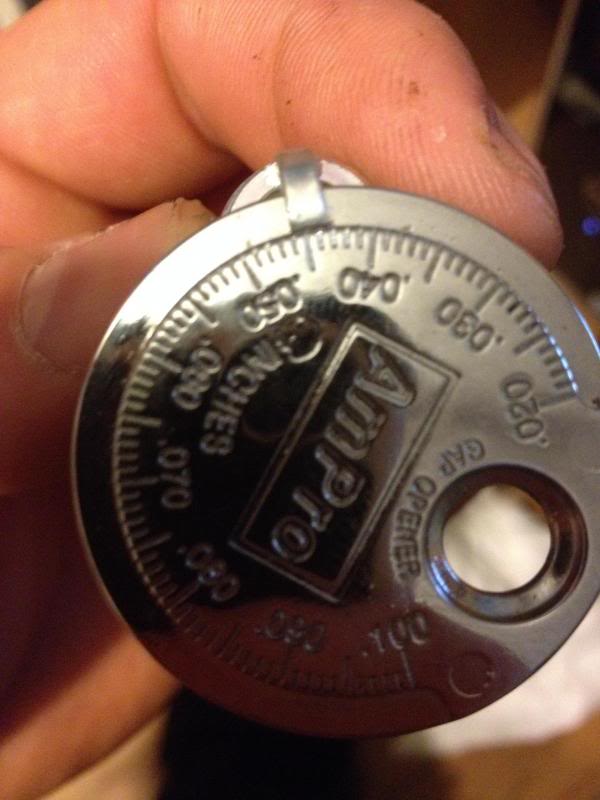
2) Making adjustments to new plug (gap size).
My truck is a 2003 so I needed to adjust the gap size.
The plugs came out of the box with a gap of .055"
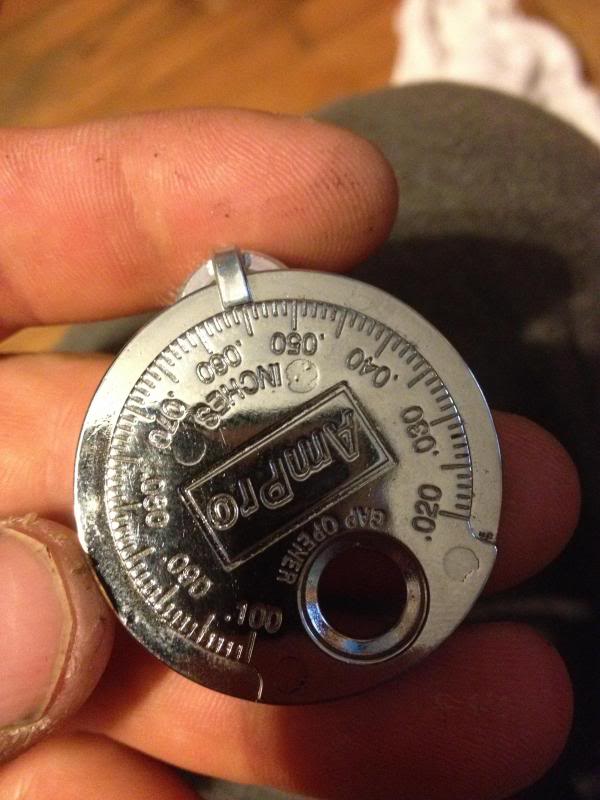
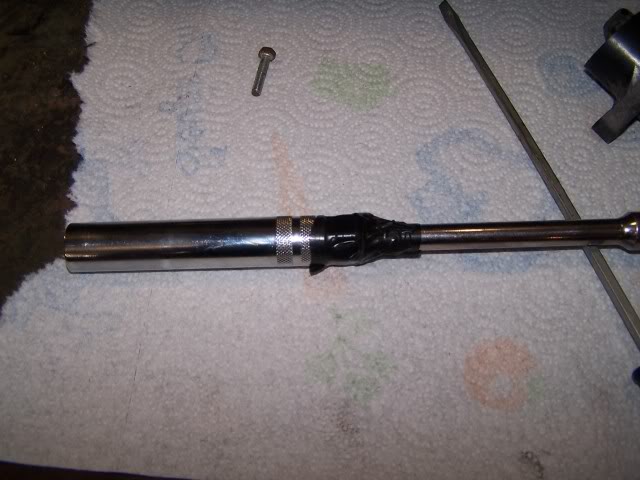
To gap them perfectly, do the follow: You will need a gap opener (see above).
If your gap is too large, simply tap the end(ground electrode) gently on a piece of wood to close the gap. After a tap or two, the gap should shrink down. Now with the gap shrunk down from the original size use a gap opening tool(measuring device) to produce the correct size. Do not try to push the gap opening tool to open up the gap, wiggle it gently and then slide it until the appropriate gap size is met. You will need to do this to all 6 or 8 plugs.
3) Tools and Materials:
Tools I used:
Tools needed: Gap Opener, 10 mm socket, 8 mm socket, 7 mm socket, � inch drive ratchet, 3/8 drive ratchet, � and 3/8 extensions, 3/8 drive torque wrench, 5/8” socket/spark-plug socket, dielectric grease, DMM.
Materials:
6-8 Spark plugs (Always replace all of them when doing a change).
Dielectric grease
Injector O-Rings
4) Making room to work.
A) Disconnect the IAT, MAF sensor, and all vacuum hoses from the intake tube and remove the intake from the engine bay.
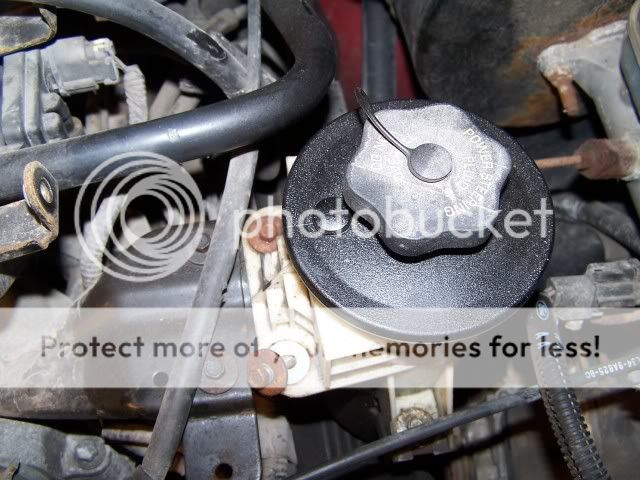
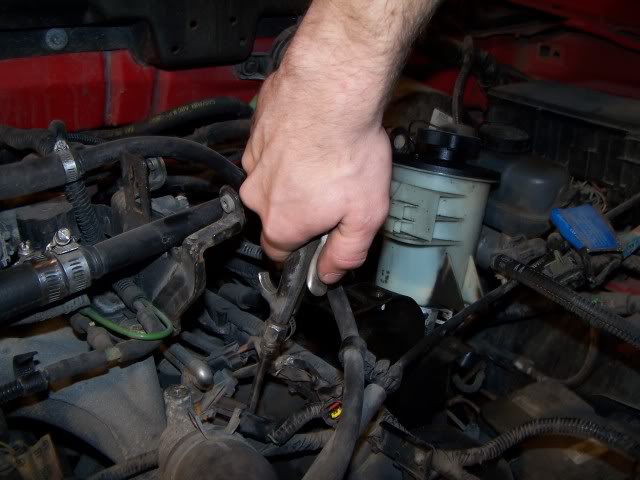
B) Take out the three 8mm bolts that hold the power steering reservoir on and the three that hold the bracket on. I take both off to add a little more room to maneuver. Place the reservoir out of the way. The hoses will hold it while it is off.
C) I also find it easier to get to the plugs on the drivers side if I remove the DPFE/EVR solenoid and retaining bracket. It is held on by a 10mm nut on the EGR Valve stud and a 10mm bolt on the intake. (Remove the hoses and connector off the EVR solenoid also).
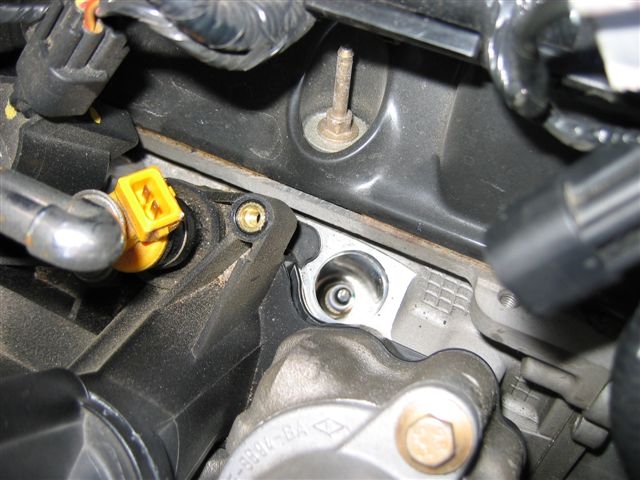
In the picture below you will see the DPFE, do not remove it from the bracket, remove the entire bracket itself. Remove necessary hoses and connectors.
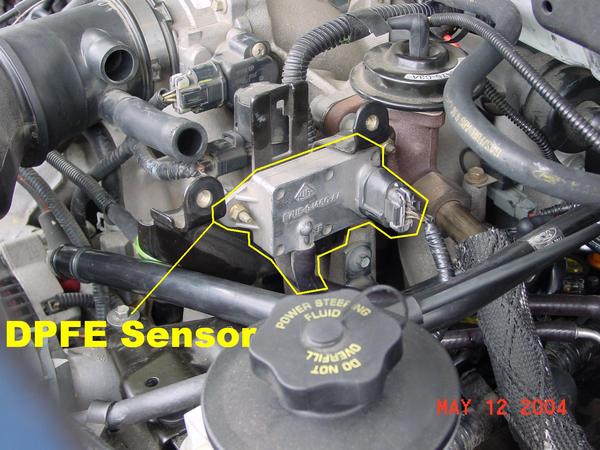
This picture shows the EVR solenoid on the right connected to the bracket you will be removing.
In the top of this picture you will see the small 10mm nut that holds the bracket to the EGR valve stud.
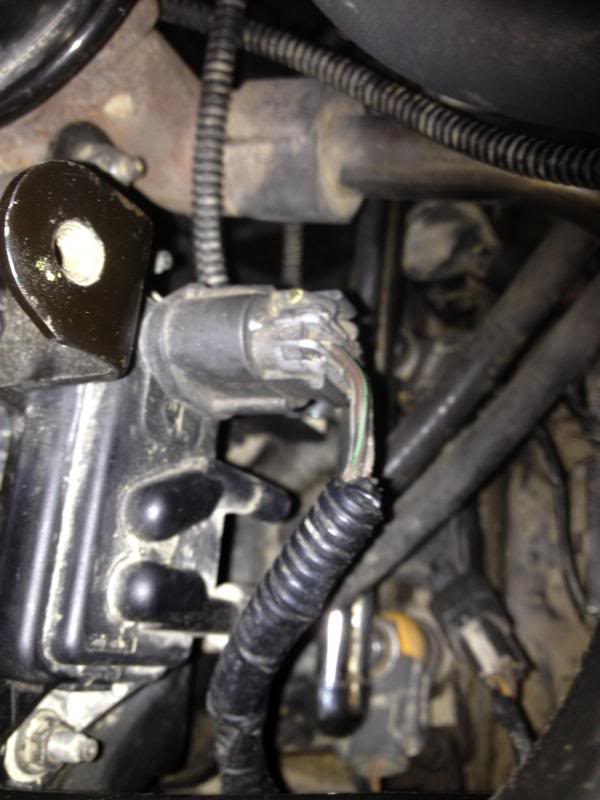
Remove both hoses from the DPFE and electrical connector.
5) COP Removal
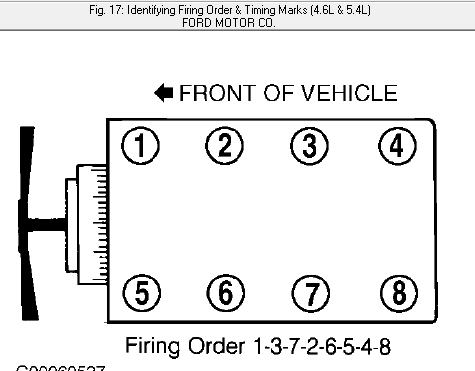
Before we remove any coils or begin to work on the engine, its only appropriate to know how the cylinders are labeled for reference.
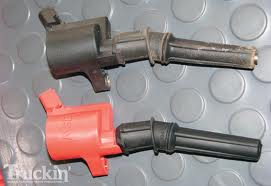
What does a COP look like?
It's simply a "Coil Over Plug". These attach over the spark plug and are connected via a connector to the ignition system.
A)
I prefer to start with the easiest COP's to reach, which are COP's #1 and #5.
First, undo the clip that provides power to the COP. It is a small push tab on the underside of the connector. Push on the tab and pull out the connector from the COP.

There is a 7 mm bolt that holds the COP in place. Take this bolt out and the COP will be free to come out. It is very helpful to have magnetic sockets or a long pen magnet for the rear COP bolts. If it drops it can be very hard to retrieve them without assistance.
Pull the COP out. Some slight twisting may be needed to help get the boot off the spark plug. Take compressed air and blow out the spark plug well and the area around before attempting to remove the plug. This prevents any debris falling into the cylinder while the plug is out. I attach a length of hose to the end of a small blowgun to get down into the well and around the plug.
***Alot of people find it easier to remove the fuel rails***
If you feel this is the case, follow Otto's directions.
https://www.f150forum.com/f72/97-03-...-change-93389/
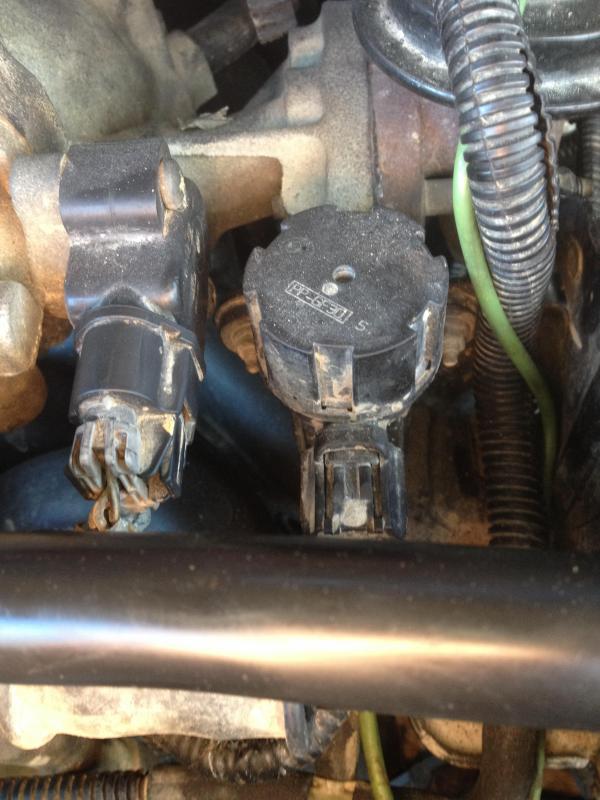
I honestly, don't find it mandatory to remove the fuel rails, the only COP you may have issues with is #6 and #7 on the drivers side. These require a swivel, or a very small open end wrench to get too while the fuel rail is in-tact. Below is a picture of the hardest COP's IMO to remove. The back two COP's require a little work to get your hands in there.
Finish taking the rest of the COPs off by removing the 7mm bolts. DO NOT TAKE THE PLUGS OUT UNTIL YOU HAVE FINISHED REMOVING ALL 8 COPS. This prevents you from knocking debris into the cylinder head.
Spark Plug Removal notes:
When removing the plugs its important to note that the valley containing the plugs are tilted. The Passengers side is tilted towards the back of the truck, while the drivers side is tilted towards the front of the truck. This is important to note because your socket and extension need to be at an angle when you go to remove the plug.
It is also worthy to note: If it has 5+ years or more since you changed plugs, it is very possible debris has caked up around the 5 edges on the plug. You make have to take a long flat head screw driver to knock the gunk off from around plug and blow it out in order for the 5/8" socket to fit on the plug firmly.
Disclaimer: A lot of the info in this thread is updated from time to time by FORD. Make sure you double check your own specifications in regard to your model year and engine size. Spark plug gap and torque settings can vary greatly, and are very important when do this, so do your research. Mine was an 03, so I used the specifications I listed.
Good things to do during a spark plug change:
Change O-rings on injectors
Replace COP's
Check injectors for resistance
Check COP's for resistance
Before doing any spark plug change there are several things you need to know;
1) Spark plug type (Motorcraft is the preferred) and gap.
Please notice the 01-03 gap is .045 vs .054 in the previous years. I know alot of the retail auto parts dealers don't get these exactly right. Typically, when you give them your trucks information they pull up the general spark plug. Most autolite, NGK, etc's will be gaped at .054" for 97-03. So double check and make adjustment as necessary.
The names of these plugs have been discontinued, but ask for the appropriate match at the dealership and they will hook you right up.
1997
4.2L V6 Motorcraft AWSF-42EG or equivalent 0.054 inch
4.6L V8 Motorcraft AWSF-32PG or equivalent 0.054 inch
5.4L V8 Motorcraft AWSF-22EE or equivalent 0.054 inch
1998 through 2000
4.2L V6 Motorcraft AGSF-34EE or equivalent 0.054 inch
4.6L V8 Motorcraft AWSF-32PP or equivalent 0.054 inch
5.4L V8 Motorcraft AWSF-22E or equivalent 0.054 inch
2001 and later models
4.2L V6 Motorcraft AGSF-34EE or equivalent 0.054 inch
4.6L V8 Motorcraft AWSF-32P or equivalent 0.054 inch
5.4L V8 Motorcraft AWSF-22W or equivalent 0.054 inch
2001 through 2003 Motorcraft ASWF-22 or equivalent 0.045 inch
2) Making adjustments to new plug (gap size).
My truck is a 2003 so I needed to adjust the gap size.
The plugs came out of the box with a gap of .055"

To gap them perfectly, do the follow: You will need a gap opener (see above).
If your gap is too large, simply tap the end(ground electrode) gently on a piece of wood to close the gap. After a tap or two, the gap should shrink down. Now with the gap shrunk down from the original size use a gap opening tool(measuring device) to produce the correct size. Do not try to push the gap opening tool to open up the gap, wiggle it gently and then slide it until the appropriate gap size is met. You will need to do this to all 6 or 8 plugs.
3) Tools and Materials:
Tools I used:
Tools needed: Gap Opener, 10 mm socket, 8 mm socket, 7 mm socket, � inch drive ratchet, 3/8 drive ratchet, � and 3/8 extensions, 3/8 drive torque wrench, 5/8” socket/spark-plug socket, dielectric grease, DMM.
Materials:
6-8 Spark plugs (Always replace all of them when doing a change).
Dielectric grease
Injector O-Rings
4) Making room to work.
A) Disconnect the IAT, MAF sensor, and all vacuum hoses from the intake tube and remove the intake from the engine bay.
B) Take out the three 8mm bolts that hold the power steering reservoir on and the three that hold the bracket on. I take both off to add a little more room to maneuver. Place the reservoir out of the way. The hoses will hold it while it is off.
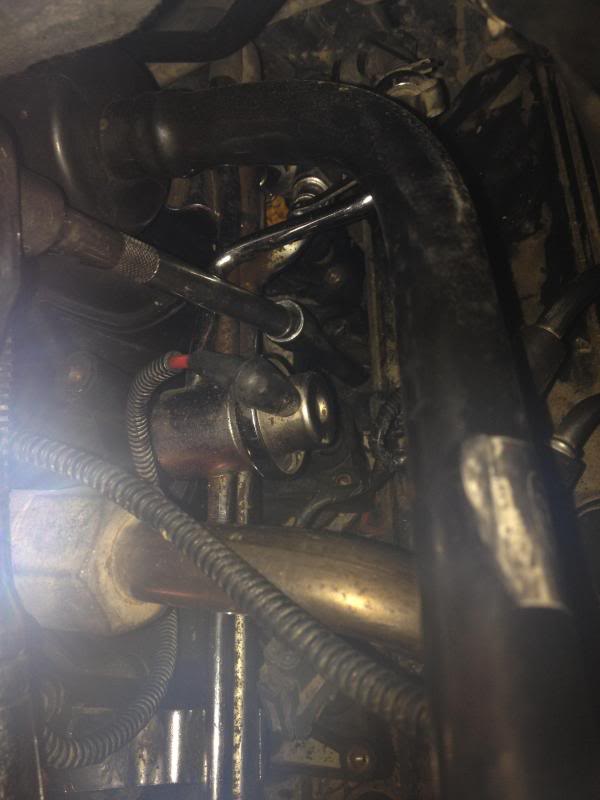
C) I also find it easier to get to the plugs on the drivers side if I remove the DPFE/EVR solenoid and retaining bracket. It is held on by a 10mm nut on the EGR Valve stud and a 10mm bolt on the intake. (Remove the hoses and connector off the EVR solenoid also).
In the picture below you will see the DPFE, do not remove it from the bracket, remove the entire bracket itself. Remove necessary hoses and connectors.

This picture shows the EVR solenoid on the right connected to the bracket you will be removing.

In the top of this picture you will see the small 10mm nut that holds the bracket to the EGR valve stud.

Remove both hoses from the DPFE and electrical connector.
5) COP Removal
Before we remove any coils or begin to work on the engine, its only appropriate to know how the cylinders are labeled for reference.

What does a COP look like?
It's simply a "Coil Over Plug". These attach over the spark plug and are connected via a connector to the ignition system.

A)
I prefer to start with the easiest COP's to reach, which are COP's #1 and #5.
First, undo the clip that provides power to the COP. It is a small push tab on the underside of the connector. Push on the tab and pull out the connector from the COP.

There is a 7 mm bolt that holds the COP in place. Take this bolt out and the COP will be free to come out. It is very helpful to have magnetic sockets or a long pen magnet for the rear COP bolts. If it drops it can be very hard to retrieve them without assistance.
Pull the COP out. Some slight twisting may be needed to help get the boot off the spark plug. Take compressed air and blow out the spark plug well and the area around before attempting to remove the plug. This prevents any debris falling into the cylinder while the plug is out. I attach a length of hose to the end of a small blowgun to get down into the well and around the plug.
***Alot of people find it easier to remove the fuel rails***
If you feel this is the case, follow Otto's directions.
https://www.f150forum.com/f72/97-03-...-change-93389/
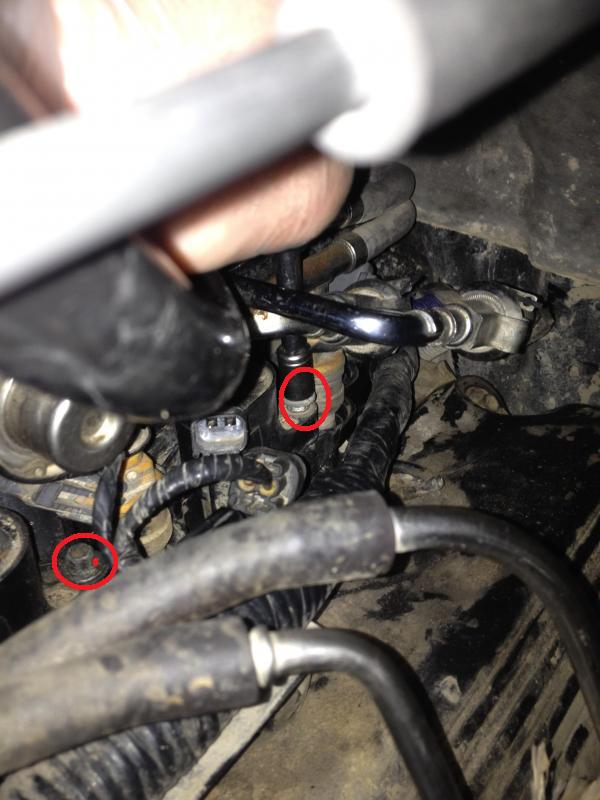
I honestly, don't find it mandatory to remove the fuel rails, the only COP you may have issues with is #6 and #7 on the drivers side. These require a swivel, or a very small open end wrench to get too while the fuel rail is in-tact. Below is a picture of the hardest COP's IMO to remove. The back two COP's require a little work to get your hands in there.

Finish taking the rest of the COPs off by removing the 7mm bolts. DO NOT TAKE THE PLUGS OUT UNTIL YOU HAVE FINISHED REMOVING ALL 8 COPS. This prevents you from knocking debris into the cylinder head.
Spark Plug Removal notes:
When removing the plugs its important to note that the valley containing the plugs are tilted. The Passengers side is tilted towards the back of the truck, while the drivers side is tilted towards the front of the truck. This is important to note because your socket and extension need to be at an angle when you go to remove the plug.

It is also worthy to note: If it has 5+ years or more since you changed plugs, it is very possible debris has caked up around the 5 edges on the plug. You make have to take a long flat head screw driver to knock the gunk off from around plug and blow it out in order for the 5/8" socket to fit on the plug firmly.
Last edited by ibd2328; 02-04-2014 at 12:48 PM.
 02-04-2014, 01:58 AM
#2
6) Spark Plug Removal.
*Double check that all the debris is out of the each of the 8 spark plug bays*
To remove the spark plug, use a 5/8” spark plug socket and extension. Only remove and install the spark plugs with a fully cool engine. I like to tape the socket to the extension/swivel to keep them from coming apart. I used a variety of 4-8" extensions varying on where my ratchet was. A good swivel extension is helps tremendously.
Here is what the socket on #5 looks like. Loosen and remove the sparkplug.
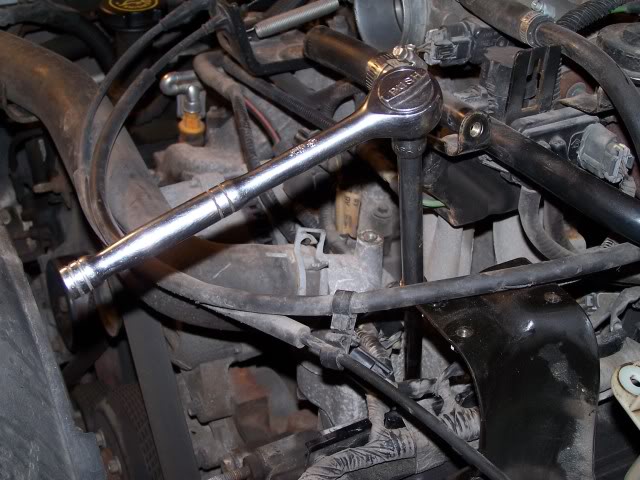
Once you loosen up the spark plug, you should be able to thread it out by hand using the extension. I also found it useful to use a rag to wipe out the socket each time so that it holds the plug allows you to pull it out of the bay without it slipping off.
After you remove each plug, place a lint free cloth or other suitable rag to cover the plug holes until you are ready to re-install the new plugs.
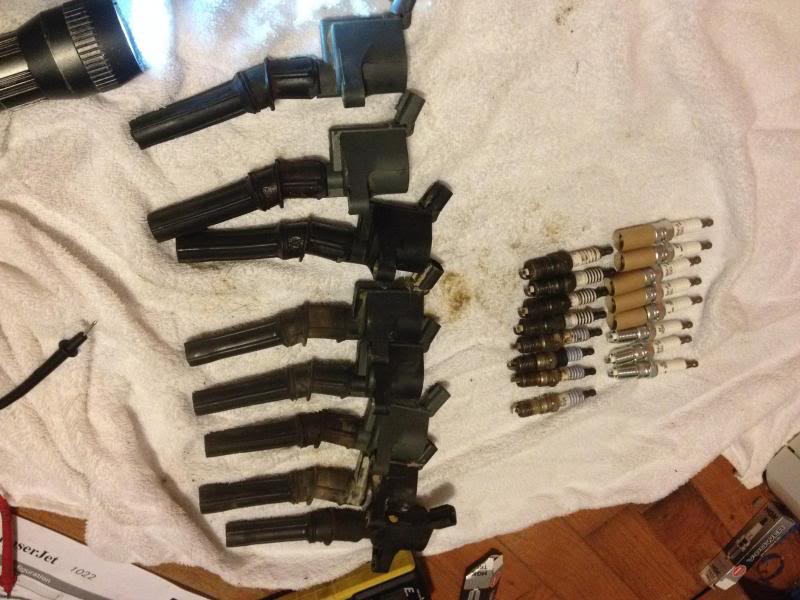
7) Comparing old to new:
With all 8 COP's and Plugs out it is a great time to compare them. I also like to test each cop.
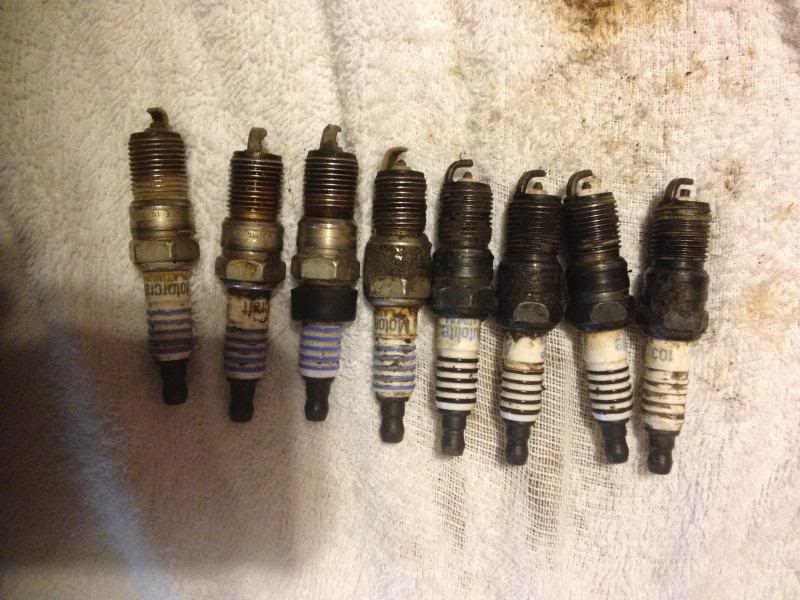
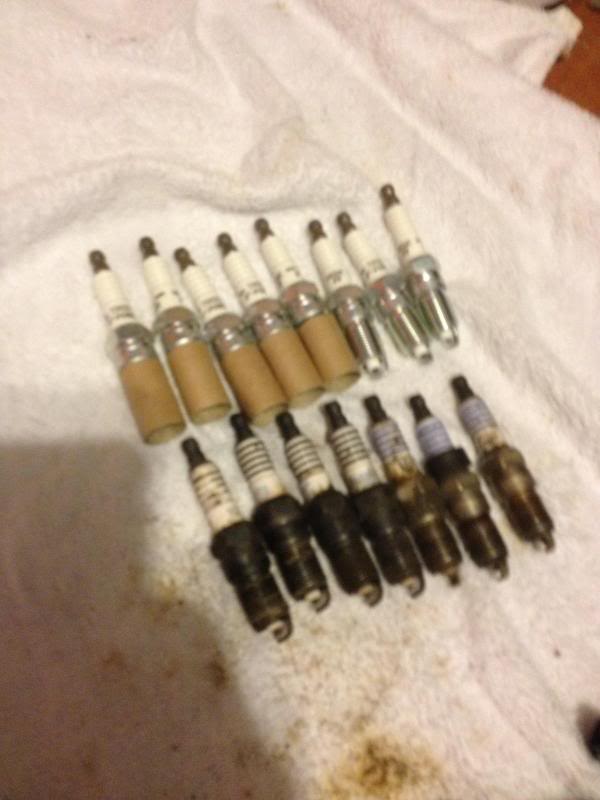
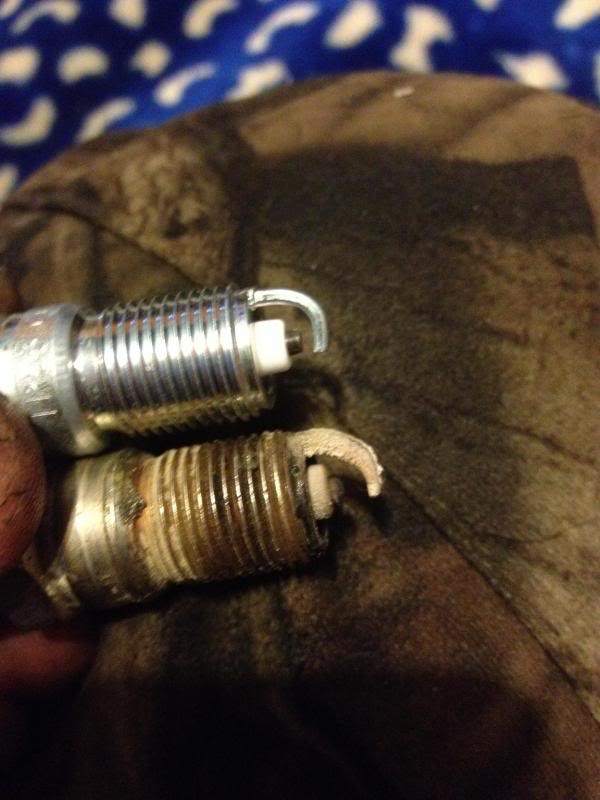
If you notice in the picture above, the gap difference between the old plug and new plug was about double. This can greatly decrease your mileage and the way your truck runs.
The old plugs were so worn out, the gap was about .075"
*Double check that all the debris is out of the each of the 8 spark plug bays*
To remove the spark plug, use a 5/8” spark plug socket and extension. Only remove and install the spark plugs with a fully cool engine. I like to tape the socket to the extension/swivel to keep them from coming apart. I used a variety of 4-8" extensions varying on where my ratchet was. A good swivel extension is helps tremendously.
Here is what the socket on #5 looks like. Loosen and remove the sparkplug.

Once you loosen up the spark plug, you should be able to thread it out by hand using the extension. I also found it useful to use a rag to wipe out the socket each time so that it holds the plug allows you to pull it out of the bay without it slipping off.
After you remove each plug, place a lint free cloth or other suitable rag to cover the plug holes until you are ready to re-install the new plugs.
7) Comparing old to new:
With all 8 COP's and Plugs out it is a great time to compare them. I also like to test each cop.


If you notice in the picture above, the gap difference between the old plug and new plug was about double. This can greatly decrease your mileage and the way your truck runs.
The old plugs were so worn out, the gap was about .075"
 02-04-2014, 01:58 AM
#3
Testing each COP:
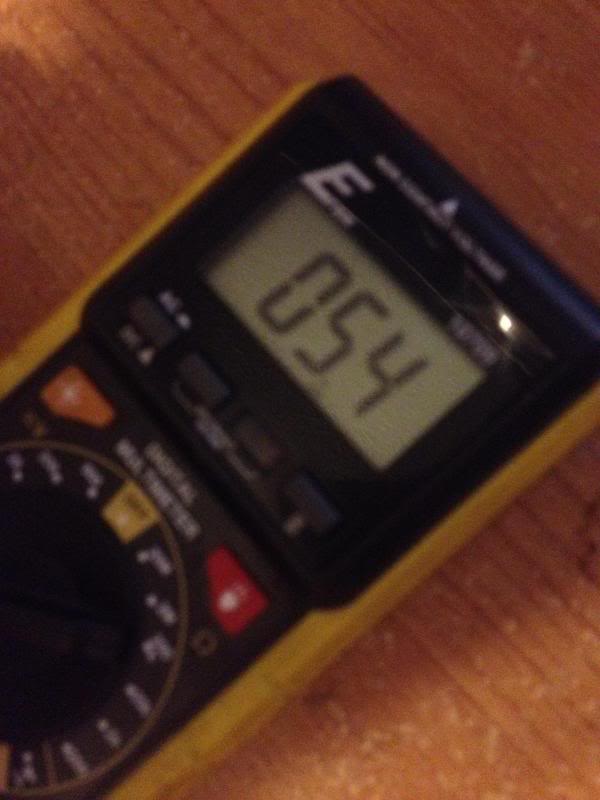
Primary reading:
Place your Ohmmeter on 200 ohms.
Test the resistance at primary male terminals on the COP.
You should get a reading of .45 - .6 ohms. My meter isnt very accuracty down to that level, so my reading stayed at .6 ohms. (which is good)
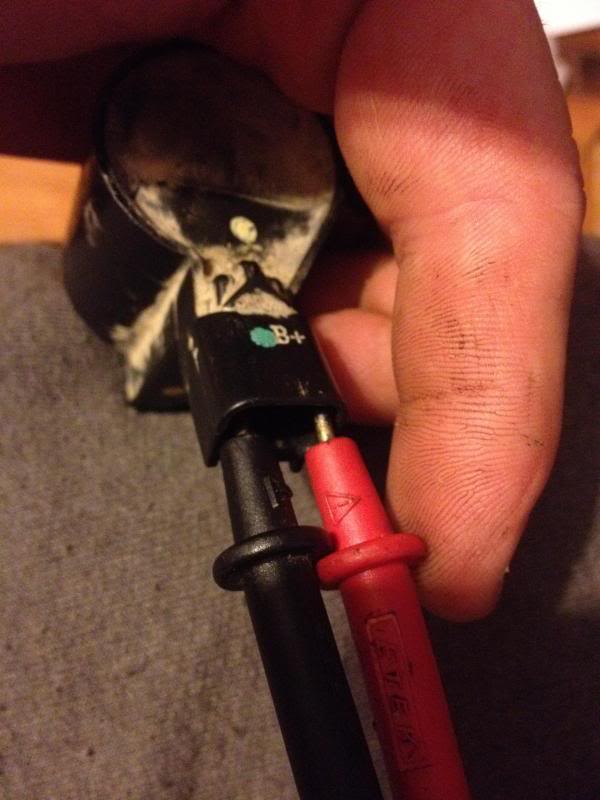
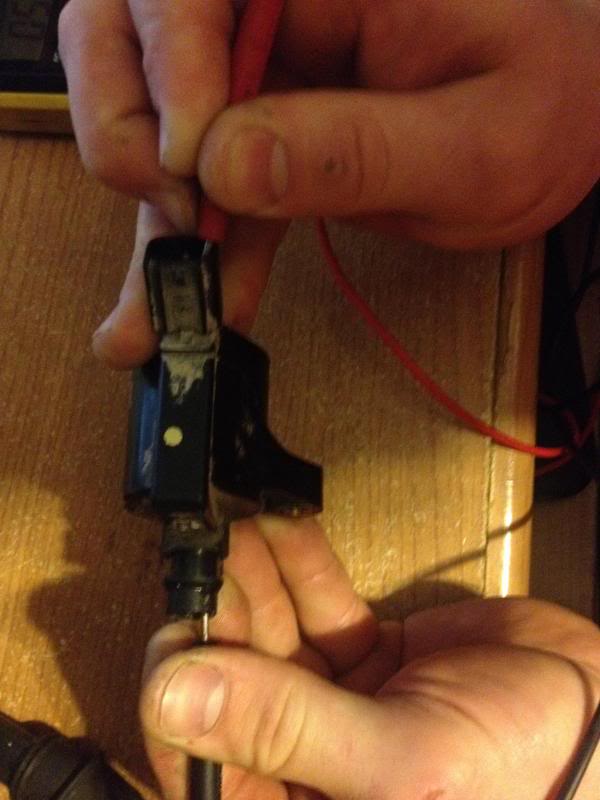
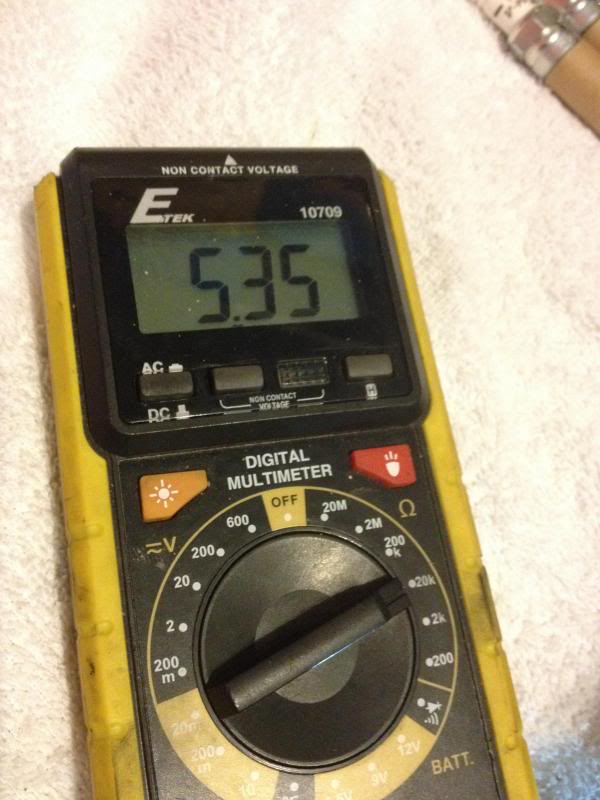
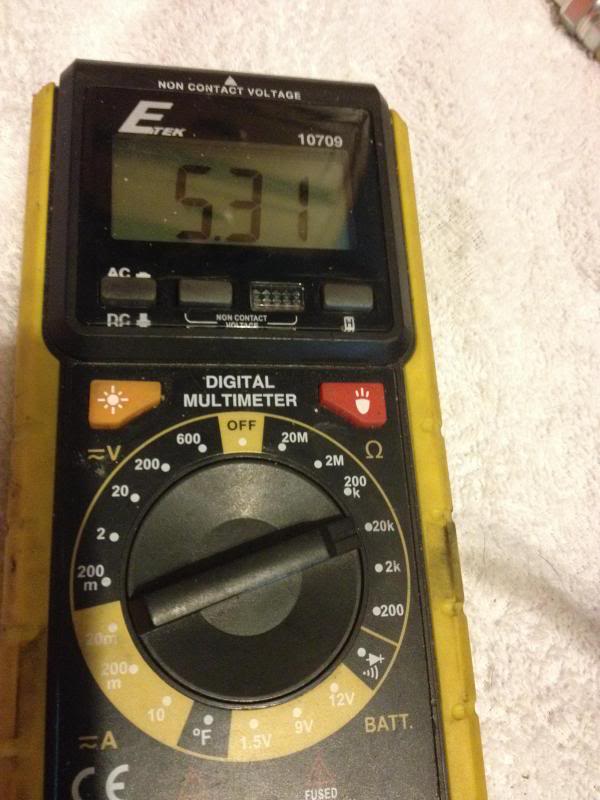
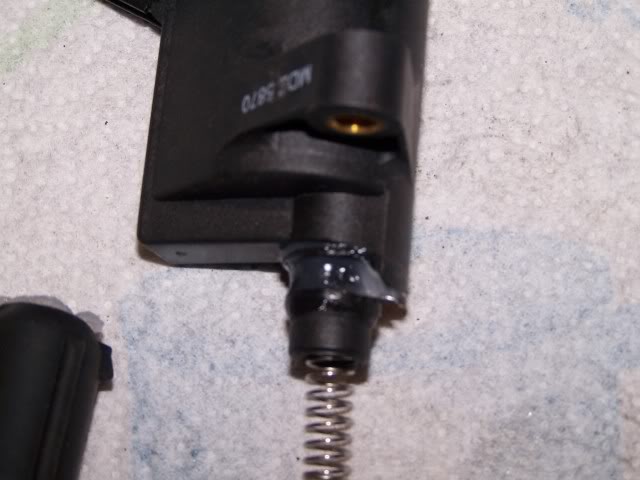
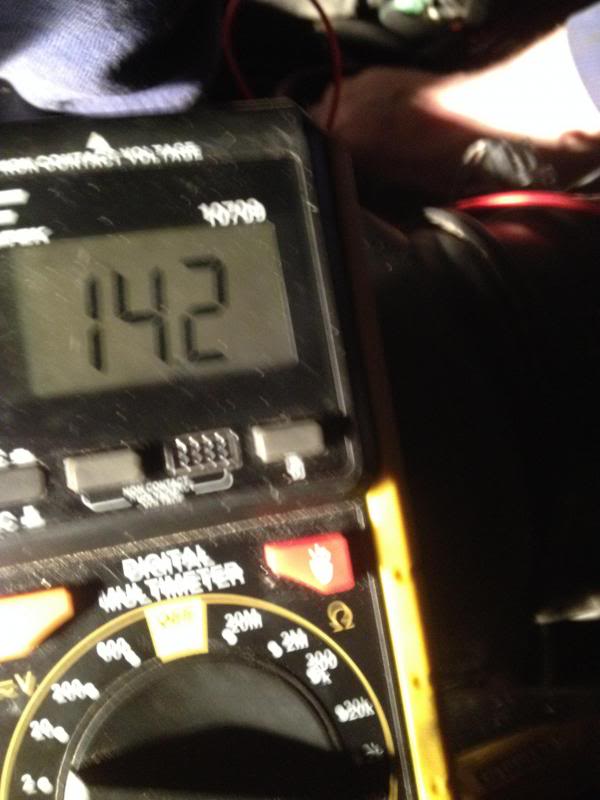
Secondary reading:
Place your ohm meter on 20k ohms.
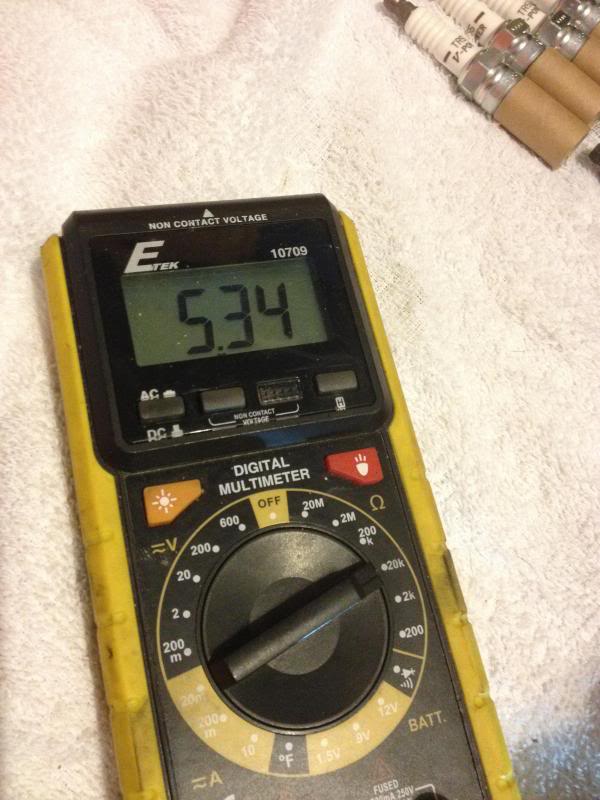
With the COP off the truck, place your positive prob from the ohmmeter on the male termial (+), then place the negative prob at the coil/spring at the end of the boot. Your reading should be around 5,400 - 5,600 ohms.
Do this to each COP, if you see a huge variance in one of the COP's resistance, replace it with a new one.
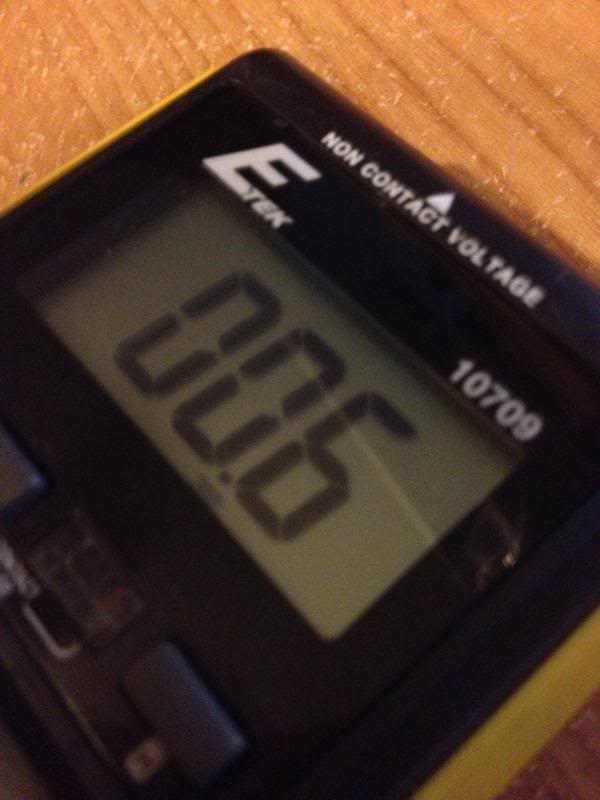
I chose to do this on ever plug just to see the variance. Here are a few pictures.
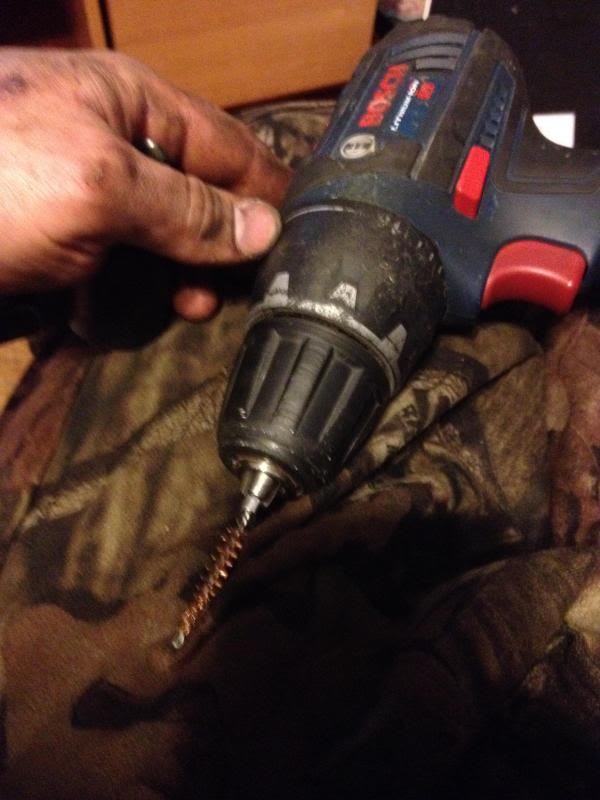
All my Primary and Secondary readings were good. So I decided to reuse the same COPs. I then took the boot of each plug and used a small wire brush and a drill to clean the terminals and all connecting parts of the COP.

Primary reading:
Place your Ohmmeter on 200 ohms.
Test the resistance at primary male terminals on the COP.

You should get a reading of .45 - .6 ohms. My meter isnt very accuracty down to that level, so my reading stayed at .6 ohms. (which is good)

Secondary reading:
Place your ohm meter on 20k ohms.
With the COP off the truck, place your positive prob from the ohmmeter on the male termial (+), then place the negative prob at the coil/spring at the end of the boot. Your reading should be around 5,400 - 5,600 ohms.


Do this to each COP, if you see a huge variance in one of the COP's resistance, replace it with a new one.
I chose to do this on ever plug just to see the variance. Here are a few pictures.


All my Primary and Secondary readings were good. So I decided to reuse the same COPs. I then took the boot of each plug and used a small wire brush and a drill to clean the terminals and all connecting parts of the COP.
 02-04-2014, 01:59 AM
#4
Whether reusing COPs or installing new, dielectric grease on the COPs is recommended to prevent corrosion on the coil and subsequent misfires.
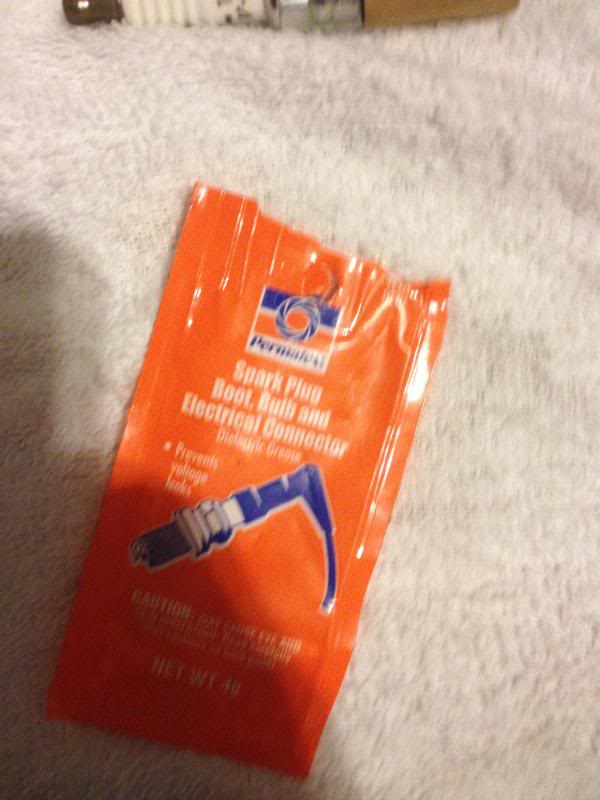
Remove the boot from the COP and using a long screwdriver, lightly coat the inside of the boot with dielectric grease. A bead of grease around the top of the COP where the boot contacts can also be used. Reinstall the boot and clean any dielectric grease from the inside/end of the coil wire with a small pipe cleaner.


Install new plugs with appropriate gap openings.
Double check all plugs that the gap oppening is correct.
My 03 requires .045"
With the electrical grease on all the COP's and plugs its time to install all 8 spark plugs. Remove the lint free cloth cover each opening ONE AT A TIME.
Then place your spark plug into the opening and use your 5/8" socket to hand tighten the plugs so you do not cross thread them. Once you get them hand tight, pull out your torque wrench.
THIS IS VERY IMPORTANT!!! DO NOT SIMPLY TIGHTEN UNTIL SNUG.
Spark Plug Torque Specifications!
2002 and earlier models 84 to 168 in-lbs
2003 and 2004 models 15 ft-lbs
Note: 1 ft- lb= 12 in-lbs , so 15 ft-lb = 180 ft-lbs
Install each plug in the manner listed above, torquing each plug to its specified ft-lbs.
Check injectors resistance.
Once you have all 8 spark plugs in, its a good time to check your injectors resistance. This simply requires you to unplug the electrical connector to the injector and prob the male terminals.
For a good injector you should see 13-20 ohms.
Reinstalling COP's
Reinstall the COP onto the new plug, and reinstall the bolt. Hook back up the electrical connector to the COP. Do this for all 8 cylinders. Make sure the boot is securely on the plug.
That�s all there is to it. Reinstall all connectors and intake parts and start to ensure there are no problems. When changing the plugs it is also a good time to clean the throttle, MAF, and check for any cracked or damaged hoses causing vacuum leaks.

Remove the boot from the COP and using a long screwdriver, lightly coat the inside of the boot with dielectric grease. A bead of grease around the top of the COP where the boot contacts can also be used. Reinstall the boot and clean any dielectric grease from the inside/end of the coil wire with a small pipe cleaner.
Install new plugs with appropriate gap openings.
Double check all plugs that the gap oppening is correct.
My 03 requires .045"

With the electrical grease on all the COP's and plugs its time to install all 8 spark plugs. Remove the lint free cloth cover each opening ONE AT A TIME.
Then place your spark plug into the opening and use your 5/8" socket to hand tighten the plugs so you do not cross thread them. Once you get them hand tight, pull out your torque wrench.
THIS IS VERY IMPORTANT!!! DO NOT SIMPLY TIGHTEN UNTIL SNUG.
Spark Plug Torque Specifications!
2002 and earlier models 84 to 168 in-lbs
2003 and 2004 models 15 ft-lbs
Note: 1 ft- lb= 12 in-lbs , so 15 ft-lb = 180 ft-lbs
Install each plug in the manner listed above, torquing each plug to its specified ft-lbs.
Check injectors resistance.
Once you have all 8 spark plugs in, its a good time to check your injectors resistance. This simply requires you to unplug the electrical connector to the injector and prob the male terminals.
For a good injector you should see 13-20 ohms.

Reinstalling COP's
Reinstall the COP onto the new plug, and reinstall the bolt. Hook back up the electrical connector to the COP. Do this for all 8 cylinders. Make sure the boot is securely on the plug.
That�s all there is to it. Reinstall all connectors and intake parts and start to ensure there are no problems. When changing the plugs it is also a good time to clean the throttle, MAF, and check for any cracked or damaged hoses causing vacuum leaks.
The following users liked this post:
dobhran (03-11-2016)
02-04-2014, 05:31 AM
#5
Senior Member

Yea, there's quite a bit of bad info in here. Not all bad, but very old and needs updating. It would take a little bit to go thru. Notations should be added here and there I guess. Some by the book info, specs discontinuations and revised information should be noted.
02-04-2014, 06:01 AM
#7
Senior Member
Nope. Should be 28' lbs ft for the V8/V10. That's one update. Yea, don't use the manual specs here. Manuel specs are correct for 2003 + F150's w/8/9 thread plug chambers.
Last edited by Jbrew; 02-04-2014 at 06:04 AM.
The following users liked this post:
caron (02-04-2014)
Trending Topics
02-04-2014, 09:45 AM
#8
Member

Join Date: Jan 2014
Location: South Jersey
Posts: 48
Likes: 0
Received 0 Likes
on
0 Posts

Kudos for the write up.
I would just like to add my 2 cents:
-Are you sure your plug gap for your 2003 calls for .045 and not .054? My 2002 with a 5.4 call for between .052 - .056. Here's a copy of the factory manual that references the .054 gap. (skip to page 301) http://www.fordservicecontent.com/Fo.../02f12og1e.pdf In fact when I search the 2003 manual, located here (page 262) it also references a .052 to .056 gap. http://www.fordservicecontent.com/Fo.../03f12og1e.pdf
-Second, this job can be done without removing the fuel rail. I see no reason to go in there and pull that off. (If it ain't broke, why fix it)?
-I do not think COPs need to be replaced either unless you have a misfire or something. At that point I would go ahead and replace them all, but I wouldn't just do it as a preventive maintenance thing.
 02-04-2014, 11:10 AM
#10
Senior Member
Kudos for the write up.
I would just like to add my 2 cents:
-Are you sure your plug gap for your 2003 calls for .045 and not .054? My 2002 with a 5.4 call for between .052 - .056. Here's a copy of the factory manual that references the .054 gap. (skip to page 301) http://www.fordservicecontent.com/Fo.../02f12og1e.pdf In fact when I search the 2003 manual, located here (page 262) it also references a .052 to .056 gap. http://www.fordservicecontent.com/Fo.../03f12og1e.pdf
-Second, this job can be done without removing the fuel rail. I see no reason to go in there and pull that off. (If it ain't broke, why fix it)?
-I do not think COPs need to be replaced either unless you have a misfire or something. At that point I would go ahead and replace them all, but I wouldn't just do it as a preventive maintenance thing.
I would just like to add my 2 cents:
-Are you sure your plug gap for your 2003 calls for .045 and not .054? My 2002 with a 5.4 call for between .052 - .056. Here's a copy of the factory manual that references the .054 gap. (skip to page 301) http://www.fordservicecontent.com/Fo.../02f12og1e.pdf In fact when I search the 2003 manual, located here (page 262) it also references a .052 to .056 gap. http://www.fordservicecontent.com/Fo.../03f12og1e.pdf
-Second, this job can be done without removing the fuel rail. I see no reason to go in there and pull that off. (If it ain't broke, why fix it)?
-I do not think COPs need to be replaced either unless you have a misfire or something. At that point I would go ahead and replace them all, but I wouldn't just do it as a preventive maintenance thing.
________________________
Replacing COP system coils.
It depends how new the others are. It's a system integrity thing. As coils age copper turns around the build magnet short. Not all at once but little by little. With age this effects performance and eventually results into low grade misfiring before failing completely.
The following users liked this post:
ccriley (03-18-2015)