how to install double din head unit


 04-27-2014, 11:20 AM
#12
 09-23-2016, 03:24 PM
#13
Junior Member

Join Date: Jul 2016
Posts: 13
Likes: 0
Received 0 Likes
on
0 Posts
hello guys i saw a few threads on here about the double din head units and alot of people where not sure how to install them..so i went out and did mine and took pics in the process. i might not be the best explainer but i have pics yeahh lol and if i miss spell something or it dont make any sences lol its ok i have dyslexia so  off lol just in fair warning lol.. well here we go. i poped off the outside bezel and unplugged the airbag wire and if you have 4x4 unplug that one to..now there is 2 ways to do this leave it all in there and take a dremel and make a mess everywhere and try to squeeze ur hand it tight spots or just take it all out thats up to you i took it all out.so after i unbolted all the screws that where holding the main radio harness?? (the hard black thing that the a/c and radio are bolted on).. i unhooked and removed the a/c / heat buttons.. and then removed the black harness and took it in the house and and took my dd head unit and lined it up with the harness and made a mark for what i needed to be cut out.then i took a dremel tool cut about 1/2 of molding off. this does not need to be perfect it all will be coverd harness is done!! now back to the inside there is a angled peace of plastic as marked in the picture below u will have to cut that out so the top of your dd head unit dont hit. now the fun part u have to put everything back togeather hook up all your wires and install your new double din head unit. since its such a tight fit i just used like 2 peaces of foam stuck it in there and that head unit is snugg as a bug its not moving anywhere.. and the last picture you see is my head unit installed but i did not have the trim on yet and i did not have the out side bezel pushed on all the way lol just saying it now so no one points it out lol.. it took around 2 hrs that was the head unit install runing sub wires installing subs and amp..i say out of 10 for hardness its a 4 its all common sense . now after 10 mins of me doing all this i was like ahhhhh i dont like that head unit and now i am ordering another one so geez i have to do it all again lol hope this helps
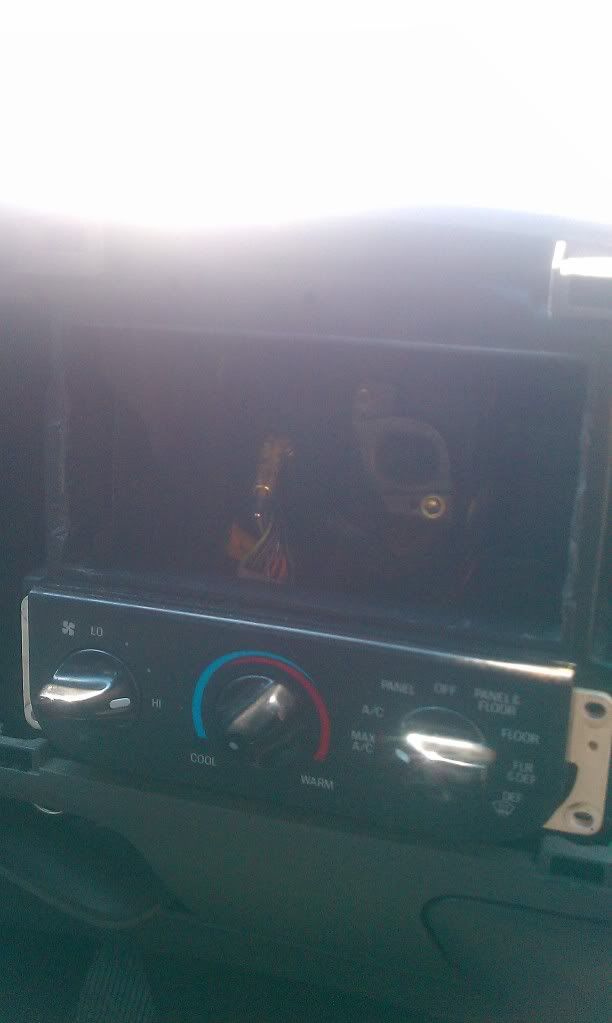
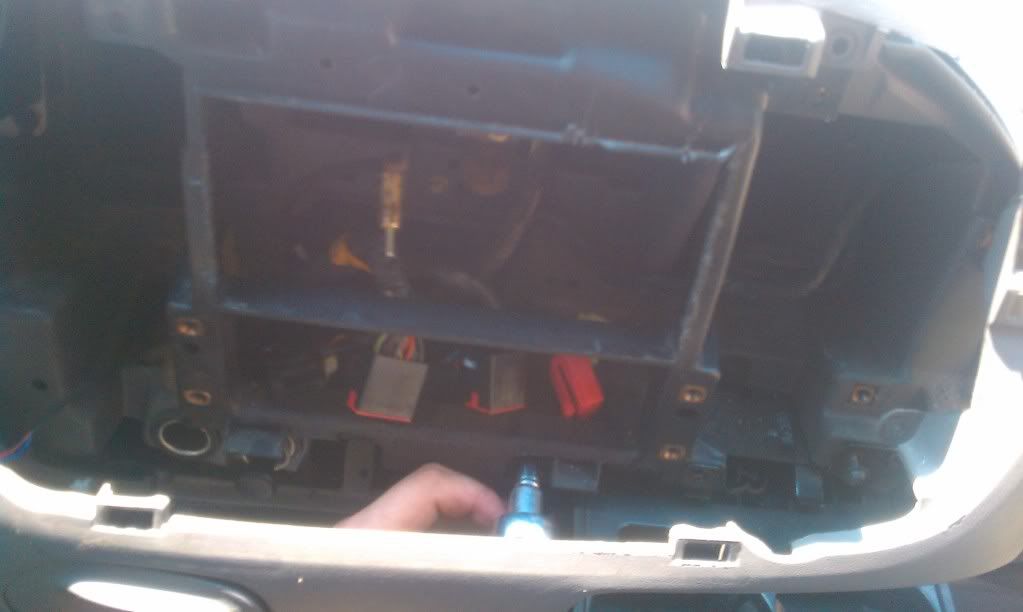
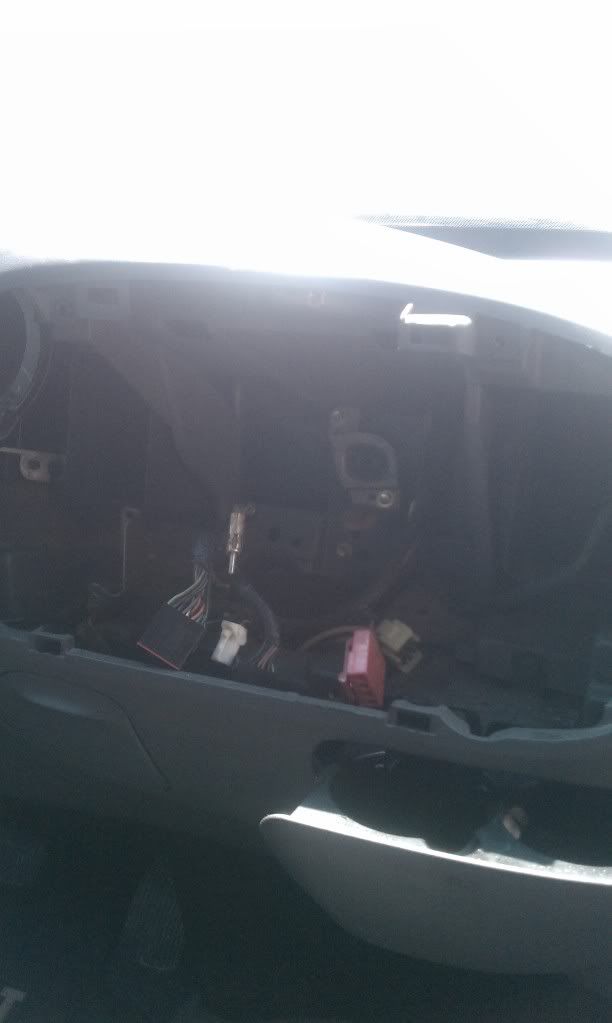
off lol just in fair warning lol.. well here we go. i poped off the outside bezel and unplugged the airbag wire and if you have 4x4 unplug that one to..now there is 2 ways to do this leave it all in there and take a dremel and make a mess everywhere and try to squeeze ur hand it tight spots or just take it all out thats up to you i took it all out.so after i unbolted all the screws that where holding the main radio harness?? (the hard black thing that the a/c and radio are bolted on).. i unhooked and removed the a/c / heat buttons.. and then removed the black harness and took it in the house and and took my dd head unit and lined it up with the harness and made a mark for what i needed to be cut out.then i took a dremel tool cut about 1/2 of molding off. this does not need to be perfect it all will be coverd harness is done!! now back to the inside there is a angled peace of plastic as marked in the picture below u will have to cut that out so the top of your dd head unit dont hit. now the fun part u have to put everything back togeather hook up all your wires and install your new double din head unit. since its such a tight fit i just used like 2 peaces of foam stuck it in there and that head unit is snugg as a bug its not moving anywhere.. and the last picture you see is my head unit installed but i did not have the trim on yet and i did not have the out side bezel pushed on all the way lol just saying it now so no one points it out lol.. it took around 2 hrs that was the head unit install runing sub wires installing subs and amp..i say out of 10 for hardness its a 4 its all common sense . now after 10 mins of me doing all this i was like ahhhhh i dont like that head unit and now i am ordering another one so geez i have to do it all again lol hope this helps
09-23-2016, 09:57 PM
#14

I think you made it a lot harder rhan necessary. People been doing this for 15 years.
All you do is remove about 3/8" from top bar above the head unit
Score it wirh a razor knife, and snap it off with pliers. The support parts behind the bar snap off too. Very brittle plastic. They are too deep to cut with dremel anyway. Dont need to remove anything.
Takes 5 minutes, and no mess like a dremel. Might need to saw/cut at top corners to get that all out there.
A soldering gun with flat blade woyld likely cut it great as well, no mess. Especially at corners.
Nothing else necessary. You dont have to cut ot anything inside. The angled bar at top back is perfectly fine as is, so is top supports. Not sure why you cut that all apart. People been doing this for 15 years.
If you use the metra trim and side mounts, it snaps snug!y into place and looks perfect.. I suppose you removed that other stuff because the wire bundle behind it caused it to pop out. Its snug, but you need the mounting flanges in a mounting kit to make the unit actually snap snugly into place. Without it your units just sitting there
Original can go back in seconds too. Its looser than before though because cutout is oversized at top, but trim bezel holds it in place so face doesnt move around. No one who didnt know would ever notice.
A good way to get familiar with this, is take a small hacksaw for corners, razor knife, and pliers to a junkyard for trial run.
Last edited by mbb; 09-23-2016 at 10:39 PM.
