Viper 5704 Alarm/Keyless/Remote Start Install with Pics
 01-18-2013, 12:53 AM
#1


For anyone who is interested.
I just finished wiring the main alarm/RS/and keyless portions of my viper 5704 and thought I would post my wiring notes and pictures for others to reference.
With my install I ordered a factory Remaned viper 5704 (I accidentally ordered remaned...didnt read the description thoroughly) from Fleabay for 185 along with 2 530T ($50 Ea) modules for one touch window operation and also aux window control, the viper audio glass sensor($20), and for the Gee Whiz factor, the Viper Electro luminescent indicator (OOOOO AHHH what a fancy way to say $12 large blinking light with a picture of a viper on it),and a 556U bypass kit($8)
All these were fleabay buys at a fraction of the cost but here are the links to the viper website:
http://www.viper.com/P-5704V/Viper-5...e-Start-System
http://www.viper.com/P-506T/Audio-Glass-Break-Sensor
http://www.viper.com/P-620V/Viper-El...cent-Indicator
I have yet to tackle the window modules but I have gotten the rest of the system and accessories installed and operational. I am waiting on the windows because a. I havent figured out where I wanna mount them and b. I am thinking that I may be able to possibly get one of the other three aux channels to control the heated seat modules but I haven't taken a solid look at the wiring and want to do all the Aux channels at once.
So here is the wiring pinout I used. I made this after talking with some members on here as well as referencing a few sites such as this one:http://www.bulldogsecurity.com/diagr...8&link=Bulldog
Main Harness
h1/1 red const 12v - tap to a const 12v TN/WH BCM
h1/2 black grnd - chassis ground Bk BCM
h1/3 brown siren out - connect to sirens red (black to ground)
h1/4 white/brown park light isolation wire - not used
h1/5 white park light out - BRN from pin 6 not pin 11 BCM
h1/6 orange ground when armed out - Orange on 530t and BK 620v
Door lock
1 blue out - tap to neg unlock - Pnk/LG
2 empty
3 green - tap to neg lock- Pnk/YL
Aux/shutdown/trigger harness, 24-pin connector
h2/1 pink/white ign/flex relay out - not used
h2/2 black/white neutral safety input - Run straight to grnd
h2/3 blue white 2nd stat/rear defog out - not used
h2/4 green black oem alarm disarm out - not used
h2/5 red/white trunk release out - not used
h2/6 green door trigger in - tap to door trigger Bk/yl, Bk/Pk, BK/Lt Bl, BLK/WT BCM NOTE:These need to be Isolated with diodes in order to keep the unit from getting false alarm triggers
h2/7 black/yellow dome light supv out - Opted to not hook this up
h2/8 brown/black horn honk - tap to horn DK BL BCM
h2/9 dark/blue status out - Blue Wire on 556u
h2/10 pink ign out - not used
h2/11 white/black aux3 out - not used
h2/12 violet door trigger in - not used
h2/13 white/violet aux1 out - RD/WT 530T
h2/14 violet/black aux2 out - Possibly to WH/YE and WH/RD behind the EATC module or at the seat wiring harnesses
h2/15 orange/black aux4 out - not used
h2/16 brown brake shutdown in - tap to brake wire switch LT GR at 3rd brake light
h2/17 grey hood pin - not used
h2/18 violet yellow starter out - not used
h2/19 blue instant trigger in - not used
h2/20 grey/black diesel wait to start - not used
h2/21 white/blue remote start/tt acvt in - not used
h2/22 orange acc out - not used
h2/23 violet/white tach in - not used
h2/24 oem alarm out - not used
remote start 10 pin heavy gauge connector
h3/1 pink ign in/out - DB/LG ignition harness
h3/2 red/white fused ign2/flex relay in - not used
h3/3 orange accessory out - BK/LG - ignition harness
h3/4 violet start out Rd/LB Engine side of starter wire ignition harness
h3/5 green starter in -- RD/LB key side of cut starter wire
h3/6 red ign in - tap to const 12v lt grn/yellow BCM
h3/7 pink/white ign2 out - not used
h3/8 pink/black flex relay in - not used
h3/9 red/black acc/starter in - tap to const 12v lt grn/yellow BCM

The following users liked this post:
scobar (10-13-2013)
01-18-2013, 01:09 AM
#2
Here are pics.
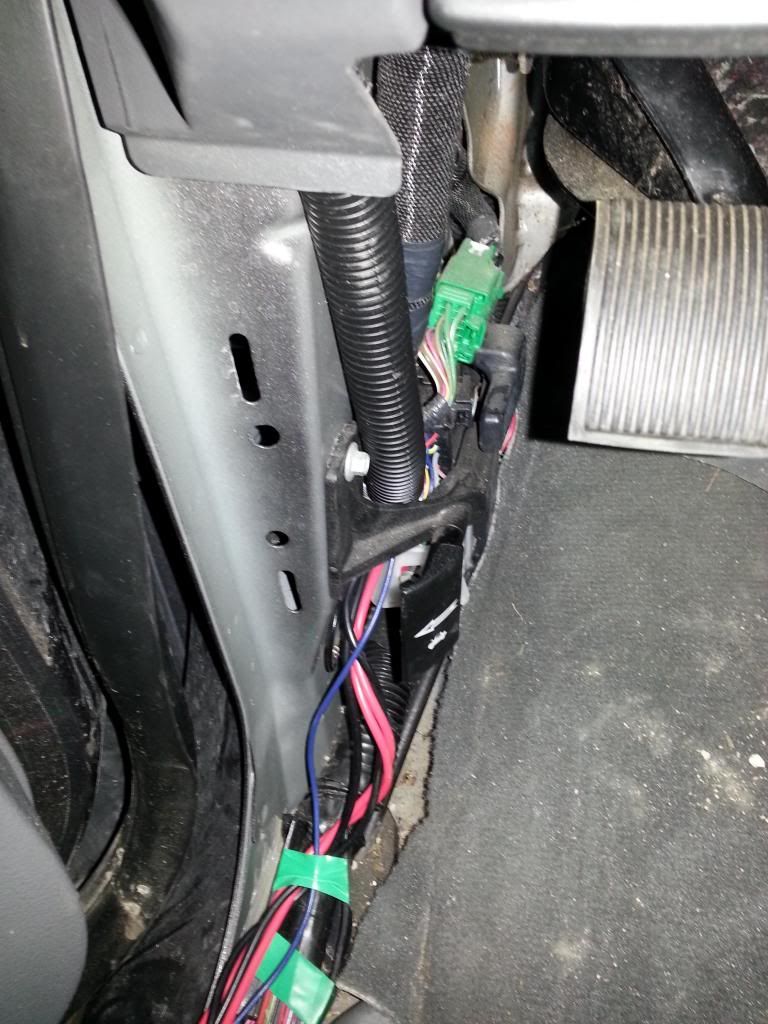
As you can See I opted to install the brain on the back wall near the Body Control Module (Or Body Security Module depending on who made the wiring diagram you are referencing) Because of this I had to make large harness to get all the wires needed for Remote start up to the from... I extended these wires 15FT and they were the perfect length to make it to the ignition harness under the column
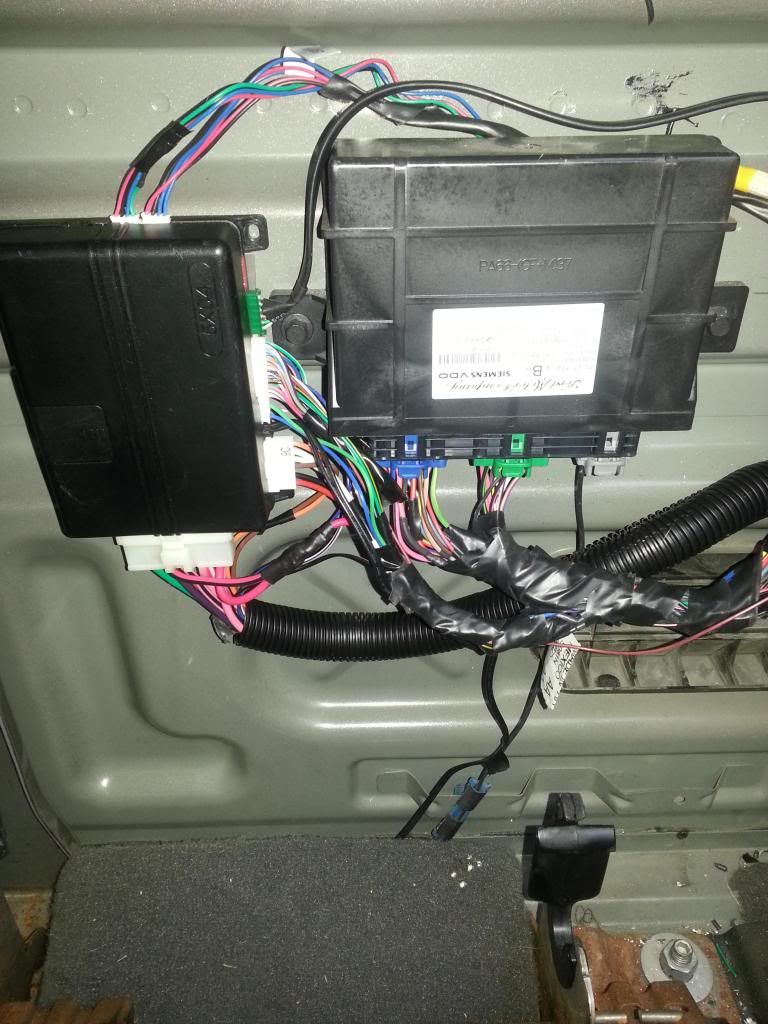
There are a buttload of wires. I did my best to make everything look clean and professional by soldering the joints and covering with shrink wrap to prevent corrosion and then wrapping the harness with counduit and electical tape but its hard to make all this extra stuff look clean in such little space.
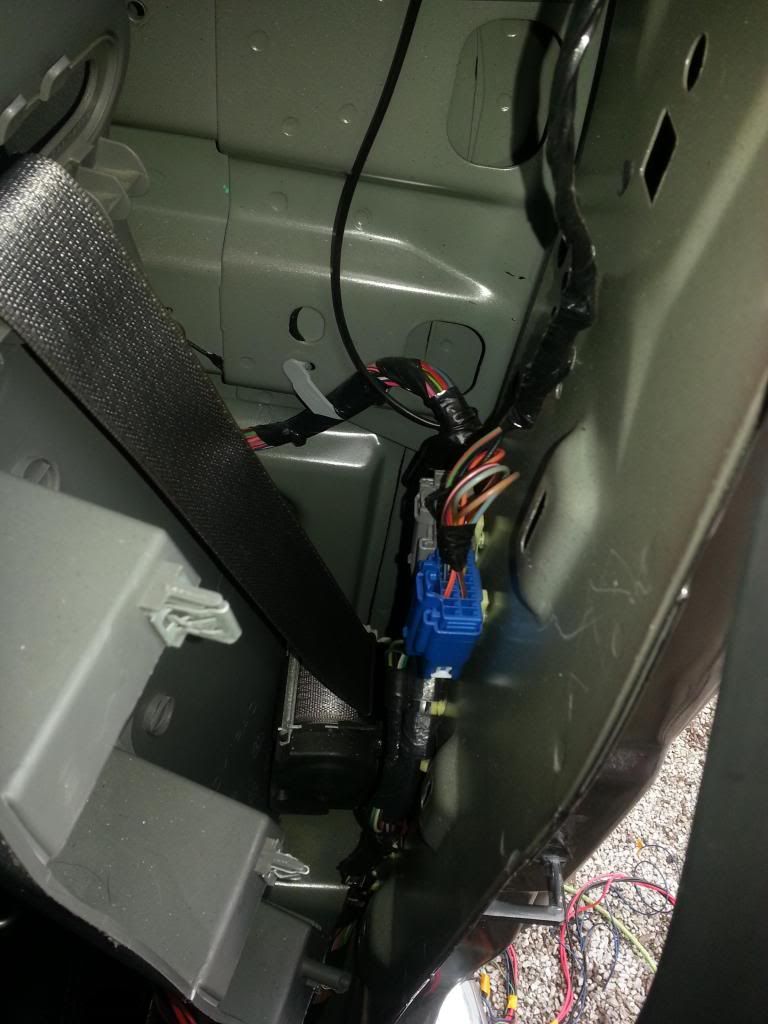
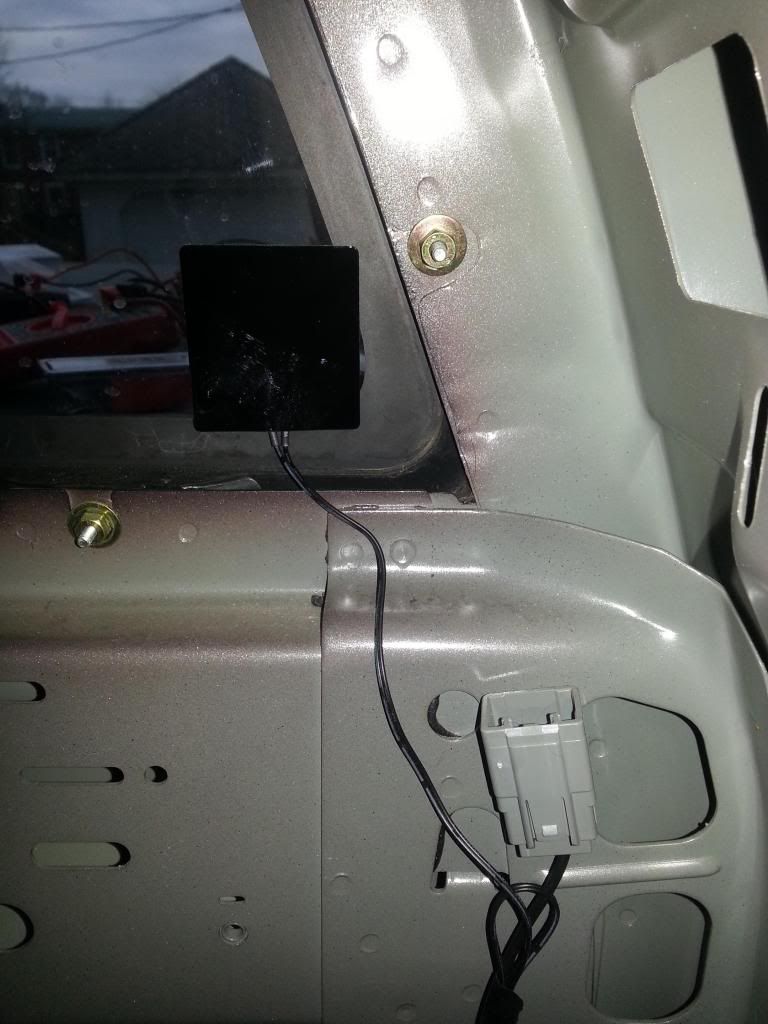
I put the shock module and the audio sensor behind the rear door above the rear pass seatbelt roller.
http://s88.beta.photobucket.com/user...tml?sort=3&o=4
I also pulled the harness for the accessories and remote start across the same wall. The wires were a tad close to the seat belt so just incase I put a small chunk of conduit to protect them from rubbing on the belt.
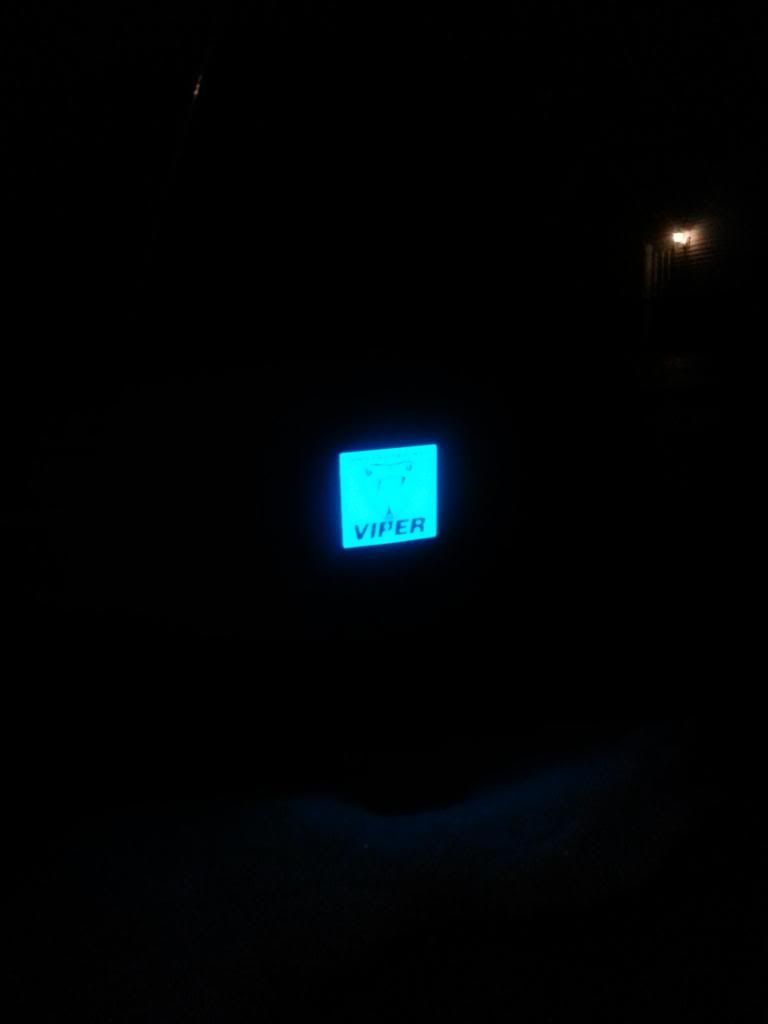
The Fancy Viper LED
Where I pulled the ignition harness wires into the dash. After I pulled the harness through the rear wall I ran them along the sill plates with the rest of the main harness.. I haven yet ziptied them in place so they are a little wild in the sill.
These are all the pics i got for now. When I get the ignition harness wires permanently situated I will get a pic of them and when I get the ball rolling on the window modules I will report back with those as well.
As you can See I opted to install the brain on the back wall near the Body Control Module (Or Body Security Module depending on who made the wiring diagram you are referencing) Because of this I had to make large harness to get all the wires needed for Remote start up to the from... I extended these wires 15FT and they were the perfect length to make it to the ignition harness under the column
There are a buttload of wires. I did my best to make everything look clean and professional by soldering the joints and covering with shrink wrap to prevent corrosion and then wrapping the harness with counduit and electical tape but its hard to make all this extra stuff look clean in such little space.
I put the shock module and the audio sensor behind the rear door above the rear pass seatbelt roller.
http://s88.beta.photobucket.com/user...tml?sort=3&o=4
I also pulled the harness for the accessories and remote start across the same wall. The wires were a tad close to the seat belt so just incase I put a small chunk of conduit to protect them from rubbing on the belt.
The Fancy Viper LED
Where I pulled the ignition harness wires into the dash. After I pulled the harness through the rear wall I ran them along the sill plates with the rest of the main harness.. I haven yet ziptied them in place so they are a little wild in the sill.
These are all the pics i got for now. When I get the ignition harness wires permanently situated I will get a pic of them and when I get the ball rolling on the window modules I will report back with those as well.
01-18-2013, 01:15 AM
#3
I had trouble today after I finished soldering up the remote start harness... it wouldnt remote start. I got an error and 7 parking light flashes. Turns out this means that the started is not set in manual transmission mode? I am assuming this is because I just grounded the alarms Neutral Safety straight to chassis?? I tried setting the system to MTS mode per the directions viper has in their owners guide and this did not work.
I ended up finding this solution on another sight
Open the door, Turn car on then off. Push n hold valet button. It'll chirp once, don't jump the gun, keep holding it! It'll chirp twice, hold strong! After the third chirp release. Then push n release once, then push n hold. Hit the lock button on the remote. It should chirp once. This programs the alarm for manual transmission.
That fixed the issue.... Not sure why viper doesnt have those instruction in their manual, just glad that someone out there somehow knew how to actually change to MTS mode.
01-18-2013, 09:30 AM
#4
Senior Member
Sub'd - Can you post a video of the finished product? I'm looking at getting one of these installed. 
01-18-2013, 09:38 AM
#5

now i know why you wanted it by the BCM. that makes a much cleaner install. i put all of mine way up under the dash and clean the install up pretty nicely but i like your idea. might have to try that. good job man.
01-19-2013, 12:22 AM
#6
01-19-2013, 12:28 AM
#7
Yeah .aybe I wasnt so clear about it in the other thread. Everything you need for for the remote entry and the alarm portion (such as parking lights, horn etc) runs through that bcm. So you dont have to run one wire to the fuse panel then the next to the light switch and so on. Of course the remote start required me to create a 15 ft wiring harness to reach the ignition harness buy all those wires are located in one spot. Ill get more pics of the remote starter harness in the am
Trending Topics
01-19-2013, 09:44 AM
#8
Yeah .aybe I wasnt so clear about it in the other thread. Everything you need for for the remote entry and the alarm portion (such as parking lights, horn etc) runs through that bcm. So you dont have to run one wire to the fuse panel then the next to the light switch and so on. Of course the remote start required me to create a 15 ft wiring harness to reach the ignition harness buy all those wires are located in one spot. Ill get more pics of the remote starter harness in the am
definitely a good clean install man, good job. i may have to try that on my next install.
01-19-2013, 11:02 AM
#9
Senior Member
Just a walk through of the features and the viper logo in the Window. I'd like to just be able to get an idea of what it's like once it's installed. Does it make any chirps when you get close to it? When it's activated and someone gets close, does it say "back the f up I'm about to explode", etc..... Lol
01-19-2013, 11:33 AM
#10
Just a walk through of the features and the viper logo in the Window. I'd like to just be able to get an idea of what it's like once it's installed. Does it make any chirps when you get close to it? When it's activated and someone gets close, does it say "back the f up I'm about to explode", etc..... Lol
http://viper.com/P-508D/Invisibeam%c...urbance-Sensor
http://viper.com/P-516L/Programmable-Voice-System