USB Port Installation in 2006 F-150 Lariat


Thread Starter
Junior Member
Joined: Aug 2013
Posts: 3
Likes: 0
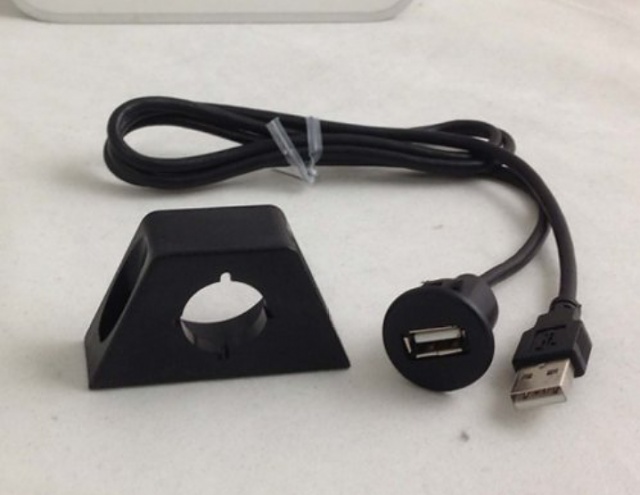
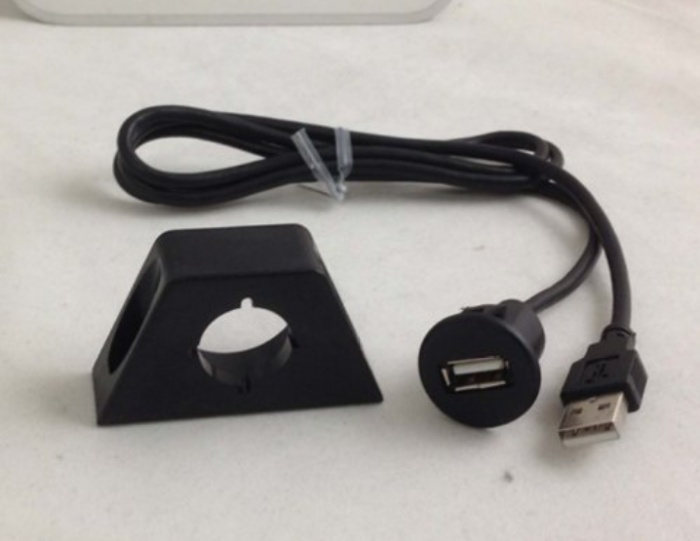
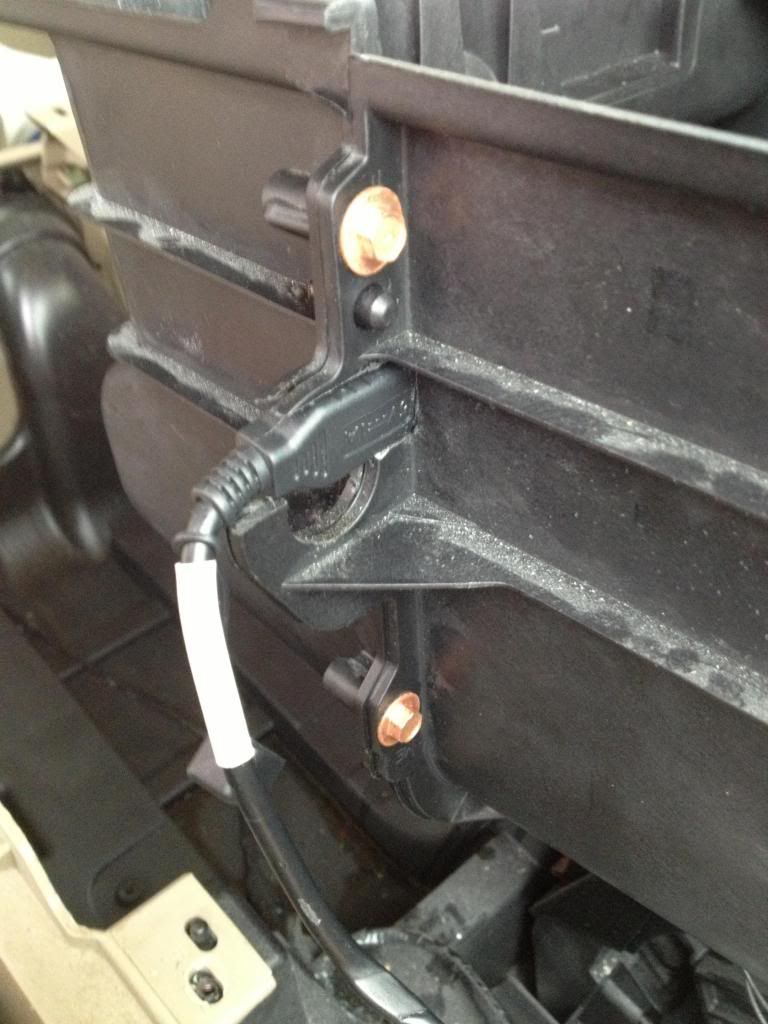
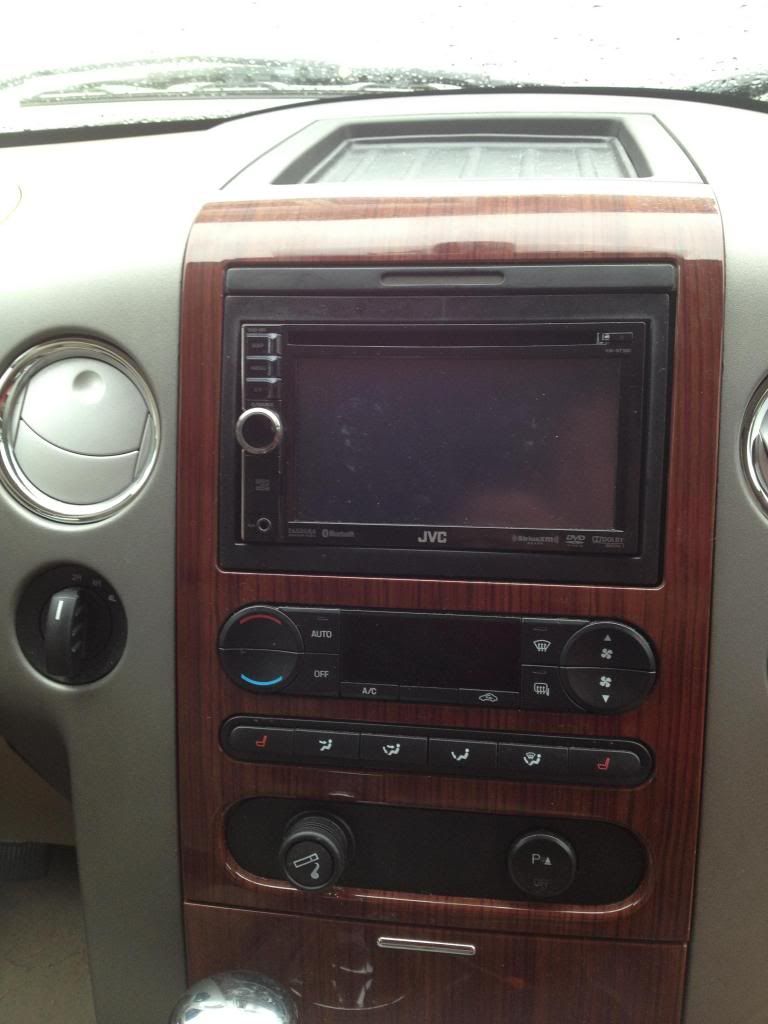
Not being content with my stock radio, or more importantly, wanting a navigation system, l bought and installed the JVC KW-NT300. It went in without problems, using a Metra install kit and wiring harness. The problem I had was what to do with the USB cable for using a phone or USB drive. I initially had the cable running out through the dash where the tray is. It looked kind of like this:

Except that this pic is after I fixed everything. I didn�t think of taking pics until I was about � finished with the install.
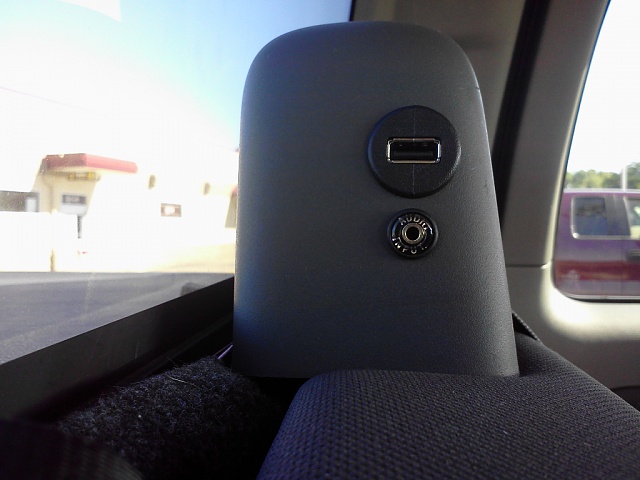
Anyway, I hate having wires showing, and eventually of had to do something to have a more clean looking install.
I know a lot of installers put the iPhone connection in the glove compartment, but that is too far to have to reach every time I�m getting in and out of the truck. I wanted to use the center console.
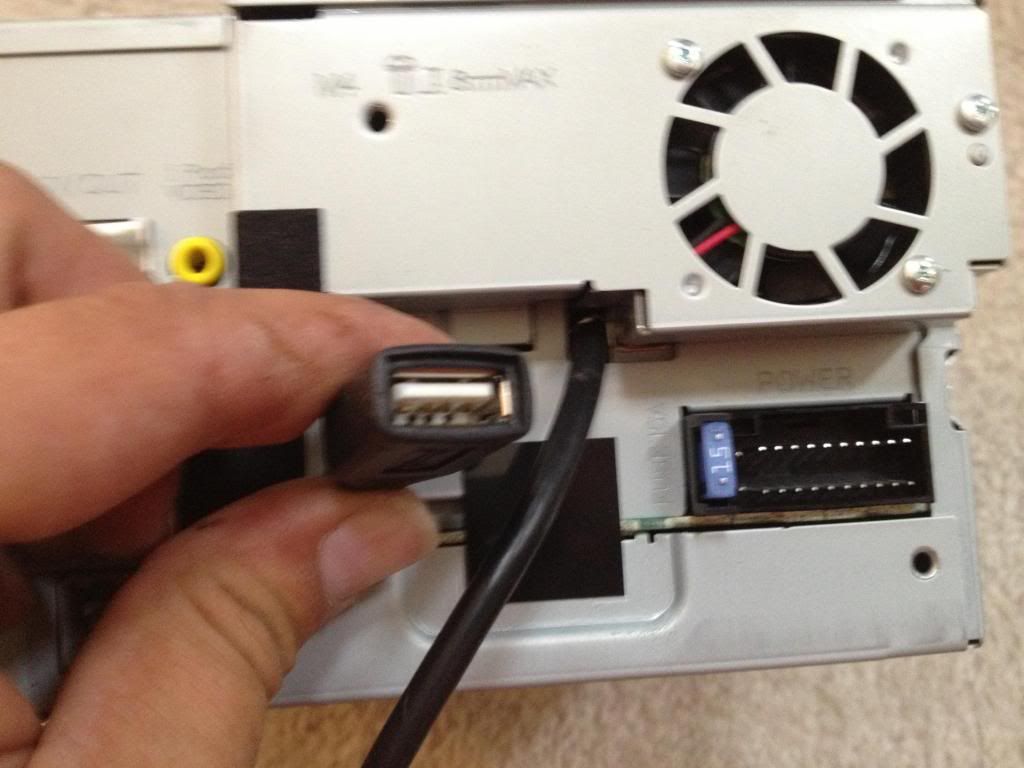
The first step was to pull everything out. The unit has about a 4 foot USB cable hard wired to the back, so that creates a minor challenge. If I could have taken out the cable from the unit, I could have stuck with a smaller hole.
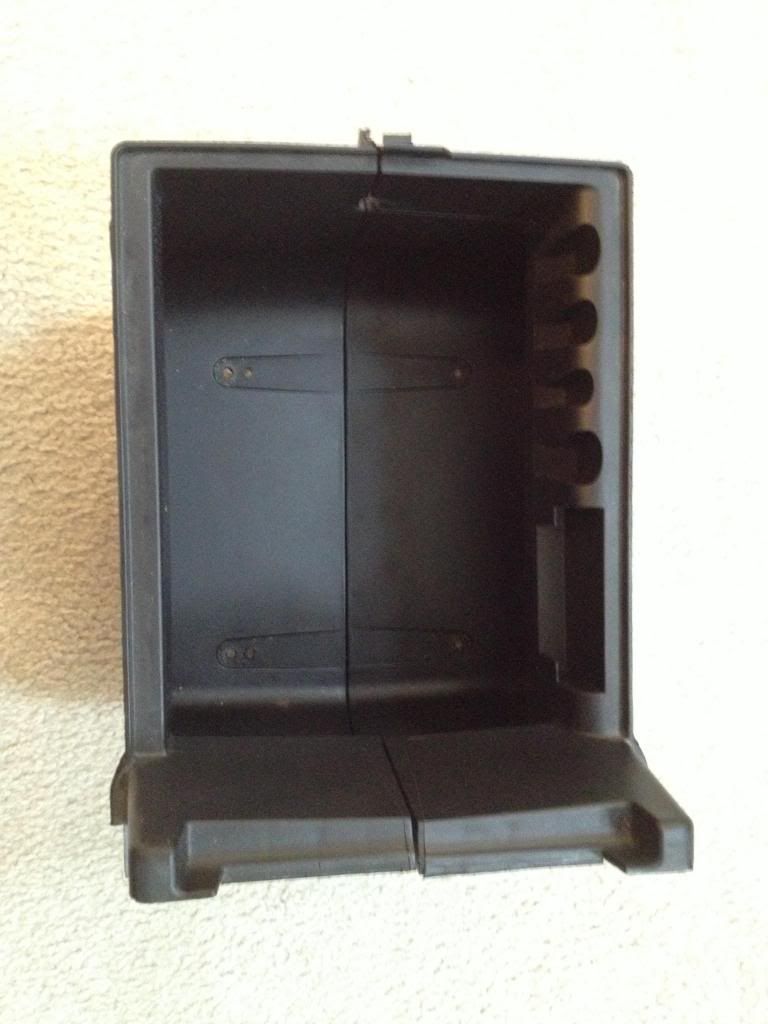
I had noticed that there was a seam running through the inside of the center console and hoped to use that space to place the USB port. When I took the actual container portion of the console out I found that it was two halves, screwed together � perfect!
I brought everything into the house for purposes of comfort and proximity to coffee and got started.
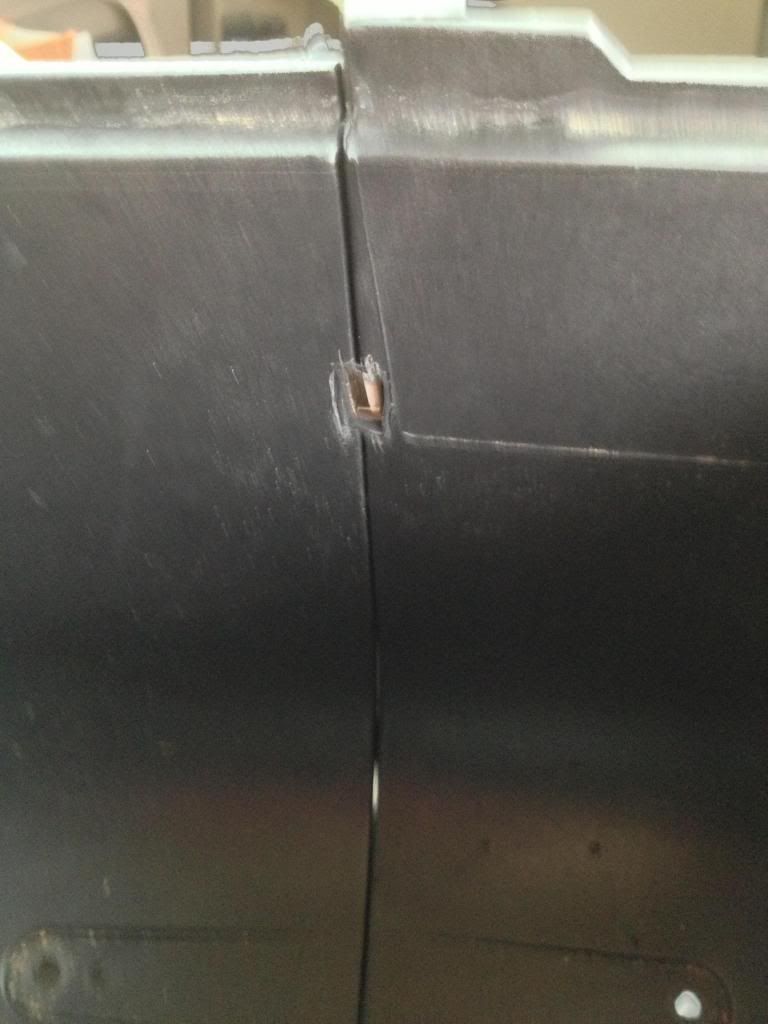
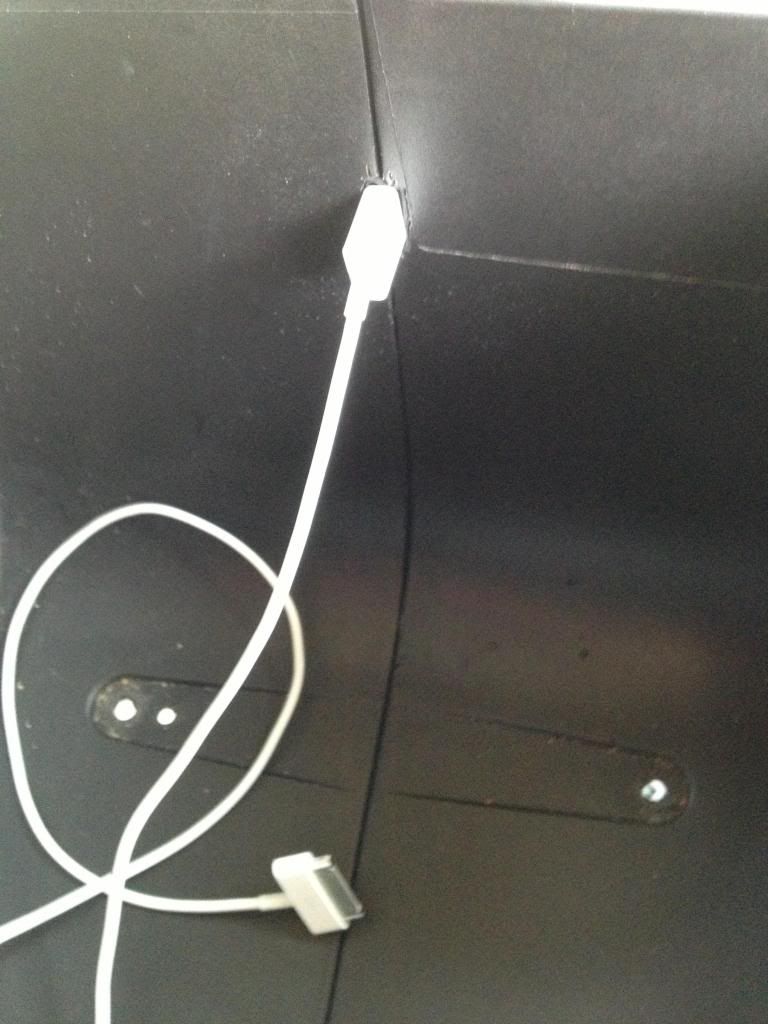
My install was pretty simple. I separated the 2 halves of the bin, did a bit of creative Dremel work, and was able to sandwich the USB plug between the two halves. Screwing the bin back together effectively clamps the jack in place.
From this point, all that remained was going back to the truck to run the cable and put everything together.
Lessons Learned:
Except that this pic is after I fixed everything. I didn�t think of taking pics until I was about � finished with the install.
Anyway, I hate having wires showing, and eventually of had to do something to have a more clean looking install.
I know a lot of installers put the iPhone connection in the glove compartment, but that is too far to have to reach every time I�m getting in and out of the truck. I wanted to use the center console.
The first step was to pull everything out. The unit has about a 4 foot USB cable hard wired to the back, so that creates a minor challenge. If I could have taken out the cable from the unit, I could have stuck with a smaller hole.
I had noticed that there was a seam running through the inside of the center console and hoped to use that space to place the USB port. When I took the actual container portion of the console out I found that it was two halves, screwed together � perfect!
I brought everything into the house for purposes of comfort and proximity to coffee and got started.
My install was pretty simple. I separated the 2 halves of the bin, did a bit of creative Dremel work, and was able to sandwich the USB plug between the two halves. Screwing the bin back together effectively clamps the jack in place.
From this point, all that remained was going back to the truck to run the cable and put everything together.
Lessons Learned:
- Take �Before� photos before getting started.
- Use either a regular camera or take enough time for the iPhone to focus before taking pictures
- Have some epoxy and paint to clean up minor ugliness.


Thread Starter
Junior Member
Joined: Aug 2013
Posts: 3
Likes: 0
Yeah, actually the issue is probably needing a greater variety of bits for my Dremel, as well as more practice running one. Keeping my practice time minimally visible - I''m a long way from being comfortable cutting on my dash! :-)
Senior Member
Joined: May 2013
Posts: 275
Likes: 31
From: Marengo, Ohio
Not too bad but like said before getting a good look is hard to do. I tried doing it your way and it just didnt have the finished look I wanted. Found a panel mount usb that did the job for me.