Poor Man's Retrofit (Picture Heavy)
 03-01-2015, 09:59 PM
#1
Texas A&M Aggie
Thread Starter

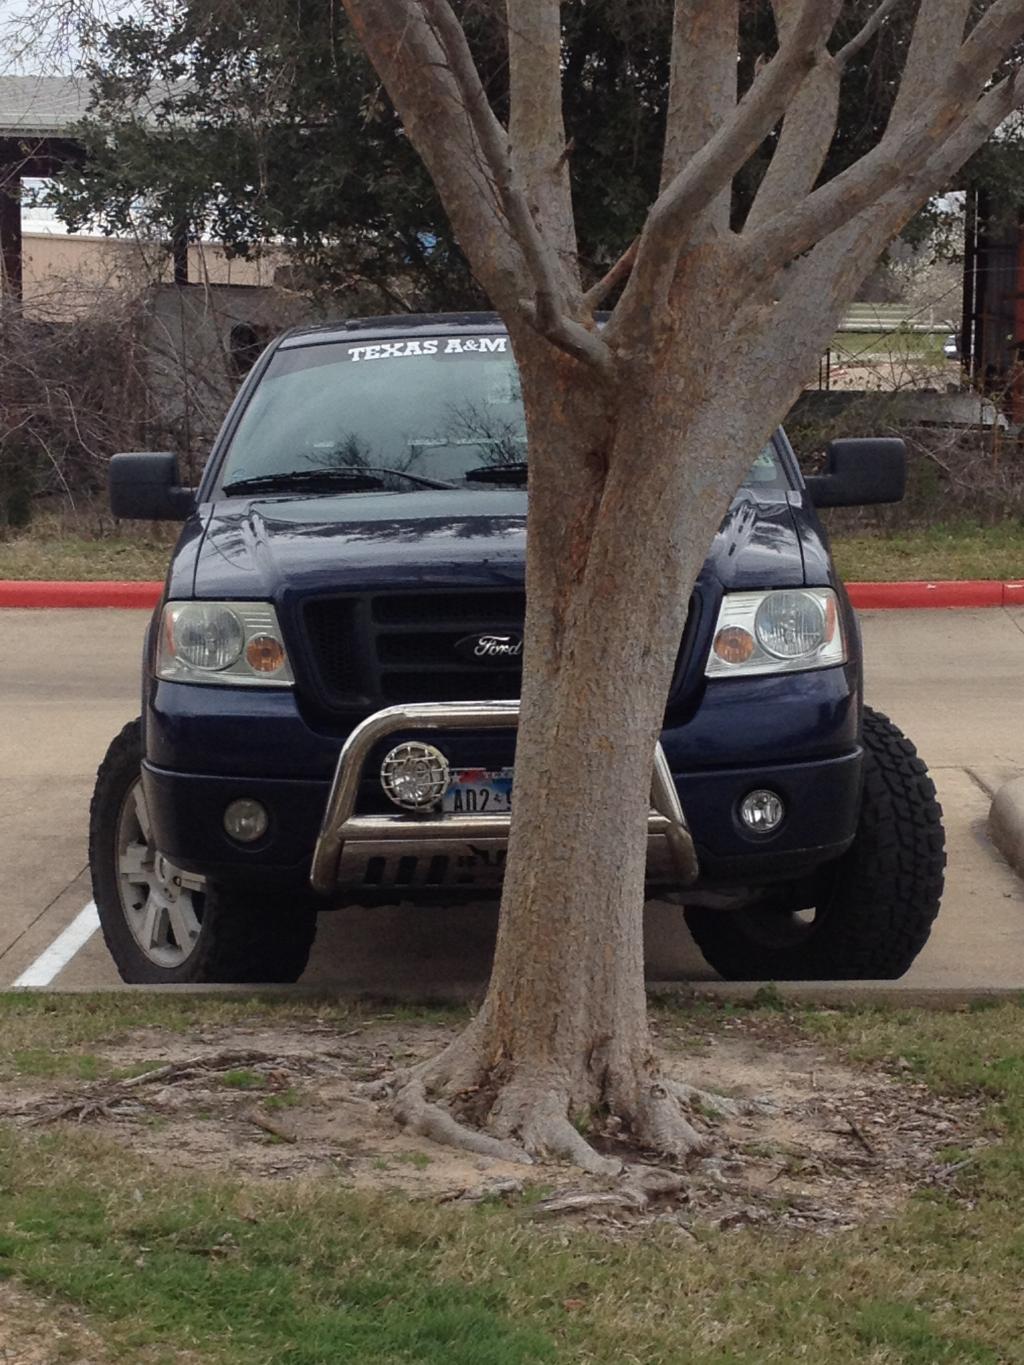
Howdy y'all. I recently got my tax return and decided to have a little fun with it, which means truck parts. Decided I was sick of these Vision-X headlights as they really don't do what they advertise. So I set out to see if I could get some cheap projector headlights with decent output. Found a set on eBay that claimed they were good and had "output pictures" to prove it. These were halogen projectors with HID projector output pictures. Ultimately decided to just retrofit my own with a little persuasion from [MENTION=138905]KMAC0694[/MENTION]. I will edit this post as this project progresses, and will have picture below the days I get to work on it.
So here's the purchase list:
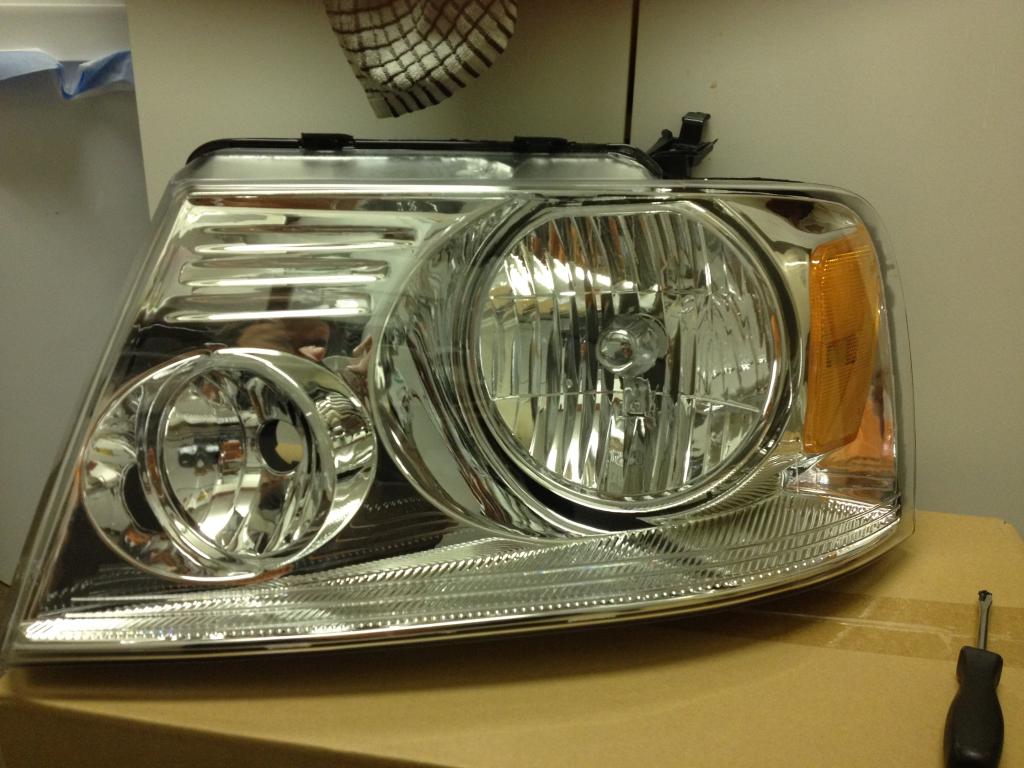
1. Chrome with Amber reflector stock heads
http://www.ebay.com/itm/141413584591?_trksid=p2059210.m2749.l2649&ssPageName=STRK%3AMEBIDX%3AIT2. Nilight HID Bi-Xenon projectors
( )
3. Kensun 35W Digital Slim Ballast
( )
4. Kensun 6,000K 35W H1 HID Bulbs
( )
5. Zenex H13 HID Relay
( )
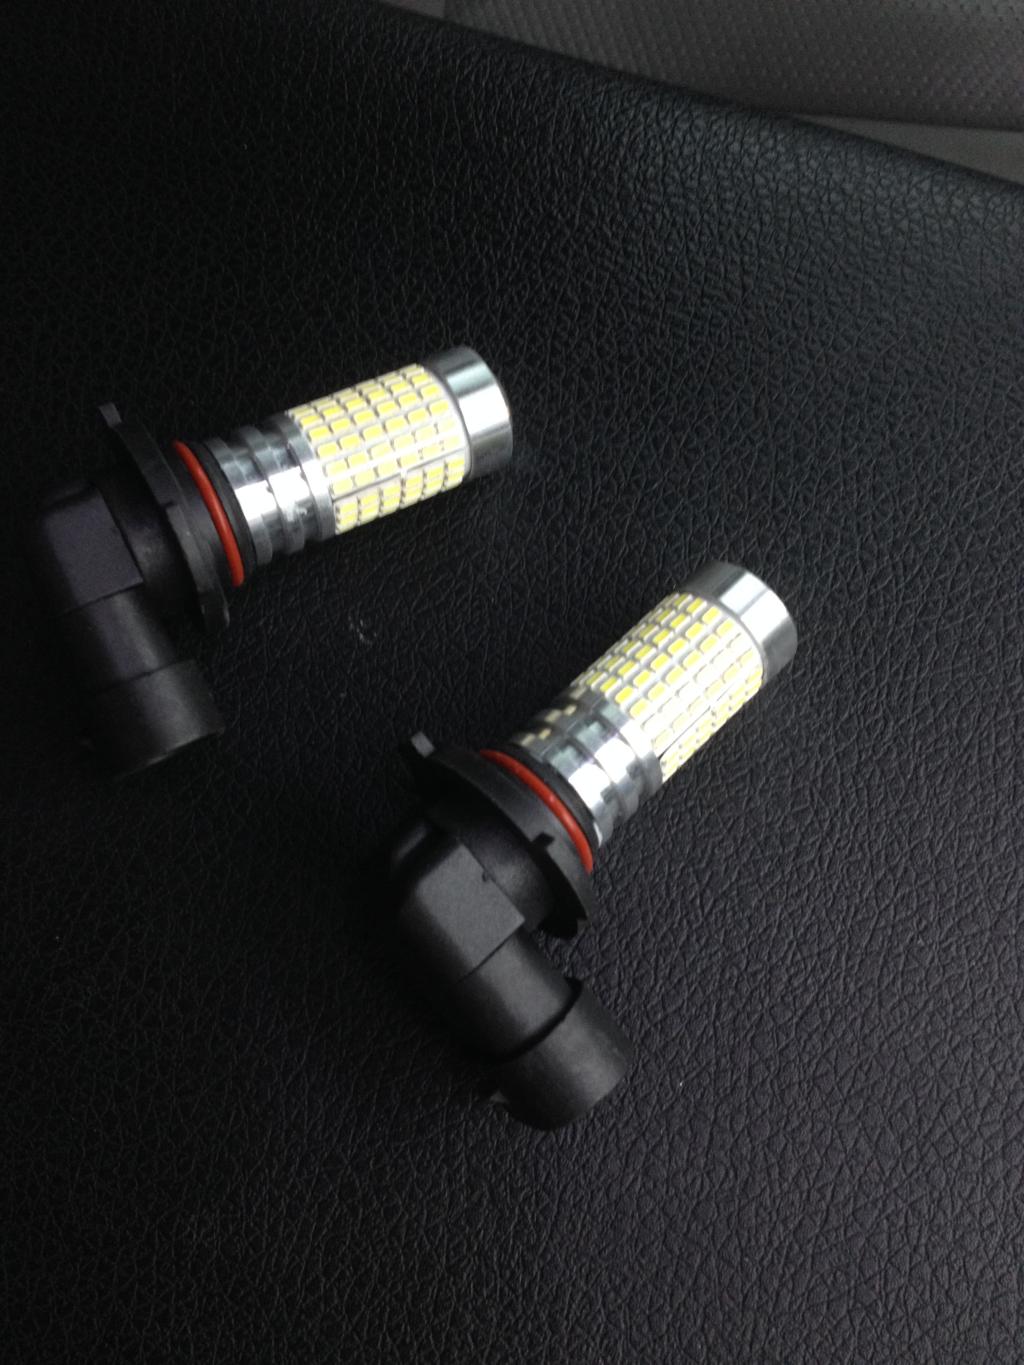
6. Stock Fog Light Housings http://www.ebay.com/itm/151043364401?_trksid=p2059210.m2749.l2649&ssPageName=STRK%3AMEBIDX%3AIT7. JDM Astar Projector LED Fog Light Bulbs 6,000K
( )
8. VHT Chrysler Red Engine Enamel
(http://www.autozone.com/paint-and-bo...el/464883_0_0/)
Items to be purchased:
1. Gloss Red Krylon Fusion
2. Duplicolor Dark Blue Pearl Metallic Paint
3. LED Projector Switchbacks
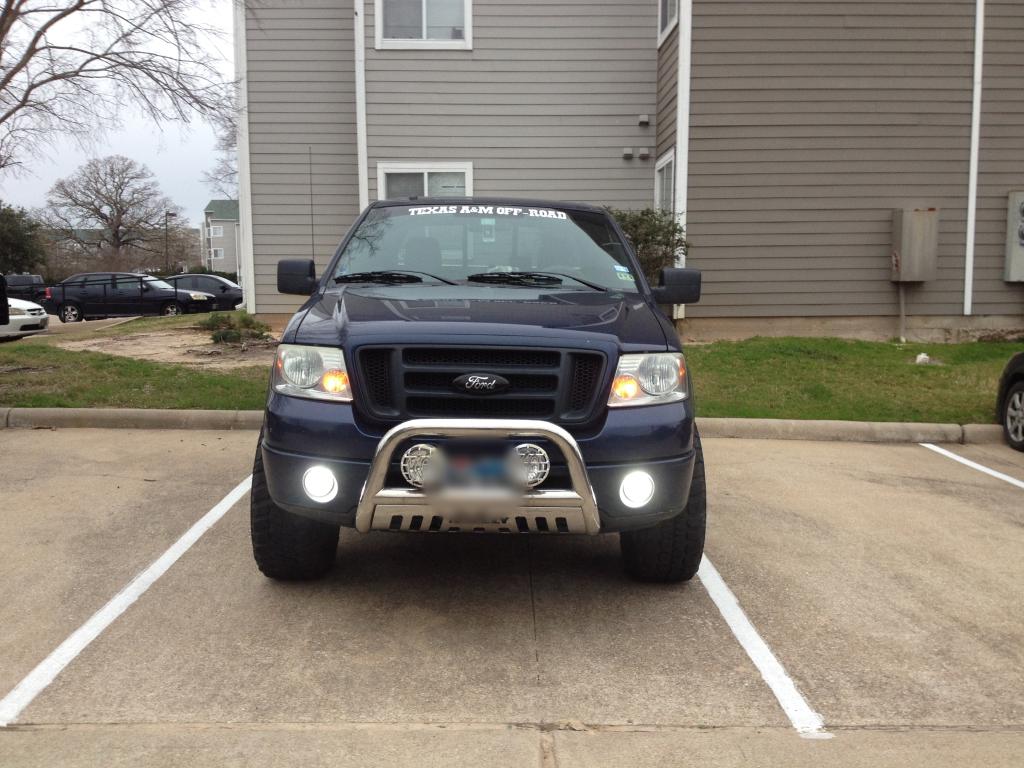
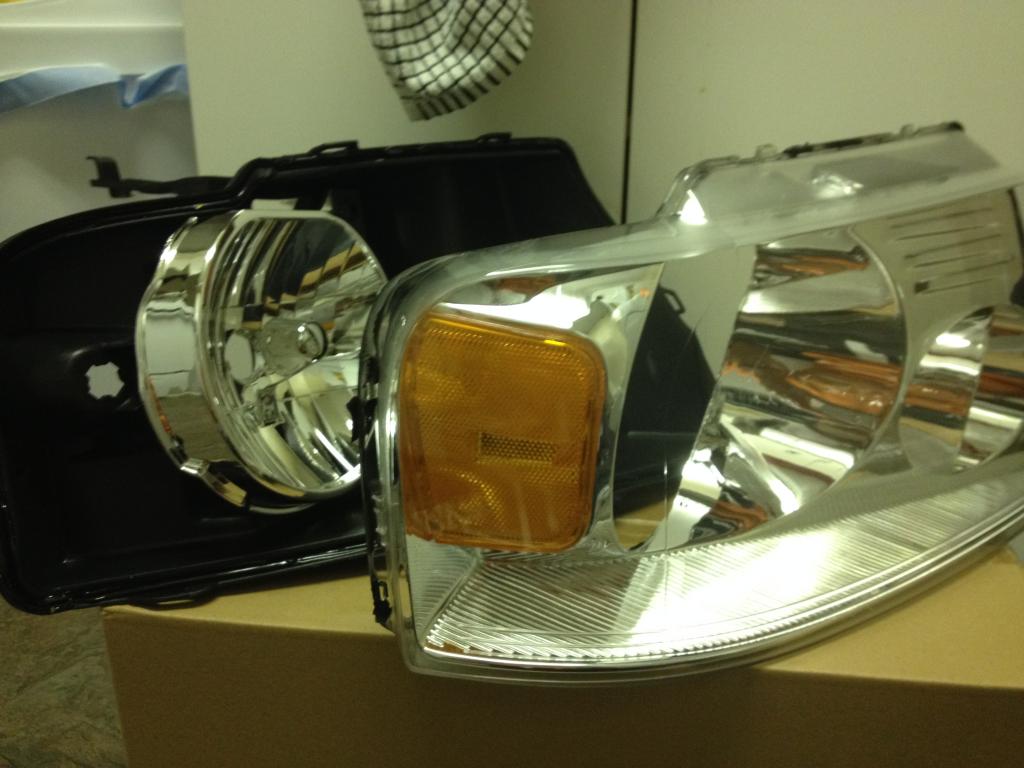
Everything came in Saturday 2/28 right when the weather took its big turn for the worst here. Rain every day this week and temperatures in the 40's and 50's. Progress will be slow. I was able to change my fog light housings out today from the faded yellow ones, to new clear ones. I also put in my projector LED bulbs.
Driver's side done
Projector Bulbs
Passenger's side installed
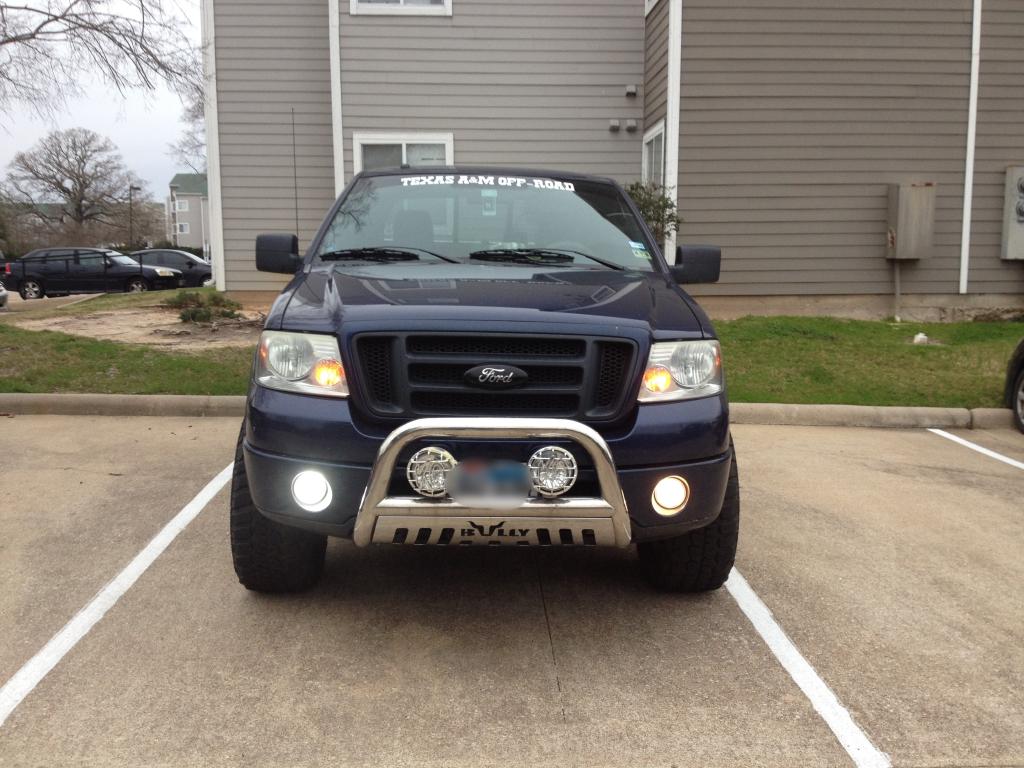
Fog lights done
Sunday 3/1:
I separated my headlight housings to prep them for paint, I also took apart my projectors to paint the cutoff shields. For the cutoff shields I am painting them with the Chrysler red paint to create passive demon eyes. The painting got started tonight as the finish isn't as critical on the shields. I have them in a small box that I take on the patio, spray a coat on, carry it to my bathroom (where the fan is on to remove paint fumes) to dry for 10 minutes, and repeat. The reason I chose my bathroom as the drying place is to avoid stinking up the entire apartment with paint fumes.
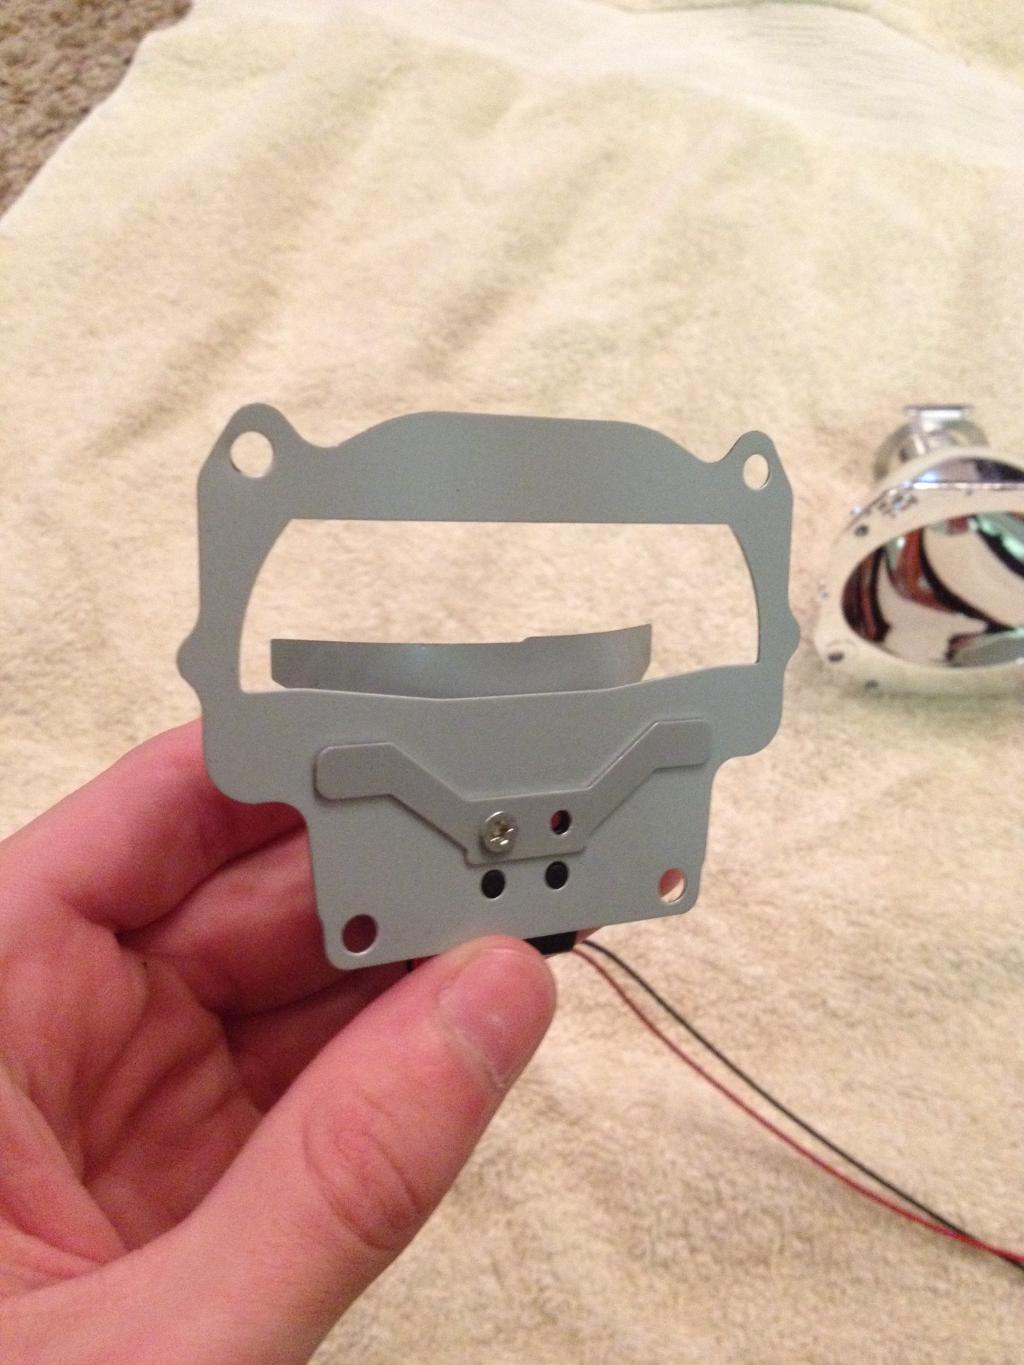
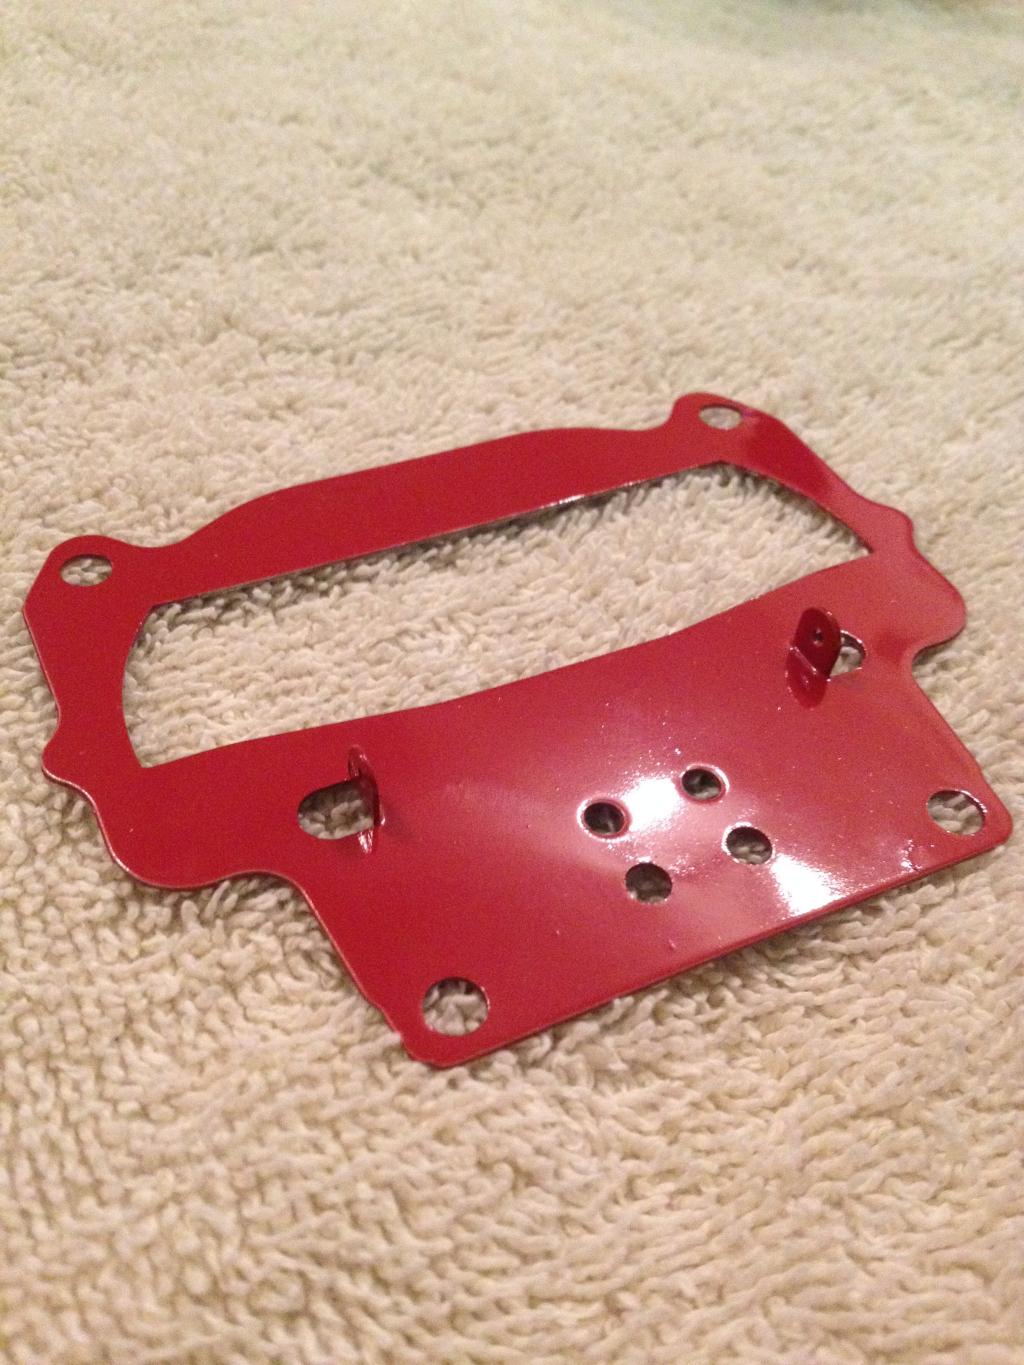
This is the back of the projector cutoff shield, this is not the side that needs to be painted for the passive demon eyes.
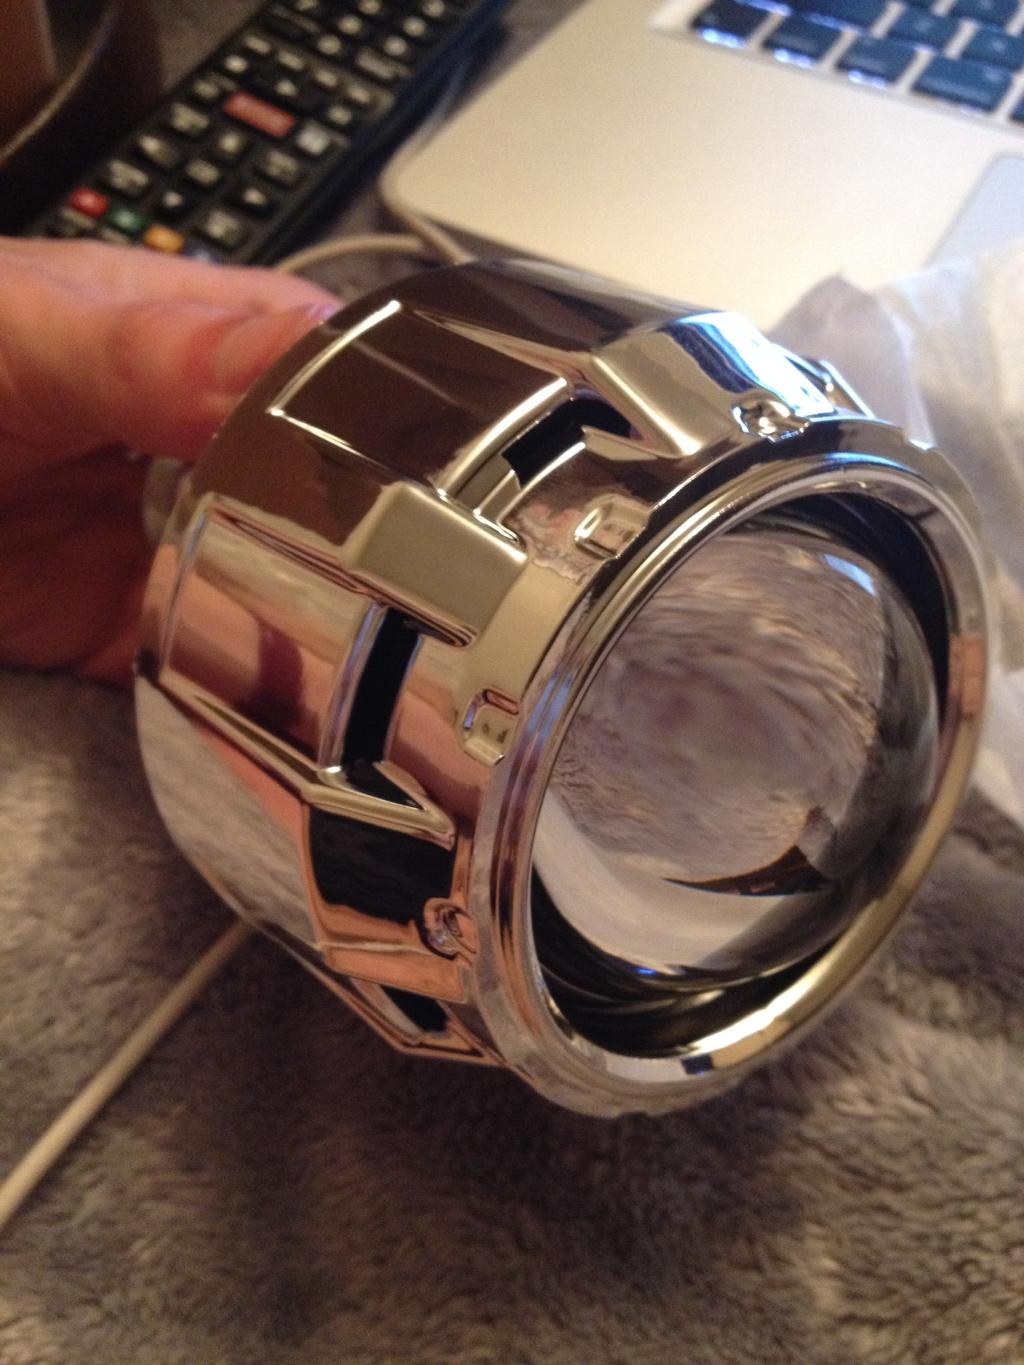
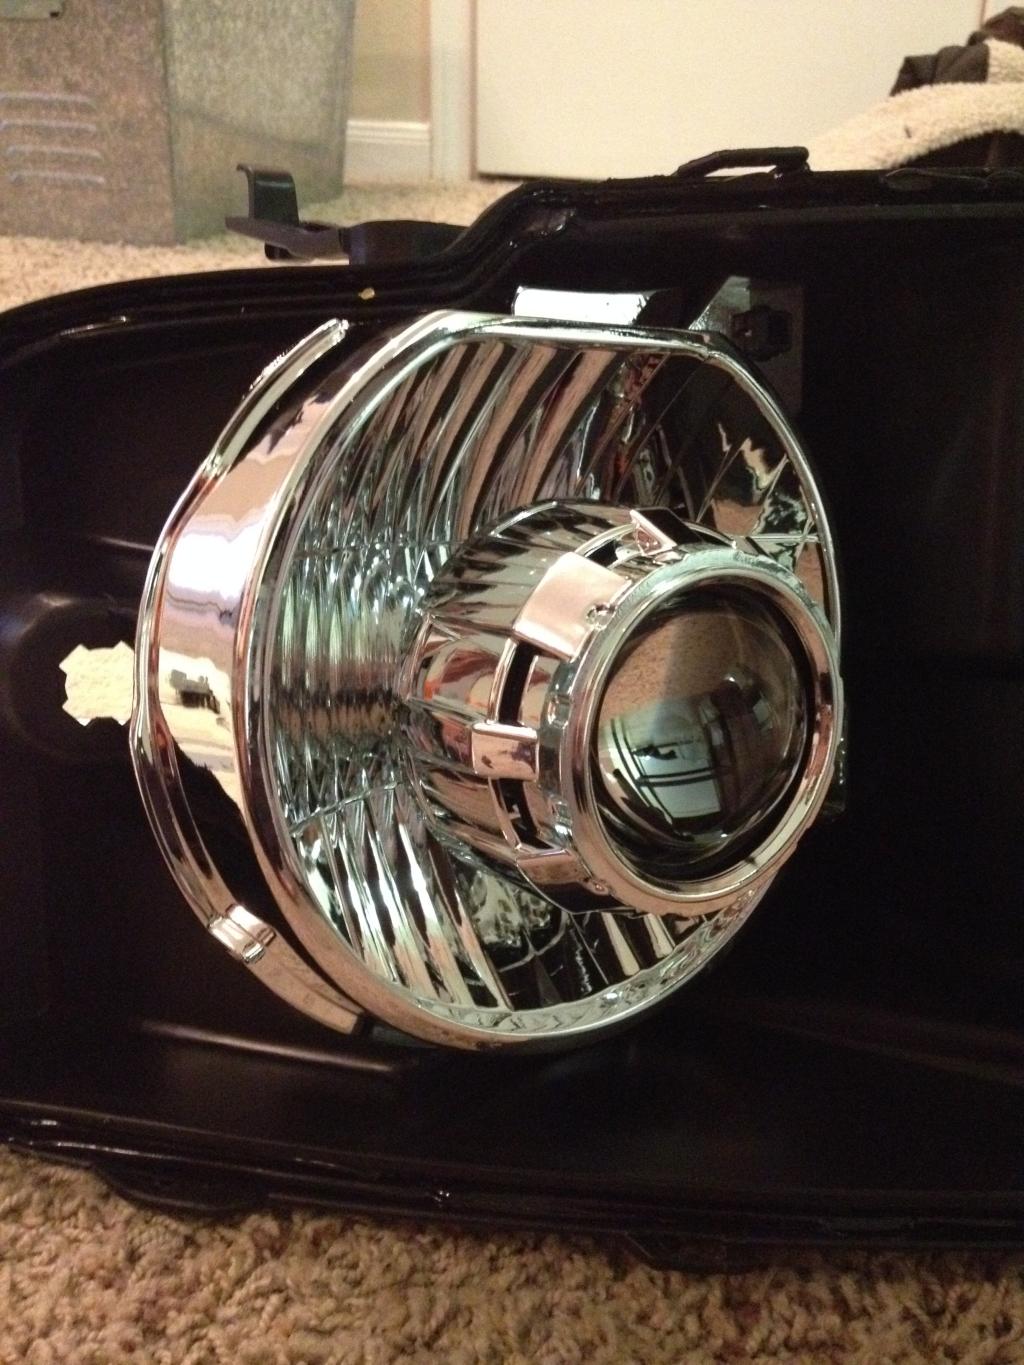
Did a quick test fit of the projector to see how it would look.
UPDATE: Got a lesson in good 'ole common sense last night. Started reassembling my projectors with the painted shield and realized that I didn't paint all the necessary pieces...
Engine enamel after curing
Pictures in later post, I hit my limit.
So here's the purchase list:
1. Chrome with Amber reflector stock heads
http://www.ebay.com/itm/141413584591?_trksid=p2059210.m2749.l2649&ssPageName=STRK%3AMEBIDX%3AIT2. Nilight HID Bi-Xenon projectors
( )
3. Kensun 35W Digital Slim Ballast
( )
4. Kensun 6,000K 35W H1 HID Bulbs
( )
5. Zenex H13 HID Relay
( )
6. Stock Fog Light Housings http://www.ebay.com/itm/151043364401?_trksid=p2059210.m2749.l2649&ssPageName=STRK%3AMEBIDX%3AIT7. JDM Astar Projector LED Fog Light Bulbs 6,000K
( )
8. VHT Chrysler Red Engine Enamel
(http://www.autozone.com/paint-and-bo...el/464883_0_0/)
Items to be purchased:
1. Gloss Red Krylon Fusion
2. Duplicolor Dark Blue Pearl Metallic Paint
3. LED Projector Switchbacks
Everything came in Saturday 2/28 right when the weather took its big turn for the worst here. Rain every day this week and temperatures in the 40's and 50's. Progress will be slow. I was able to change my fog light housings out today from the faded yellow ones, to new clear ones. I also put in my projector LED bulbs.
Driver's side done
Projector Bulbs
Passenger's side installed
Fog lights done
Sunday 3/1:
I separated my headlight housings to prep them for paint, I also took apart my projectors to paint the cutoff shields. For the cutoff shields I am painting them with the Chrysler red paint to create passive demon eyes. The painting got started tonight as the finish isn't as critical on the shields. I have them in a small box that I take on the patio, spray a coat on, carry it to my bathroom (where the fan is on to remove paint fumes) to dry for 10 minutes, and repeat. The reason I chose my bathroom as the drying place is to avoid stinking up the entire apartment with paint fumes.
This is the back of the projector cutoff shield, this is not the side that needs to be painted for the passive demon eyes.
Did a quick test fit of the projector to see how it would look.
UPDATE: Got a lesson in good 'ole common sense last night. Started reassembling my projectors with the painted shield and realized that I didn't paint all the necessary pieces...
Engine enamel after curing
Pictures in later post, I hit my limit.
Last edited by tareed94; 03-02-2015 at 12:11 PM.

The following users liked this post:
dom07 (03-14-2015)
 03-02-2015, 12:03 PM
#3
Texas A&M Aggie
Thread Starter
That was my goal to go for nice on a budget. I've seen real life output pictures of these projectors and was really impressed. I can't wait to finish these up. I'm debating converting my bathroom into a mini paint booth on like Thursday afternoon so I can get my headlights and such painted.
03-02-2015, 12:10 PM
#4
Texas A&M Aggie
Thread Starter
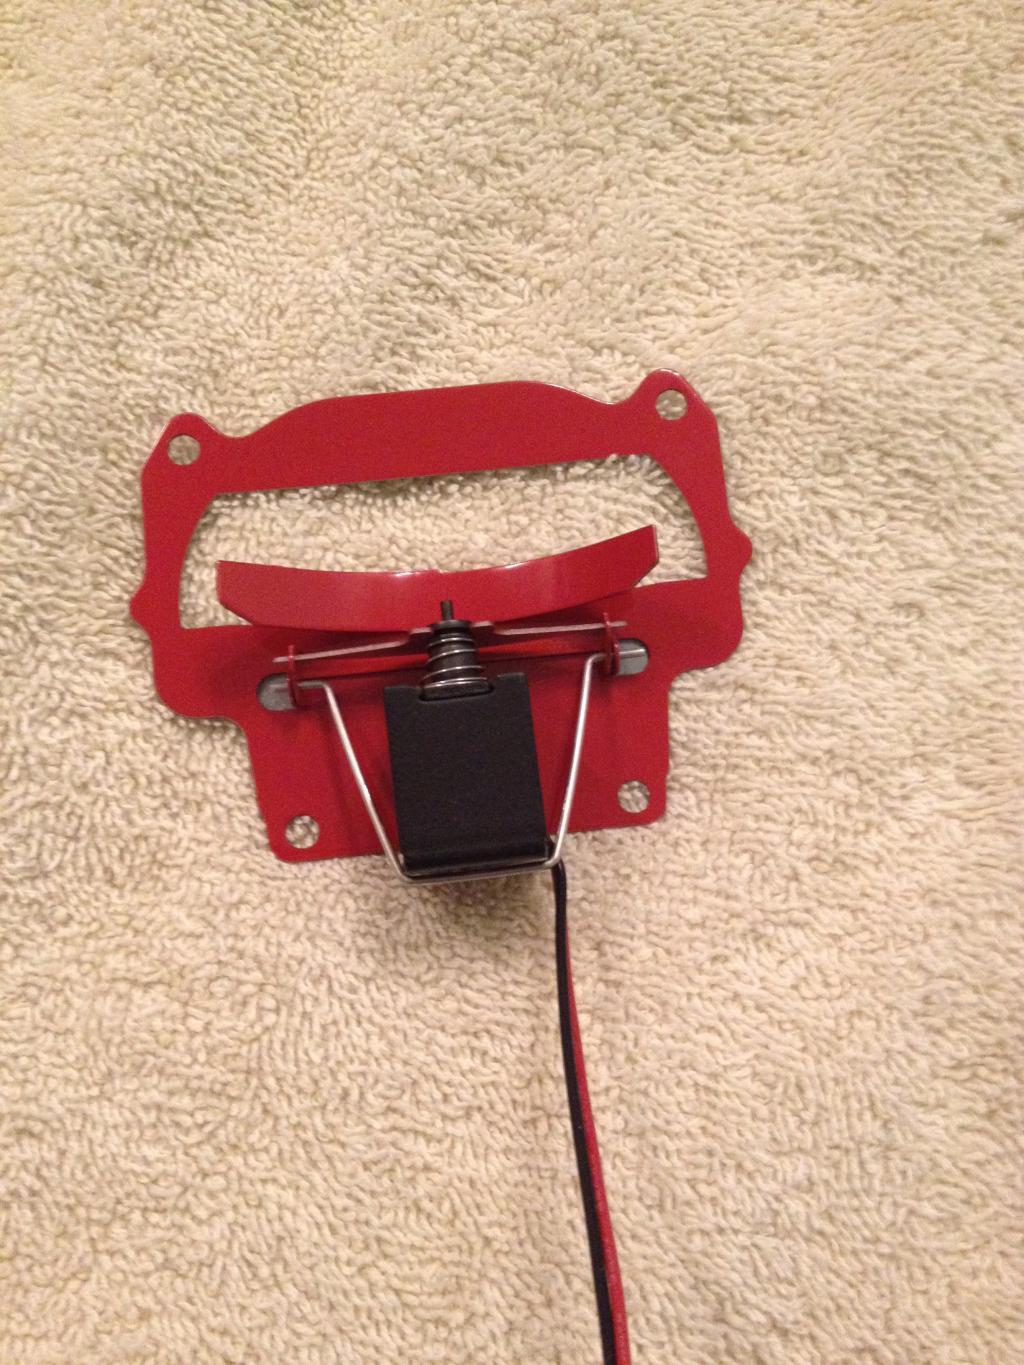
Shield reassembled (note the gray piece that is unpainted)
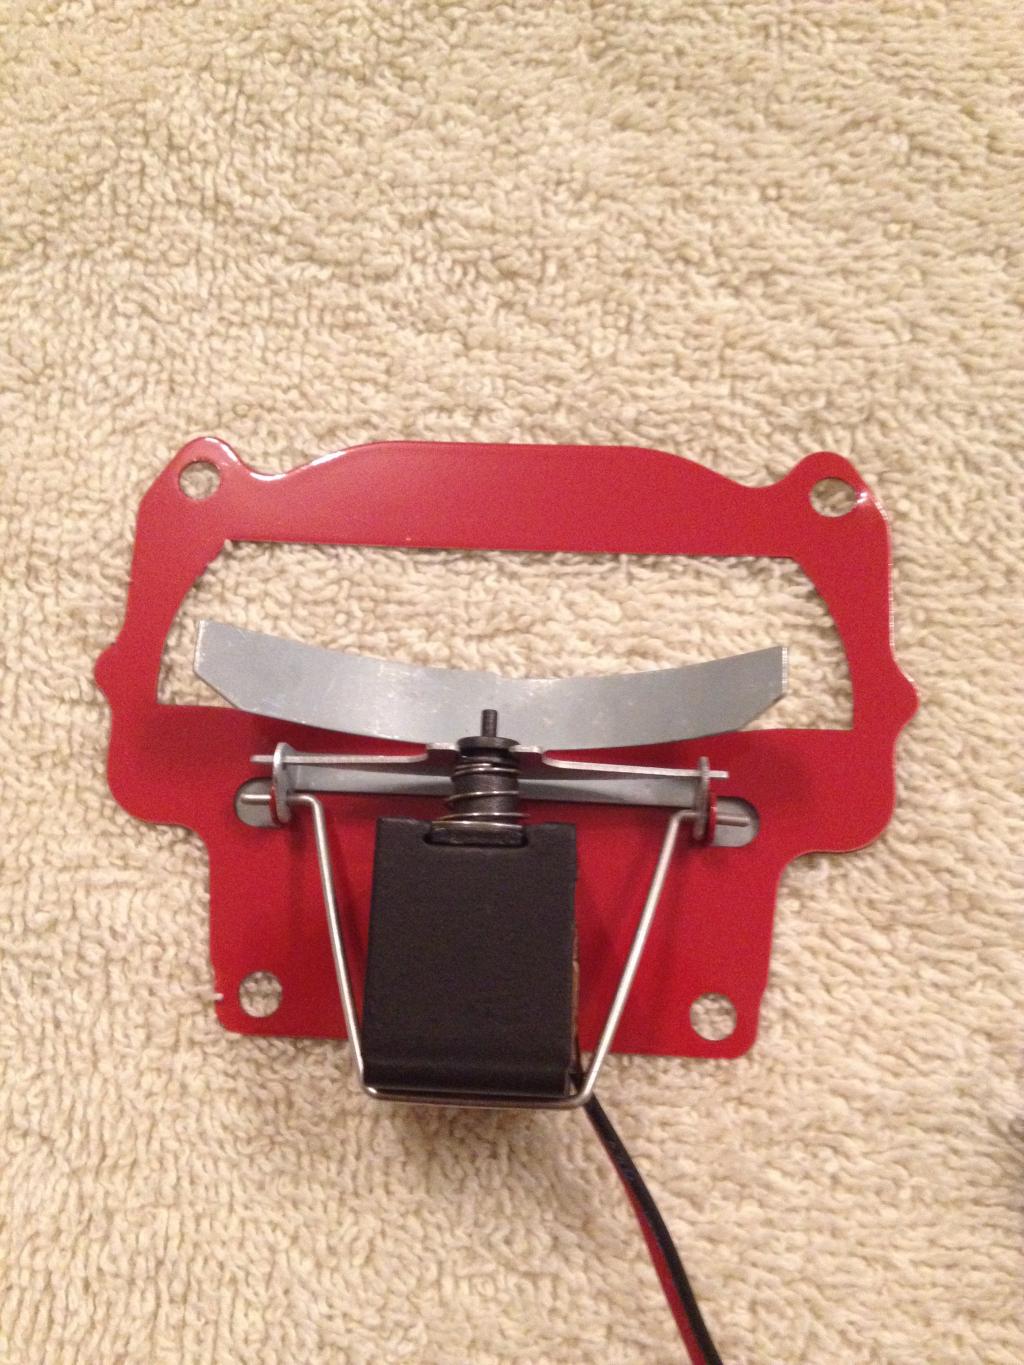
Projector reassembled. You can clearly see the plunger from the solenoid, and the spring from the solenoid. I would paint these red but I'm not sure if their functionality could be damaged by the curing process of the engine enamel so I'm opting out of painting them.
Projector reassembled. You can clearly see the plunger from the solenoid, and the spring from the solenoid. I would paint these red but I'm not sure if their functionality could be damaged by the curing process of the engine enamel so I'm opting out of painting them.
03-02-2015, 12:56 PM
#6

Did you buy H1 or H13 bulbs? I see an H13 wiring harness, just wondering am I missing something...
Did you have to hog out the chrome reflector on the headlight, or the projector bolted right in?
Looks awesome, can't wait for the payoff shot.
Did you have to hog out the chrome reflector on the headlight, or the projector bolted right in?
Looks awesome, can't wait for the payoff shot.
03-02-2015, 01:58 PM
#7
Texas A&M Aggie
Thread Starter
I still have to cut out some of the chrome reflector, but I have to borrow a tool from a friend so that hasn't been done yet.
Thanks man, I can't wait either
Trending Topics
03-02-2015, 06:11 PM
#8
Texas A&M Aggie
Thread Starter
UPDATE 3/2: I got the passive demon eyes successfully completed today. I'm working on getting everything prepped for paint, and have come to the realization that sanding sucks. I've got a one day window that I can potentially paint outside in. If I miss the window I bought masking paper and a respirator so I can paint in my bathroom.
Cutoff shield reassembled
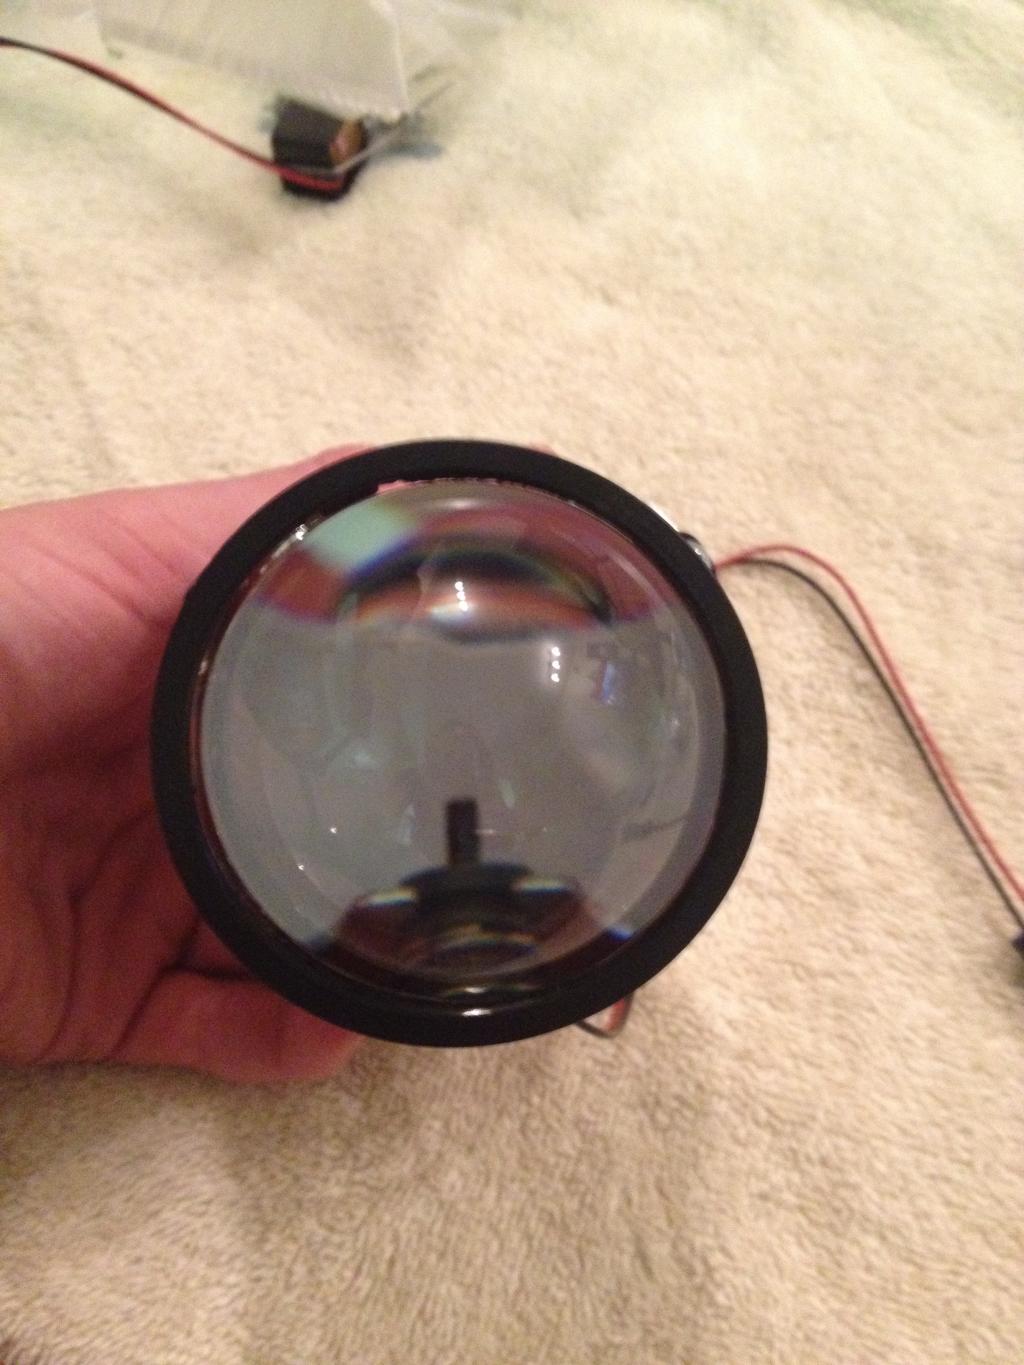
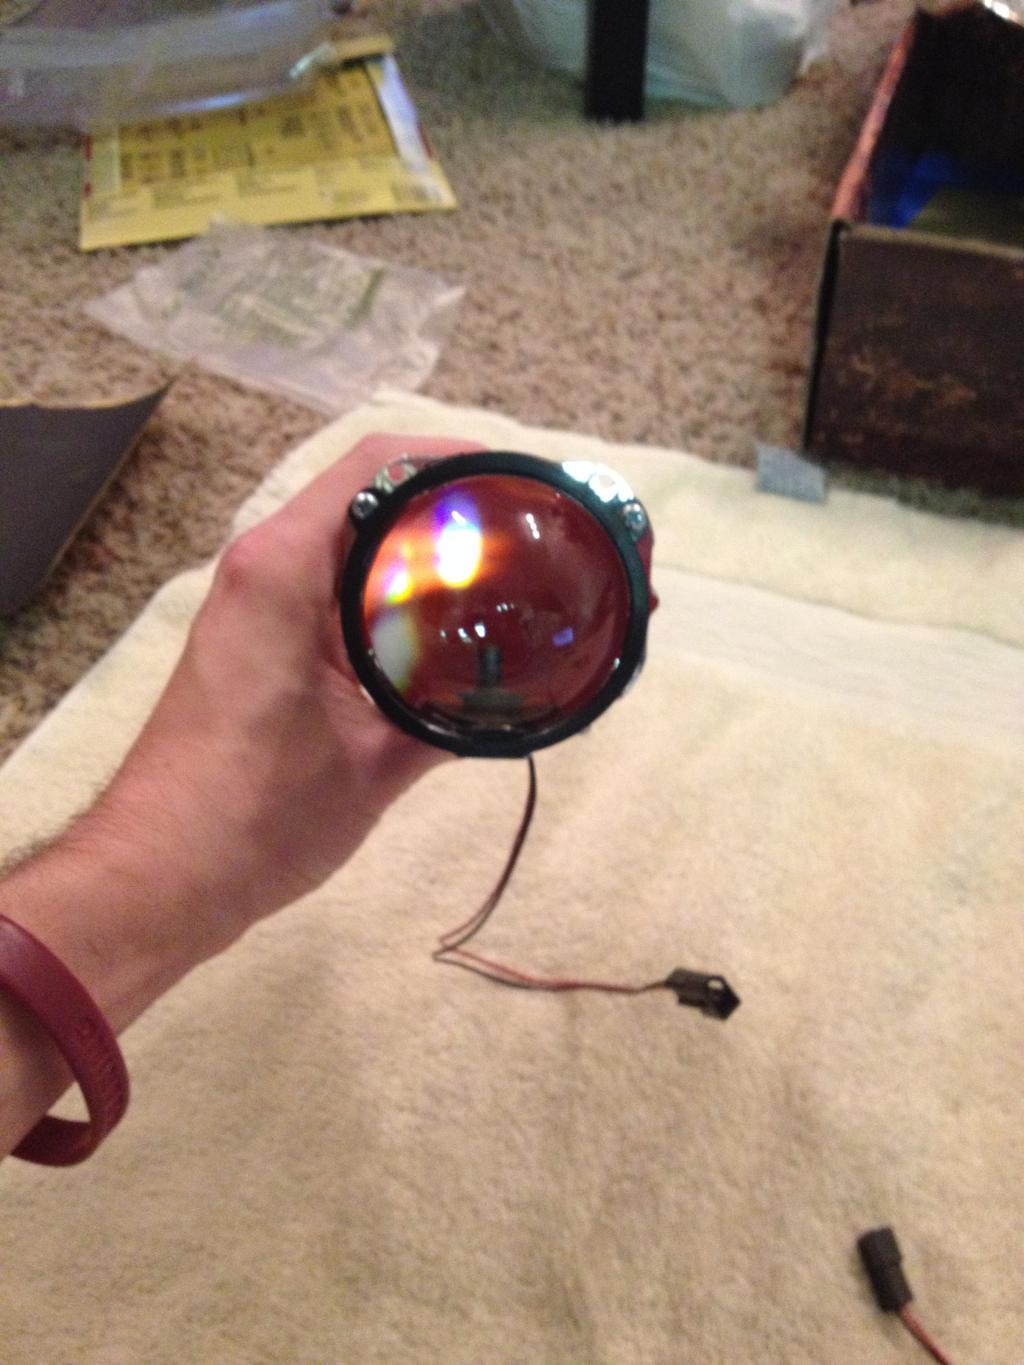
Passive demon eye complete
Cutoff shield reassembled
Passive demon eye complete
03-02-2015, 06:19 PM
#9
Thanks in advance for taking pictures of the chrome bucket post-cutting, and your mounting scheme for the projectors.
So, if you use some ebay housings, you're under $200 all in for this setup. If you already have good headlights, it's about $120. Don't forget the butyl glue.
DUH on the bulbs vs. ballasts... makes total sense.
So, if you use some ebay housings, you're under $200 all in for this setup. If you already have good headlights, it's about $120. Don't forget the butyl glue.
DUH on the bulbs vs. ballasts... makes total sense.

