2004-2008 F150 Mini D2S Retrofit Guide
 01-28-2017, 05:07 PM
#1


At last, my retrofit is done.
Someone did a guide using the Mini H1 projectors, but nobody had one for the Mini D2S. I found there are some variations to the process. Here are my notes.
Pats list:
2004-08 OEM Headlight housings
Painted black bezel
Stock turn signals
Stock side marker lights
Morimoto Mini D2S Stage 3 kit
- Morimoto Mini D2S 4.0
- Morimoto 50w XB ballast
- Morimoto 6500k XB D2S bulbs
- Morimoto Motocontrol Bi-Xenon H13
- Apollo 2.0 Full Circle Shrouds
- Morimoto black retrorubber sealant
HVAC high temp tape
Meguiars headlight restore kit
Sylvania UV Protectant
Some of the tools I used:
Flat head screwdriver
Dremel with cutting wheel and drum sander bits
Oven
Heat gun
Zip ties
Overall I spent probably 16-20 hours on this little project. 6 of those were spent just baking open and cleaning the stock headlights. One of them came apart easy but the other was terrible. Take your time, and do the job right. I didn't rush. I tried a few different approaches to mounting the projectors in the reflector bowl too. So if you follow this guide, you could surely save a few hours compared to me.
I wont go over how to open and clean the headlights, that's covered a lot of other places.
I also wont cover the painting process, that is covered by a few good guides too. I did prep them by scuffing them with sandpaper and then cleaning them off real good. The Krylon SuperMAXX paint I used said it had primer built-in and bonds to paint, so I went with it.
With that said, here we go:
I started by painting the bezels for the headlights, and they came out great
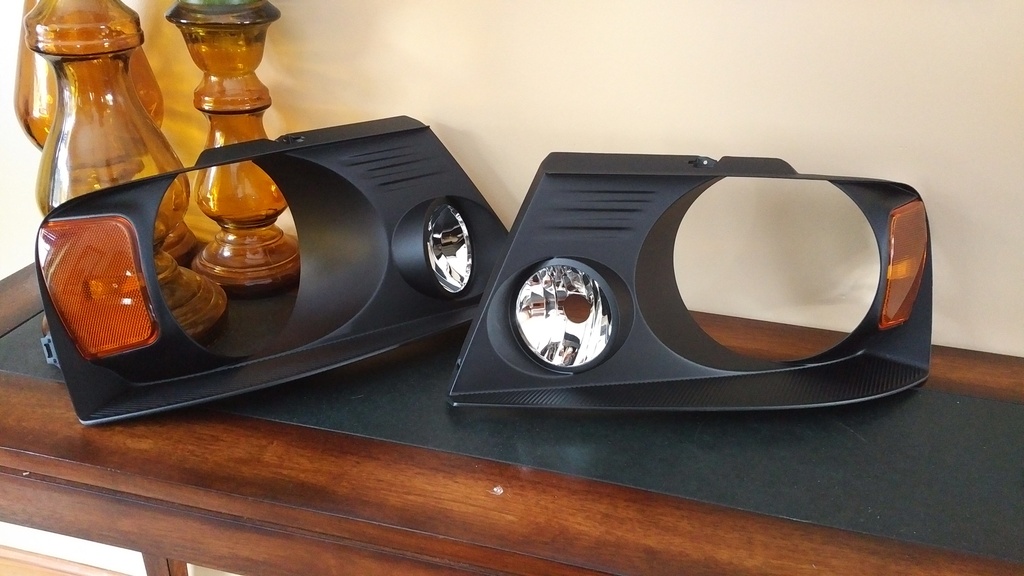
Next I painted the main reflector bowls.
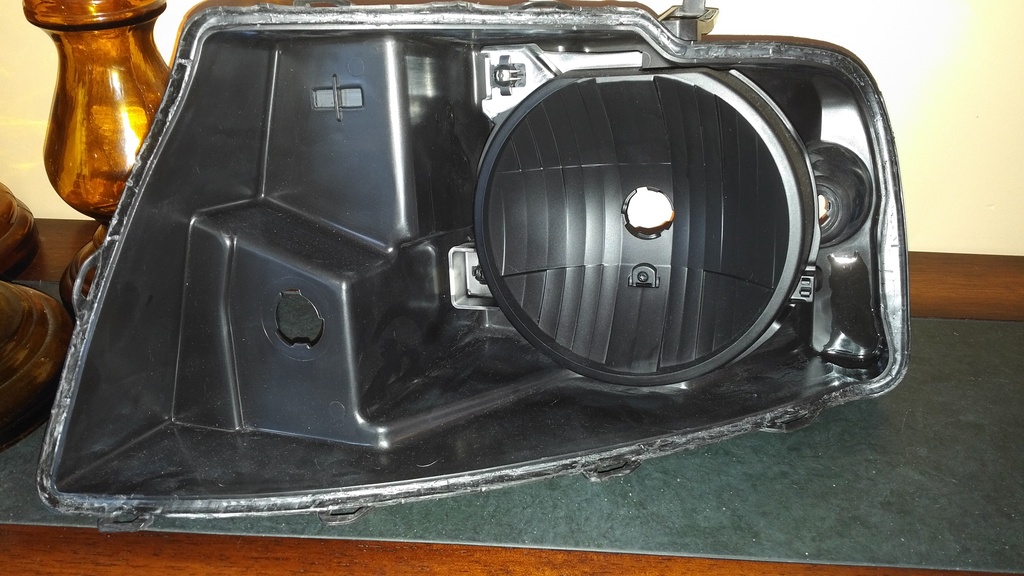
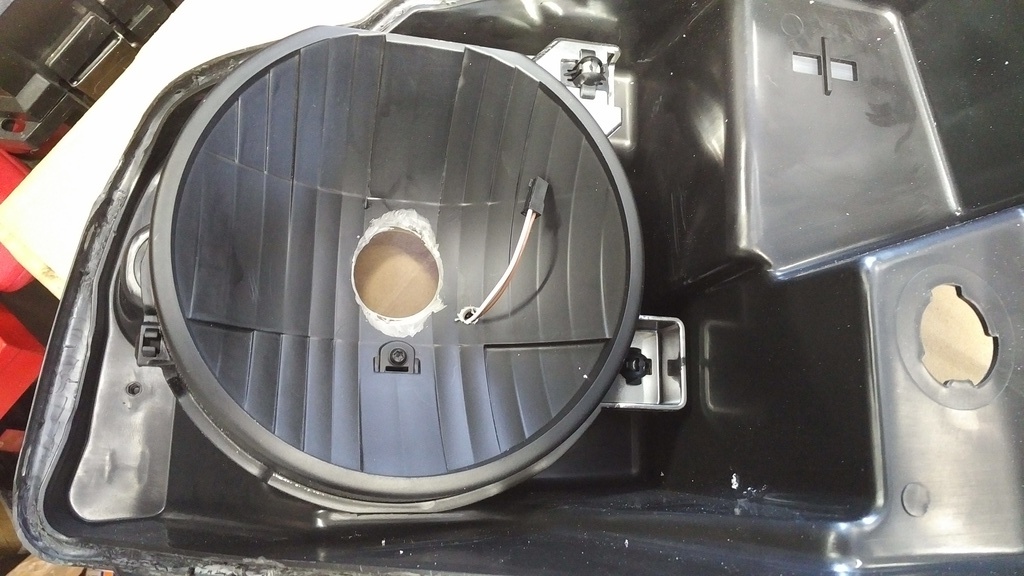
Now I got out the dremel and began making modifications.
One odd thing I noticed is that the reflector bowl in both my OEM headlights was a slightly different plastic. One was transparent, the other was not. Both seemed to be just as hard as the other, and since I was painting anyway it didnt matter. But an odd observation I thought.
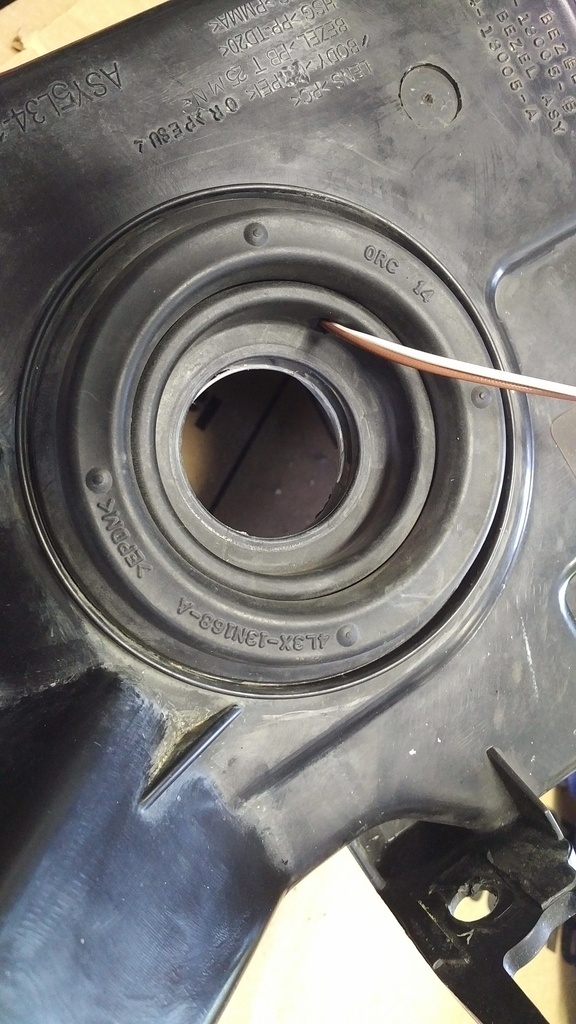
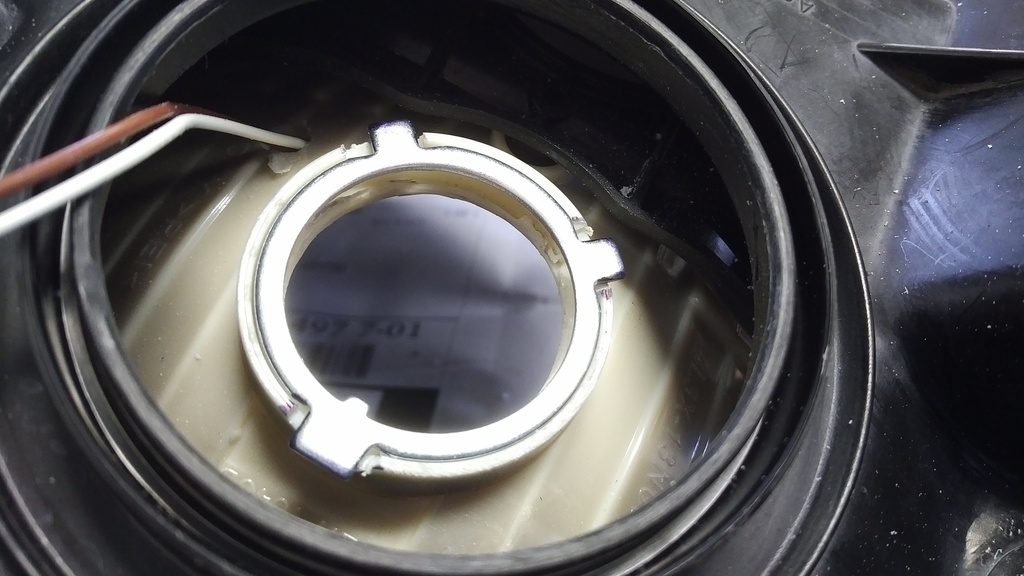
First you need to enlarge the hole. Basically you want to cut it back almost beyond the first "ring" when looking at the back of the reflector bowl. Also, to help the projecter sit firmly I trimed the front of the reflector bowl too. When you have your reflector bowl in hand you'll see why I did this.
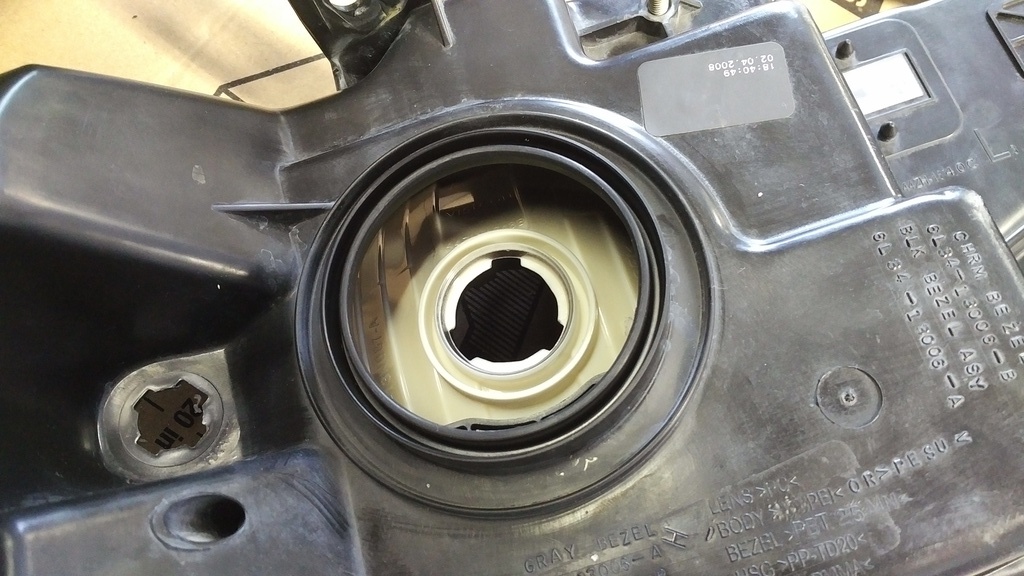
And the stock dust boot mounts up next to the outer ring, so it will still install nicely. The dust boot was a big concern of mine initially so this was a relief to me.
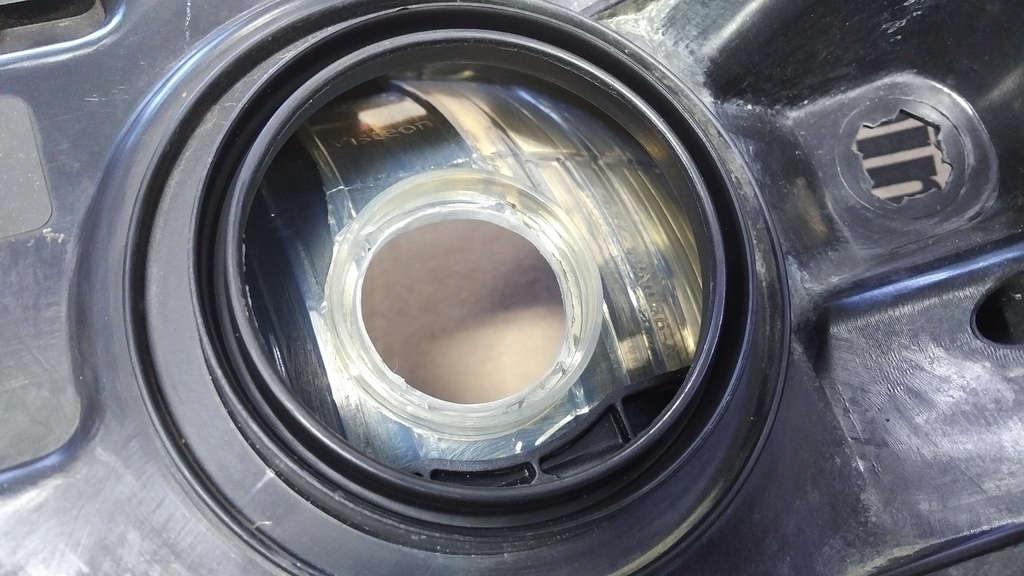
At first I thought I was done cutting. The projector fits at this stage, but, the shaft isn't long enough to get the nut to tighten down far enough to get the bulb in and the ignitor installed.
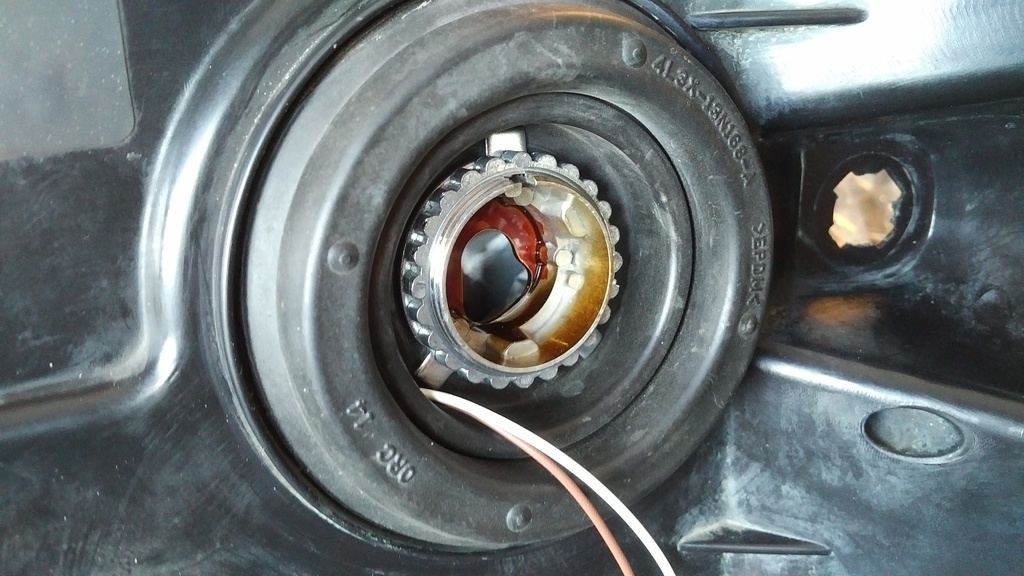
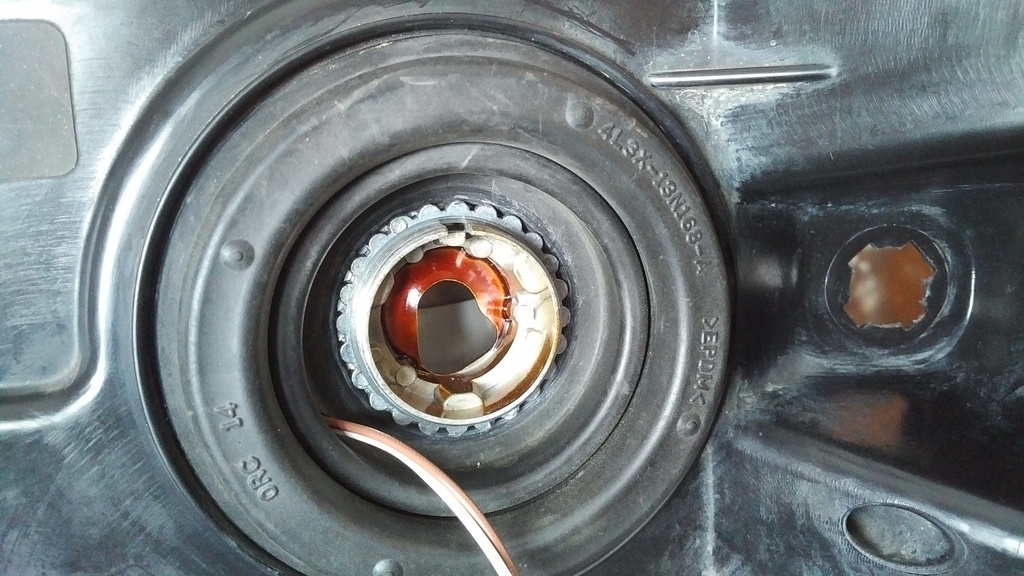
So I made a few notched cuts into the reflector so that the "washer" could sit flush.
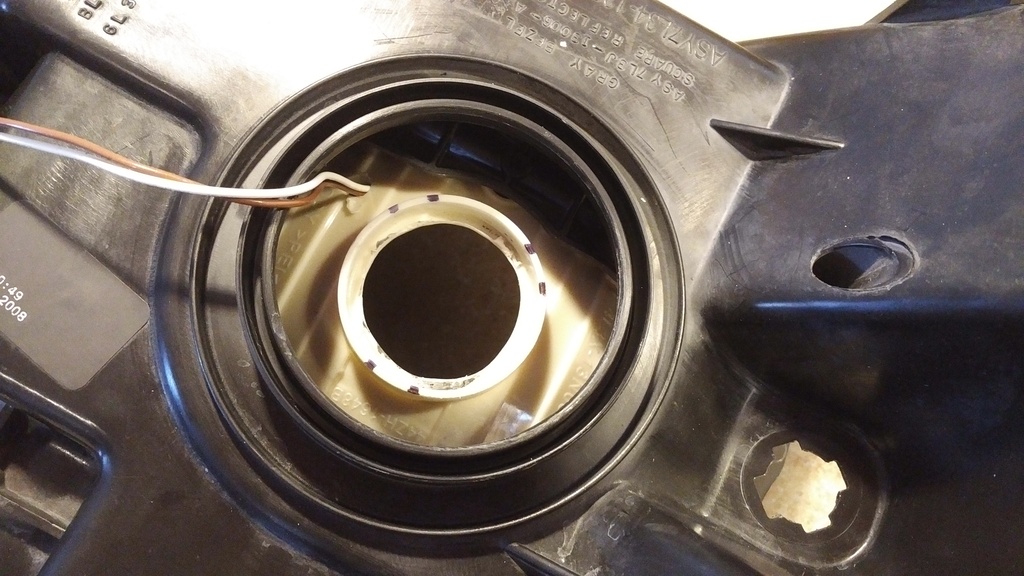
At this stage you'll also want to drill a 1/4" hole into the reflector for the bi-xenon selonoid wiring. Then use a 1/8" drill bit to make a small hole in the stock rubber boot, and thread the wiring through. The rubber should retract and keep a good seal around the wires. I found it helpful to slide off the little orange weather seals off the two selonoid wires, run them through the boot, then reinstall them.
Someone did a guide using the Mini H1 projectors, but nobody had one for the Mini D2S. I found there are some variations to the process. Here are my notes.
Pats list:
2004-08 OEM Headlight housings
Painted black bezel
Stock turn signals
Stock side marker lights
Morimoto Mini D2S Stage 3 kit
- Morimoto Mini D2S 4.0
- Morimoto 50w XB ballast
- Morimoto 6500k XB D2S bulbs
- Morimoto Motocontrol Bi-Xenon H13
- Apollo 2.0 Full Circle Shrouds
- Morimoto black retrorubber sealant
HVAC high temp tape
Meguiars headlight restore kit
Sylvania UV Protectant
Some of the tools I used:
Flat head screwdriver
Dremel with cutting wheel and drum sander bits
Oven
Heat gun
Zip ties
Overall I spent probably 16-20 hours on this little project. 6 of those were spent just baking open and cleaning the stock headlights. One of them came apart easy but the other was terrible. Take your time, and do the job right. I didn't rush. I tried a few different approaches to mounting the projectors in the reflector bowl too. So if you follow this guide, you could surely save a few hours compared to me.
I wont go over how to open and clean the headlights, that's covered a lot of other places.
I also wont cover the painting process, that is covered by a few good guides too. I did prep them by scuffing them with sandpaper and then cleaning them off real good. The Krylon SuperMAXX paint I used said it had primer built-in and bonds to paint, so I went with it.
With that said, here we go:
I started by painting the bezels for the headlights, and they came out great

Next I painted the main reflector bowls.

Now I got out the dremel and began making modifications.
One odd thing I noticed is that the reflector bowl in both my OEM headlights was a slightly different plastic. One was transparent, the other was not. Both seemed to be just as hard as the other, and since I was painting anyway it didnt matter. But an odd observation I thought.
First you need to enlarge the hole. Basically you want to cut it back almost beyond the first "ring" when looking at the back of the reflector bowl. Also, to help the projecter sit firmly I trimed the front of the reflector bowl too. When you have your reflector bowl in hand you'll see why I did this.


And the stock dust boot mounts up next to the outer ring, so it will still install nicely. The dust boot was a big concern of mine initially so this was a relief to me.

At first I thought I was done cutting. The projector fits at this stage, but, the shaft isn't long enough to get the nut to tighten down far enough to get the bulb in and the ignitor installed.

So I made a few notched cuts into the reflector so that the "washer" could sit flush.


At this stage you'll also want to drill a 1/4" hole into the reflector for the bi-xenon selonoid wiring. Then use a 1/8" drill bit to make a small hole in the stock rubber boot, and thread the wiring through. The rubber should retract and keep a good seal around the wires. I found it helpful to slide off the little orange weather seals off the two selonoid wires, run them through the boot, then reinstall them.
Last edited by rkneeshaw; 01-28-2017 at 07:23 PM.
 01-28-2017, 05:08 PM
#2
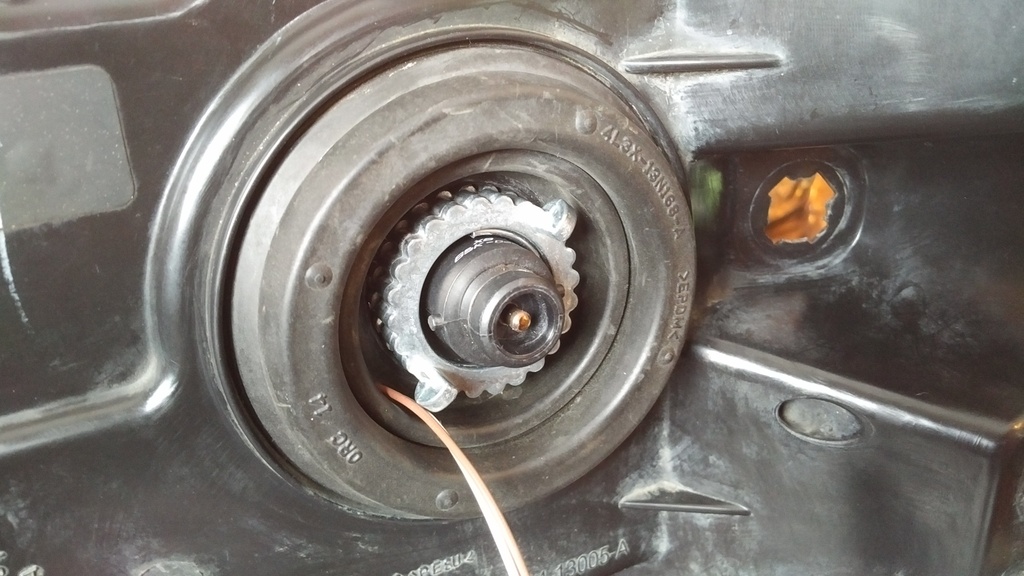
And don't forget to trim those tabs on the "washers" just a bit, you don't want them sticking out and pushing out the dust boot, you wont get a good seal.
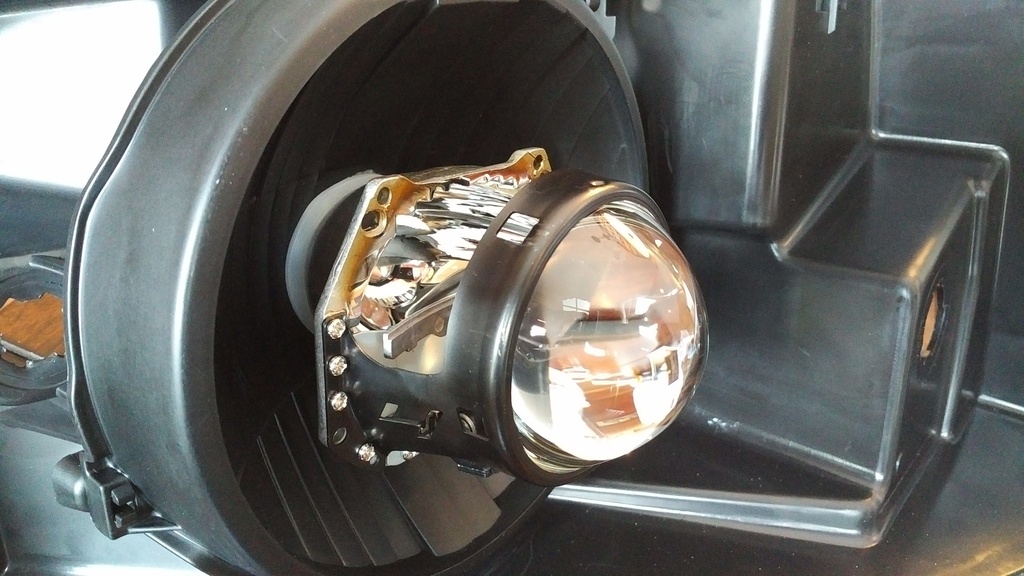
Install the Mini D2S projector and then slip on the dust boot, it should sit real nice
Bulb installed
Ignitor installed, fits great
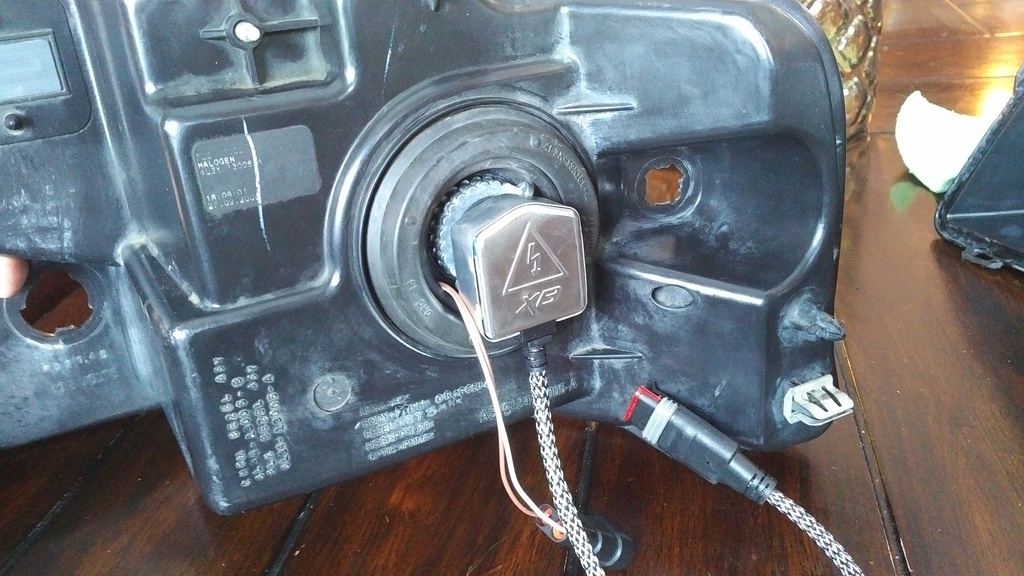
And at this point the front of the headlight looks like this:
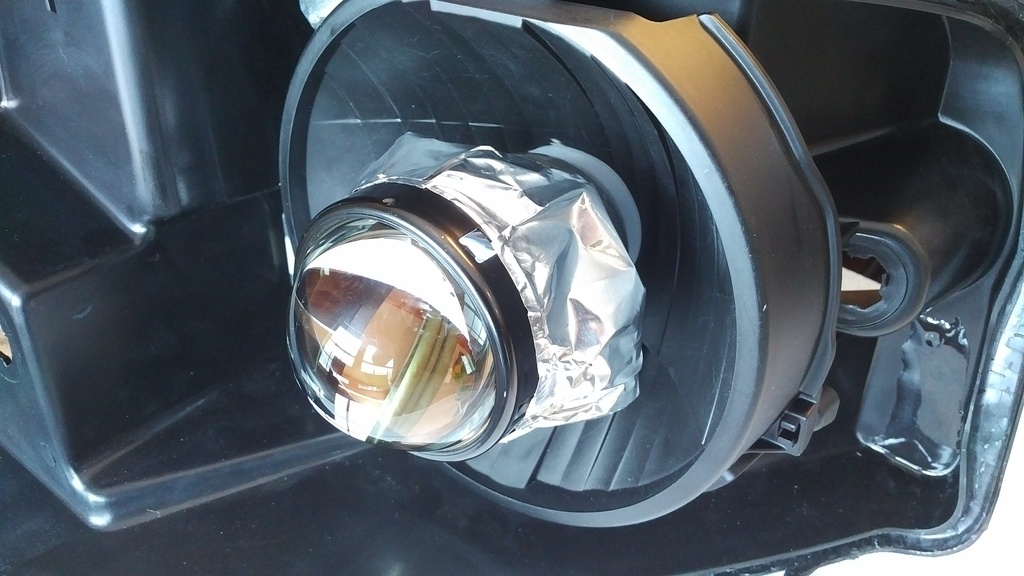
When I wired them up and tested them there was some light bleeding out behind the shrouds and I didnt like that, so I copied someone else and used a high temp HVAC metal repair tape to seal up the projector:
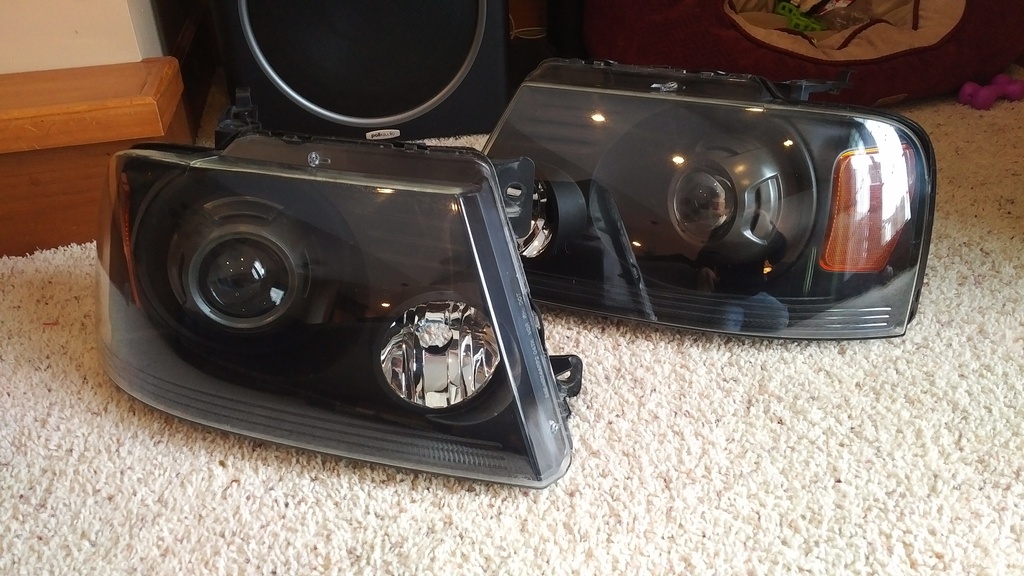
And now a note about shrouds.
I originally wanted the Apollo 1.0 shrouds, I liked the look the most. But, they aren't deep enough, too much gap:
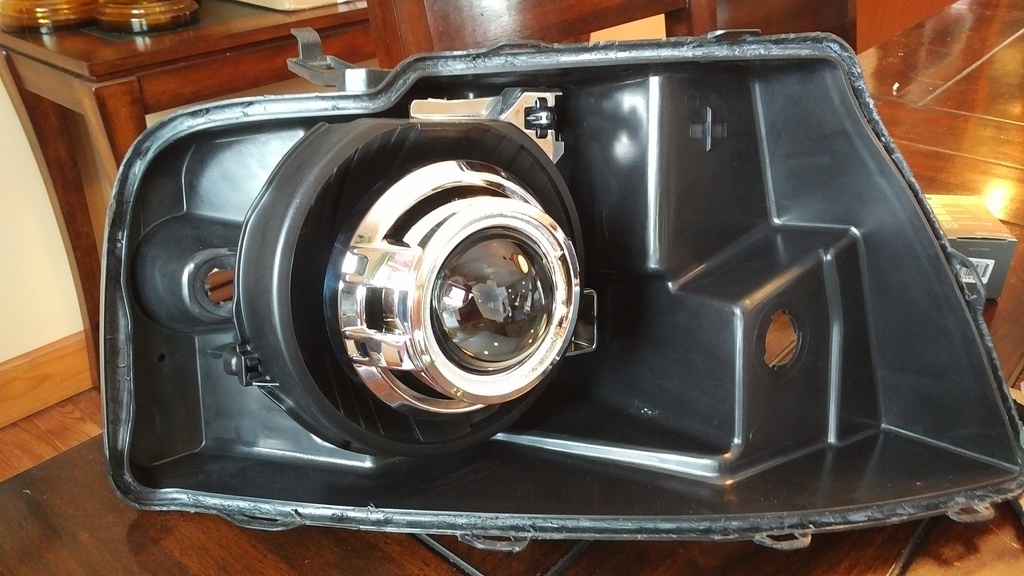

The Apollo 2.0 full circle shrouds are about a half inch deeper, and they filled out the reflector perfectly. No trimming required. I chose to paint mine dark shadow grey to match my truck.
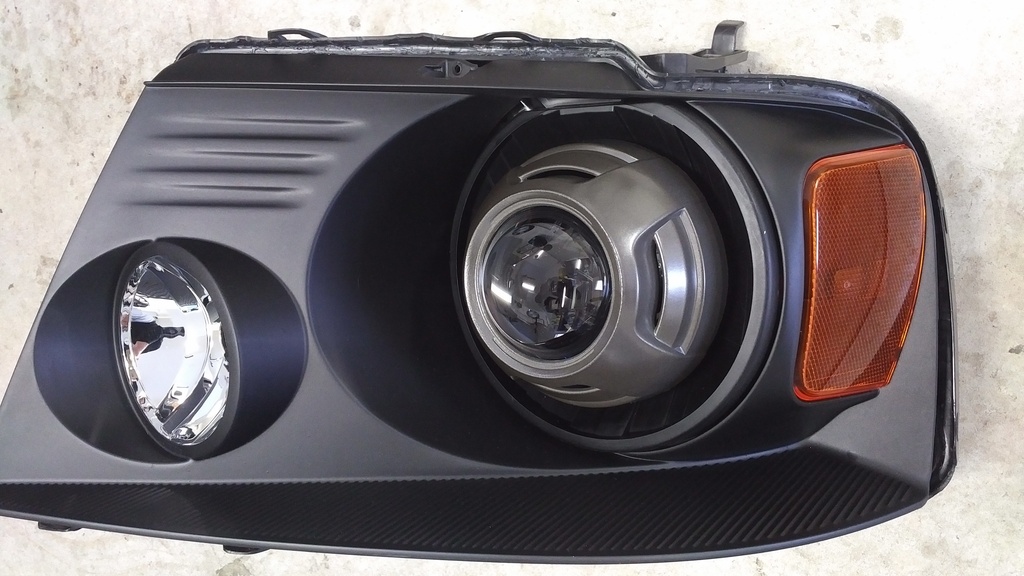
With the 2006 F150's round fog lights I thought it would compliment things if the shrouds had some kind of accent, but chrome was out of the question for me. So I wanted some kind of grey, so why not match the truck. I think the dark shadow grey came out real nice. It's just DupliColor dark shadow grey in a spray can. I took care to prep the shroud before paint by scuffing it with sandpaper and using a spray can plastic primer
Install the Mini D2S projector and then slip on the dust boot, it should sit real nice

Bulb installed

Ignitor installed, fits great

And at this point the front of the headlight looks like this:

When I wired them up and tested them there was some light bleeding out behind the shrouds and I didnt like that, so I copied someone else and used a high temp HVAC metal repair tape to seal up the projector:

And now a note about shrouds.
I originally wanted the Apollo 1.0 shrouds, I liked the look the most. But, they aren't deep enough, too much gap:


The Apollo 2.0 full circle shrouds are about a half inch deeper, and they filled out the reflector perfectly. No trimming required. I chose to paint mine dark shadow grey to match my truck.

With the 2006 F150's round fog lights I thought it would compliment things if the shrouds had some kind of accent, but chrome was out of the question for me. So I wanted some kind of grey, so why not match the truck. I think the dark shadow grey came out real nice. It's just DupliColor dark shadow grey in a spray can. I took care to prep the shroud before paint by scuffing it with sandpaper and using a spray can plastic primer
Last edited by rkneeshaw; 01-28-2017 at 05:19 PM.
01-28-2017, 05:09 PM
#3
Always make sure you mount your lights to the truck and test low and high beams, and adjust the rotation of the projects, before you seal them up. You don't want to find out you have problems after you have everything sealed.
Before I removed my stock headlights I threw some tape on the wall in the garage to mark the current height of the beam pattern. I then test fit the new headlights and checked rotation. I had to make some adjustments. At this point I just want both projectors' cutoff line to be parallel to each other so I know things are straight across. I also used this opportunity to adjust the projectors up to the right height using the tape I had put on the wall from the halogen headlights. The height wont be perfect but it will at least be close, I wont be WAY off when I first take the truck for a drive.
I did this without the shroud or bezels installed, but threw them on for a couple quick pictures at this stage, just to make sure I as happy with the color of the shrouds:
Once you confirm everything is working, and the rotation is right, its time to seal up the headlights!
I made sure the inside of the lenses were perfectly clean and smudge and lint free. Same for the painted bezel, turn signal reflector bowls, and projector lenses.
Pre-heat up your oven to 220 degrees F. While that is warming up get your RetroRubber sealant out and start laying it into the grooves around the headlight. TRS has some youtube videos on this process. I didnt get pictures of this stage But its pretty straightforward. You can stretch the retrorubber to thin it out around some of the bends and kinks. Then mash the headlight lense onto the headlight as best you can. It wont' clip all the way together yet, but it will stick together. I wrapped some zipties around the headlights just be sure it stayed in place.
Then throw one of them into the oven for about 8 minutes.
Put on a pair of mechanics gloves and pull it out of the oven. Remove the zip ties and using your hands begin pushing the lense into the headlight housing, working your way around the headlight until all the clips engage and its nice and tight.
Then throw the other one into the oven and repeat.
Step back and enjoy your craftsmanship!
Remember your headlight beam height wont be perfect at this point. Be sure to properly aim them before spending too much time on the road.
I can't wait for sundown!
Before I removed my stock headlights I threw some tape on the wall in the garage to mark the current height of the beam pattern. I then test fit the new headlights and checked rotation. I had to make some adjustments. At this point I just want both projectors' cutoff line to be parallel to each other so I know things are straight across. I also used this opportunity to adjust the projectors up to the right height using the tape I had put on the wall from the halogen headlights. The height wont be perfect but it will at least be close, I wont be WAY off when I first take the truck for a drive.
I did this without the shroud or bezels installed, but threw them on for a couple quick pictures at this stage, just to make sure I as happy with the color of the shrouds:


Once you confirm everything is working, and the rotation is right, its time to seal up the headlights!
I made sure the inside of the lenses were perfectly clean and smudge and lint free. Same for the painted bezel, turn signal reflector bowls, and projector lenses.
Pre-heat up your oven to 220 degrees F. While that is warming up get your RetroRubber sealant out and start laying it into the grooves around the headlight. TRS has some youtube videos on this process. I didnt get pictures of this stage
But its pretty straightforward. You can stretch the retrorubber to thin it out around some of the bends and kinks. Then mash the headlight lense onto the headlight as best you can. It wont' clip all the way together yet, but it will stick together. I wrapped some zipties around the headlights just be sure it stayed in place.Then throw one of them into the oven for about 8 minutes.
Put on a pair of mechanics gloves and pull it out of the oven. Remove the zip ties and using your hands begin pushing the lense into the headlight housing, working your way around the headlight until all the clips engage and its nice and tight.
Then throw the other one into the oven and repeat.
Step back and enjoy your craftsmanship!

Remember your headlight beam height wont be perfect at this point. Be sure to properly aim them before spending too much time on the road.
I can't wait for sundown!
Last edited by rkneeshaw; 01-29-2017 at 10:13 AM.
01-28-2017, 07:29 PM
#4
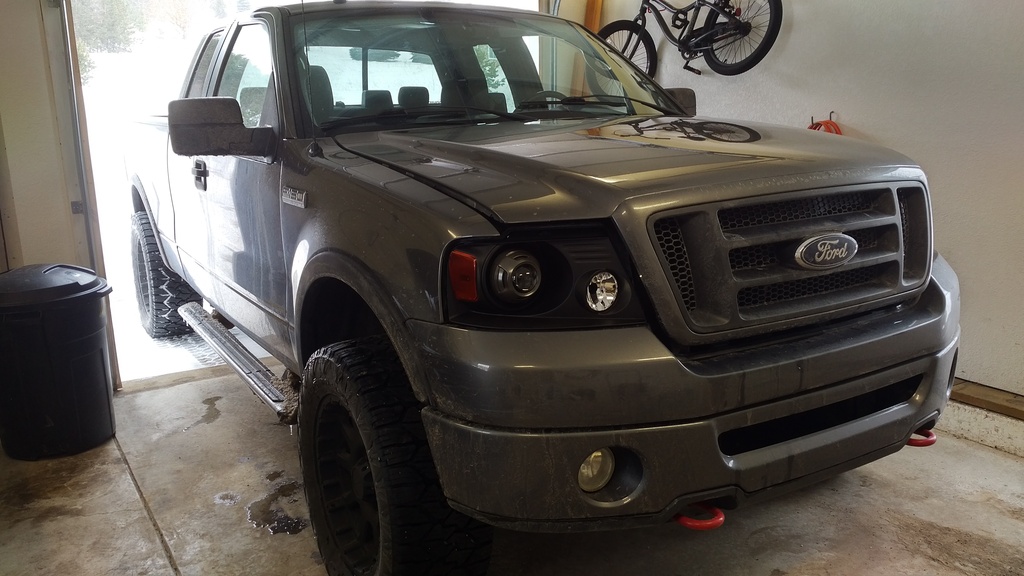
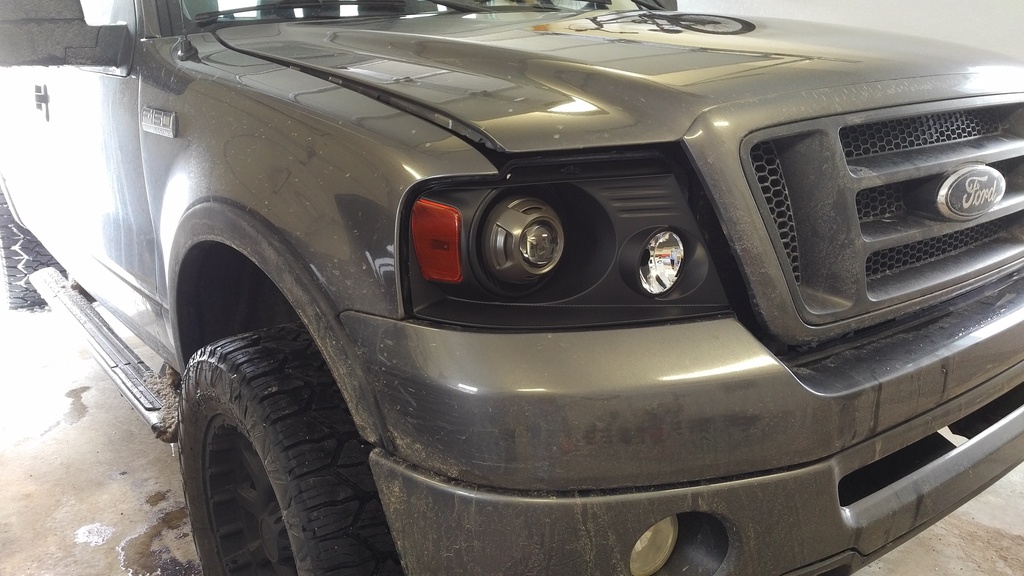
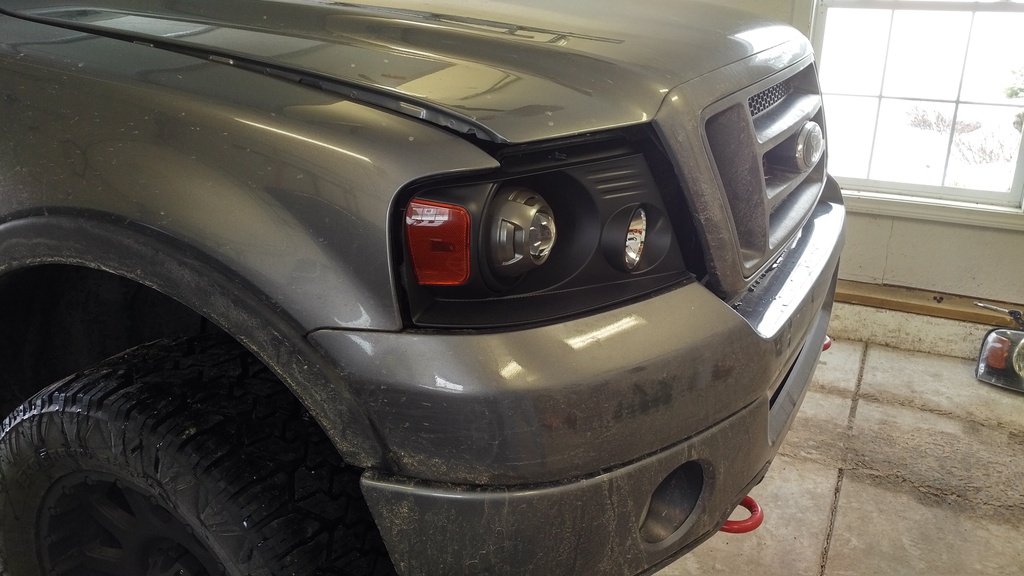
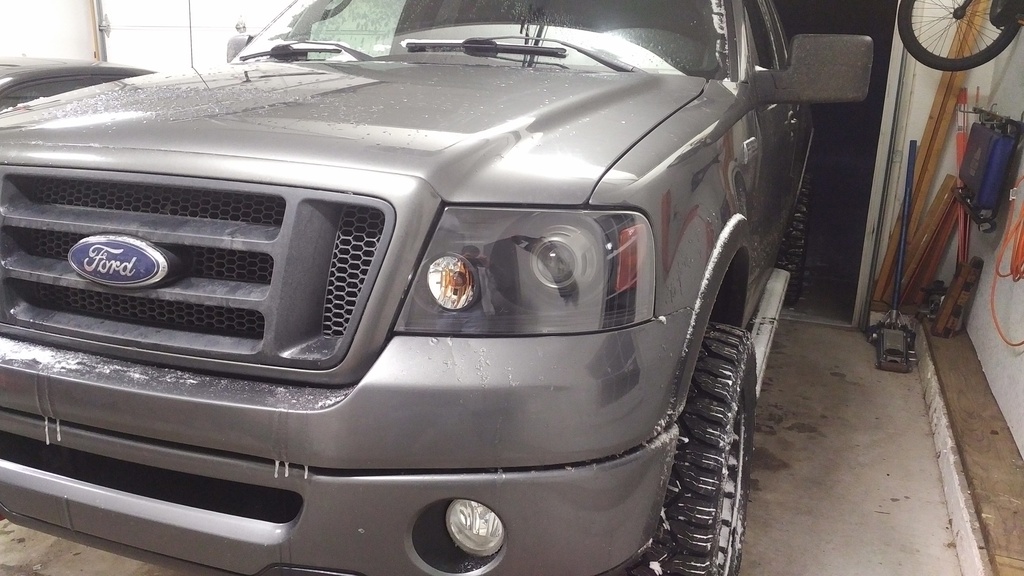
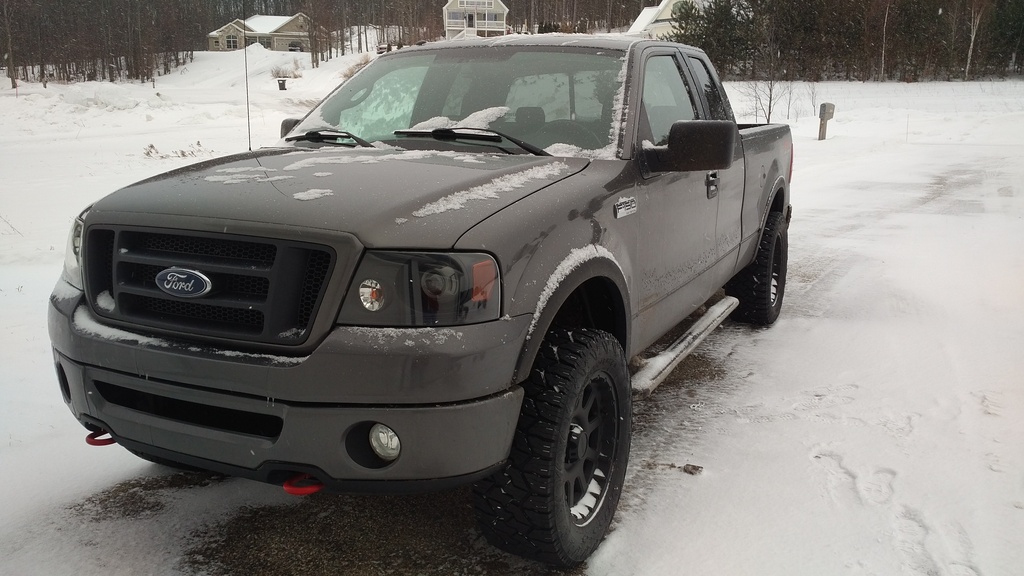
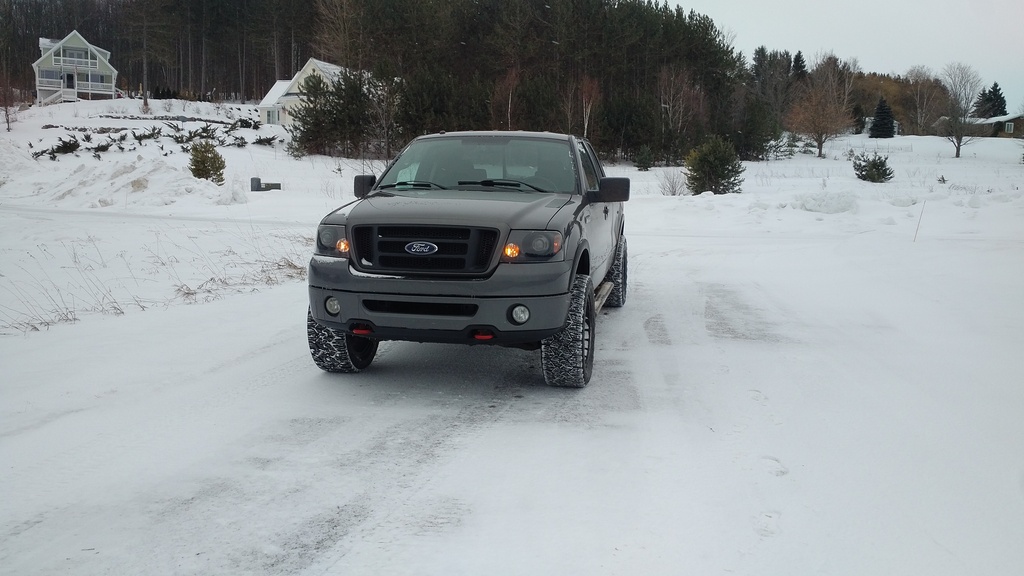
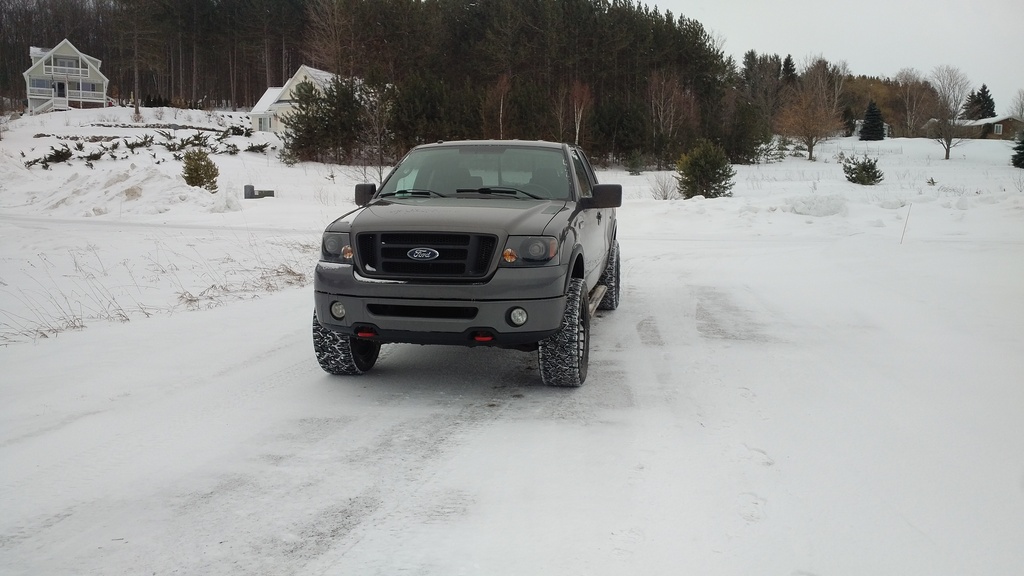
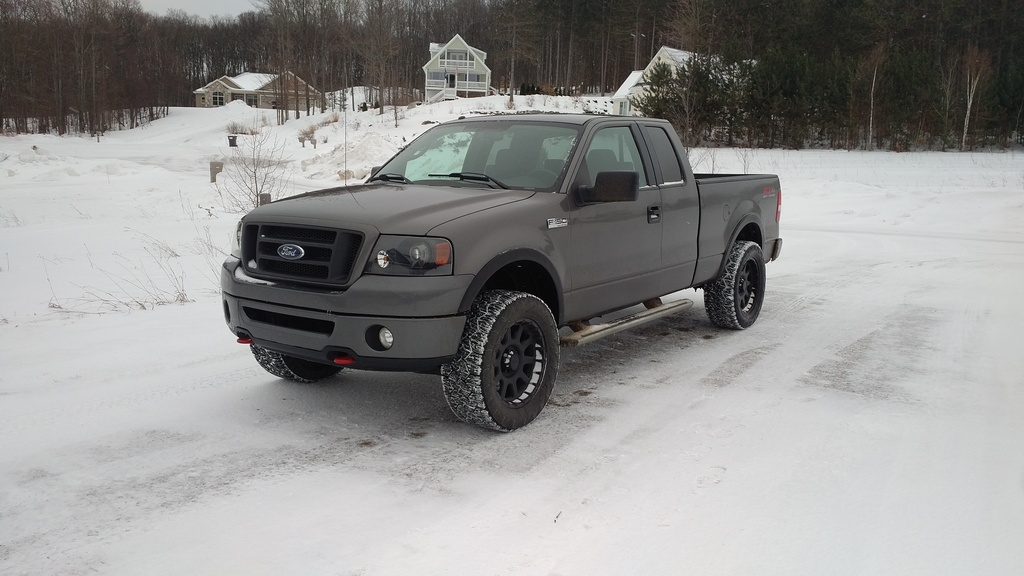
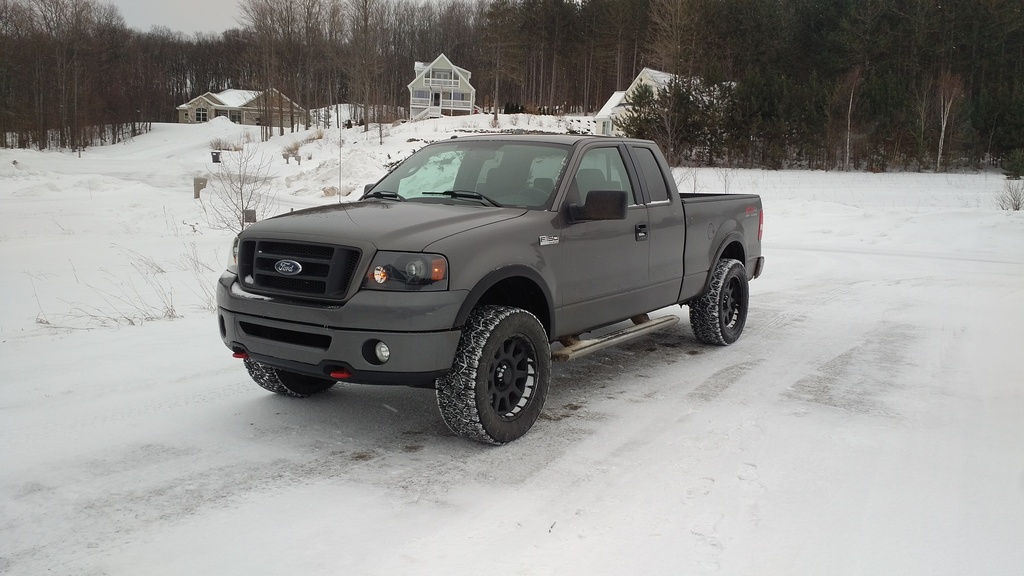
Installed:
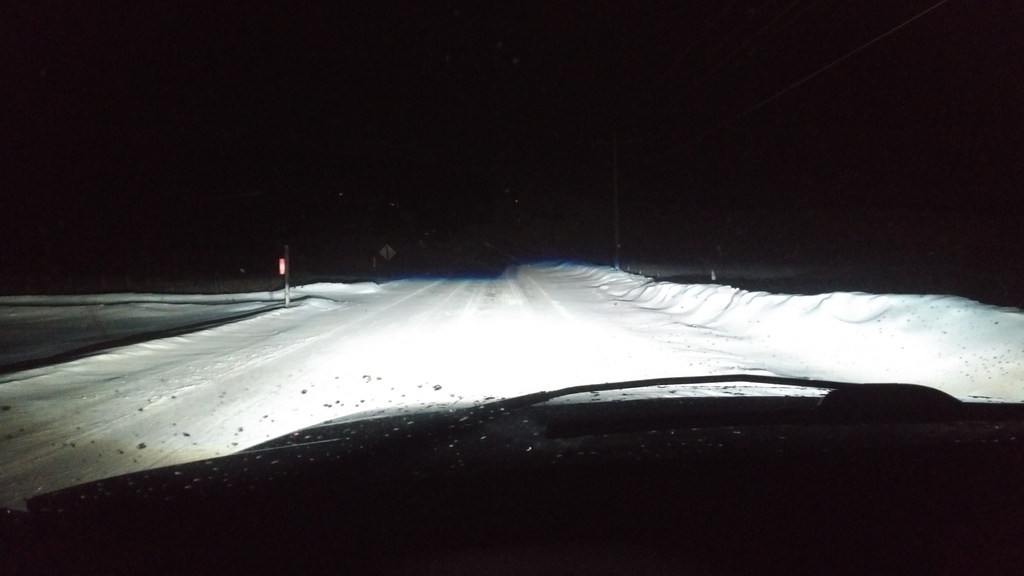
Output shots!
I'm on a road that slopes up and gradually increases grade as it goes on. So the low-beam pics dont have a lot of distance. I was primarily trying to demonstrate the width and brightness.
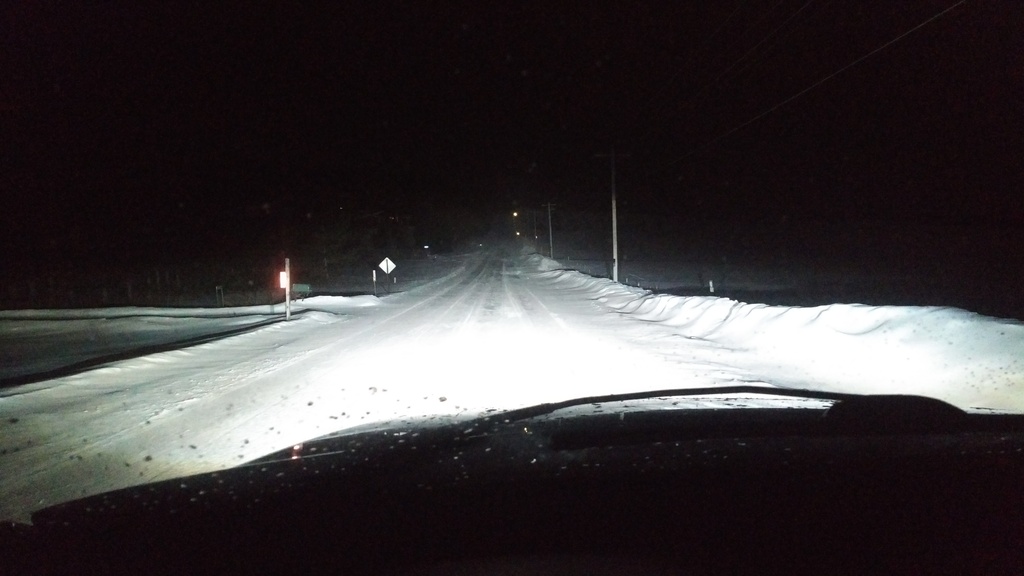
Then when I flip on the high-beams, you can see there's a hill there in the distance
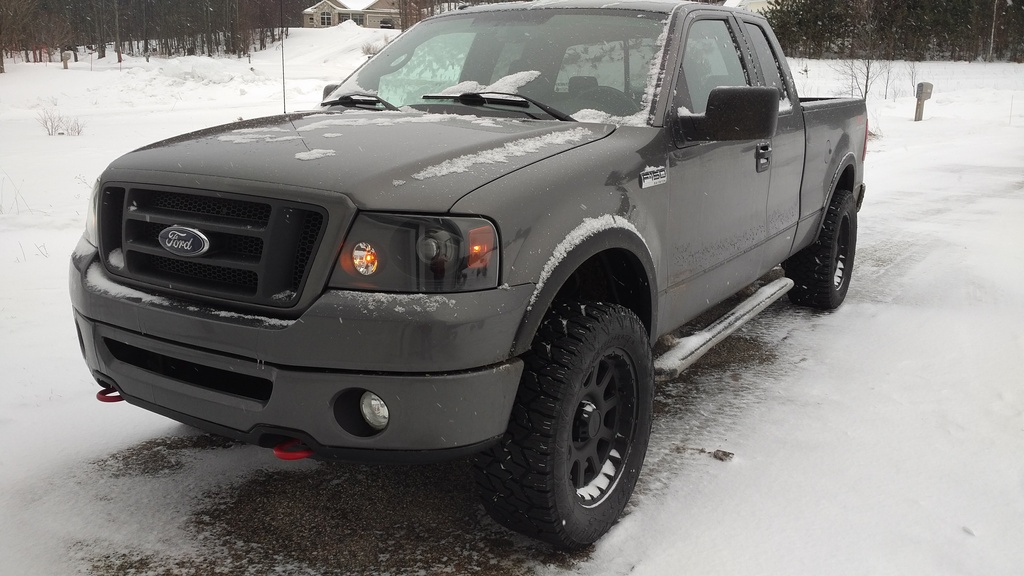
From outside the truck looking back at it, these look amazing!
It was a bit of a project, but I couldn't be happier with the results
01-29-2017, 10:35 AM
#6
Thanks summers! I followed your guide pretty closely, but there were some changes with the Mini D2S. TRS now includes a connector for the bi-xenon selenoid that clicks into the motocontrol H13 wiring harness. And the way the bulb sits on the D2S allowed me to retain the stock dust boot.
In your guide you also suggested to put cardboard under the headlight when you put them in the oven, that's a great idea that I used when I did my retrofit, and I highly recommend everyone else do it too.
Here are a few more pics now that its day time, with the parking lights on and off
In your guide you also suggested to put cardboard under the headlight when you put them in the oven, that's a great idea that I used when I did my retrofit, and I highly recommend everyone else do it too.
Here are a few more pics now that its day time, with the parking lights on and off


