
Writeup: Adding backup camera to 2010 F150
 07-26-2011, 10:57 PM
#1
Member
Thread Starter


I found most of the useful info to complete this project on f150forum.com. The particular thread is here:
https://www.f150forum.com/f38/09-rea...-camera-18468/
There's a lot to wade through there in the 60+ pages, so I created a short writeup on my 2010 XLT F150 for those in a similar situation to myself. Final cost to me was around $360 for everything not including tools like soldering irons, heat shrink, wire, etc.
My truck came from the factory with a rear view mirror that autodims, has a built in compass and a sync microphone. I wanted to add a backup camera, but after researching the aftermarket systems I decided to install a factory camera and mirror.
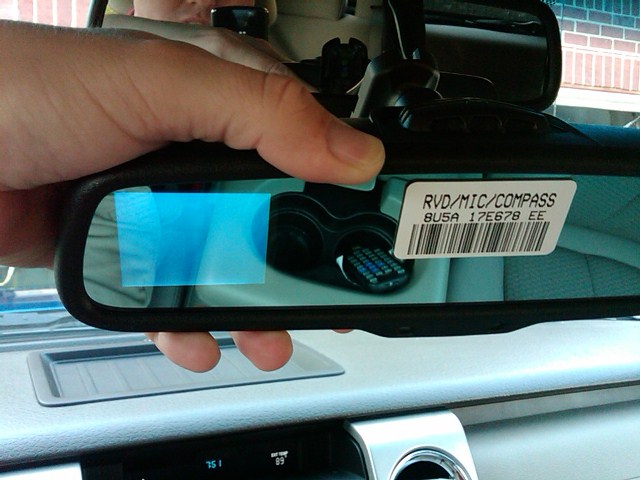
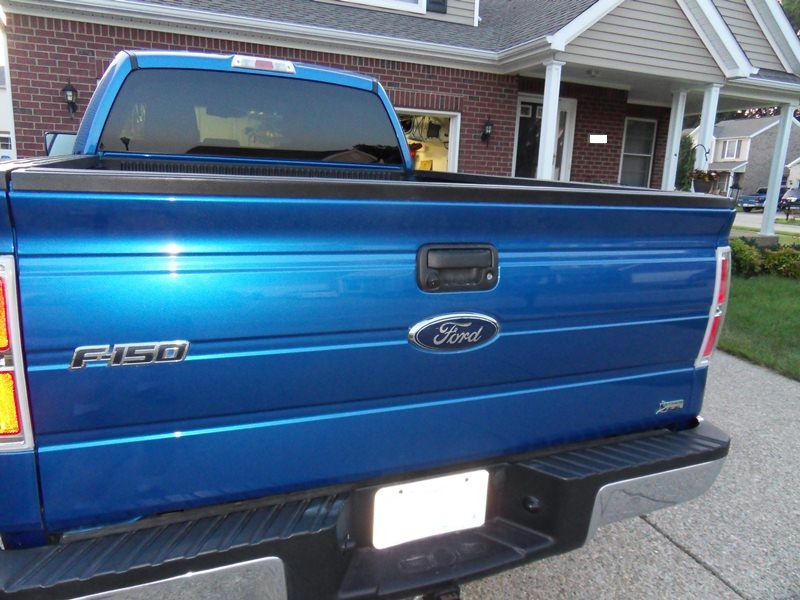
First, I got a rear view mirror and backup camera off of ebay. These can be had for about $150 each or sometimes $250-$320 as a package deal. Newer ford vehicles have the camera mounted in the ford emblem on the rear of the vehicle. I opted to go with an older style camera in the tailgate handle. The pinout for the two different cameras is identical, but the tailgate camera install appeared to be much easier from my research. New information also seems to indicate the pinout on 2011 mirrors is different than previous years. (new mirror I used was 8U5A 17E678 EE)
In order to get power to my camera and power and video signals to my rear view mirror I could either buy factory harnesses from a dealer like Tasca Ford ($250+) or do the wiring myself. I opted to go cheap and do it myself.
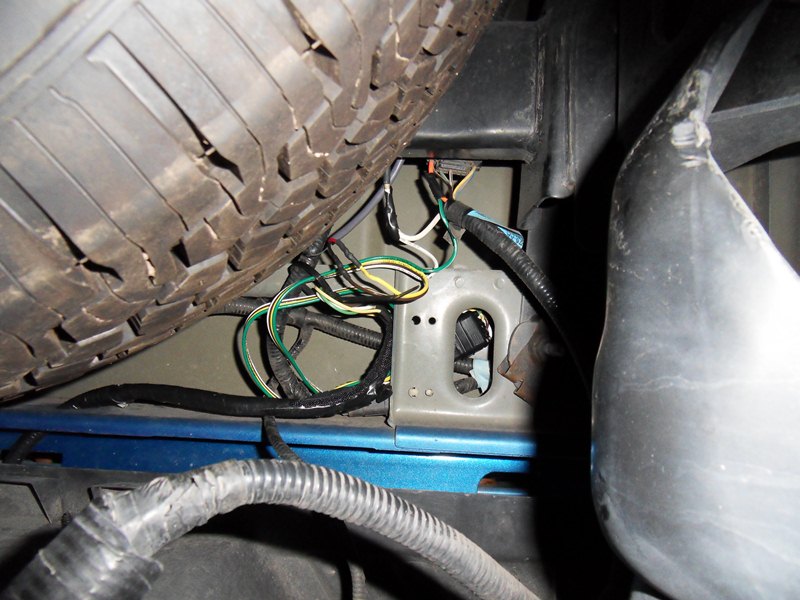
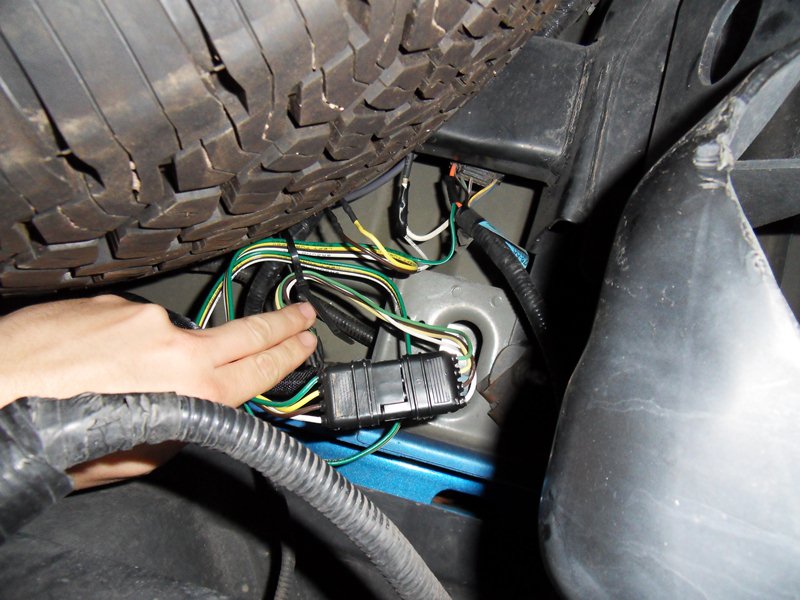
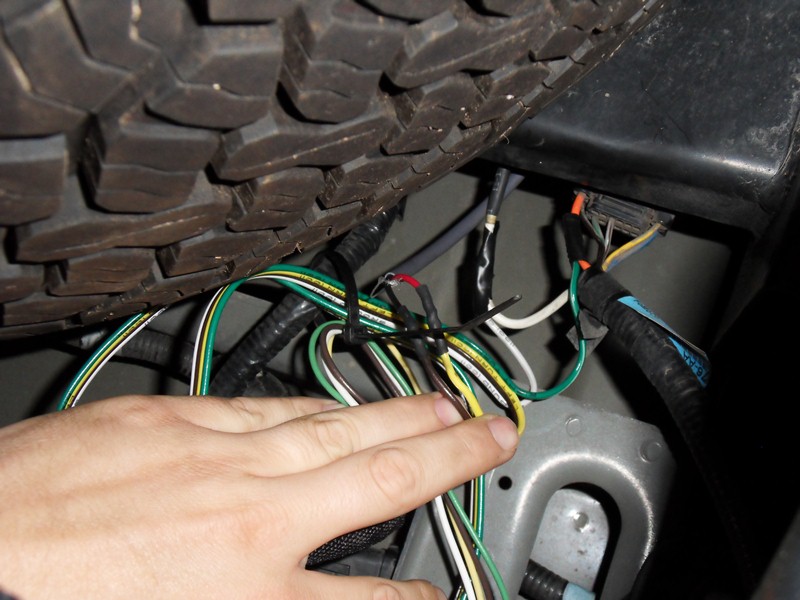
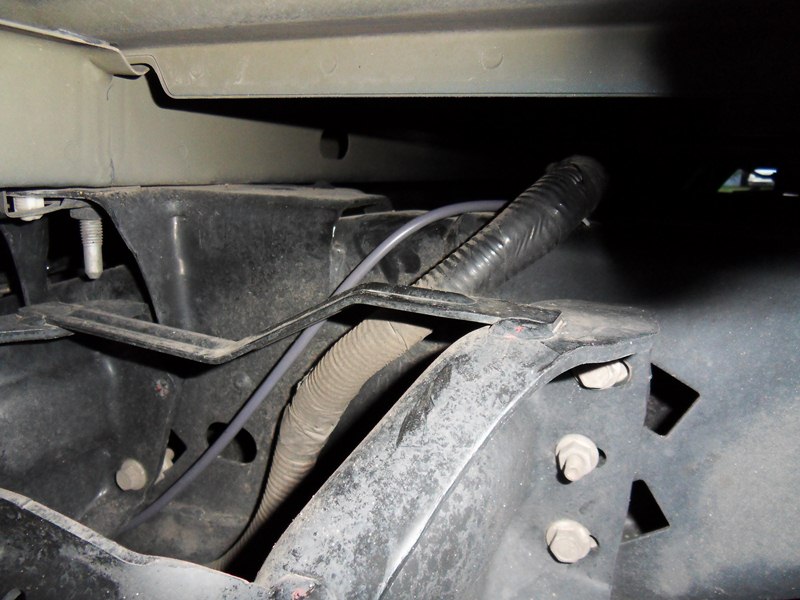
My factory tail light harness lacked the wires and connectors to hook up a camera and supply power to it, so I bought a four pin trailer light connector set and installed that instead. This will give me the ability to plug the truck into a backup camera on the back of a trailer in the future as well.
The orange power wire on the trailer plug supplied 12V and the white frame ground, you guessed it, gnd. When wired to power all the time there is no delay getting video to the mirror when shifting into reverse. If you wire the camera power to a reverse signal from the transmission there may be a couple second delay for the video feed.
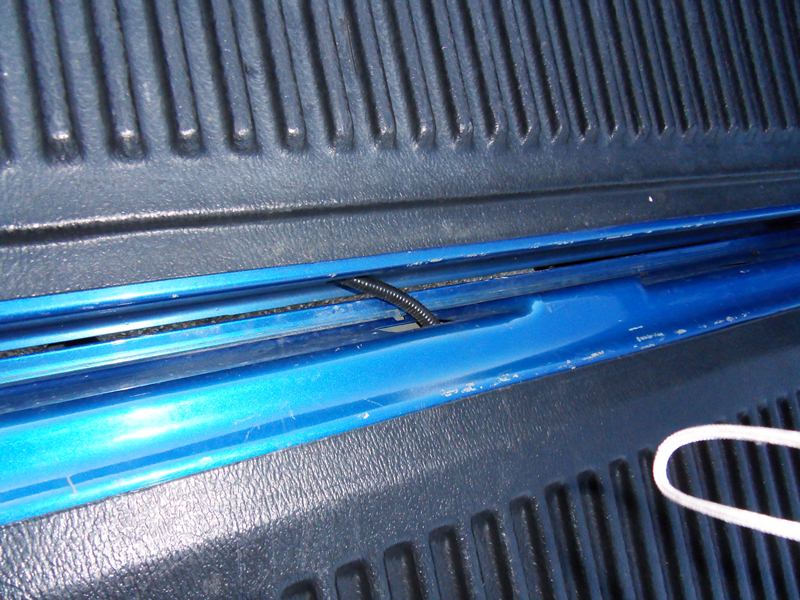
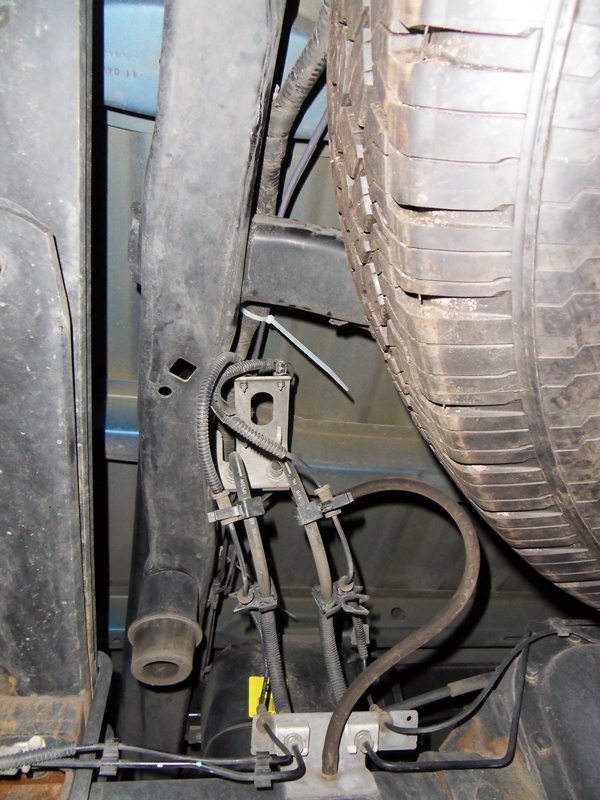
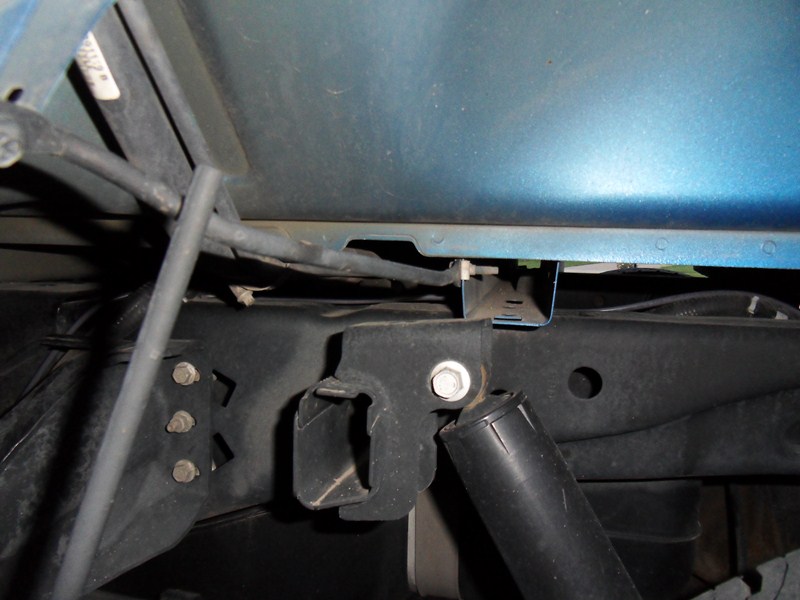
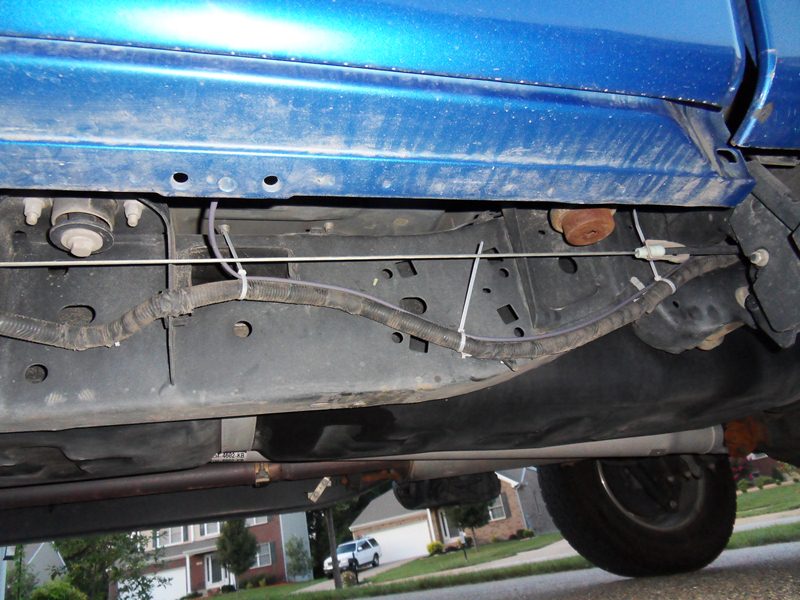
Also, my main frame harness and cab harnesses lacked the video + and video - signal wires to get the video signal from the rear of the truck to the rear view mirror. I decided to run a two wire cable from Lowes from the rear of the truck to the rear view mirror instead.
At the back of the truck:
Along the frame with the main harness:
https://www.f150forum.com/f38/09-rea...-camera-18468/
There's a lot to wade through there in the 60+ pages, so I created a short writeup on my 2010 XLT F150 for those in a similar situation to myself. Final cost to me was around $360 for everything not including tools like soldering irons, heat shrink, wire, etc.
My truck came from the factory with a rear view mirror that autodims, has a built in compass and a sync microphone. I wanted to add a backup camera, but after researching the aftermarket systems I decided to install a factory camera and mirror.
First, I got a rear view mirror and backup camera off of ebay. These can be had for about $150 each or sometimes $250-$320 as a package deal. Newer ford vehicles have the camera mounted in the ford emblem on the rear of the vehicle. I opted to go with an older style camera in the tailgate handle. The pinout for the two different cameras is identical, but the tailgate camera install appeared to be much easier from my research. New information also seems to indicate the pinout on 2011 mirrors is different than previous years. (new mirror I used was 8U5A 17E678 EE)
In order to get power to my camera and power and video signals to my rear view mirror I could either buy factory harnesses from a dealer like Tasca Ford ($250+) or do the wiring myself. I opted to go cheap and do it myself.
My factory tail light harness lacked the wires and connectors to hook up a camera and supply power to it, so I bought a four pin trailer light connector set and installed that instead. This will give me the ability to plug the truck into a backup camera on the back of a trailer in the future as well.
The orange power wire on the trailer plug supplied 12V and the white frame ground, you guessed it, gnd. When wired to power all the time there is no delay getting video to the mirror when shifting into reverse. If you wire the camera power to a reverse signal from the transmission there may be a couple second delay for the video feed.
Also, my main frame harness and cab harnesses lacked the video + and video - signal wires to get the video signal from the rear of the truck to the rear view mirror. I decided to run a two wire cable from Lowes from the rear of the truck to the rear view mirror instead.
At the back of the truck:
Along the frame with the main harness:
 07-26-2011, 10:58 PM
#2
Member
Thread Starter
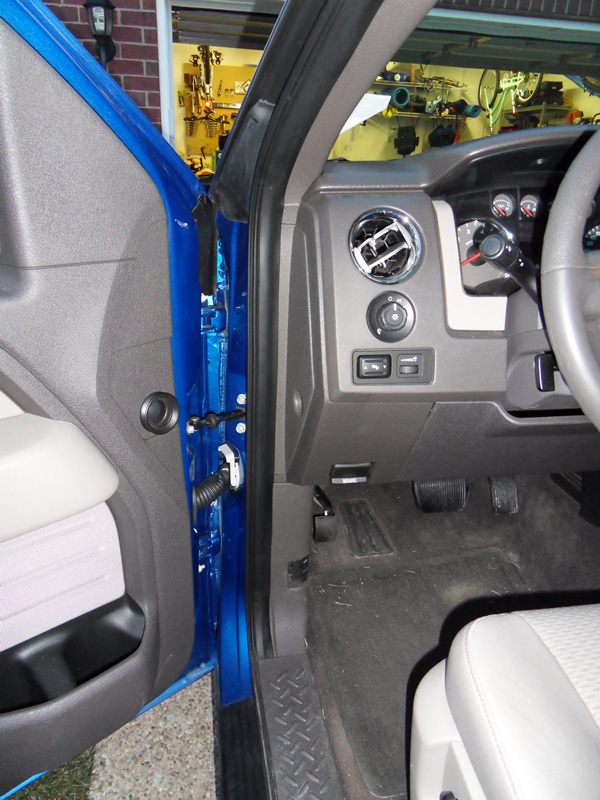
Through a small grommet under my supercab driver's side rear door:
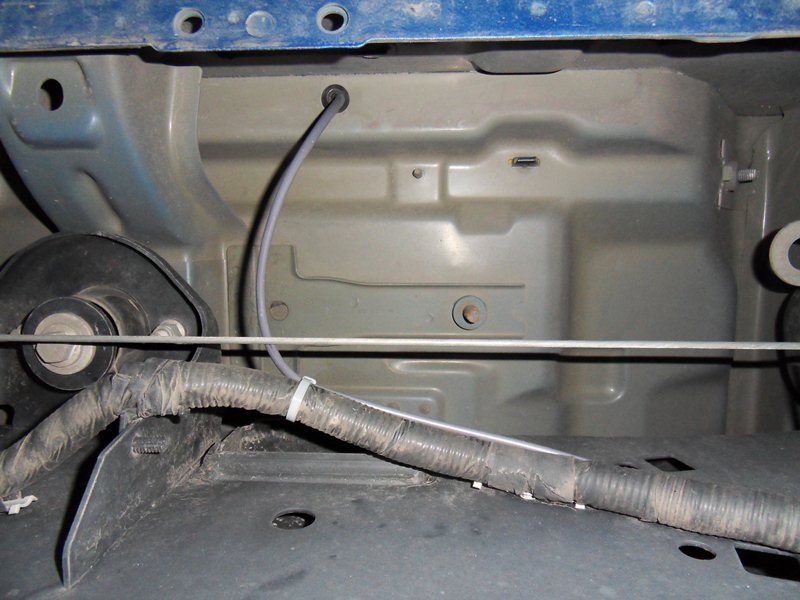
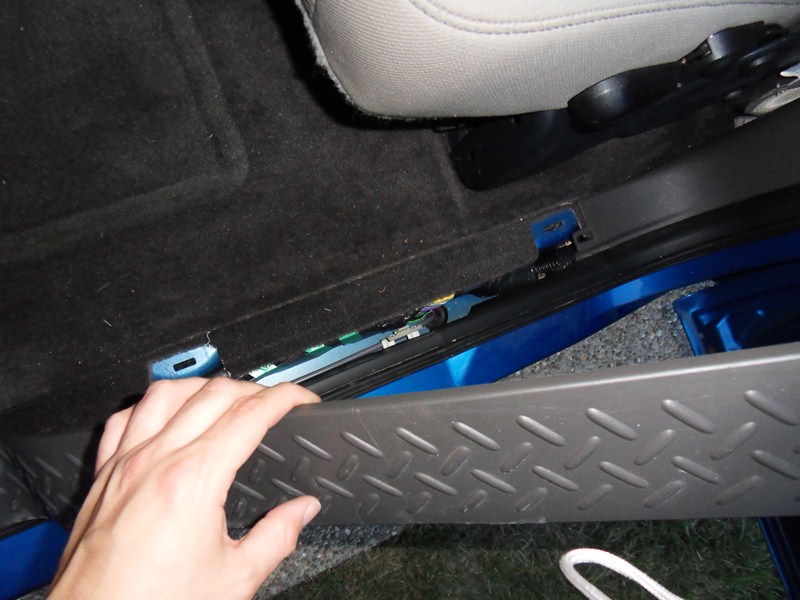
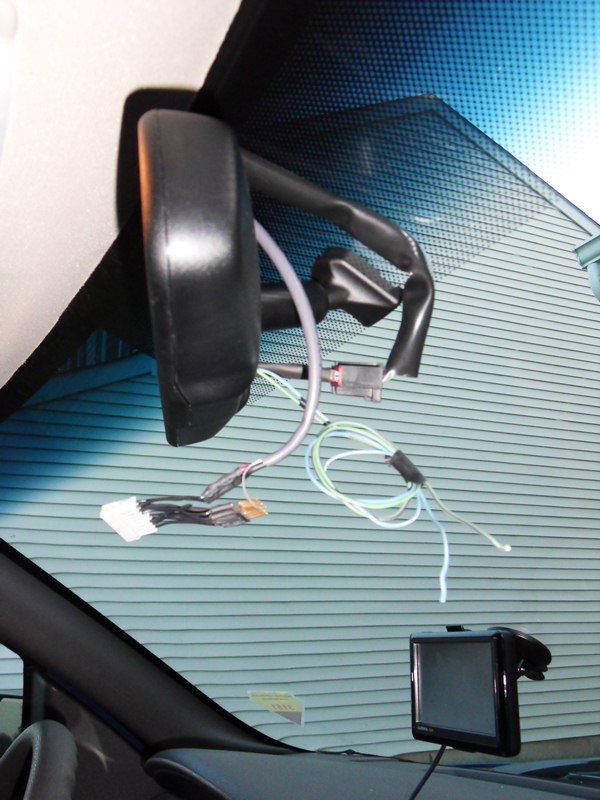
With the plastic door sill plate up I pulled the door seal away from the hinge edge of the cab and removed the a-pillar trim to run the cable behind the dash plastic and airbag in the a-pillar. Then I pushed it up under the headliner to get it to the mirror. The pictures below show the route:

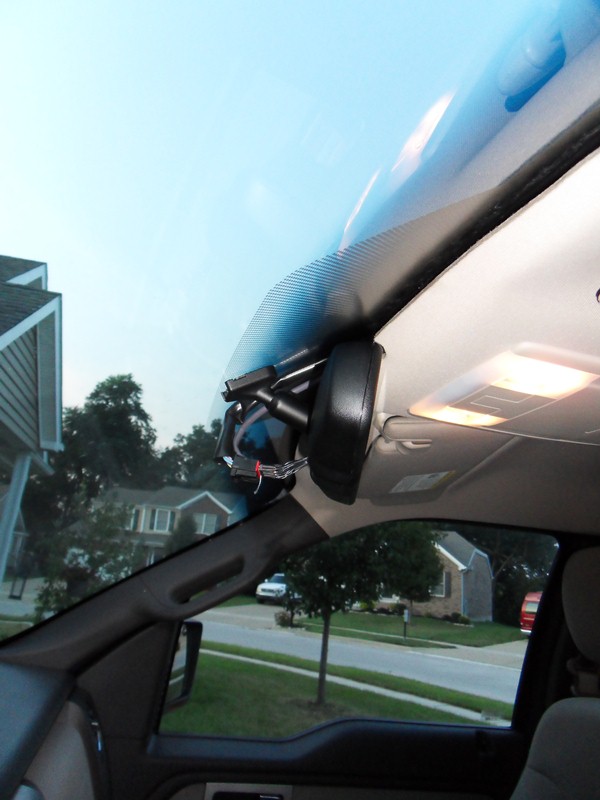
My existing headliner harness has the sync mic, reverse signal, compass and power already, so I made an adapter that converted the 10 pin MIC/COMPASS mirror to a 16 pin RVD/MIC/COMPASS mirror. The only two missing wires I needed for the 16 pin were the video + and video - signals that I ran in the new two wire cable.

I used the following pinouts and schematics for the camera and mirrors.
16 pin and 10 pin comparison:
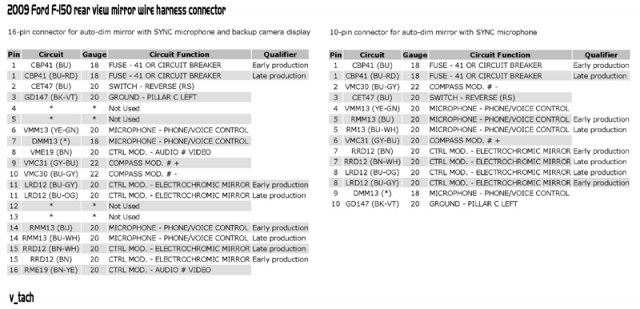
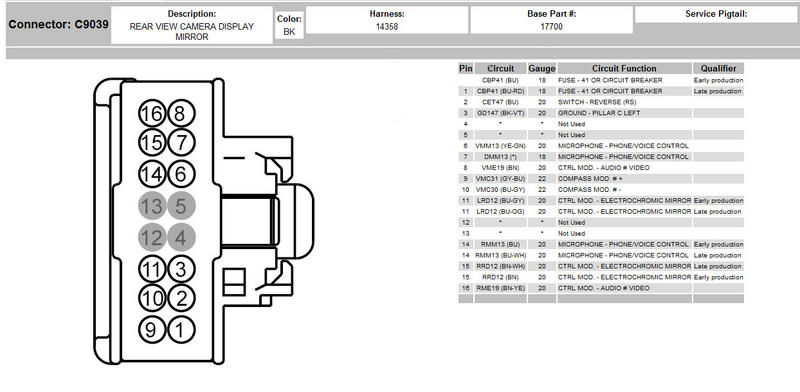
16 pin pinout and connector:
Camera pinout (I hacked off factory connector in favor of 4 pin trailer connector):
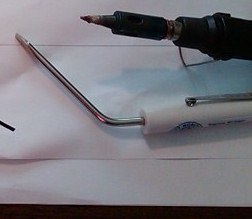
In order to remove the factory mirror from the glass to replace it with the 'RVD/MIC/COMPASS' mirror I used a small flathead screwdriver. I bent the shaft of the screwdriver so that I could insert it in the top of the mirror mount and release the locking spring. Then I used a plastic hammer to tap the mirror mount up and release it from the glued on wedge on the windshield. Many report trouble with this step, but it only took me about 30 seconds. I have done it four or five times now. Install the new mirror by sliding it on from the top and pressing down hard until the lock spring engages to hold it on.
The tool I made to remove the mirror:
With the plastic door sill plate up I pulled the door seal away from the hinge edge of the cab and removed the a-pillar trim to run the cable behind the dash plastic and airbag in the a-pillar. Then I pushed it up under the headliner to get it to the mirror. The pictures below show the route:
My existing headliner harness has the sync mic, reverse signal, compass and power already, so I made an adapter that converted the 10 pin MIC/COMPASS mirror to a 16 pin RVD/MIC/COMPASS mirror. The only two missing wires I needed for the 16 pin were the video + and video - signals that I ran in the new two wire cable.
I used the following pinouts and schematics for the camera and mirrors.
16 pin and 10 pin comparison:
16 pin pinout and connector:
Camera pinout (I hacked off factory connector in favor of 4 pin trailer connector):
In order to remove the factory mirror from the glass to replace it with the 'RVD/MIC/COMPASS' mirror I used a small flathead screwdriver. I bent the shaft of the screwdriver so that I could insert it in the top of the mirror mount and release the locking spring. Then I used a plastic hammer to tap the mirror mount up and release it from the glued on wedge on the windshield. Many report trouble with this step, but it only took me about 30 seconds. I have done it four or five times now. Install the new mirror by sliding it on from the top and pressing down hard until the lock spring engages to hold it on.
The tool I made to remove the mirror:
07-26-2011, 10:59 PM
#3
Member
Thread Starter
I installed the adapter by pushing the ten pin header into the factory headliner harness 10 pin female connector being careful to line up pin 1 on my adapter to pin 1 on the connector. The correct orientation locates pin 8 (vid+) and pin 16 (vid-) on the passenger side of the installed mirror.
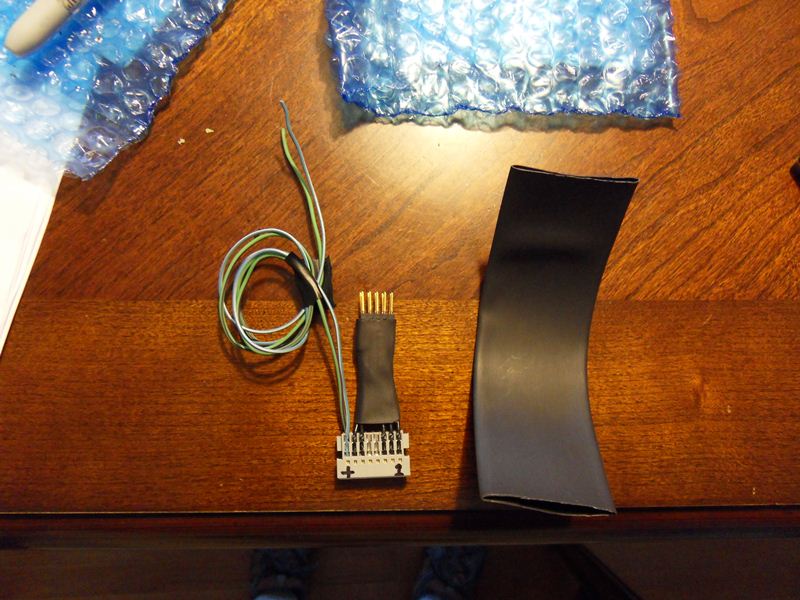
This picture shows two adapters I made. One is connected to the video wires and dangling while the other is installed between the factory harness and mirror. I was testing the new harness I was making for someone else:
If you connect all the wires from the 10 pin to the 16 pin in your adapter correctly you should end up with this:
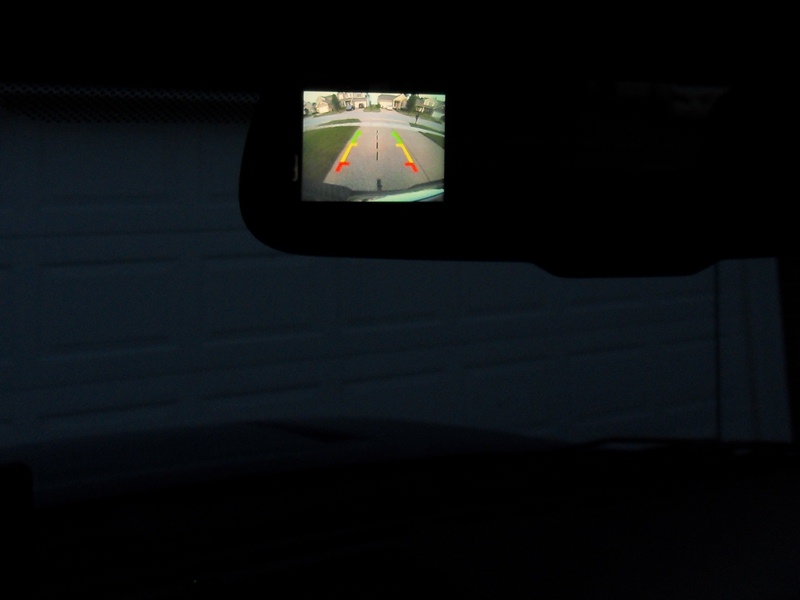
I bought the connectors below to make my adapter. I used 22 awg wire with an overall diameter of less than .054" as stated in the connector specification for a proper fit. The female 16 pin connector just needs to have the insulated wire ends pressed in using a flathead (the removal tool worked). I soldered the other end of the wire to the 10-pin header and used heat shrink to tidy it up:
https://www.alliedelec.com/search/pr...px?SKU=6181874
^used small flathead to force 22 gauge wire into slots
https://www.alliedelec.com/search/pr...px?SKU=5120783
^used female connector to hold pins in place while I soldered to the header above
Finished adapter with heatshrink to cover adapter and video cable:
If you have specific questions about how I did something you can post up or PM me. I'll try to respond when I can.
Thanks specifically to v_tach on F150forums for the info on the connectors. He was the first pioneer of the 10 to 16 adapter that I found on the internet.
This picture shows two adapters I made. One is connected to the video wires and dangling while the other is installed between the factory harness and mirror. I was testing the new harness I was making for someone else:
If you connect all the wires from the 10 pin to the 16 pin in your adapter correctly you should end up with this:
I bought the connectors below to make my adapter. I used 22 awg wire with an overall diameter of less than .054" as stated in the connector specification for a proper fit. The female 16 pin connector just needs to have the insulated wire ends pressed in using a flathead (the removal tool worked). I soldered the other end of the wire to the 10-pin header and used heat shrink to tidy it up:
https://www.alliedelec.com/search/pr...px?SKU=6181874
^used small flathead to force 22 gauge wire into slots
https://www.alliedelec.com/search/pr...px?SKU=5120783
^used female connector to hold pins in place while I soldered to the header above
Finished adapter with heatshrink to cover adapter and video cable:
If you have specific questions about how I did something you can post up or PM me. I'll try to respond when I can.
Thanks specifically to v_tach on F150forums for the info on the connectors. He was the first pioneer of the 10 to 16 adapter that I found on the internet.
Last edited by wjfawb0; 07-26-2011 at 11:00 PM. Reason: cleanup
07-26-2011, 11:48 PM
#4
Senior Member
Good stuff.
I might end up doing this myself some day as the factory equipment seems to be the way to go.
I bought an aftermarket wireless camera last year and ended up taking it back w/out installing it because most of my research indicated that they were crap.
Getting by fine w/out a camera but it would be nice to have just as an extra safety precaution or for hooking up a trailer.

 02-20-2012, 11:38 PM
#7
Junior Member

Join Date: Jun 2011
Location: East Coast of Michigan
Posts: 12
Likes: 0
Received 0 Likes
on
0 Posts

Hi wjfawb0,
Nice write up. I want to do the same type of camera on my 2010 STX and go to a monitor instead of the mirror. Did you just buy the handle w/camera hole and then the camera? Was it a CMOS or CCD and where did you buy it from? Or did you buy the OEM 2008 handle w/camera as a unit?
thanks,
geo
Nice write up. I want to do the same type of camera on my 2010 STX and go to a monitor instead of the mirror. Did you just buy the handle w/camera hole and then the camera? Was it a CMOS or CCD and where did you buy it from? Or did you buy the OEM 2008 handle w/camera as a unit?
thanks,
geo
Trending Topics
 02-21-2012, 10:59 AM
#9
Member
Thread Starter
My handle and camera came as one assembly. I believe it was off a superduty? I'm not certain. It was given to me. All I had to connect to the handle was power, gnd, video+ and video-. I leave power on to the camera via my towing package harness whenever the key is on. This prevents any delay from the video signal once I shift into reverse and the LCD is activated in the mirror.
You can buy a wireless kit, but I wanted a hardwired OEM camera and no extra monitors on my dash. Teh wiring was pretty simple in the rear and running it along the truck. I've done a good bit of wiring in my life, though.
You can buy a wireless kit, but I wanted a hardwired OEM camera and no extra monitors on my dash. Teh wiring was pretty simple in the rear and running it along the truck. I've done a good bit of wiring in my life, though.
02-21-2012, 02:36 PM
#10
Junior Member
Join Date: Jun 2011
Location: East Coast of Michigan
Posts: 12
Likes: 0
Received 0 Likes
on
0 Posts
Thanks. I'll look for one otherwise I'll make one from parts. I can get a tailgate handle w/camera hole for $35 and there are various hole cameras from $17-120 depending on CMOS or CCD. CCD gives a better picture. There is a foldable mirror for $40 that would fit on the dash to the left of the instrument cluster. When I do it I'll post it.
geo
geo
Last edited by greybeard59; 02-21-2012 at 06:09 PM.