
Truck is finished for now!
 11-05-2013, 01:02 AM
#21

www.Blendmount.com
Did you use their power tap? If so, how in the WORLD did you get the brass 'blades' into the OEM connector??? I tried and tried, and finally gave up, and just use T- taps and connected to the OEM wiring directly. So frustrating. But hey, it works now.
Did you use their power tap? If so, how in the WORLD did you get the brass 'blades' into the OEM connector??? I tried and tried, and finally gave up, and just use T- taps and connected to the OEM wiring directly. So frustrating. But hey, it works now.
 Regardless, I decided to just use the Power Tap wires and just hard wire it. I have the Power Tap they sent in replacement sitting here collecting dust.
 11-05-2013, 01:08 AM
#22
Senior Member


Did you find that after installing the blend mount your V1 was cocked a little to the right? No matter how I adjusted the mirror I couldn't get it to point straight and still be able to see. Finally used a longer screw that came with the mount with 3 rubber washers on the right side to get it to point straight.
I'm also not a big fan of their mirror tap. I prefer this kit:
http://www.safe-n-sound1.com/Valenti...at%20Mute.html
I used this kit in my old Explorer and in my 150 and it is great. The mute button is invaluable! In the Explorer I mounted the mute button on the back side of the turn signal lever. Very easy to reach up and hit it. In the 150 it's just laying on the floor in front of the center console until I work up the nerve to dremel a notch in the dash panel to mount it. I just used a sheet metal screw to ground the ground wire behind the dash and tapped into the trailer brake fuse on the hot side for power. I did dremel a notch in the fuse box cover for the wire to fit.
11-05-2013, 01:17 AM
#23
Pretty cool. I wonder if I could get one longer than 4'. I would think it would be a bit longer to get from the center of windshield, around A-Pillar, through dash and to center console.. The mute button definately seems pretty cool. Only reason why I would do this from just hard wiring it. Thanks for posting it up!
The following users liked this post:
Boatman_FX4 (11-15-2013)
The following users liked this post:
Boatman_FX4 (11-15-2013)
11-05-2013, 11:46 AM
#26
Senior Member
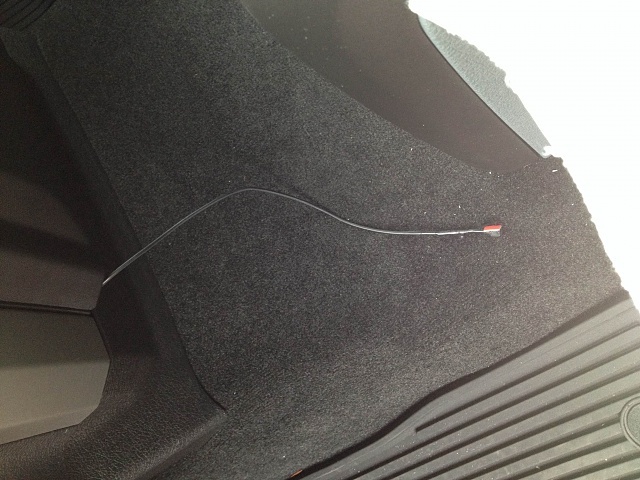
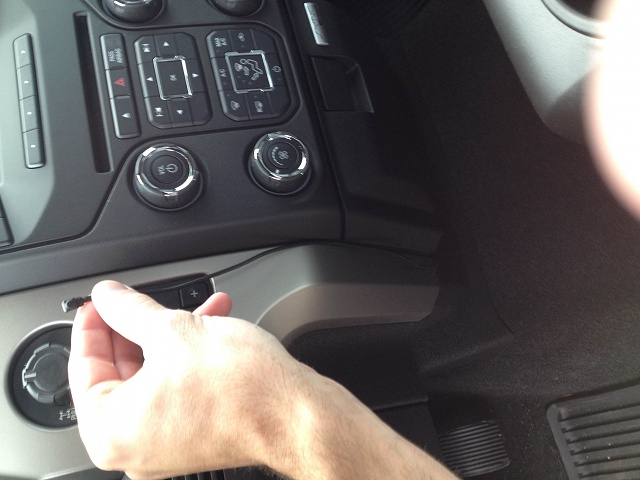
I think the length of the mute button is pretty good. I ran it down the passenger a pillar, just like remote start, then along the floor behind the dash and you can see how much I have left. It will still reach up as high as the 4x4 switch


The following users liked this post:
Boatman_FX4 (11-15-2013)
11-05-2013, 04:58 PM
#28
Senior Member
I had the same issue with my Power Tap. I actually had them send me a replacement one because I had destroyed it tried to get it in. They said they had never heard of anyone having the issue. Regardless, I decided to just use the Power Tap wires and just hard wire it. I have the Power Tap they sent in replacement sitting here collecting dust.
Regardless, I decided to just use the Power Tap wires and just hard wire it. I have the Power Tap they sent in replacement sitting here collecting dust.
11-05-2013, 05:54 PM
#29
Lol. They are full of ****. I did this a yr ago with my passport. Kept bending the damn things. I finally called them with much frustration. They said this accord a lot and I may have to sand the prongs down. I did this with my dremol and eventually got then squeezed in there.
11-15-2013, 06:23 PM
#30
Indecisive Member
Thread Starter
when i first installed it the left one was hyper blink but the new recons have built in resisitors so i pulled it out and messed with the wires and made sure nothing was touching metal or getting pinched and put it back in and its been two weeks now with zero problems? kinda weird but something just had to be shorting it out by touching somewhere