
OEM Raptor grill with Boost-bars hood cap... help
 04-03-2017, 10:55 AM
#1
Senior Member
Thread Starter
iTrader: (1)


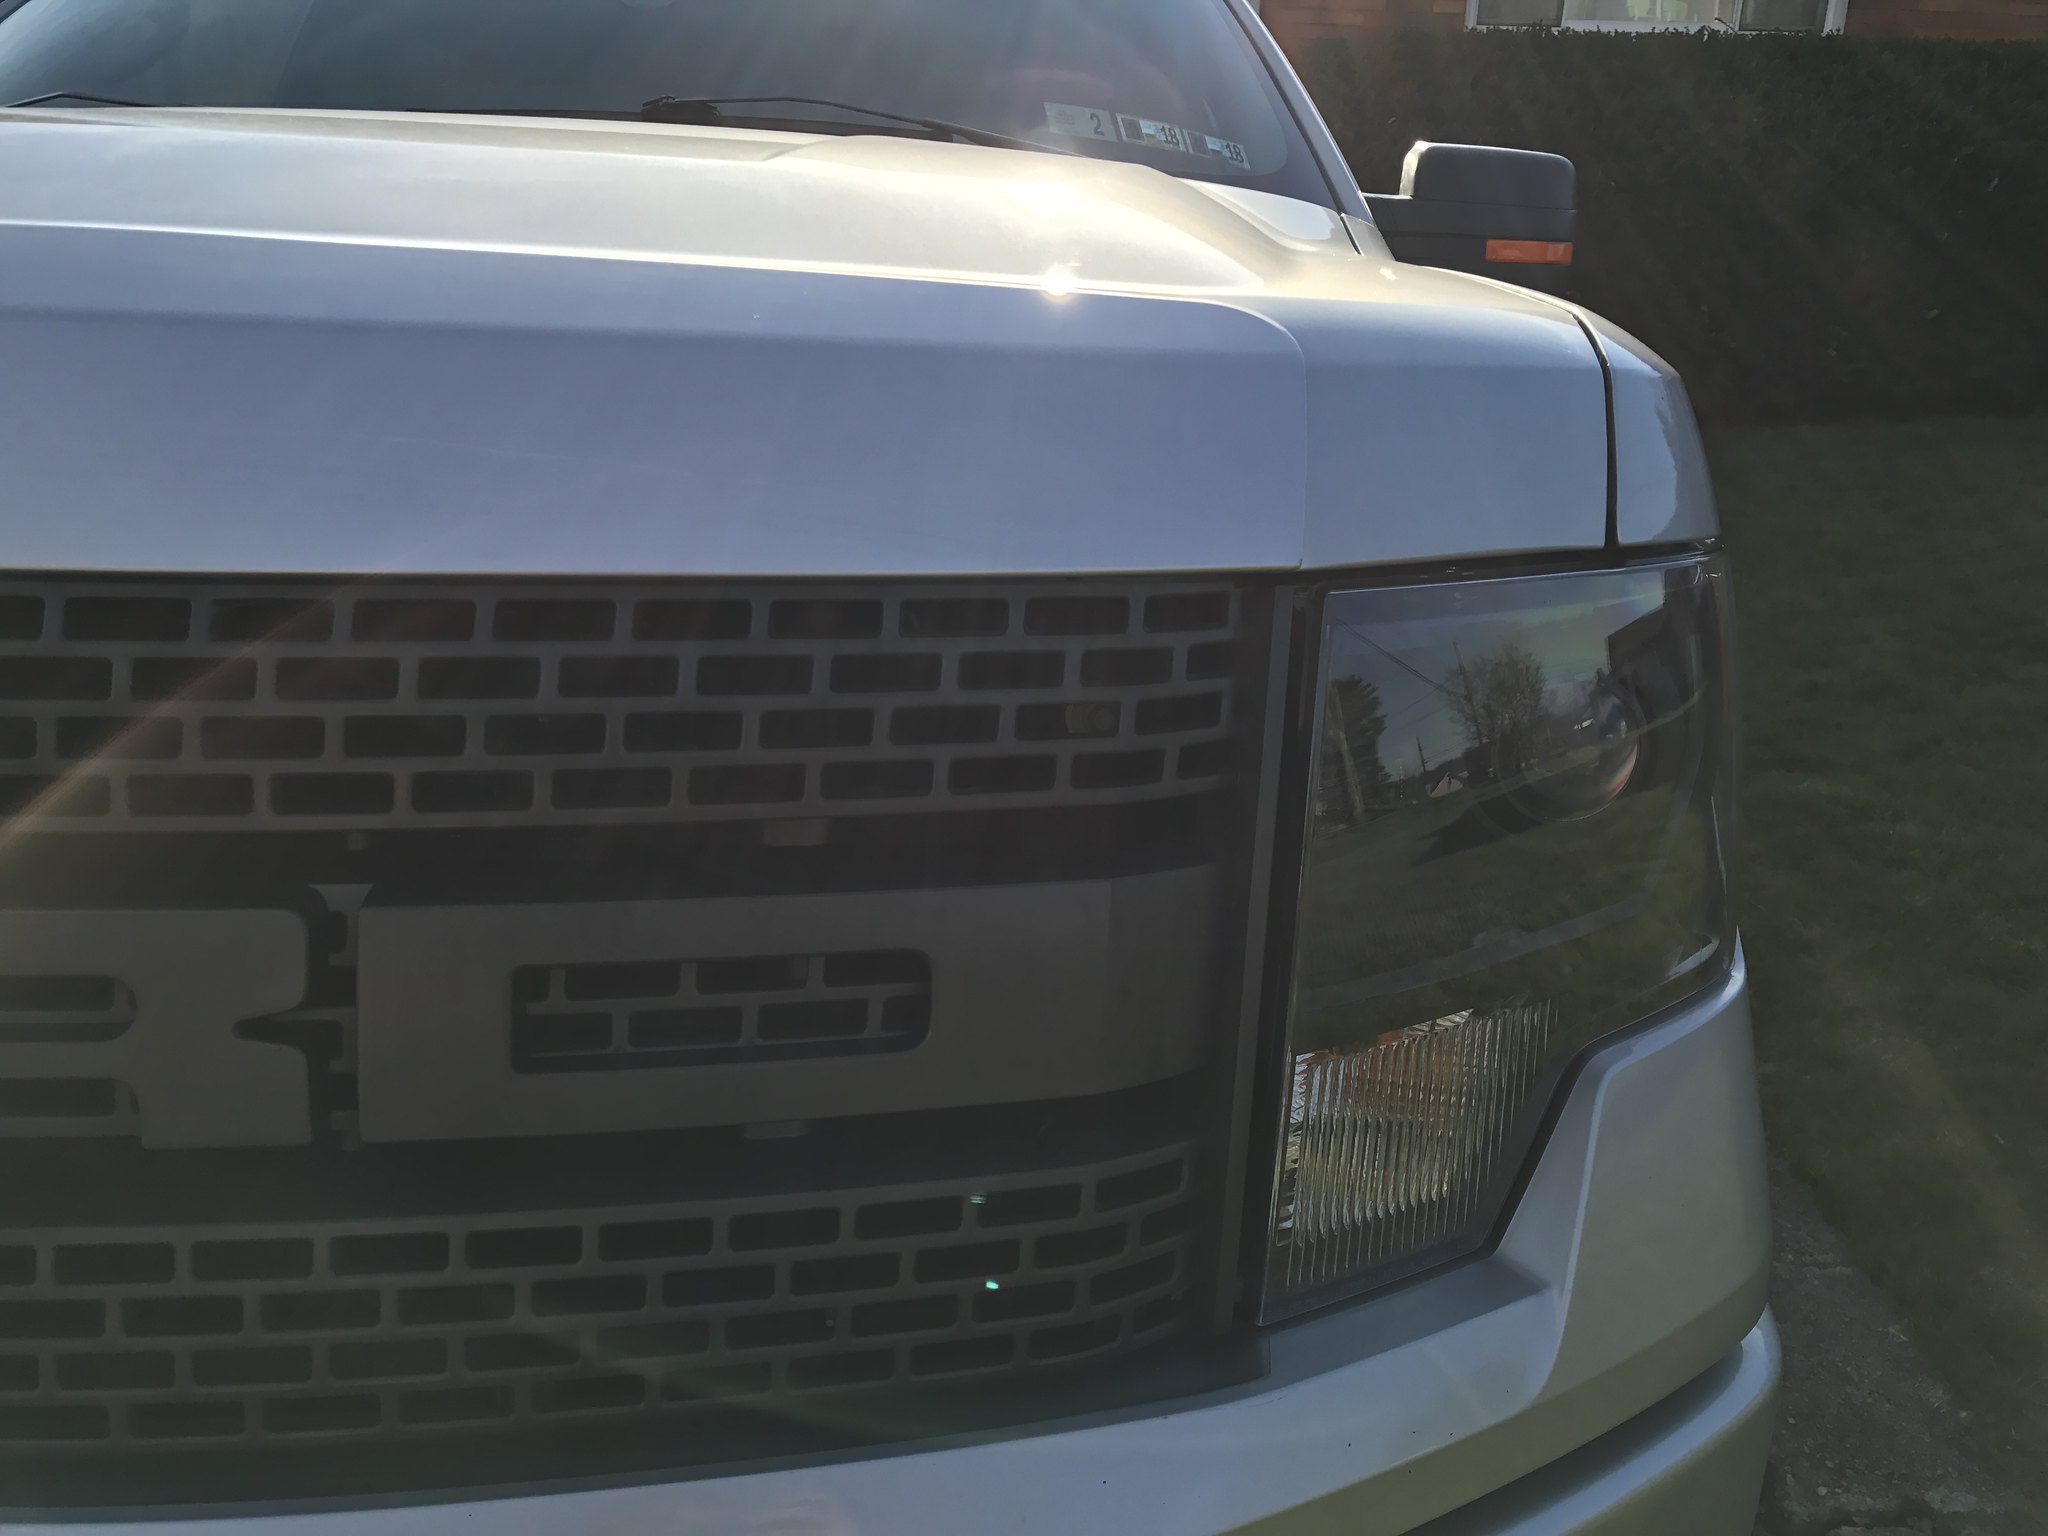
So I installed an OEM raptor grill with the boost-bars hood cap this weekend following these instructions.
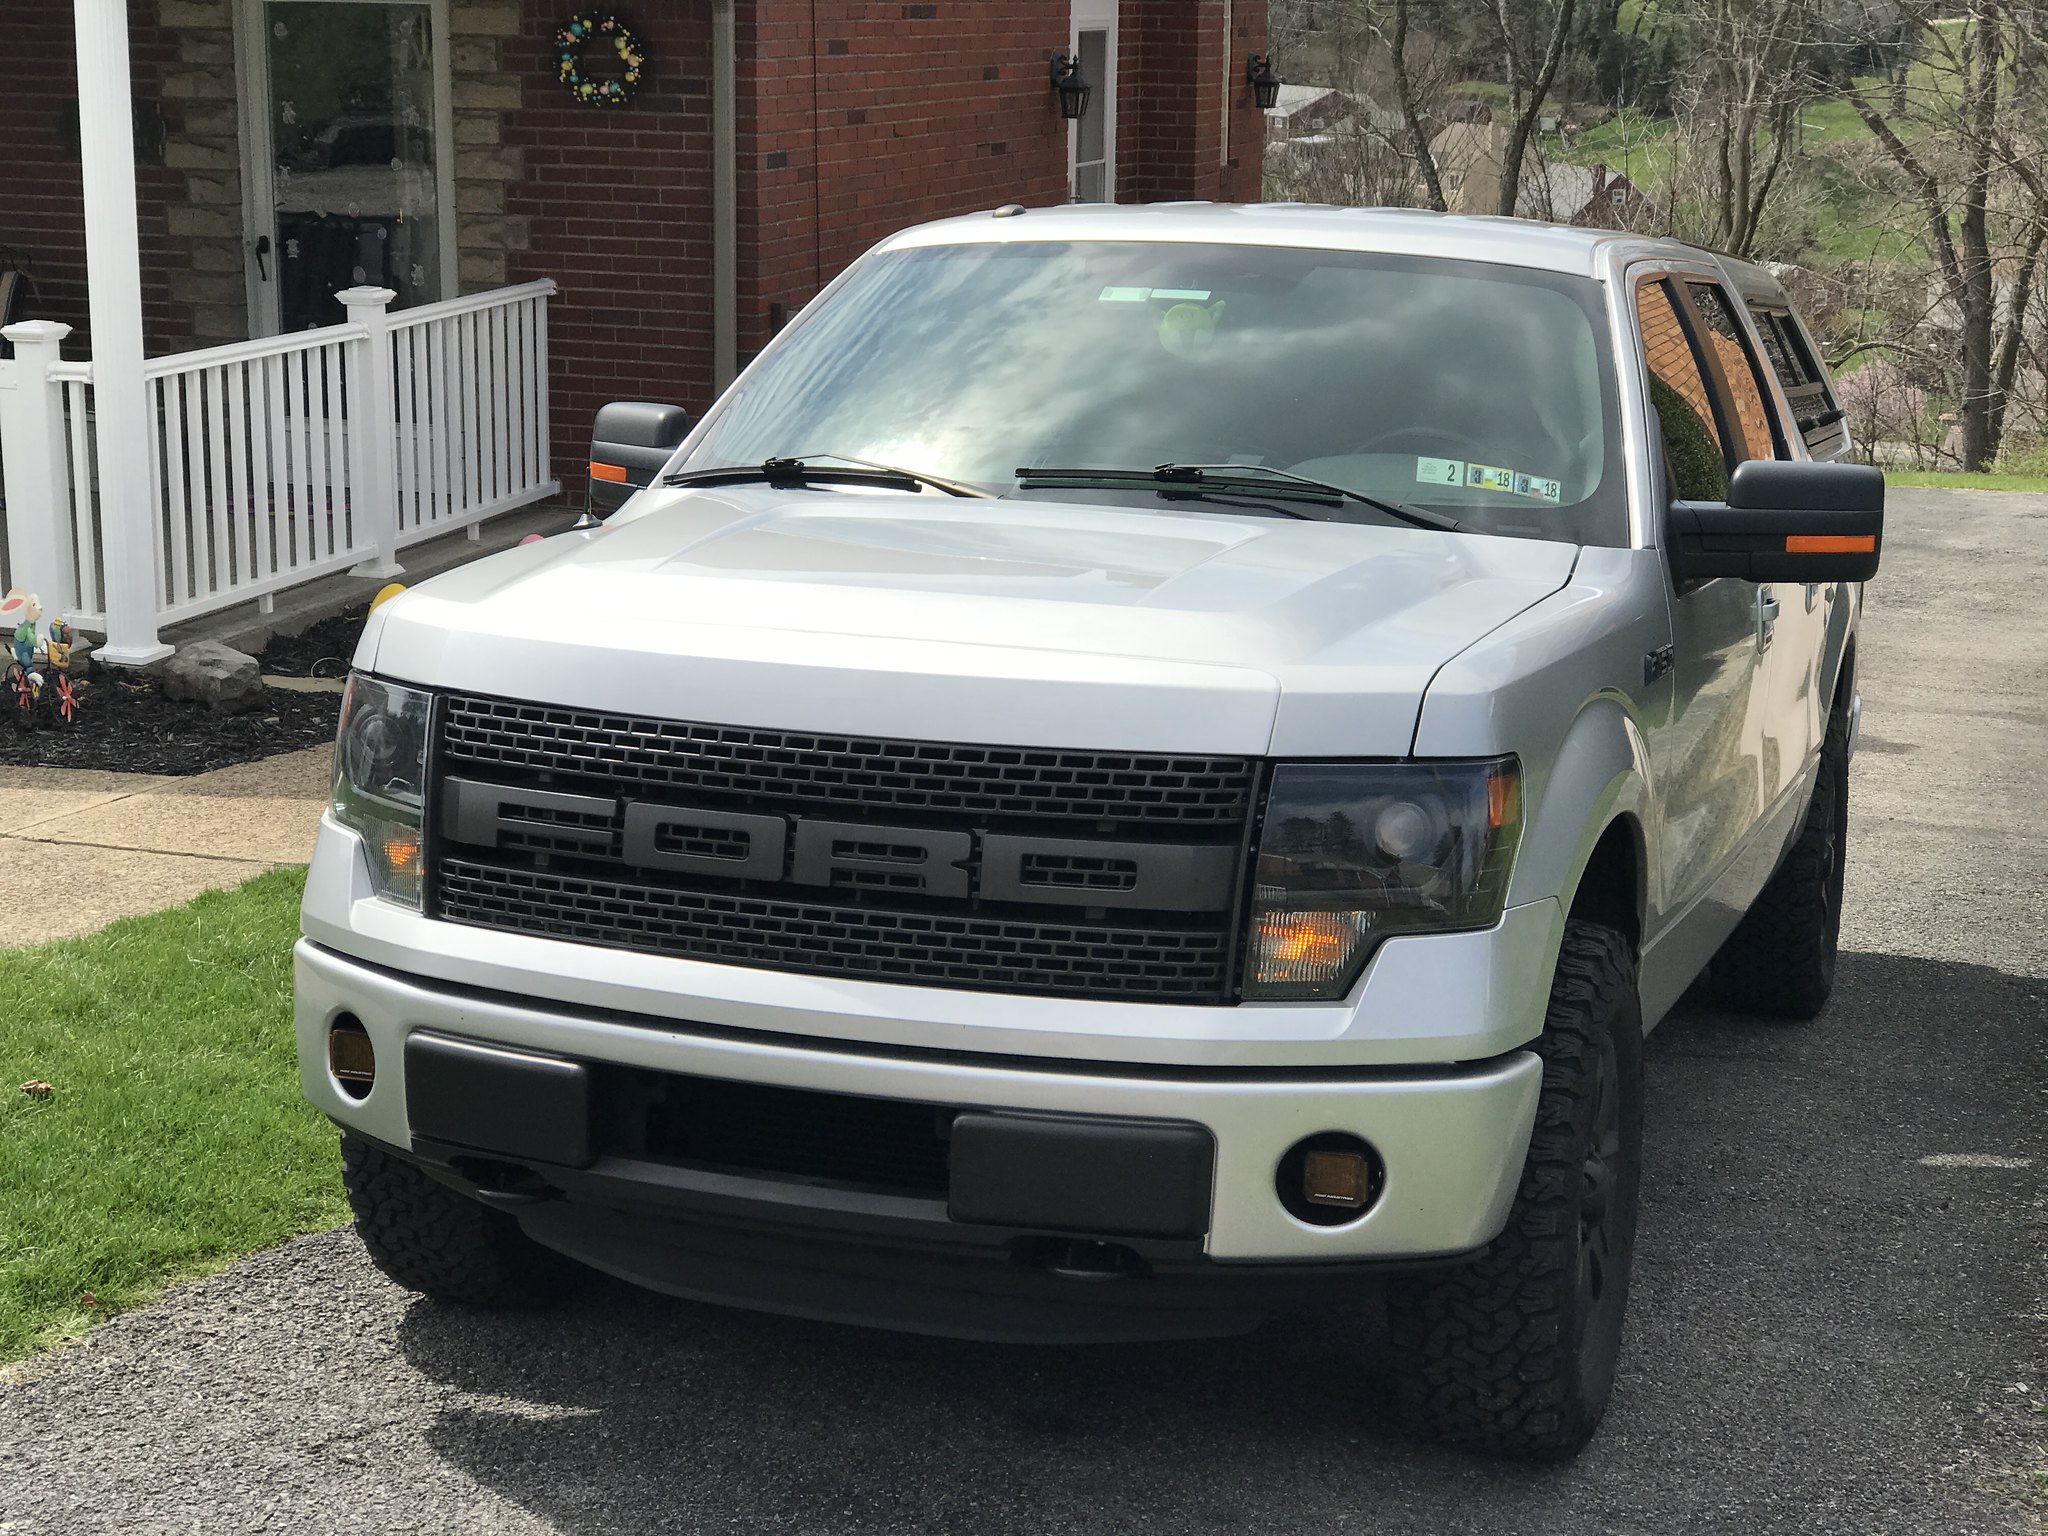
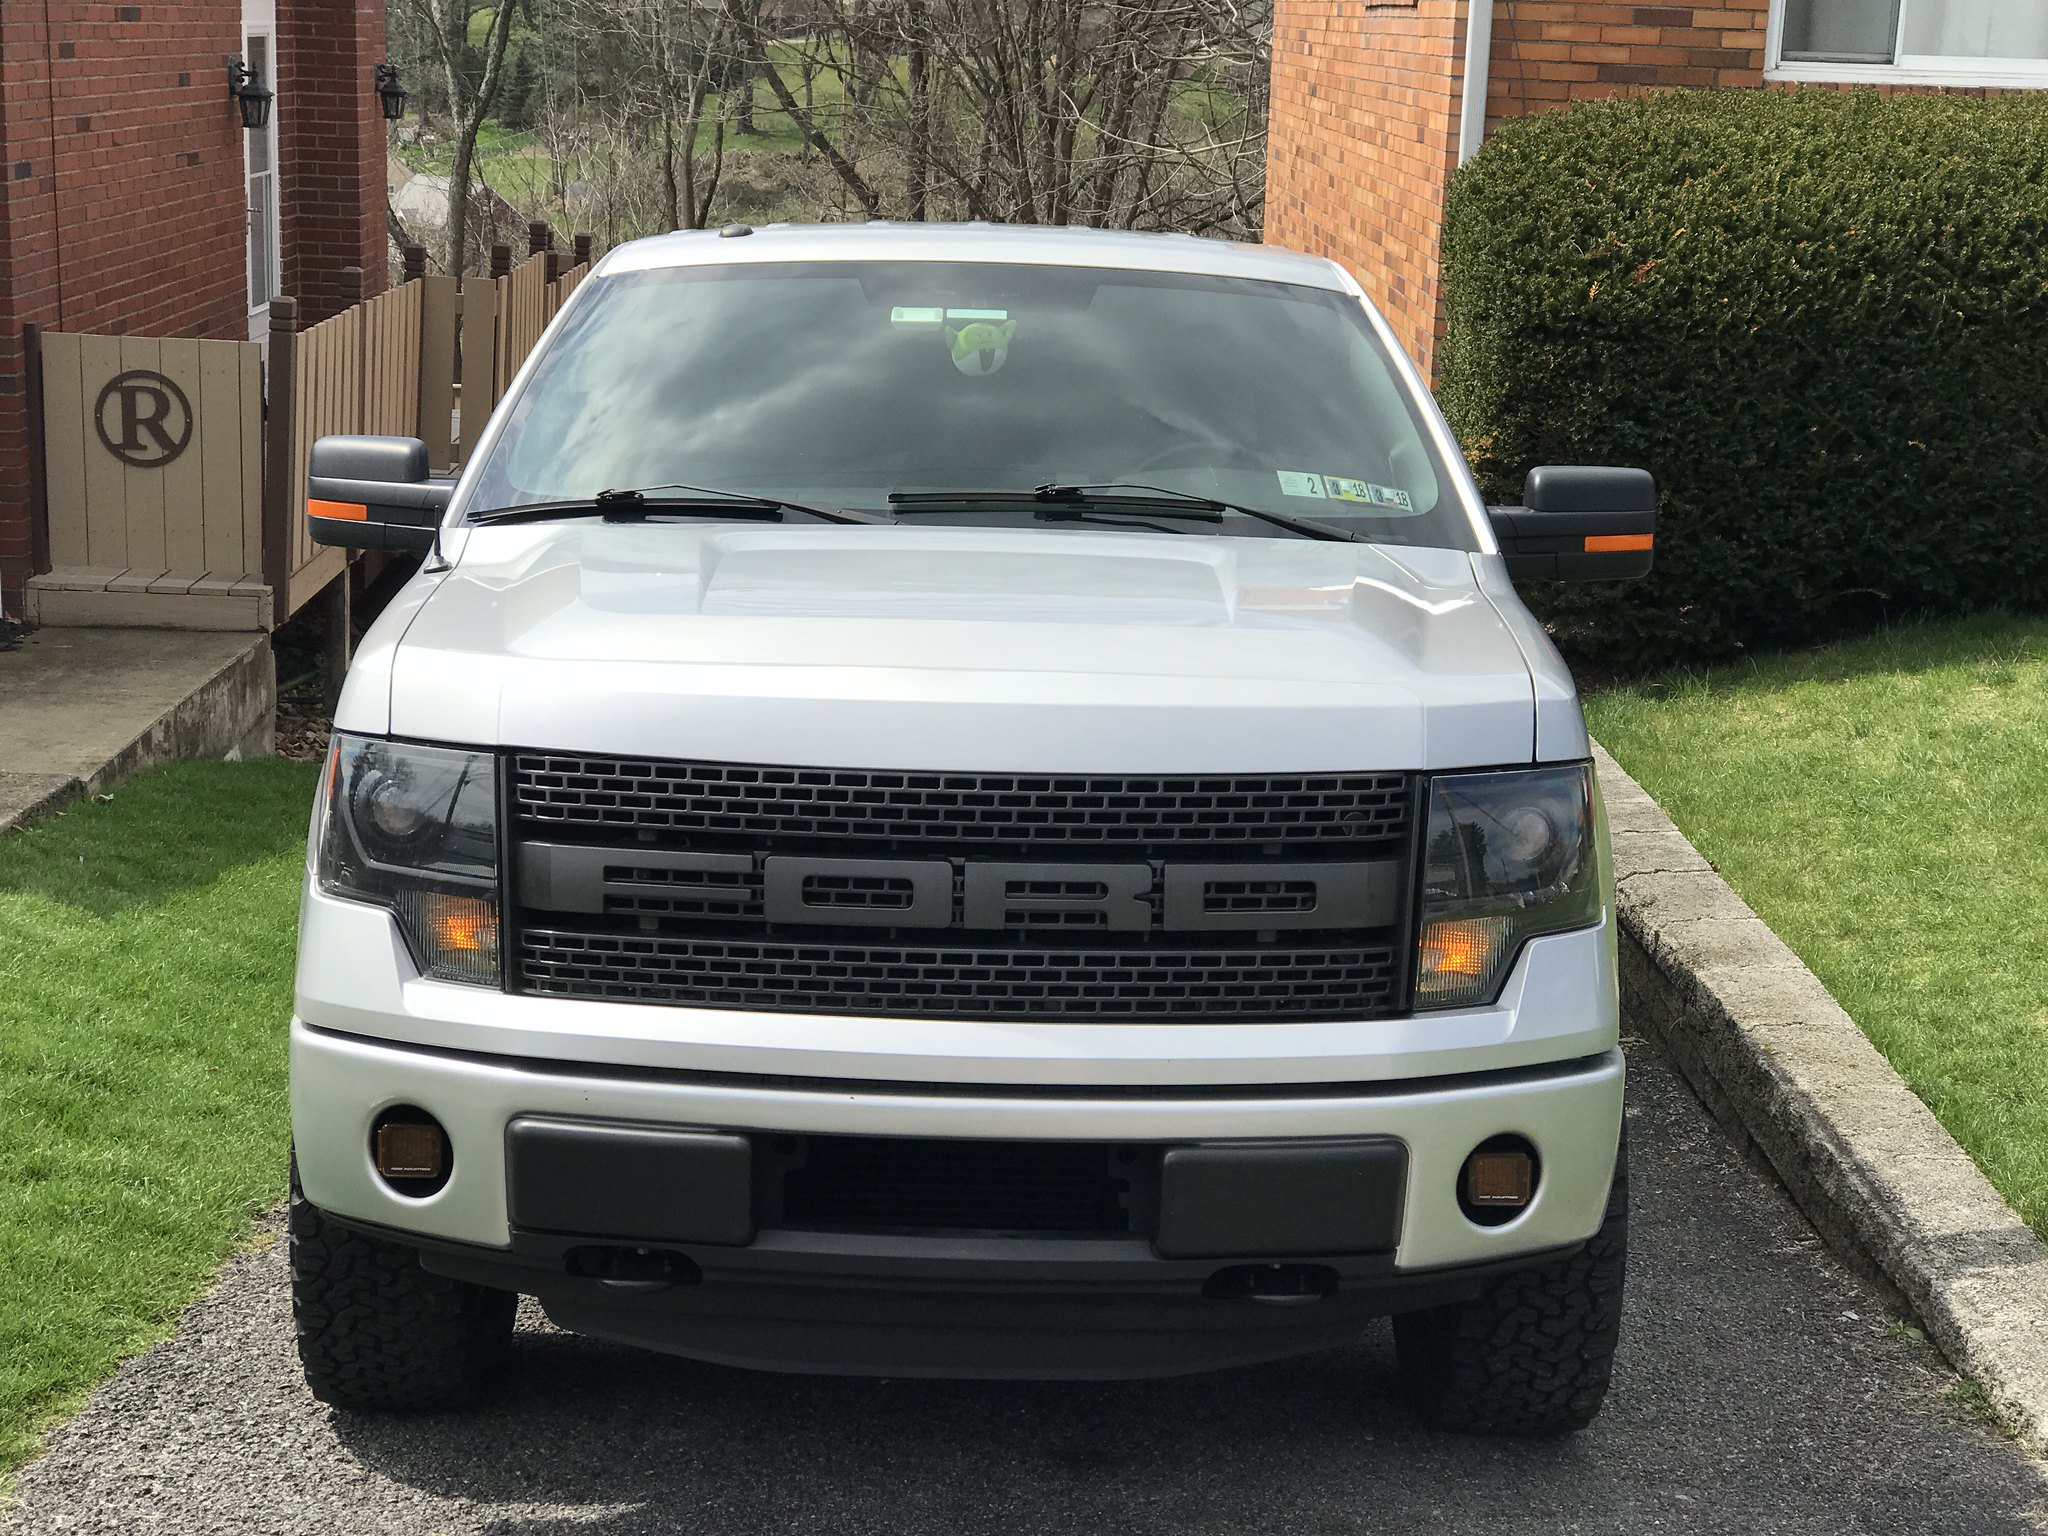
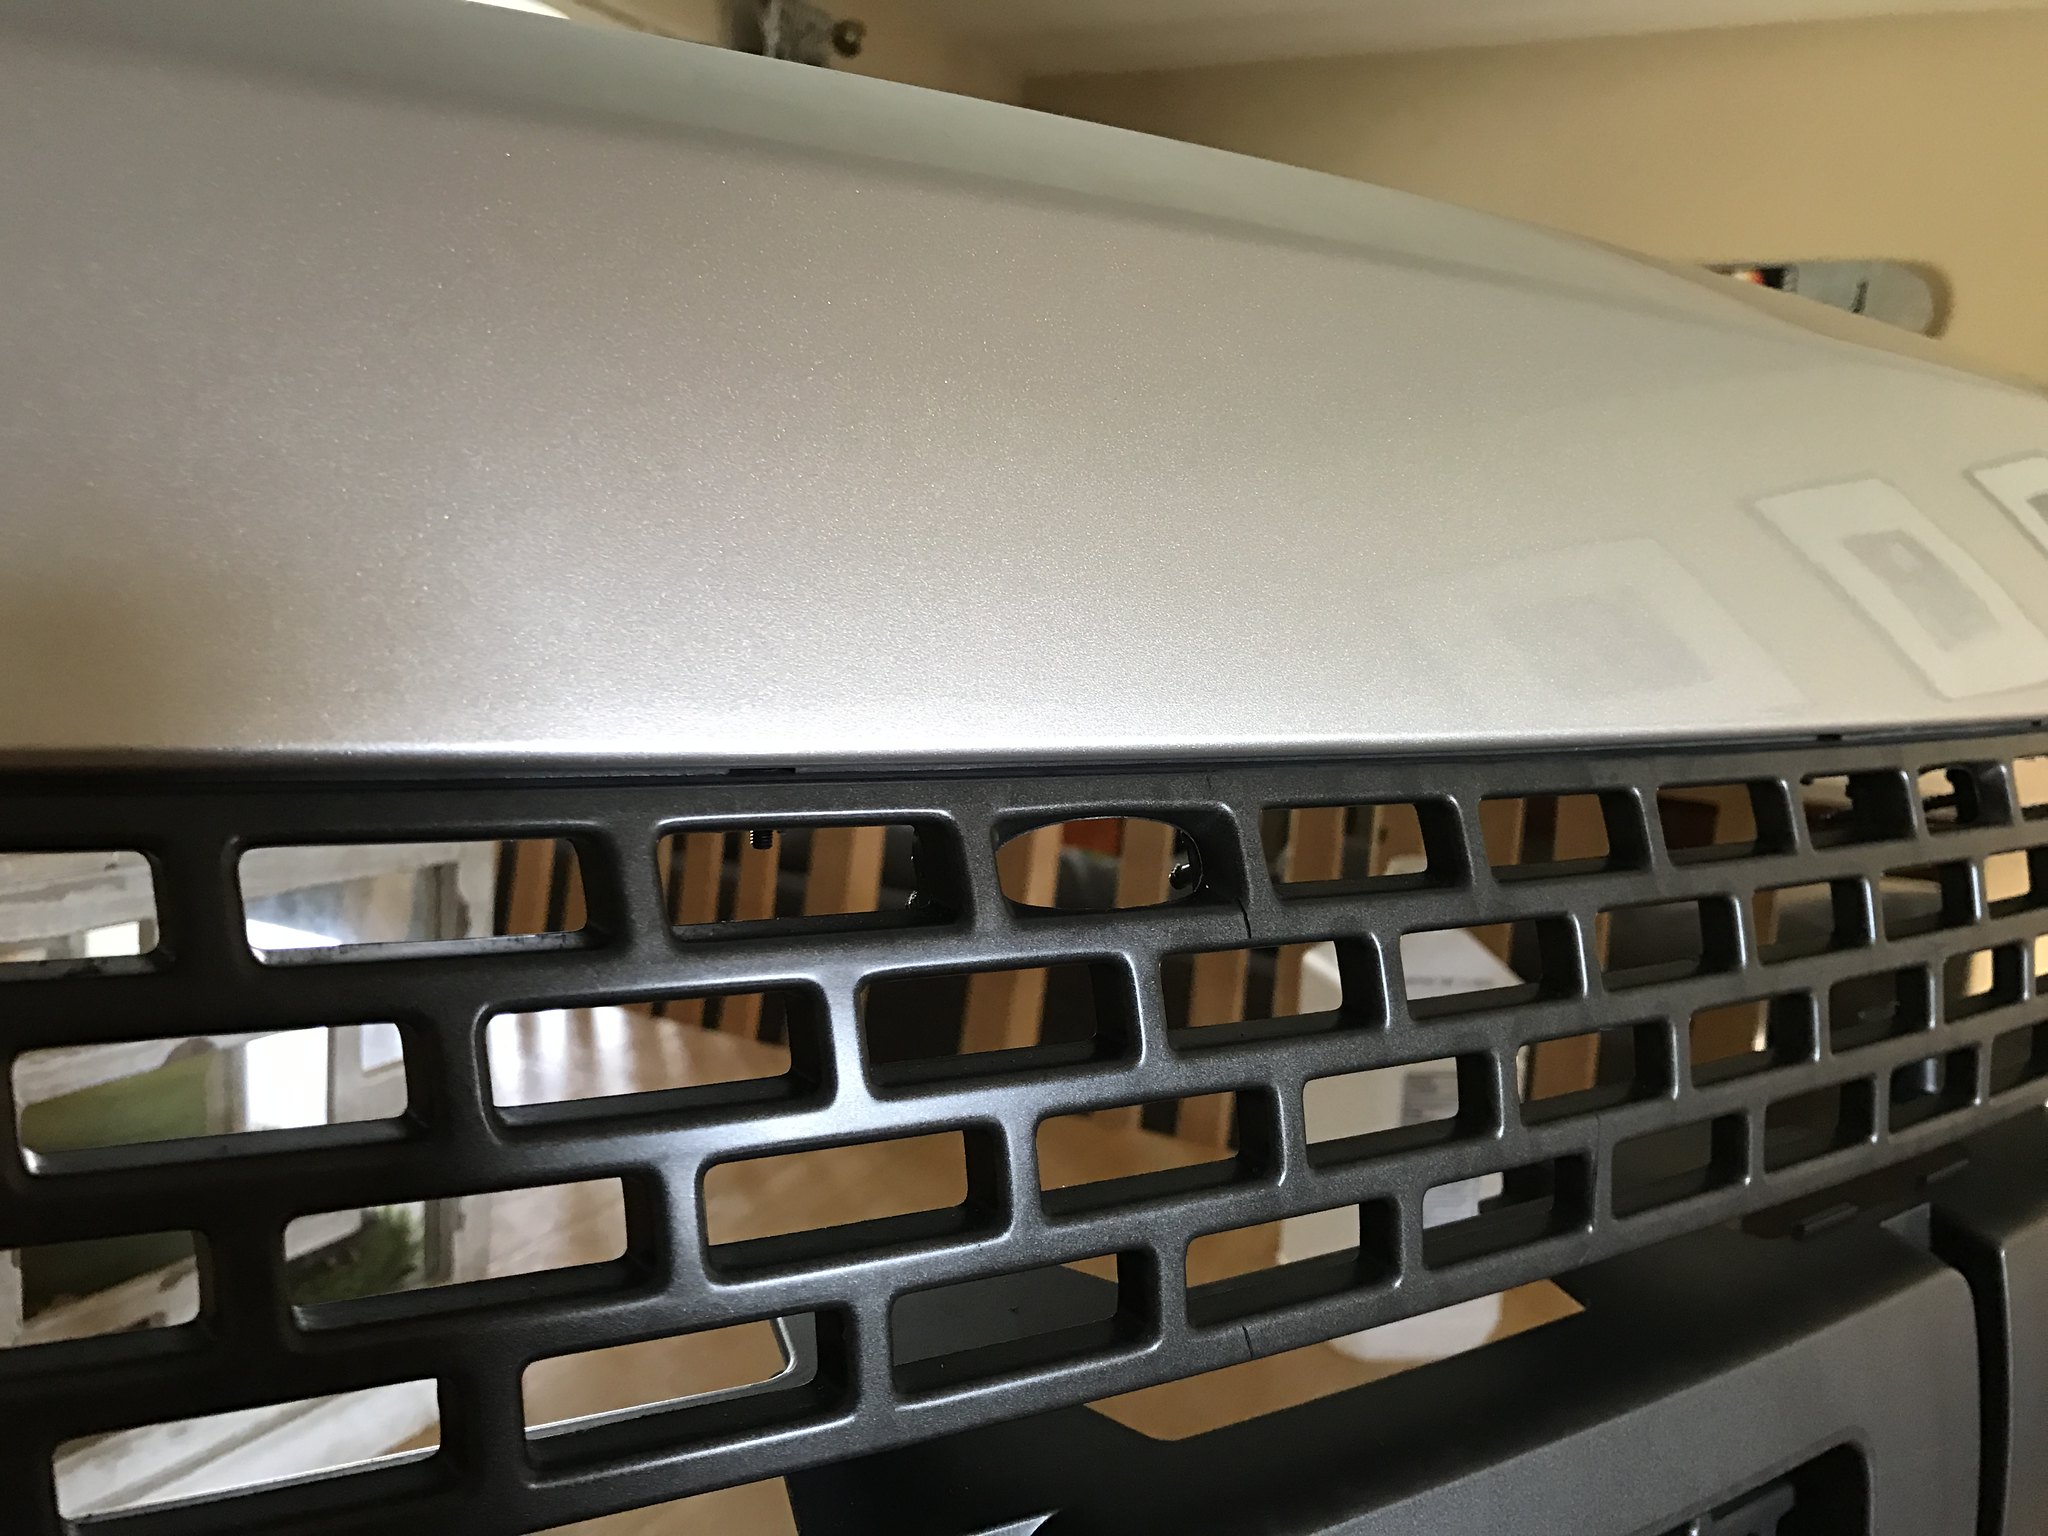
Looks good from far, but far from good. Closer inspection once everything had been tightened down and the hood closed revealed these issues.

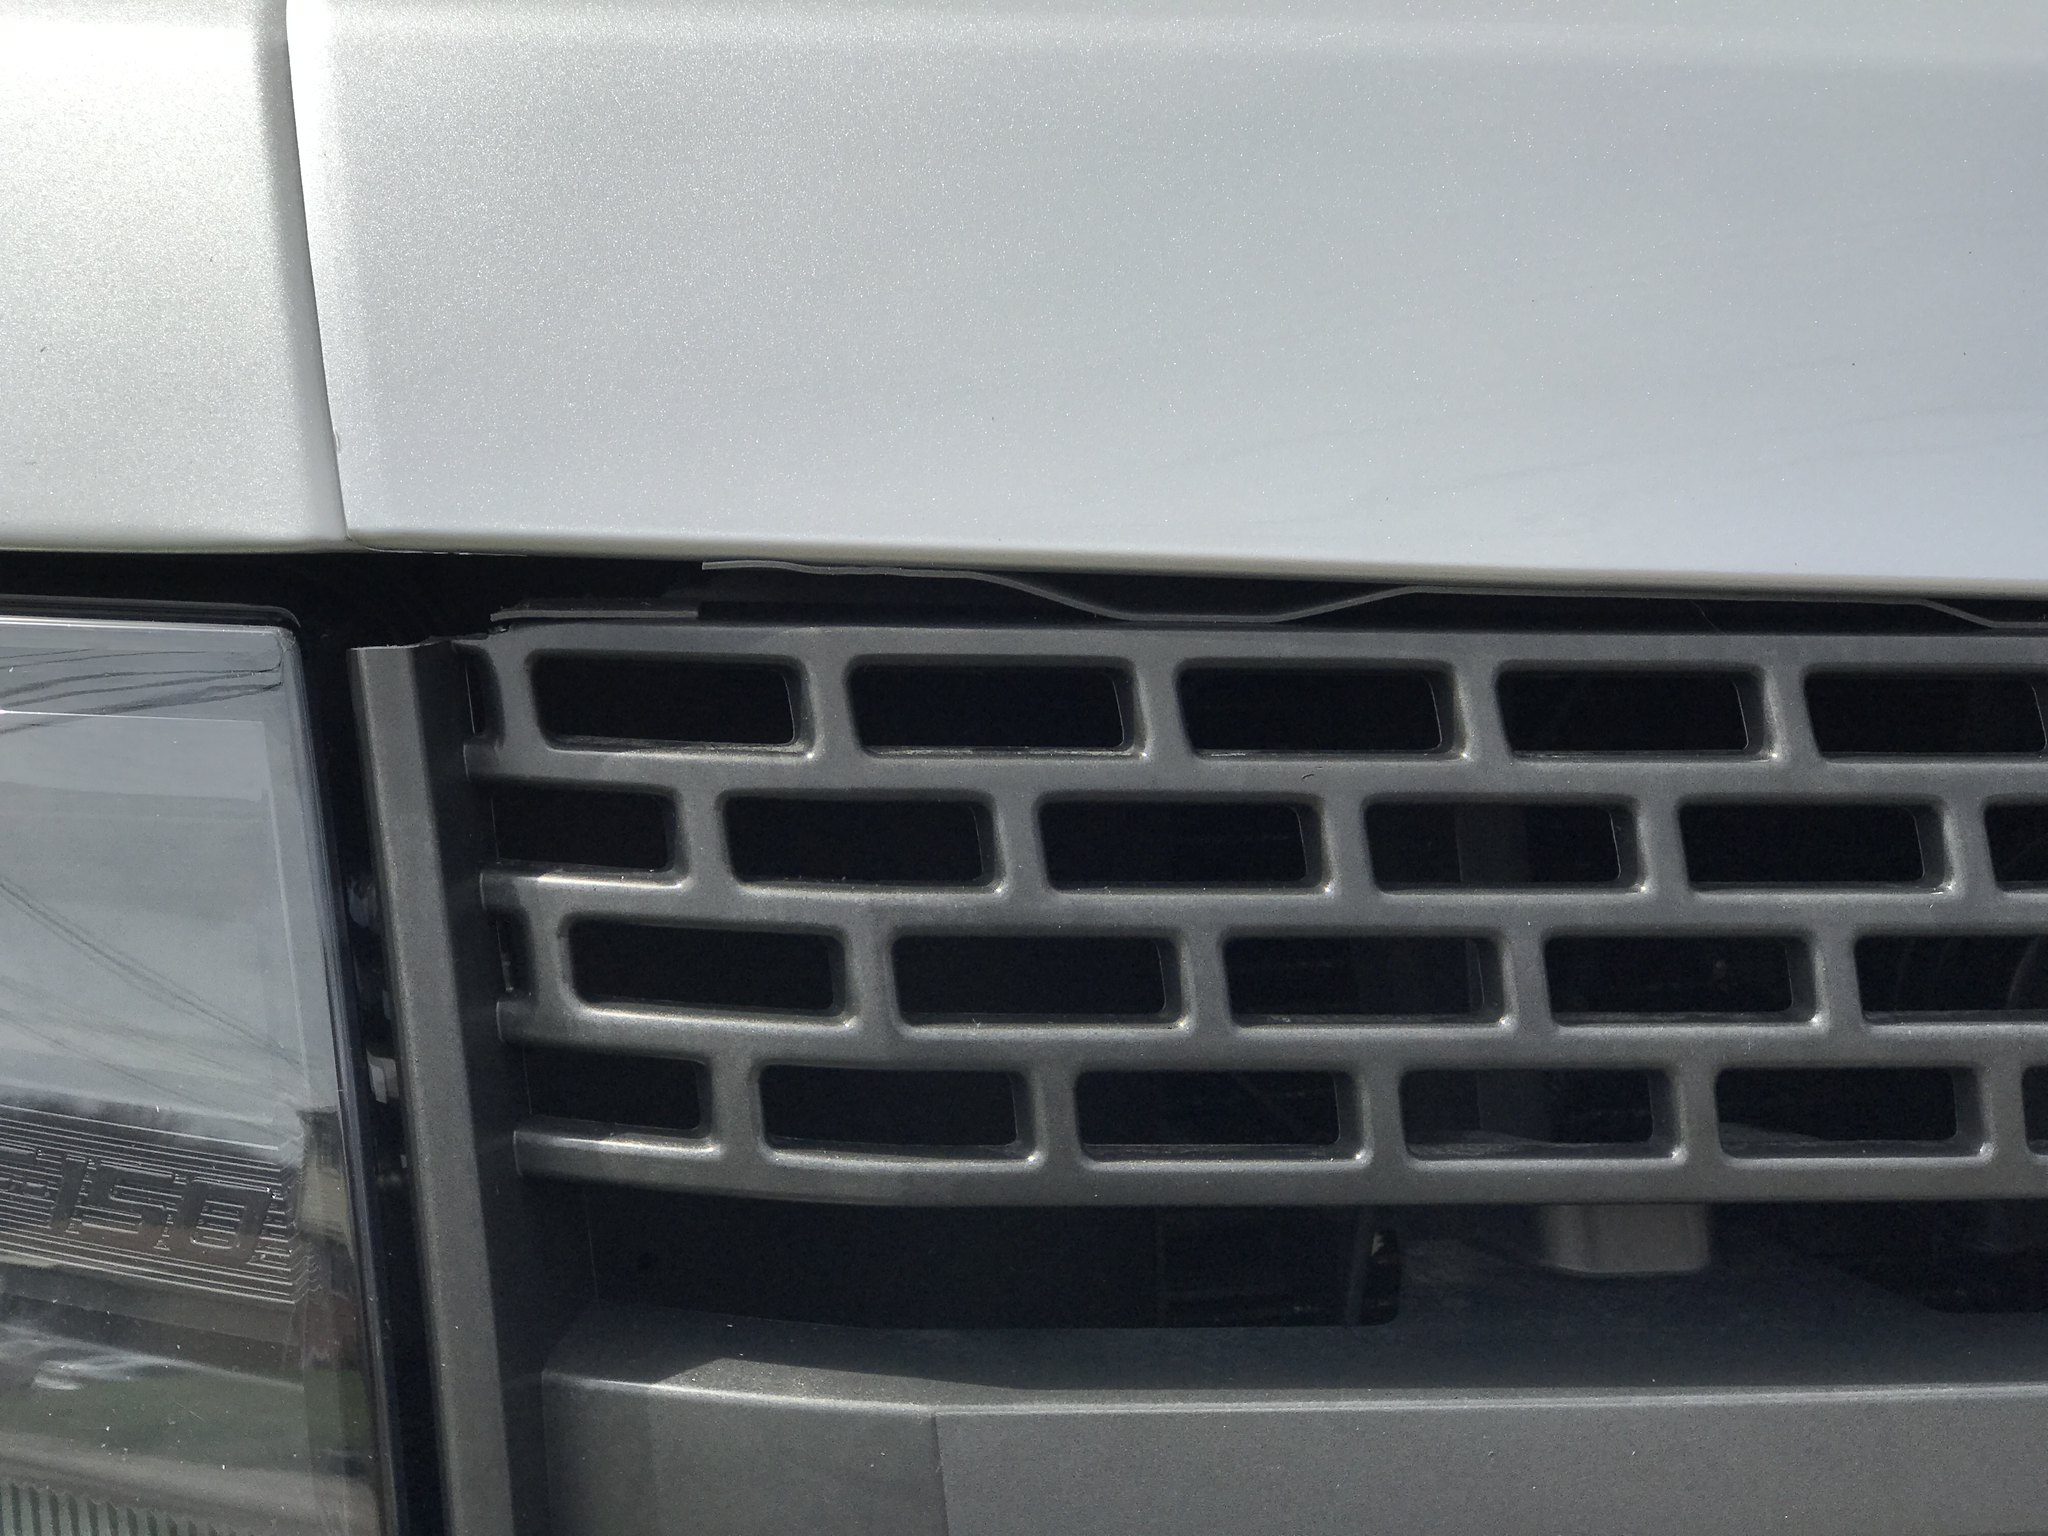
So it looks like I will need to pull it all back off and find some other way to secure the cap to the grill. I was so ****ing pissed when I saw it, I know I would break something if I tried again, so I left it for the time being.
My next thought was to drill some holes and use some pop rivets for a clean install, but I don't think there will be room to get a pop rivet gun in there to install them. So I am left with some small screws and nylock nuts to secure it all together. Unless one of you has a better idea.
My biggest concern is that once I tighten it all down with screws and nuts that I may stress the hood cap and crack it. Certainly don't want to do that since the cap with paint cost me double what the grill did. Any input would be greatly appreciated. Thanks in advance.
Looks good from far, but far from good. Closer inspection once everything had been tightened down and the hood closed revealed these issues.
So it looks like I will need to pull it all back off and find some other way to secure the cap to the grill. I was so ****ing pissed when I saw it, I know I would break something if I tried again, so I left it for the time being.
My next thought was to drill some holes and use some pop rivets for a clean install, but I don't think there will be room to get a pop rivet gun in there to install them. So I am left with some small screws and nylock nuts to secure it all together. Unless one of you has a better idea.
My biggest concern is that once I tighten it all down with screws and nuts that I may stress the hood cap and crack it. Certainly don't want to do that since the cap with paint cost me double what the grill did. Any input would be greatly appreciated. Thanks in advance.
 04-03-2017, 12:42 PM
#2

atleast your hood cap is flush. my driver side sticks up a little. about a year later I got an email saying they have found a solution but I would have to ship mine back to them so they could then send me another. I told them no thank you, that I couldn't be without a grill for my truck
04-03-2017, 01:21 PM
#3
Senior Member
Thread Starter
iTrader: (1)
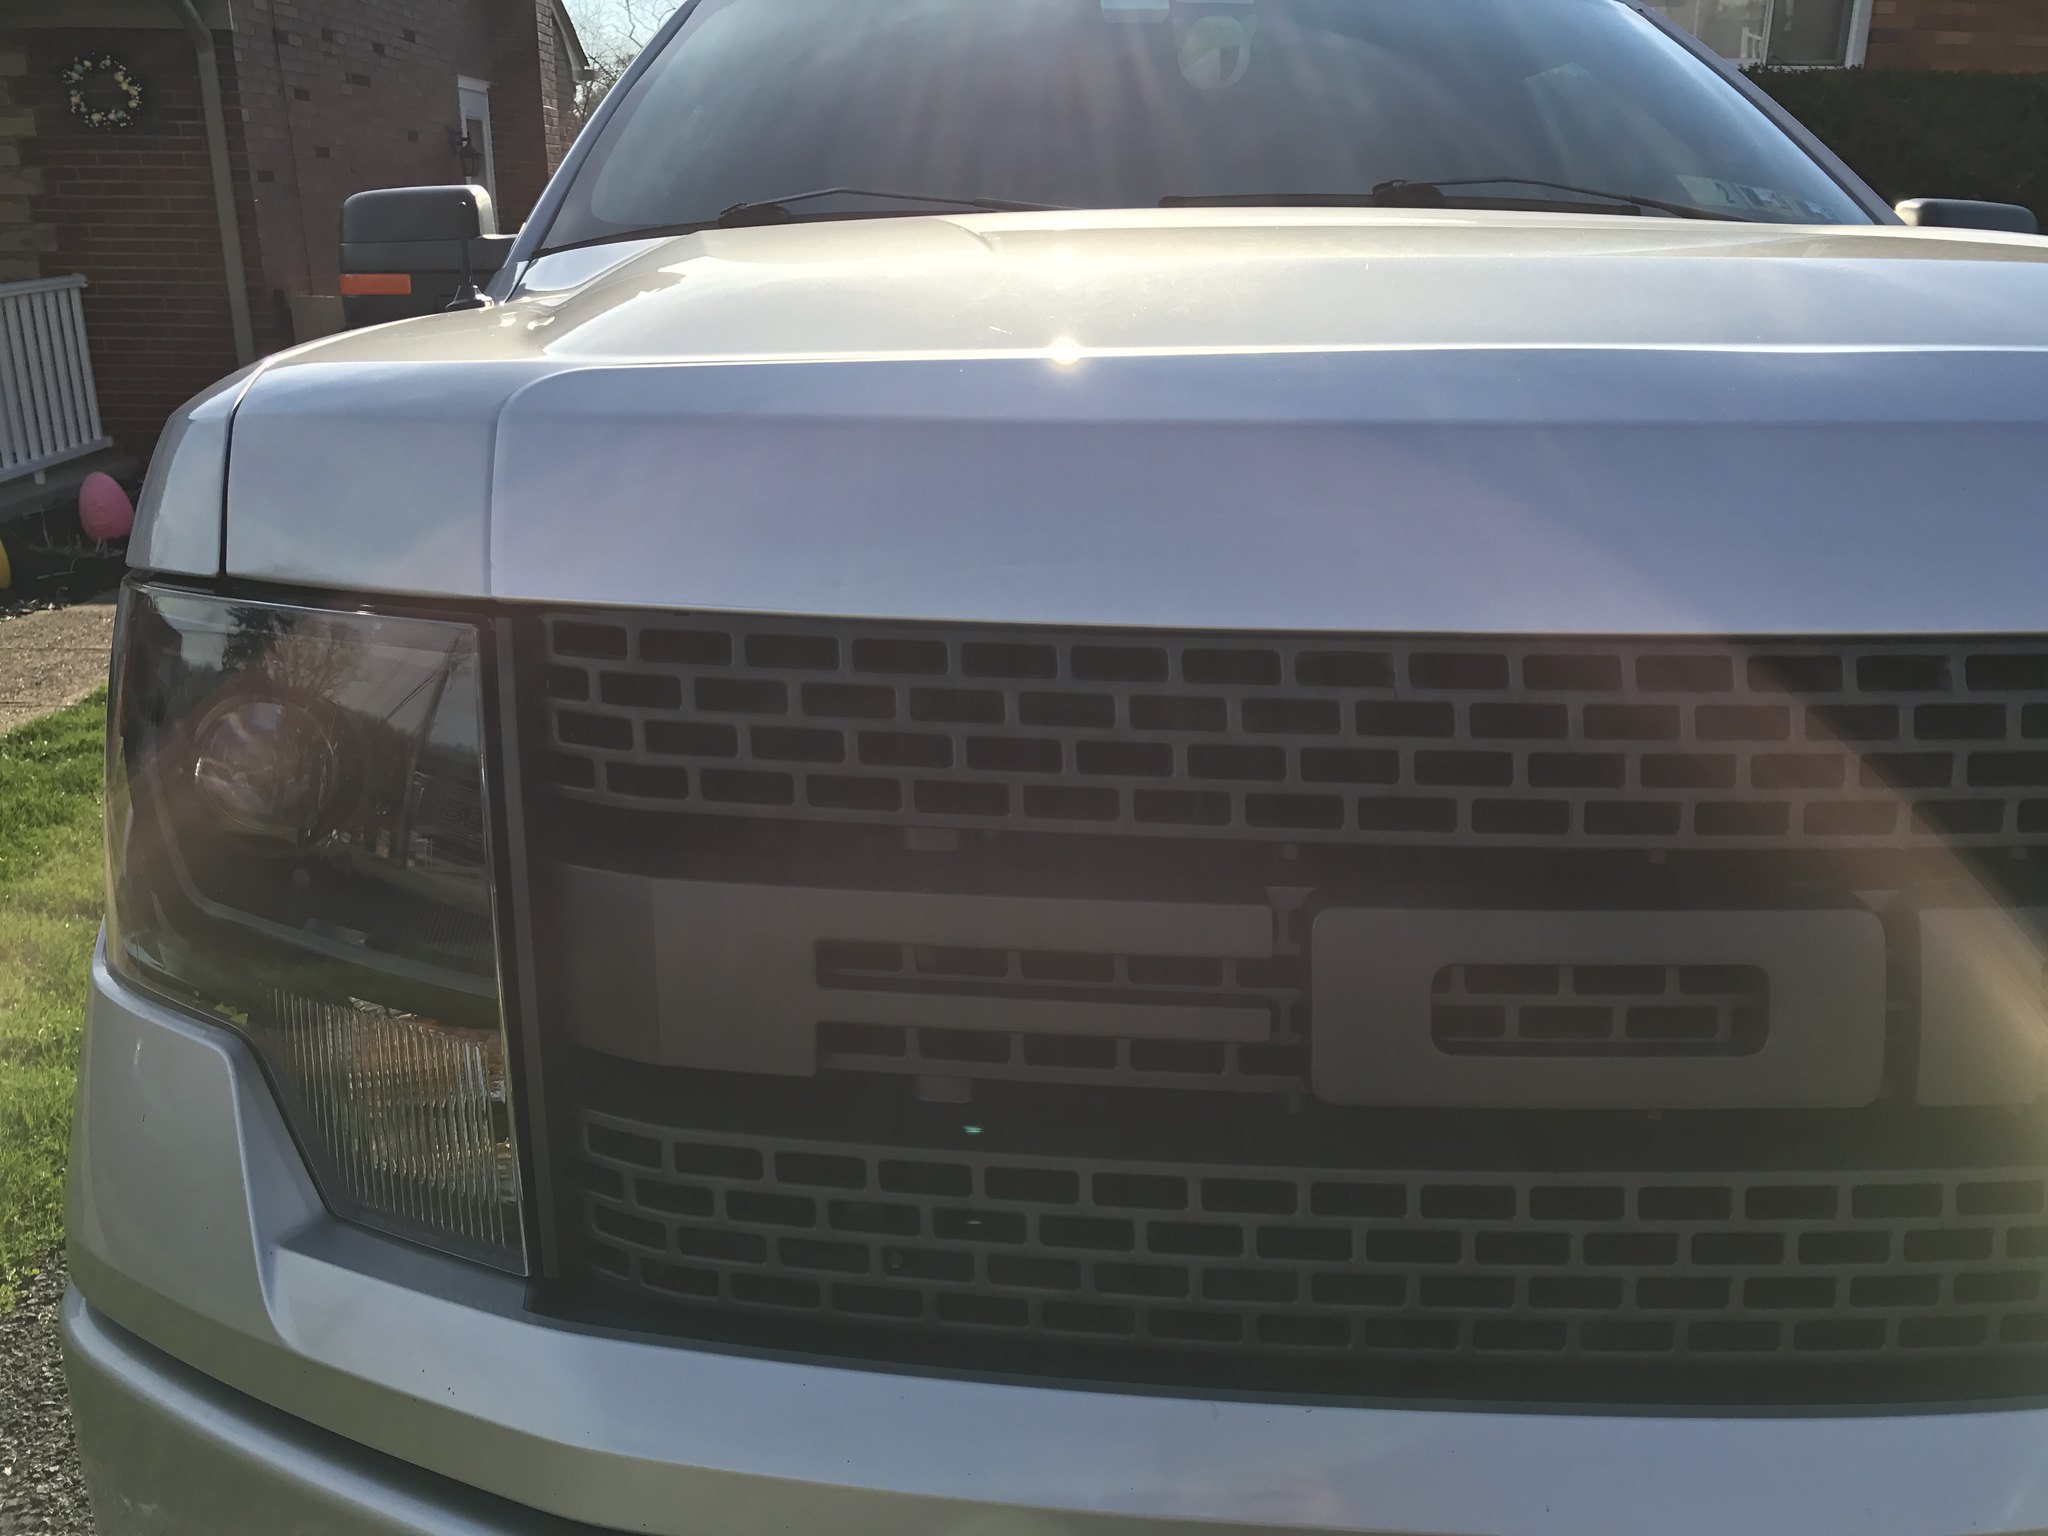
Mine does sit fairly flush. I kept going back and forth about using the stock "gasket" around the top of the hood cap. I ended up leaving it off because I couldn't get a good fit and the instructions mentioned nothing about it. Do you still have the stock plastic piece on yours?
04-03-2017, 03:14 PM
#6
Senior Member
Is that the original "grey" color of the grill. Just curious as I'm looking at getting one and the grey looks nice a dark on your and may save me from getting it painted flat black.
04-03-2017, 03:17 PM
#7
Senior Member
Thread Starter
iTrader: (1)
That is the original grey and I hit it with some Back to Black before putting it on. I was debating about getting it painted since I had swapped in the FX4 HIDs. In the end, I am happy with the color and am not planning to do any grill painting. I was worried about how well the paint would hold up anyways.
Trending Topics
04-03-2017, 03:50 PM
#8
Senior Member
Awesome, thank you. I have the same concerns, especially with all the summer time bugs and debris in the winters.
04-06-2017, 11:12 AM
#9
Senior Member
Thread Starter
iTrader: (1)
Well, I got it all fixed up and am quite happy now. Here are the end results.
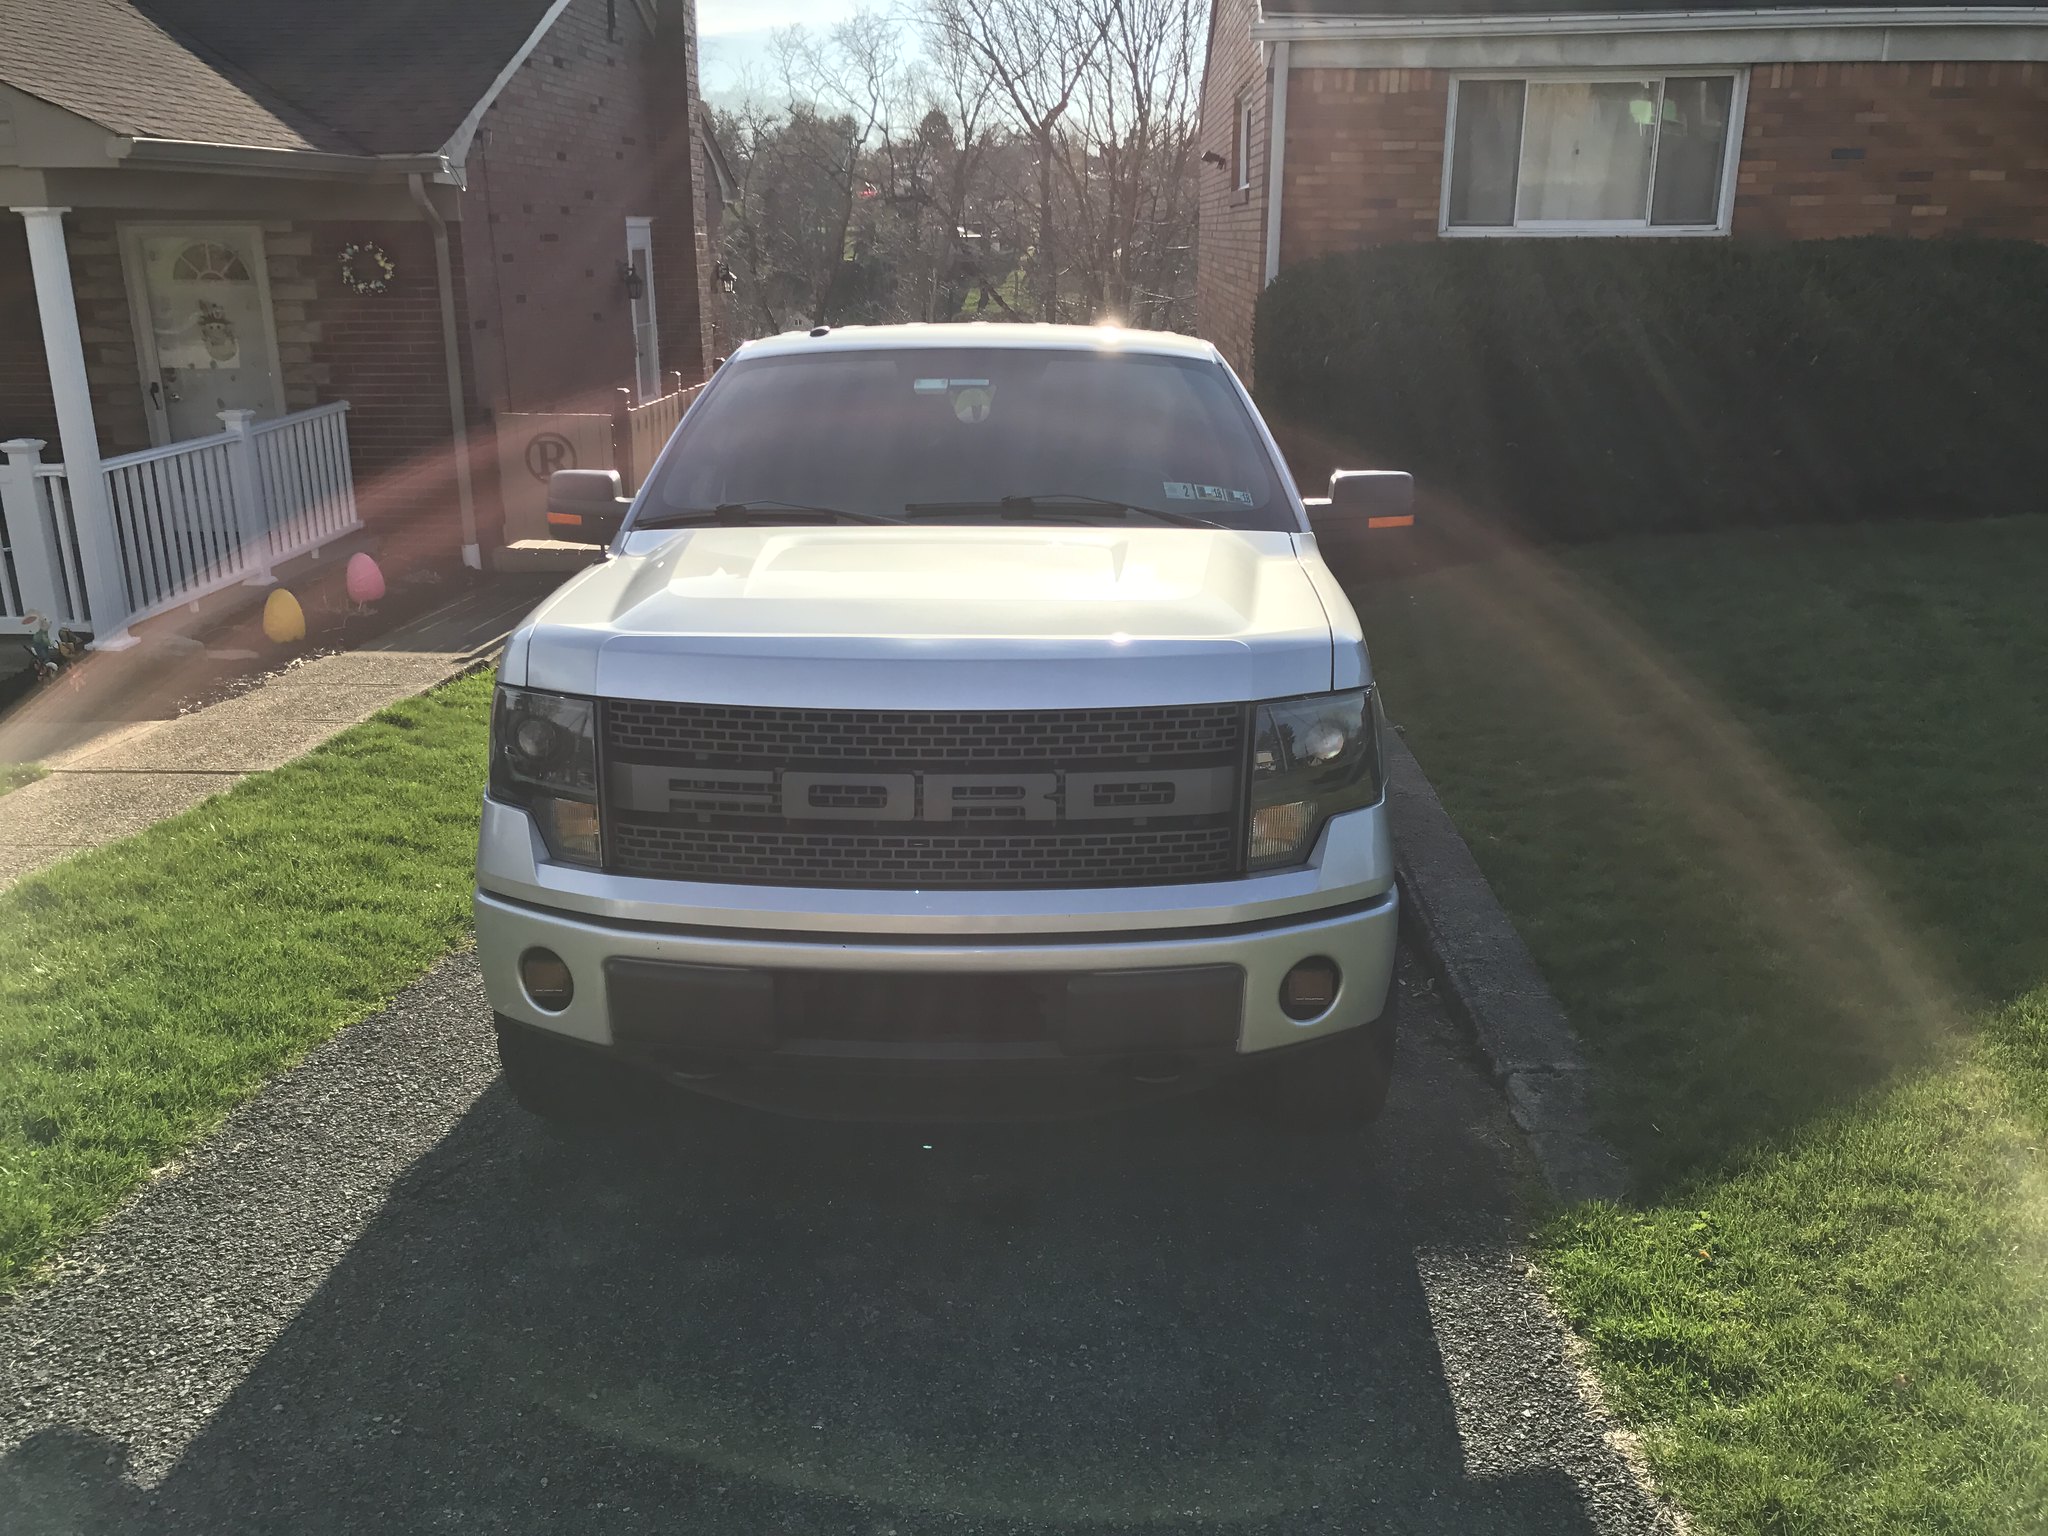
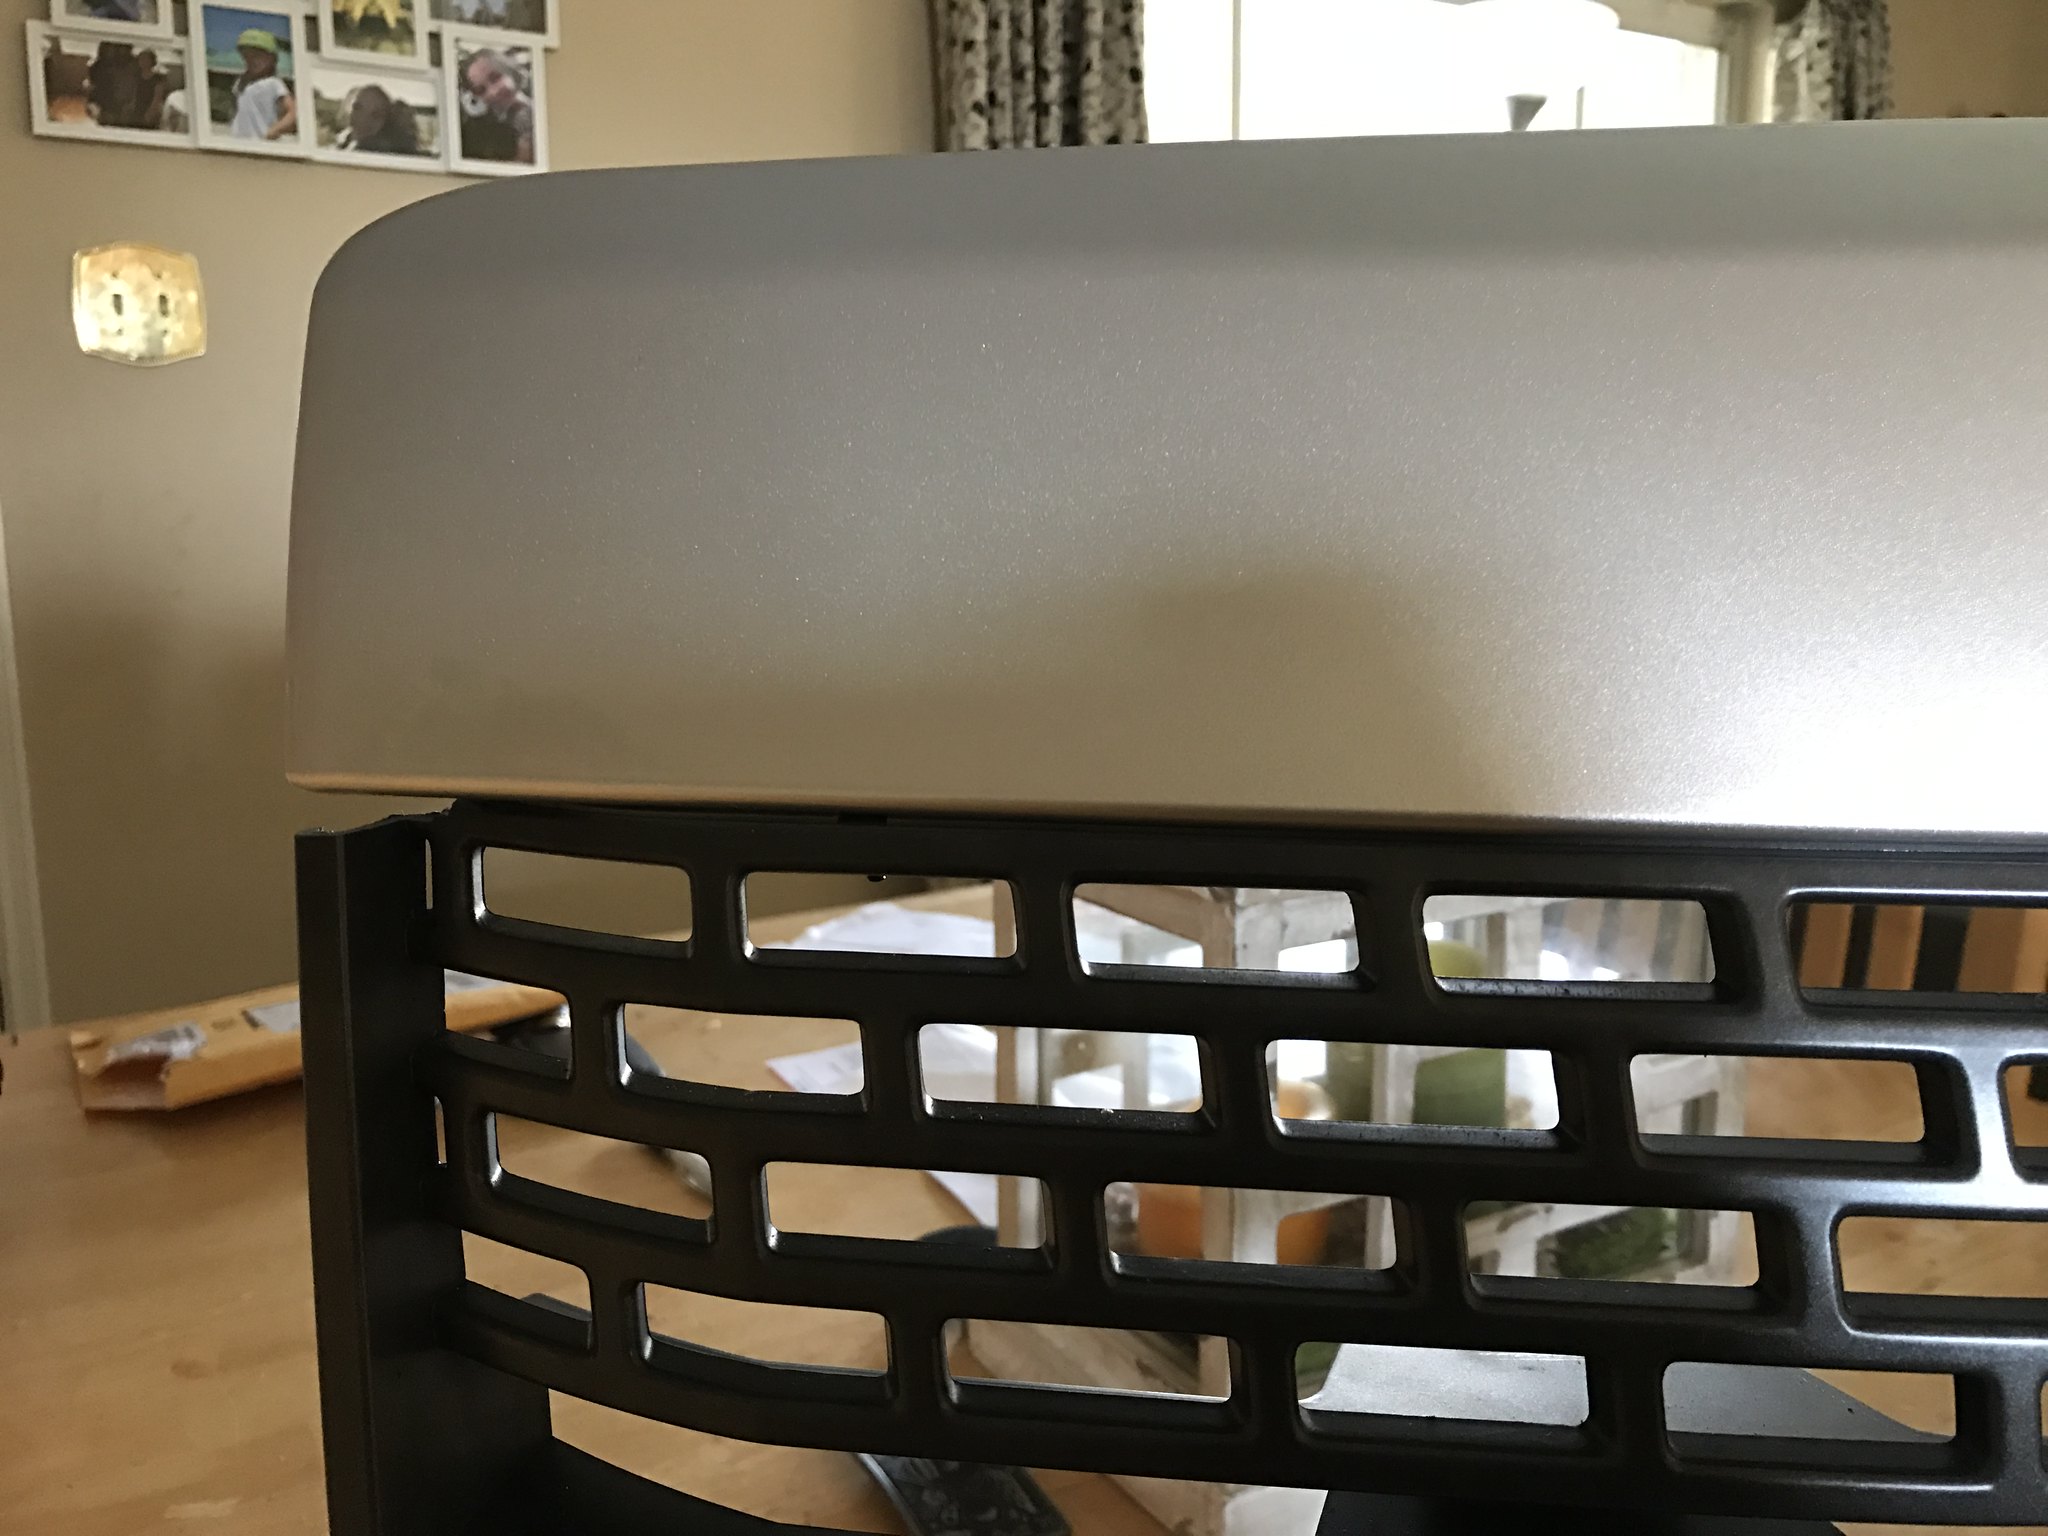
So here is what I did after talking to the original creator of the instructions. I pulled the grill off and separated the pieces again. I scuffed up both the grill and the cap with some fine sandpaper. Cleaned it all with some rubbing alcohol. I put a new strip of double-sided tape. Then I drilled six holes through both the cap and the grill. One on each side, one to the outside hole of each of the outside LED holes and one to each side of the center LED hole. I used some M3 nylon nuts and bolts to help the tape to keep it all together. Let it sit for a couple hours and remounted the grill. You can see a bit of the nylon screw hanging down on each one, but it is not very noticeable. I think I see it because I know they are there. Here are some photos of the nylon nuts and bolts.
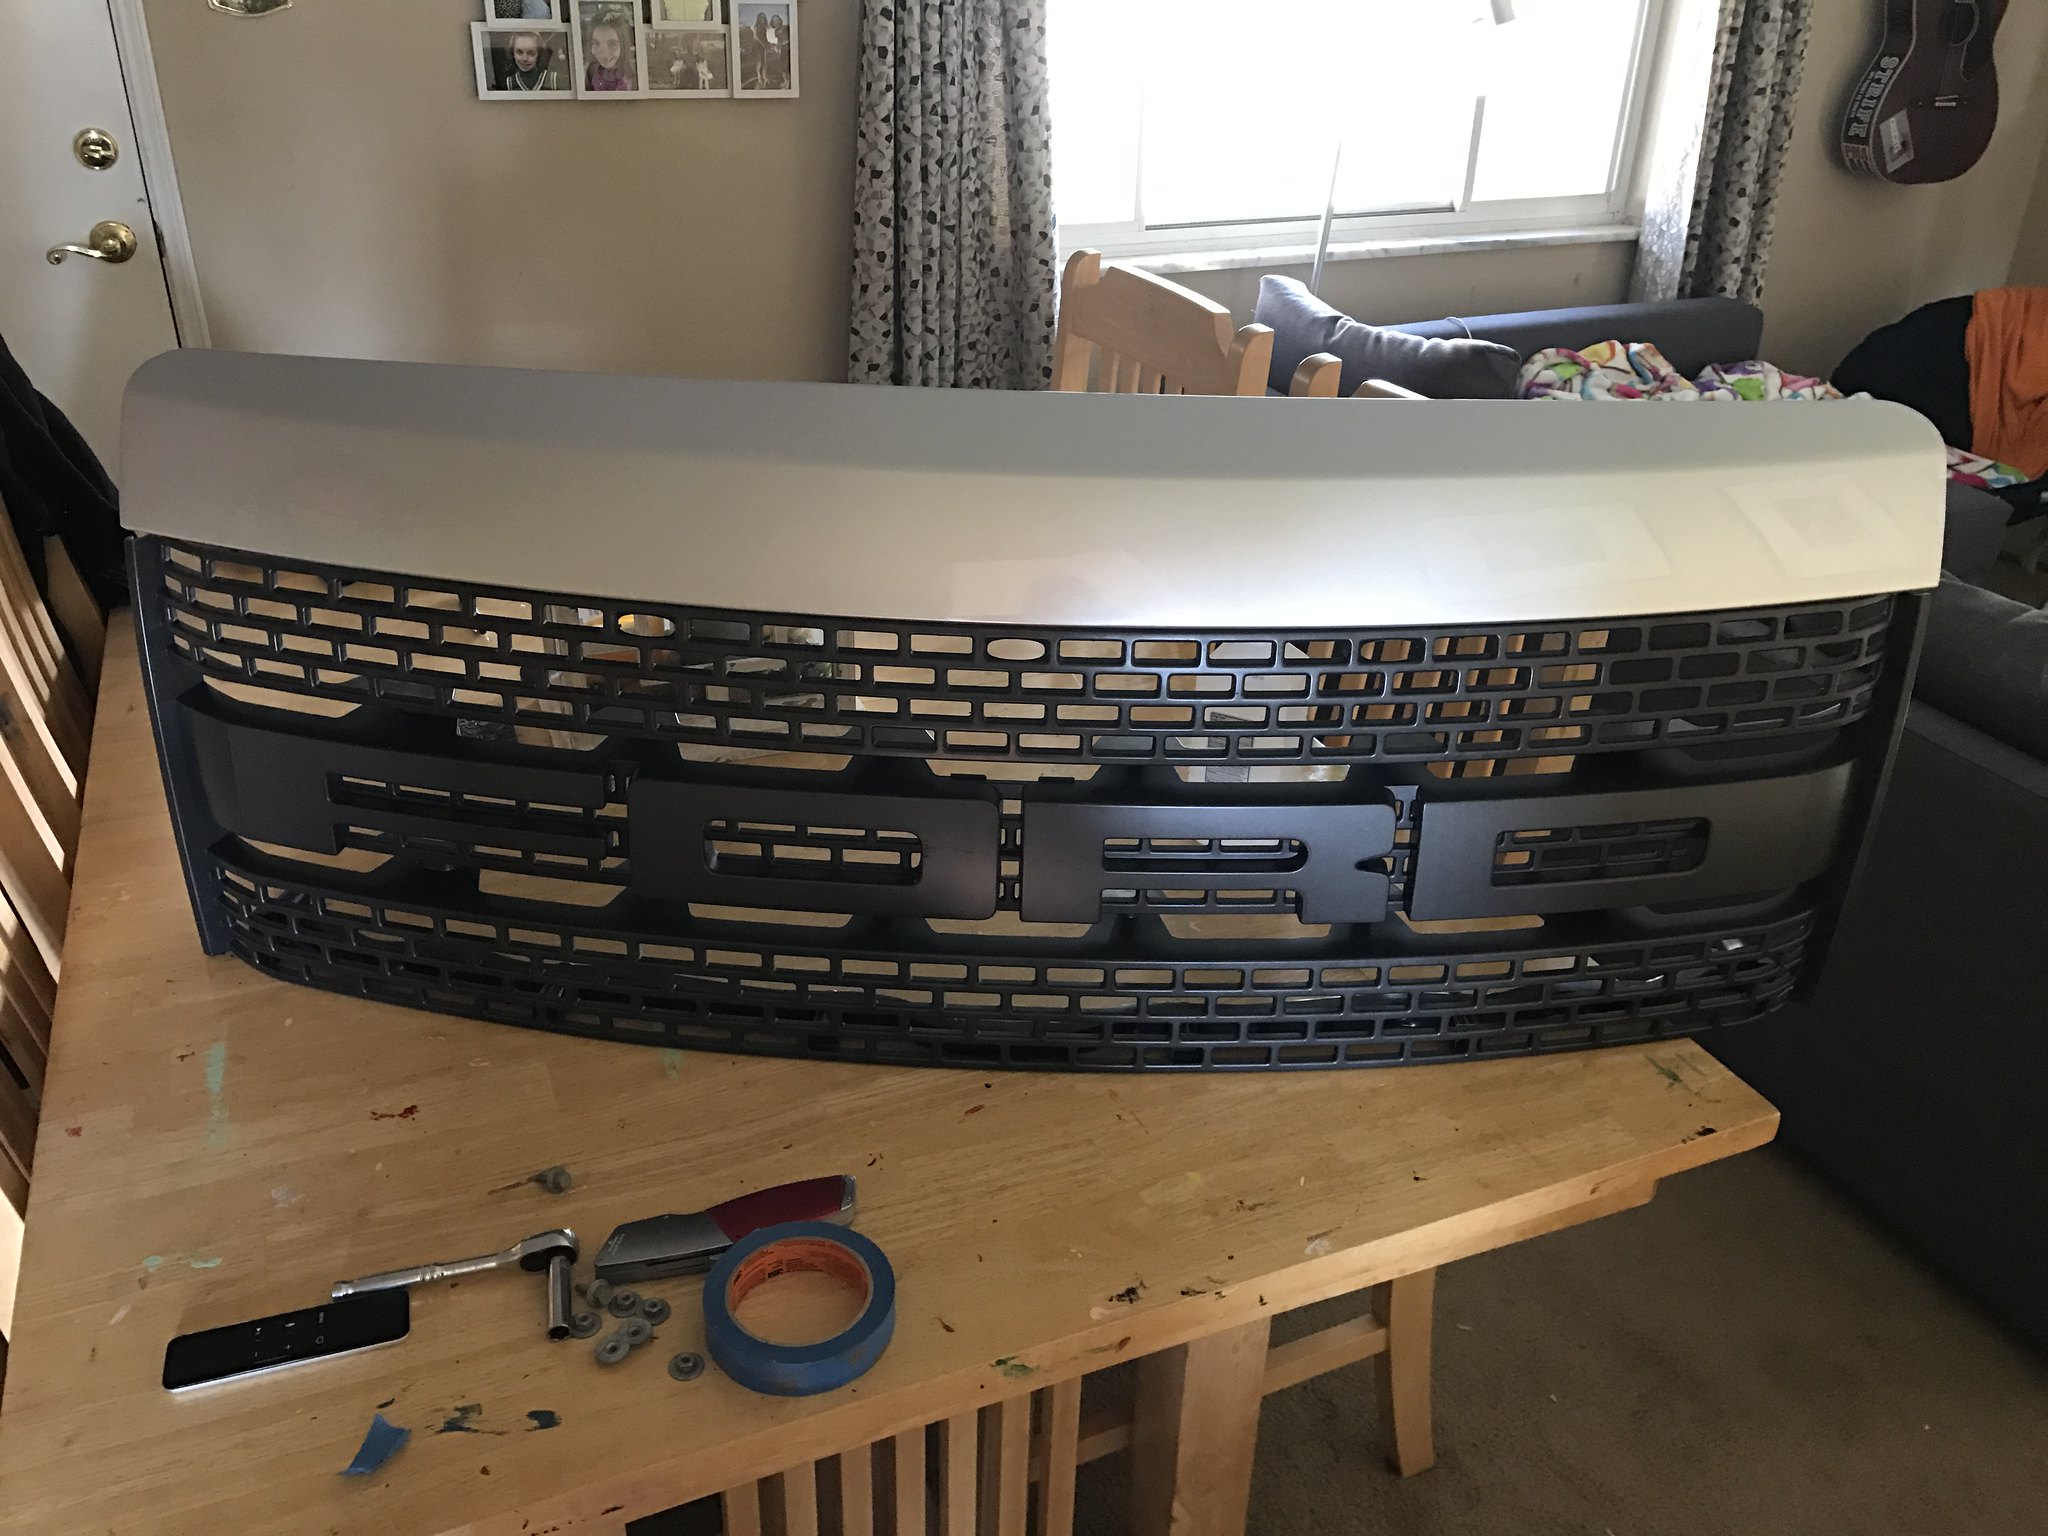
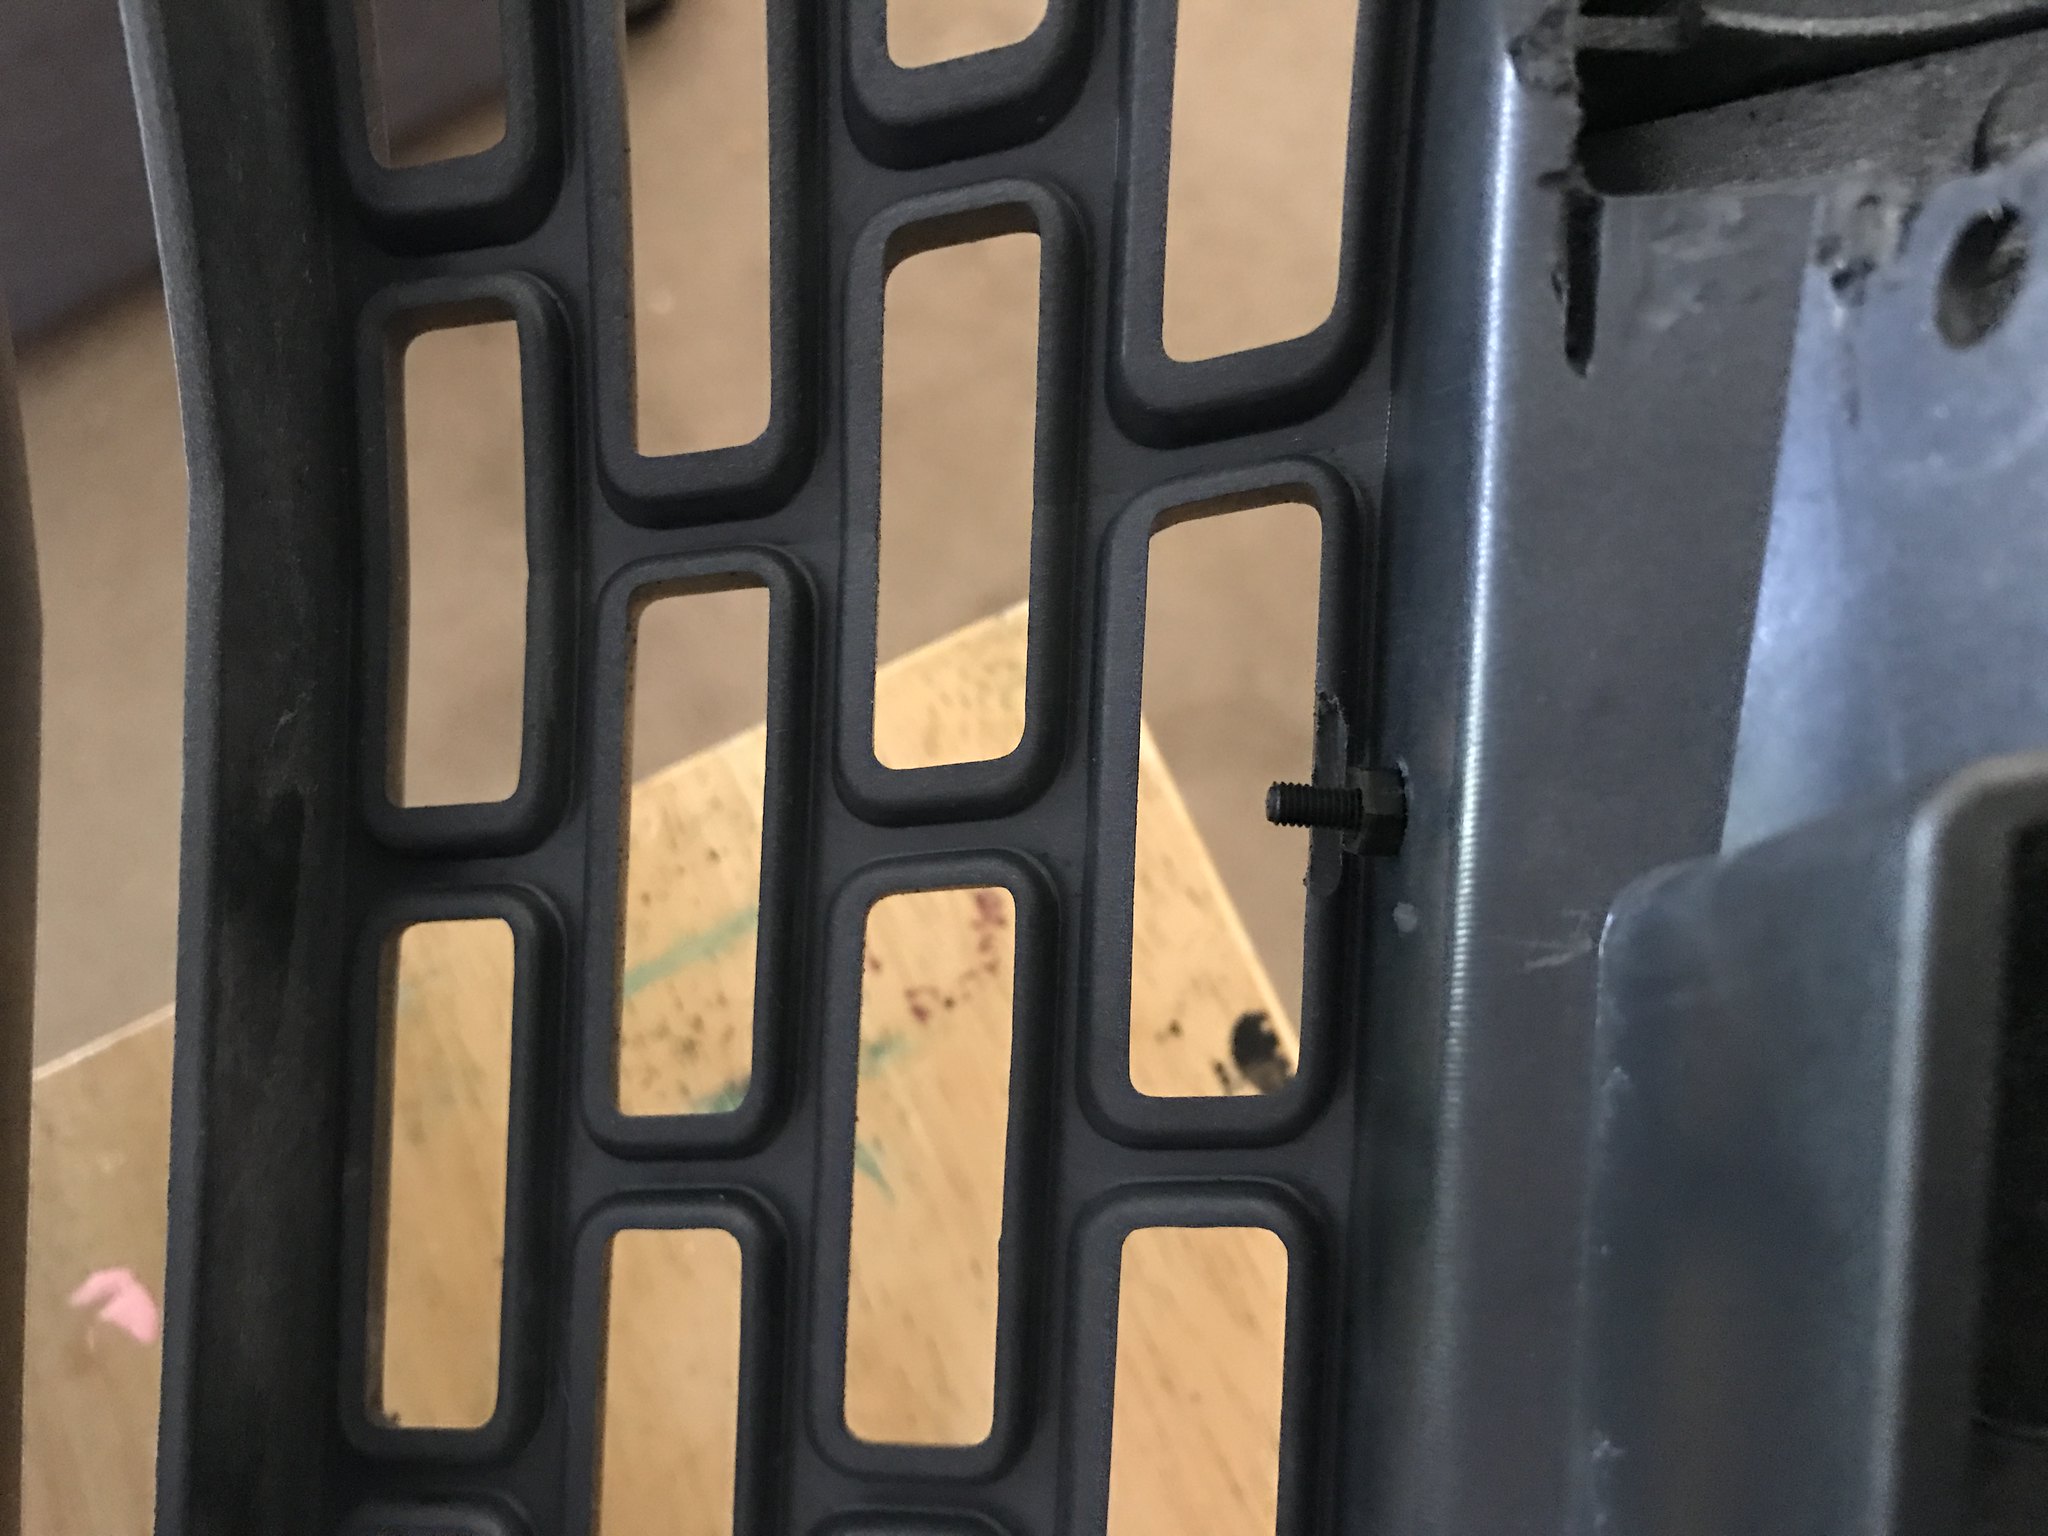
If I had to do it all over again, I would have trimmed less off of the hood cap, to give myself some more room to install the nuts and bolts without having to trim some of the honeycombs to be able to tighten the nuts and bolts.
So here is what I did after talking to the original creator of the instructions. I pulled the grill off and separated the pieces again. I scuffed up both the grill and the cap with some fine sandpaper. Cleaned it all with some rubbing alcohol. I put a new strip of double-sided tape. Then I drilled six holes through both the cap and the grill. One on each side, one to the outside hole of each of the outside LED holes and one to each side of the center LED hole. I used some M3 nylon nuts and bolts to help the tape to keep it all together. Let it sit for a couple hours and remounted the grill. You can see a bit of the nylon screw hanging down on each one, but it is not very noticeable. I think I see it because I know they are there. Here are some photos of the nylon nuts and bolts.
If I had to do it all over again, I would have trimmed less off of the hood cap, to give myself some more room to install the nuts and bolts without having to trim some of the honeycombs to be able to tighten the nuts and bolts.
The following users liked this post:
Runningriot (04-07-2017)
04-07-2017, 06:14 AM
#10

Looks great! I don't think the M3 screws are noticeable.
Is this the new style Boost Bars cap or one of the originals?
Also, just a preference question, why did you go with the OEM grill option instead of getting the whole Boost Bars kit? Just trying to determine which direction to go myself.
Is this the new style Boost Bars cap or one of the originals?
Also, just a preference question, why did you go with the OEM grill option instead of getting the whole Boost Bars kit? Just trying to determine which direction to go myself.