
F150 To Raptor Suspension Conversion
 03-27-2014, 07:27 AM
#1

Guys,
This has been posted on a few times, but there really isn't too much information out there on this subject, so I wanted to start a post where I could dump the information as I fumbled my way through.
Secondly, for those who have to ask why swap, its cheaper to buy a Raptor, you are correct and can stop reading as you already know everything . But in all seriousness, for those who are handy with Craigs List, a wrench, the enjoyment of creating something others don't have, and the desire to do so while saving a few bucks . . . then this post is for you.
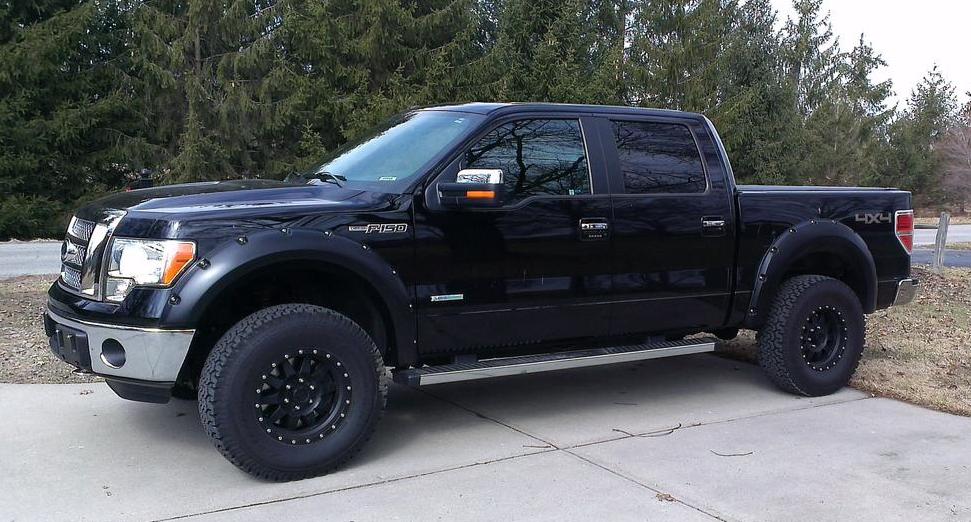
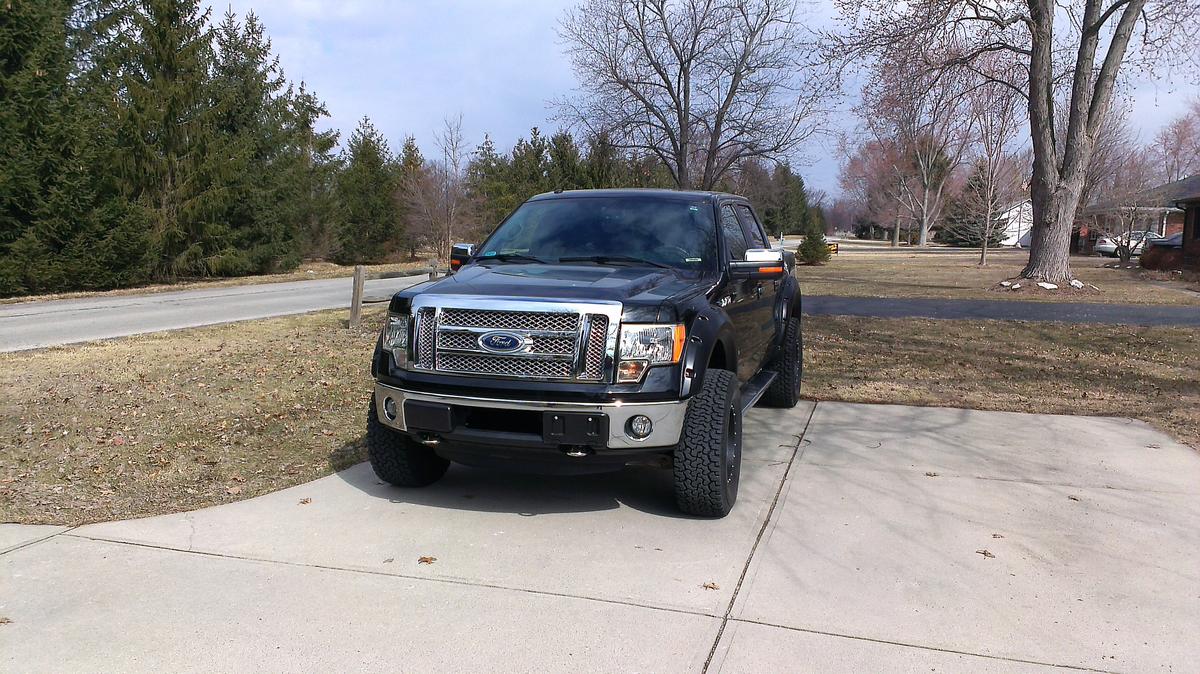
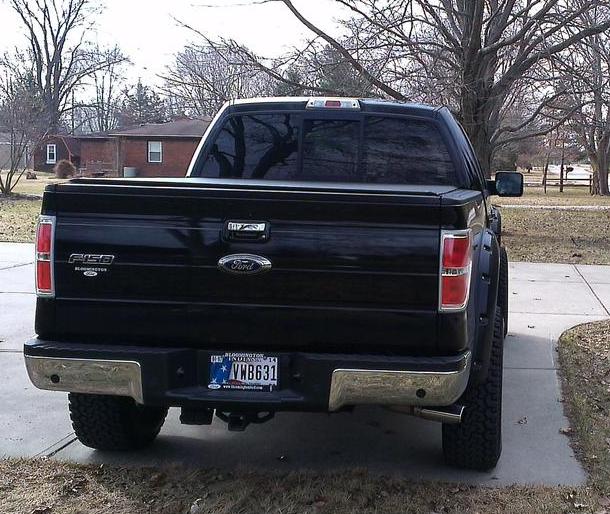
To start off, I don't care to go "full Raptor" right out of the box. I don't have the cash laying around to throw at a project like this, so I wanted to build in stages, and I really wanted the ride, so that's where I started . . . which means the body and rear axle would have to be somewhat of a "compromise". So there are some holes in my plan, but bear with me and we'll get through those.
For those watching the pennies, here is a break down of what i'm into the project so far:
2011 F150 Lariat Ecoboost 75k miles - $36,000 out the door
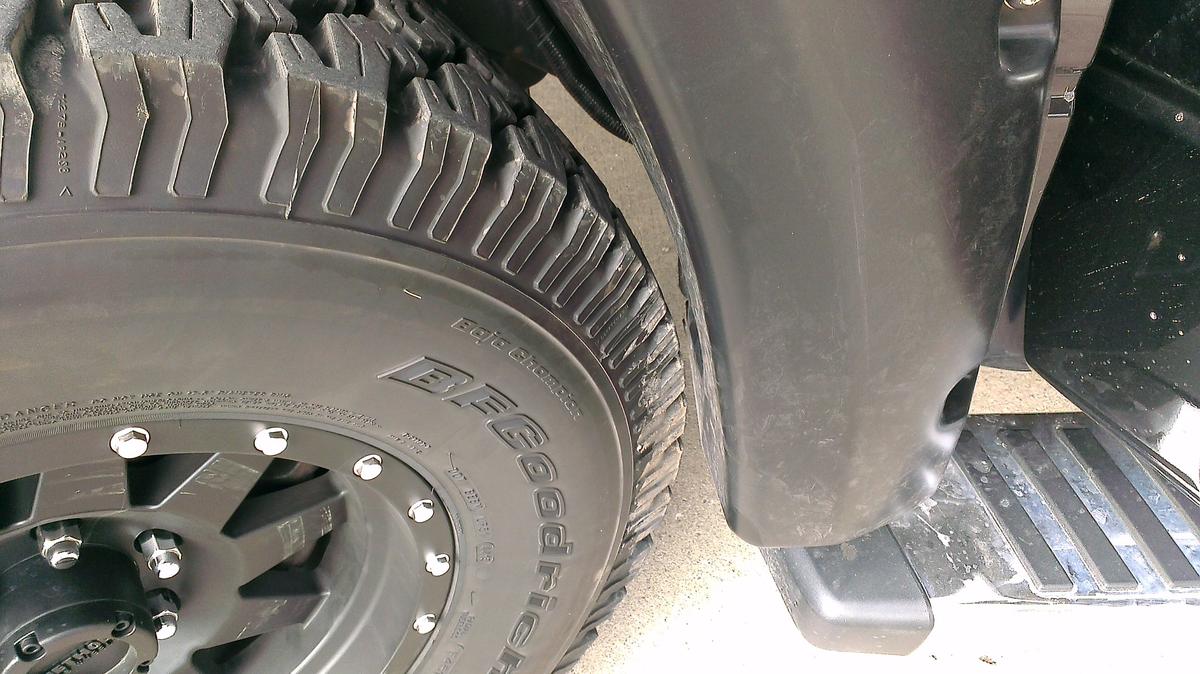
Method 17" wheels and 35" BFG AT's at tire rack - $2250
90% of the Raptor suspension parts - $2000
The balnce of the Raptor parts (CV axles, sway bar end links) - $575
50mm H&R Rear Wheel Spacers - $260
Bushwacker Fender Flares - $450
Misc parts to extend brake lines and vaccuum lines - $40
Front End Alignment - $100 (GRRR! More on this later!)
Total Cost: $41,675 including the truck . . . still cheaper than what I could get a Raptor. Yes, Yes, I know, it doesn't have all the fancy electronics. True (i'm working on that btw), but its also 600lbs lighter and gets better fuel economy . . . and I learned how to drive, so I don't need all the nannies.
Actual cost for the conversion falls in at $3,425 if you omit the truck and the tires/wheels but that includes both front and rear suspension.
Compare that against all the aftermarket offerings and its pretty price competitive, but you get factory designed and reliable parts. I didn't want spherical rod ends and all that other jazz that just doesn't hold up to the road salt they use in the northern states in the winter. I wanted a zero maintenance solution that I could put on and run and never worry about again. This is just NOT gonna happen with the aftermarket stuff.
So, what will you need to make the conversion? Here is your list:
-Lower A-Arms
-Upper A-Arms
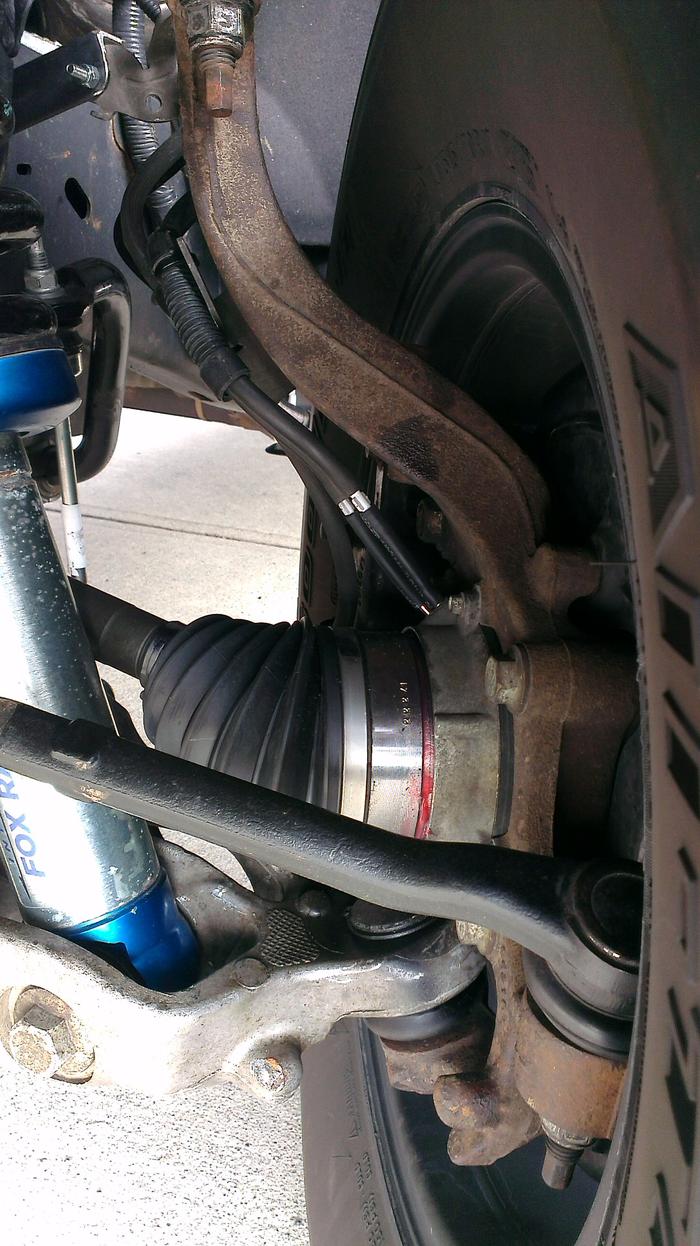
-CV Axles (they are drop in replacement)
-Sway Bar
-Sway Bar End links
-Tie Rod Ends (just the ends, they thread right onto your existing rack)
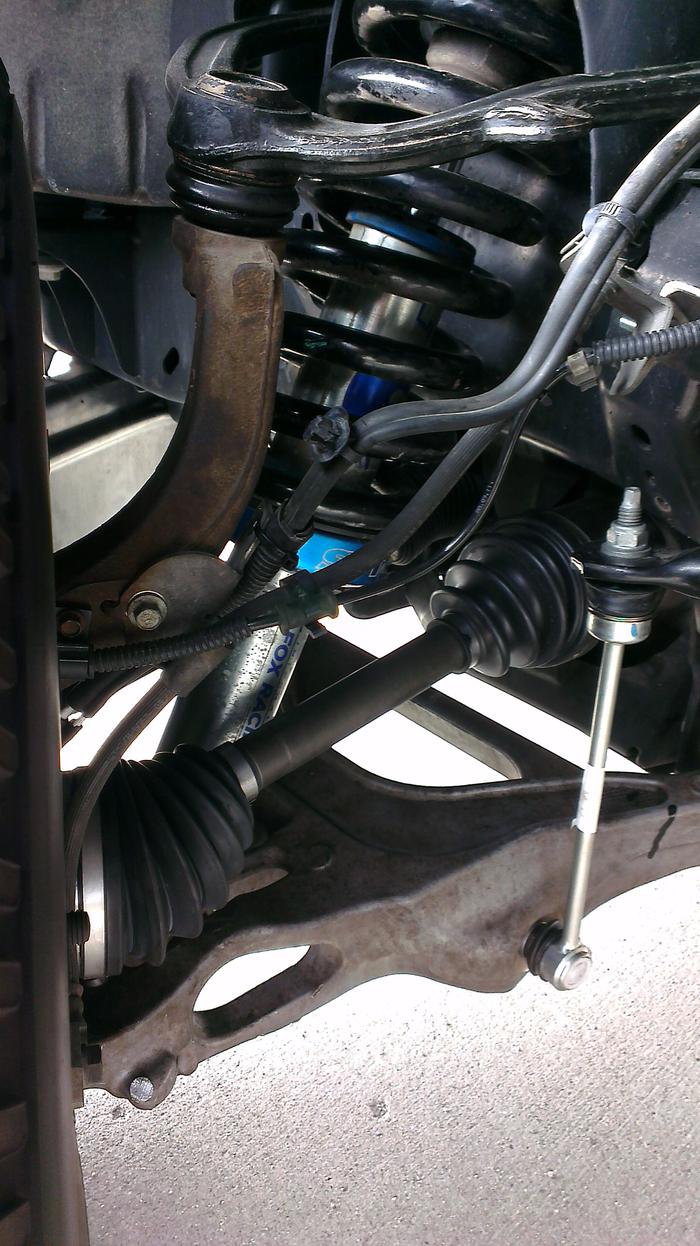
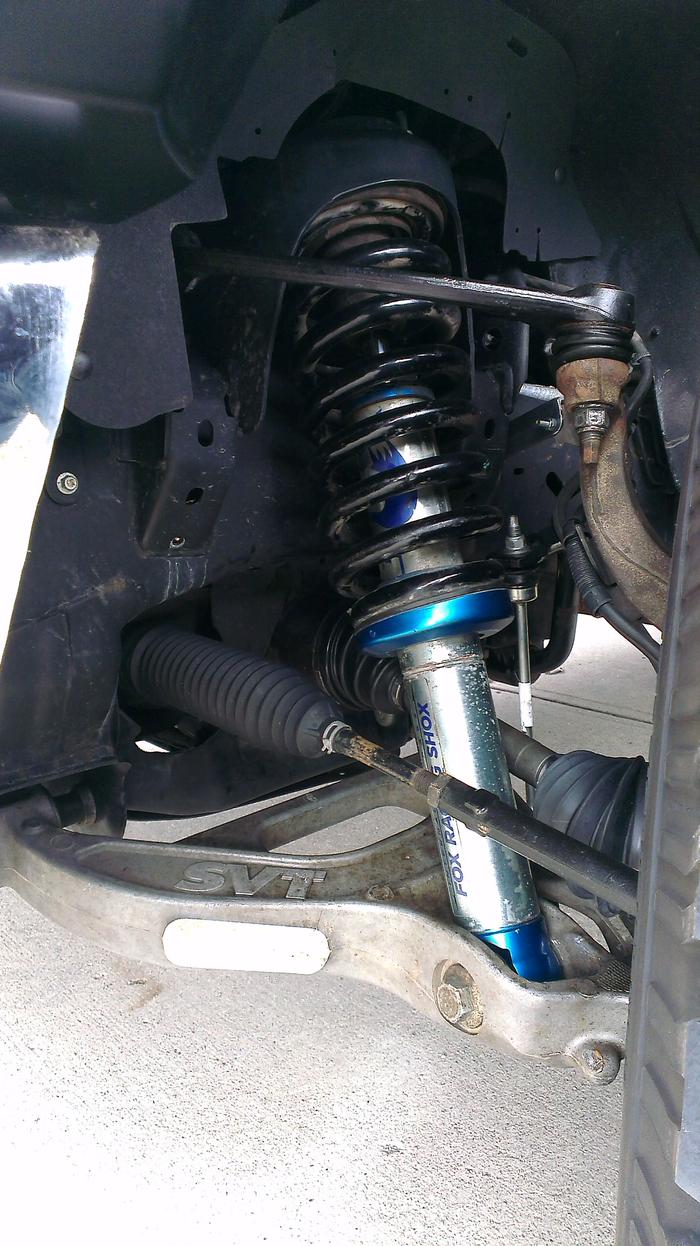
-Raptor Coil Overs (They come with 2 wedge shaped spacers per side, one goes on top of the strut when you put it in the strut pocket to tilt the strut out toward the lower mountin point, the other goes on top of the strut bucket this make a surface that is perpindicular to the studs coming through)
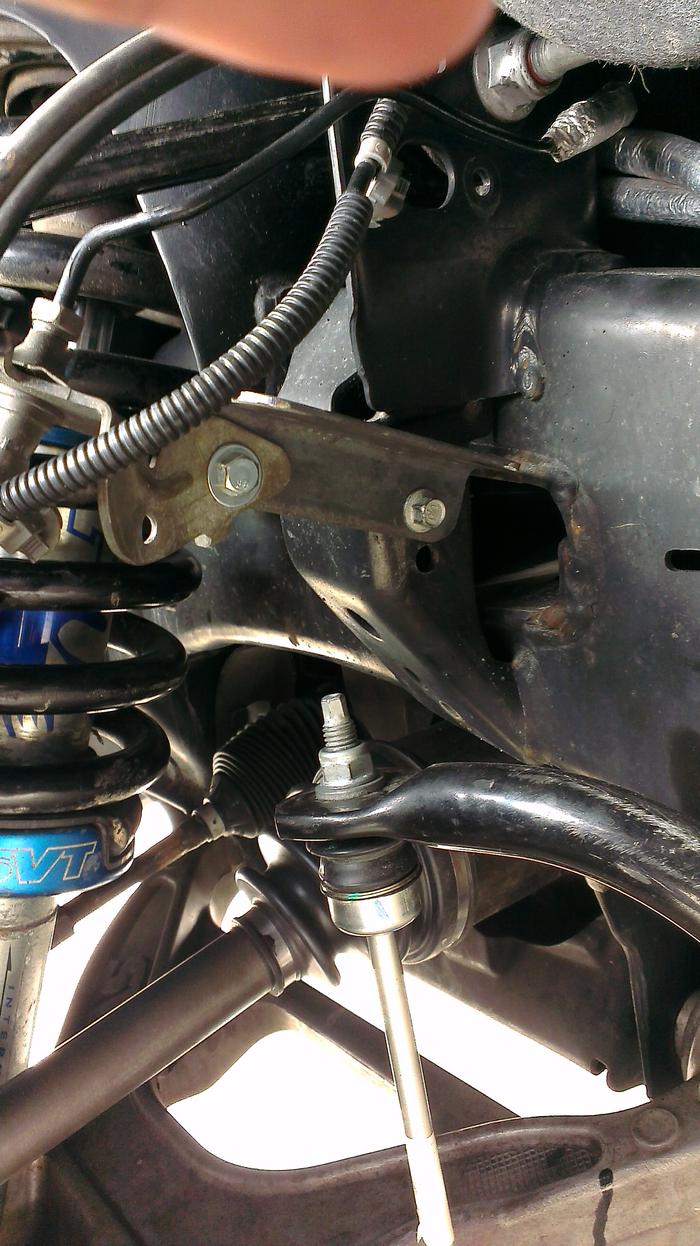
- A way to relocate the brake line mount at the frame, you will need to move it outboard around 3" to account for the additional width, the Raptor uses longer brake lines and a different mounting bracket.
- A way to splice on an additional length of vaccuum hose for actuating the front hubs to disengage them when not in 4x4
- Rear Leaf Springs
- Rear Spring Blocks
- U Bolts for the longer lift blocks
- Rear Shocks
- Raptor Bump Stop
Now for the process, I did this over 2 days spread apart by a few weeks . . .time constraints, it sucks to be old and have responsibilities other than wrenching on my vehicles.
Rear:
You will need to lower the exhaust and lower the fuel tank to complete this. Other than lowering these parts it is a very easy process. It took me about 4 hours. I disconnected the fuel filler from the tank, leave everything else connected, and use the floor jack to lower it and roll it out away from the front spring eye bolt. For the exhaust, i supported it with jack stands and removed the hanger from the frame starting at the exhaust tip and went back as far as i needed to drop the exhaust out of the way. Other than that, its self explanatory and really pretty simple.
Front:
This took me about 5 hours. Its not bad either, just a little tedious. Here is what I learned:
1) have a 5 gallon bucket sitting next to the a-arm (on the rear facing side). Remove the brake caliper and all the mounting along the knuckle, set it on the edge of the 5 gal bucket. You can then remove the entire rest of the knucle assembly with brakes attached and sit them on the 5 gal bucket while working on the suspension. This will easily save 45 min per side in assembly/disassembly.
2) The CV shafts will require a few smacks with a hammer to get them loose from the axle, there is a retaining clip in them that engages the axle. Just drop the skid plat off the bottom of the engine . . . you can do the pass side with it in place, but the drivers side is nearly impossible. This 3 minutes worth of activity would have saved me about 30 min of futsin around trying to get them off.
3) You will need big sockets and a long breaker bar to pull the bolts out of the lower control arm (and the rear leaf spring for that matter). I used a 3/4 drive socket for this work, i found a standard socket that would work after i used a torch to put some heat into the nuts. This obviously destroyed the nyloc function so plan to have backups just in case.
4) The ball joints will release with a few taps of a hammer LOL NOT! Well, not sorta. The upper will release easily, just make sure you have a jack under the lower a-arm and don't ahve the suspension fully drooped . . .also leave the nut on a few turns so things dont go bad really quick. The lowers are a bit more difficult . . . i used a torch and put some heat into the knuckle and then beat on the side of the knuckle as well as the exposed end of the ball joint sticking out the bottom. This would normally be a bad idea, but the new lowers came with ball joints so these aren't being reused.
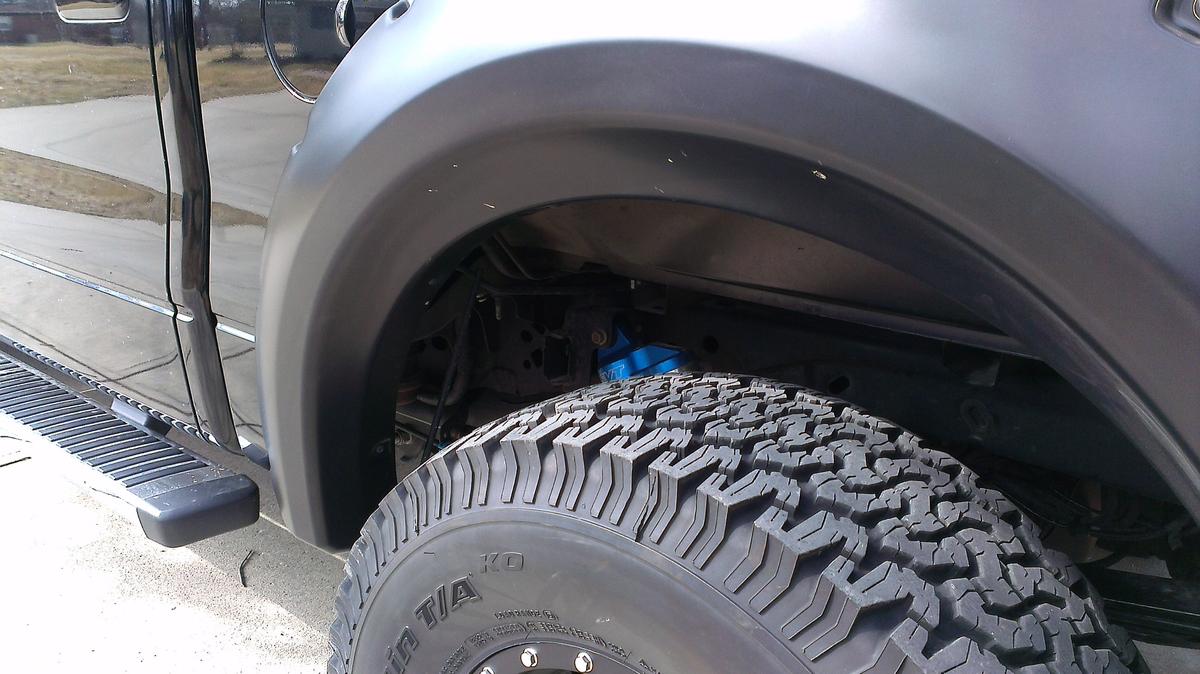
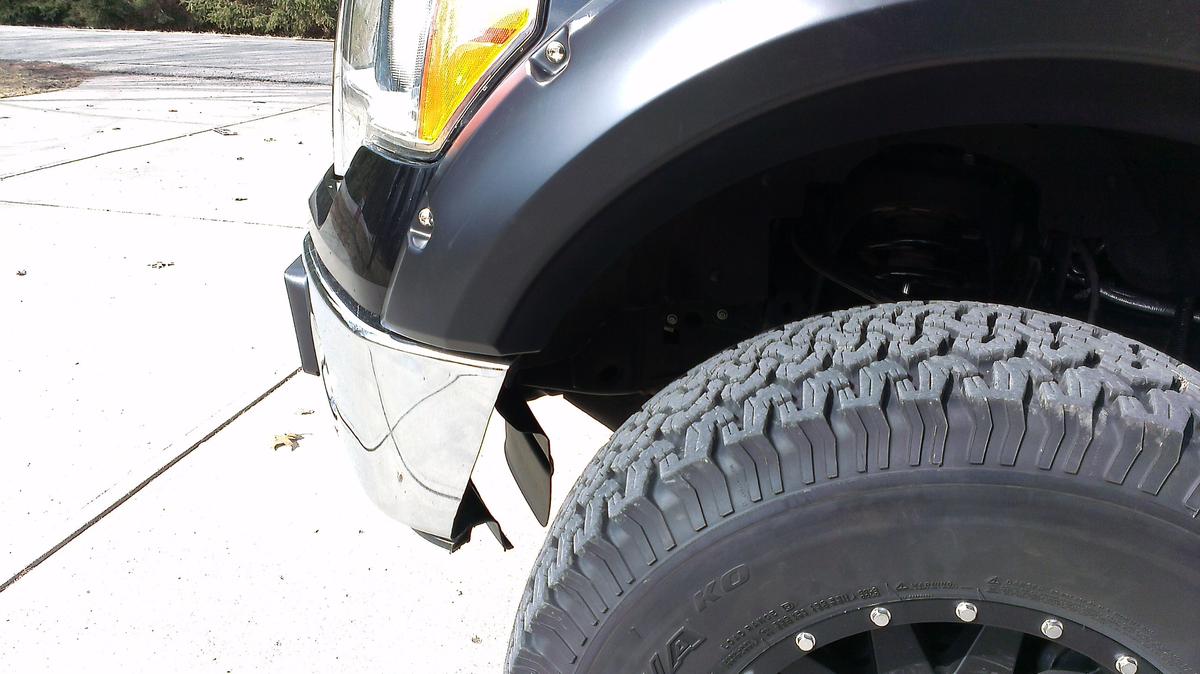
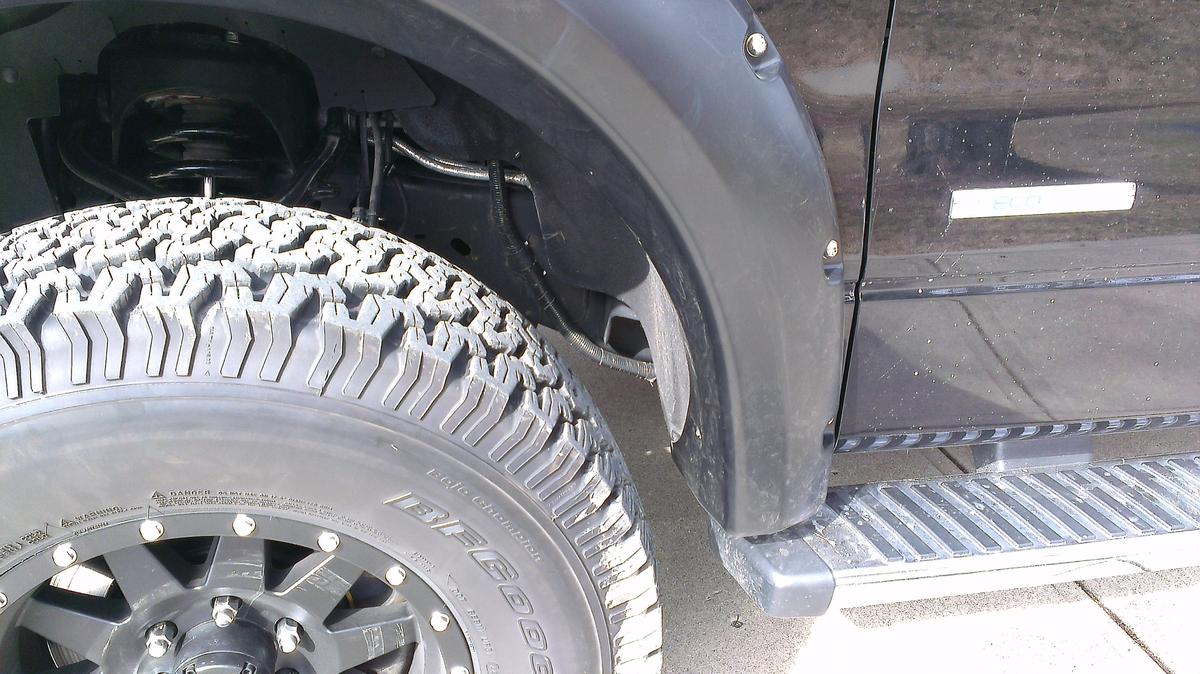
The draw backs, if you actually jump the truck, your front tires will stuff into the factory fenders. I don't plan to do any jumping so i'm not worried. I have blasted off the road pretty quickly, and ran some roads with a lot of pot holes from teh freeze-thaw cycle we had this year and had no issues. Additionally, i've pulled a 5k trailer 400 miles w/o issue either, so this is only a concern if you plan to take it out to the dessert and get some air with the truck . . . for 90% of us, this is a very good solution and stopping point in the build. Now, if i were planning to run it harder, the easy fix would be to run the fronts on the lower perch and do a 2" leveling kit, this will limit the upward travel of the suspension and should keep you out of the fenders. Also plan to do some trimming on the fender flares and front bumper depending on what size tires you are running and the offset of your rims. Additionally, I am running 50mm rear wheel spacers to equalize the stance front to rear.
This has been posted on a few times, but there really isn't too much information out there on this subject, so I wanted to start a post where I could dump the information as I fumbled my way through.
Secondly, for those who have to ask why swap, its cheaper to buy a Raptor, you are correct and can stop reading as you already know everything
. But in all seriousness, for those who are handy with Craigs List, a wrench, the enjoyment of creating something others don't have, and the desire to do so while saving a few bucks . . . then this post is for you.To start off, I don't care to go "full Raptor" right out of the box. I don't have the cash laying around to throw at a project like this, so I wanted to build in stages, and I really wanted the ride, so that's where I started . . . which means the body and rear axle would have to be somewhat of a "compromise". So there are some holes in my plan, but bear with me and we'll get through those.
For those watching the pennies, here is a break down of what i'm into the project so far:
2011 F150 Lariat Ecoboost 75k miles - $36,000 out the door
Method 17" wheels and 35" BFG AT's at tire rack - $2250
90% of the Raptor suspension parts - $2000
The balnce of the Raptor parts (CV axles, sway bar end links) - $575
50mm H&R Rear Wheel Spacers - $260
Bushwacker Fender Flares - $450
Misc parts to extend brake lines and vaccuum lines - $40
Front End Alignment - $100 (GRRR! More on this later!)
Total Cost: $41,675 including the truck . . . still cheaper than what I could get a Raptor. Yes, Yes, I know, it doesn't have all the fancy electronics. True (i'm working on that btw), but its also 600lbs lighter and gets better fuel economy . . . and I learned how to drive, so I don't need all the nannies.
Actual cost for the conversion falls in at $3,425 if you omit the truck and the tires/wheels but that includes both front and rear suspension.
Compare that against all the aftermarket offerings and its pretty price competitive, but you get factory designed and reliable parts. I didn't want spherical rod ends and all that other jazz that just doesn't hold up to the road salt they use in the northern states in the winter. I wanted a zero maintenance solution that I could put on and run and never worry about again. This is just NOT gonna happen with the aftermarket stuff.
So, what will you need to make the conversion? Here is your list:
-Lower A-Arms
-Upper A-Arms
-CV Axles (they are drop in replacement)
-Sway Bar
-Sway Bar End links
-Tie Rod Ends (just the ends, they thread right onto your existing rack)
-Raptor Coil Overs (They come with 2 wedge shaped spacers per side, one goes on top of the strut when you put it in the strut pocket to tilt the strut out toward the lower mountin point, the other goes on top of the strut bucket this make a surface that is perpindicular to the studs coming through)
- A way to relocate the brake line mount at the frame, you will need to move it outboard around 3" to account for the additional width, the Raptor uses longer brake lines and a different mounting bracket.
- A way to splice on an additional length of vaccuum hose for actuating the front hubs to disengage them when not in 4x4
- Rear Leaf Springs
- Rear Spring Blocks
- U Bolts for the longer lift blocks
- Rear Shocks
- Raptor Bump Stop
Now for the process, I did this over 2 days spread apart by a few weeks . . .time constraints, it sucks to be old and have responsibilities other than wrenching on my vehicles.
Rear:
You will need to lower the exhaust and lower the fuel tank to complete this. Other than lowering these parts it is a very easy process. It took me about 4 hours. I disconnected the fuel filler from the tank, leave everything else connected, and use the floor jack to lower it and roll it out away from the front spring eye bolt. For the exhaust, i supported it with jack stands and removed the hanger from the frame starting at the exhaust tip and went back as far as i needed to drop the exhaust out of the way. Other than that, its self explanatory and really pretty simple.
Front:
This took me about 5 hours. Its not bad either, just a little tedious. Here is what I learned:
1) have a 5 gallon bucket sitting next to the a-arm (on the rear facing side). Remove the brake caliper and all the mounting along the knuckle, set it on the edge of the 5 gal bucket. You can then remove the entire rest of the knucle assembly with brakes attached and sit them on the 5 gal bucket while working on the suspension. This will easily save 45 min per side in assembly/disassembly.
2) The CV shafts will require a few smacks with a hammer to get them loose from the axle, there is a retaining clip in them that engages the axle. Just drop the skid plat off the bottom of the engine . . . you can do the pass side with it in place, but the drivers side is nearly impossible. This 3 minutes worth of activity would have saved me about 30 min of futsin around trying to get them off.
3) You will need big sockets and a long breaker bar to pull the bolts out of the lower control arm (and the rear leaf spring for that matter). I used a 3/4 drive socket for this work, i found a standard socket that would work after i used a torch to put some heat into the nuts. This obviously destroyed the nyloc function so plan to have backups just in case.
4) The ball joints will release with a few taps of a hammer LOL NOT! Well, not sorta. The upper will release easily, just make sure you have a jack under the lower a-arm and don't ahve the suspension fully drooped . . .also leave the nut on a few turns so things dont go bad really quick. The lowers are a bit more difficult . . . i used a torch and put some heat into the knuckle and then beat on the side of the knuckle as well as the exposed end of the ball joint sticking out the bottom. This would normally be a bad idea, but the new lowers came with ball joints so these aren't being reused.
The draw backs, if you actually jump the truck, your front tires will stuff into the factory fenders. I don't plan to do any jumping so i'm not worried. I have blasted off the road pretty quickly, and ran some roads with a lot of pot holes from teh freeze-thaw cycle we had this year and had no issues. Additionally, i've pulled a 5k trailer 400 miles w/o issue either, so this is only a concern if you plan to take it out to the dessert and get some air with the truck . . . for 90% of us, this is a very good solution and stopping point in the build. Now, if i were planning to run it harder, the easy fix would be to run the fronts on the lower perch and do a 2" leveling kit, this will limit the upward travel of the suspension and should keep you out of the fenders. Also plan to do some trimming on the fender flares and front bumper depending on what size tires you are running and the offset of your rims. Additionally, I am running 50mm rear wheel spacers to equalize the stance front to rear.

The following users liked this post:
madduck (05-30-2016)
03-27-2014, 07:28 AM
#2
How does it all work?
MPG's: It is the Ecoboost motor with 3.55 gears currently. The 2.5" of leveling I got out of this kit and these tires/wheels compared to my stock 20" tires/wheels lost me between 10%-20% fuel economy. Somewhere around 10% on the highway and 20% in the city. Granted, these numbers are off a bit due to the extremely bad winter we've had . . . so i'll track it a little more as warmer weather is hopefully around the corner. If you want more info on the weight differences let me know, I have an excel spread sheet that tracks the weight and inertia differences of different tire packages. BTW, I'm running 5* tuning right now and the shifts are perfect with the larger than stock tires, the shifts always seemed to delay a little too long with the factory tires. I have a few other tuners tunes as well, but Mike's 93 octane street/tow tune has returned the best mpg's so that's what i'm running and I love it. Note: I just changed my plugs yesterday due to an increasingly rough idle. I found a cracked insulator and a loose connector, I believe these may be a culprit to my fuel economy, I will post back once I get some more gas through the truck.
Power: No shortage of power around town with these tires. Accelerating once at 60mph as in changing lanes on the interstate, I can feel that i'm "down on power", but its still just as good as stock, just not as crisp as i'm used to. I'm gonna locate a raptor rear axle this summer hopefully and run w/the 4.10's in the rear for a while and see how it feels vs the change in fuel economy . . .then i'll decide if i change the rear back to a 3.55, or change the front to the 4.10 . . . i think i'll go the 4.10 route cause i'm sure it will run amazingly. I'll let you guys know.
Towing: Like I said, I pulled a 6'X12' enclosed uhaul trailer weighing in at 4500-5000lbs from Indy to Cleveland last weekend. I ran 70-75mph the whole time, the truck ran in 6th gear which is around 1600rpm for the vast majority of the time. On some inclines it would drop to 5th and run about 2200rpm. I was towing on my "heavy tow" tune because I just wanted to set the cruise and not worry about things. It was able to maintain my set speed and really, it just pulled like a diesel truck, very little complaints. Granted, while merging onto the interstate, i knew I had a trailer, but it was far from slow . . . ive driven some econo-boxes that were slower with just me in them. And the how did it pull? Absolutely great! Ride was comfortable, but there were no goofy sways or wiggles, the trailer only started to whip once on the way home and that was mostly due to the trailer being empty and the road being grooved up pretty bad. MPG's werent' awesome (12.2 to cleveland and 10.5 coming back empty, but with a strong head wind), but i think that had a lot to do with the failing spark plug.
Ride: Amazing!!!! still feel the sharper bumps in the road, but our back roads got ate up this year, running w/my old set up (2.5" leveling kit an these tires/wheels) the truck would judder and step all across the road, 50mph was about all it was comfortable to run. Took it out last night and I was running 60mph while my wife was talking and she never once batted an eye or double checked my speedometer.
Alignment Alignment Alignment!!!! I'm really mad about this, so I will pass this learning on. Go to amazon and get a set of 86250 Caster/Camber adjustment Cams. They are $35 a box, and you will need 2 boxes to do your truck. These aren't absolutly necessary, but lets just say they are. These let you easily set the caster/camber on your truck with the weight on the tires, so the alignment shop can make your geometry spot on. That being said, i took the truck into Ford for a factory alignment, they adjusted my Toe, but did nothing with the rest of my geometry since it was "in spec" . . . that's not what I thought I was paying $100 for . . . had i known that I would have just set the tow myself and saved the $100. I have my caster/camber cams on order, they should be here today. If they show up in time and the weather holds out I will be installing them and performing my own alignment. I will post up how that worked if things work out well. Anyway, even if you don't do your own alignment, it gives the alignment tech an easy way to make adjustments . . . some shops will require these anyway. Here are the numbers you need to shoot for:
Toe: .2* total (this is toe in, front of tires slightly closer together than the rear of the tires)
Camber: -.2* (top of the tire leaning in)
Caster: 4* (top ball joint pivot behind the lower ball joint pivot as viewed from the side of the truck)
The truck will pull to the side with the most positive caster or the most negative camber. Camber wears the tires more, so set the camber equal. If you have consistently crowned roads in your area, you can run .3* or so more Caster on the passengers side to offset the natural pull of the road if you wish.
Last edited by trick76cj5; 03-27-2014 at 07:43 AM. Reason: Added Note on alignment!


The following 2 users liked this post by one2nine:
NPC5515 (08-25-2014),
trick76cj5 (03-30-2014)
The following users liked this post:
trick76cj5 (03-30-2014)
03-27-2014, 09:16 AM
#7
Senior Member

Are Raptor UCAs different than regular F-150 ones? If so can we bolt them on to our leveled trucks with bad angles/ UCAs that touch the spring at full droop? Just wondering, might be a cheaper option than Camburg etc.
Trending Topics
03-28-2014, 07:30 AM
#8
What is interesting is the raptor guys run into the same issues when they run leveling kits as well. Any time you change the limit on the droop of the suspension, you are going to run into issues w/the suspension components interfering with each other. Leveling kits move the range of suspension travel with respect to the frame of the truck. This means if you add a 1" leveling kit you move the tire 1" further from the body. This is cool, it gets you that lifted look that will clear larger tires. The leveling kits don't change how far the strut can travel though, it just moves that range of motion further from the body of the truck. So, now you have leveled your truck 1", the tire moves 1" further from teh body . . . at full compression the tire is now 1" further from the body than it was prior to the level (which is important to clear those larger tires), but now it also wants to droop 1" more, and this is where the issues arise. The suspension binds, you loose droop travel, your total suspension travel becomes limited, and the bind caused by this will destroy suspension and drive line parts if it spends a lot of time there.
Kits like the bilstein leveling kits achieve the lift by changing where the spring mounts to the strut, this effectively means the total travel of your suspension remains within the factory spec, you are just shifting where the truck naturally rides within that factory specified range of motion. Let me see if i can give you a for instance:
If you have a strut with 6" of travel, and in the factory set up, you have 2" of compression travel and 4" of droop travel. If you move the spring 1" higher up the strut, you will lift the truck by some value of 1" or greater depending on the mounting location of the strut compared to the tires . . . but for simplicity, lets say it generates a 1" lift. Now the truck sitting at the new 1" taller ride height will still have 6" of travel, but now you will have 3" of compression and 3" of droop and that travel occurs within the factory specified range of motion for the suspension and drive line parts. This is how the bilstein kit works, and interestingly enough, how the raptor struts are set up, they have 3 different spring mount locations . . .from the factory they come on the lowest ride height setting, i'm running on the middle setting to get a leveled stance.
But, when you use a leveling kit the following happens:
You have 6" of travel, 2" compression and 4" droop. Now all you do is shift the whole strut assembly down 1" to gain your 1" level (again, the geometry generates different results on our trucks, but this is just for simplicity). But, your compression travel is still only 2", and your droop is still 4". But, since you have shifted everything "down" 1", now you are technically drooping the suspension 1" further than the factory spec, this is what generates the issues with the UCA hitting the coil . . . and the extra stress on the upper ball joint which is trying to be ripped out of its socket as well as the CV's being flexed further than spec.
I ran a 2.5" leveling kit on my truck before I did the raptor conversion, I needed it to clear the new tires/rims that I got cause my old ones blew chunks in the snow and i was tired of sliding around all the time. I ran the leveling kit for about 2 months until i finished getting all the raptor parts together. with the leveling kit the ride sucked and my suspension bound and i hated it.
If I were not going to have done the raptor swap, I would have run the bilsteins.
If you don't want more lift than a leveling kit, and you never plan to go the route of a full aftermarket coil over kit to get the increased suspension travel, I would honestly save the money on the aftermarket UCA's and just pick up a set of the bilstein leveling struts, that will be cheaper, the truck will ride much better, and you will get the level w/o pushing the suspension outside of the factor design parameter which means your parts will last a lot longer.
Just my $.02, not trying to be a jerk or anything. The leveling spacers work great if you spend all of your time on the street, and in that instance they are cheaper, so a great option on the right truck. But if a guy is worried about the bind, then I feel there may be a better route to go, this is just what i've learned over the last 15 years of vehicle modification.
Last edited by trick76cj5; 03-28-2014 at 07:42 AM. Reason: Posted too early in the morning, it didn't make sense.
03-28-2014, 08:36 AM
#9
Senior Member
Unfortunately, this will not work, but it would be sweet if it did. Both UCA and LCA's on the raptor suspension are about 3" longer than the F150. A 3" longer UCA on the F150 would kill your suspension geometry.
What is interesting is the raptor guys run into the same issues when they run leveling kits as well. Any time you change the limit on the droop of the suspension, you are going to run into issues w/the suspension components interfering with each other. Leveling kits move the range of suspension travel with respect to the frame of the truck. This means if you add a 1" leveling kit you move the tire 1" further from the body. This is cool, it gets you that lifted look that will clear larger tires. The leveling kits don't change how far the strut can travel though, it just moves that range of motion further from the body of the truck. So, now you have leveled your truck 1", the tire moves 1" further from teh body . . . at full compression the tire is now 1" further from the body than it was prior to the level (which is important to clear those larger tires), but now it also wants to droop 1" more, and this is where the issues arise. The suspension binds, you loose droop travel, your total suspension travel becomes limited, and the bind caused by this will destroy suspension and drive line parts if it spends a lot of time there.
Kits like the bilstein leveling kits achieve the lift by changing where the spring mounts to the strut, this effectively means the total travel of your suspension remains within the factory spec, you are just shifting where the truck naturally rides within that factory specified range of motion. Let me see if i can give you a for instance:
If you have a strut with 6" of travel, and in the factory set up, you have 2" of compression travel and 4" of droop travel. If you move the spring 1" higher up the strut, you will lift the truck by some value of 1" or greater depending on the mounting location of the strut compared to the tires . . . but for simplicity, lets say it generates a 1" lift. Now the truck sitting at the new 1" taller ride height will still have 6" of travel, but now you will have 3" of compression and 3" of droop and that travel occurs within the factory specified range of motion for the suspension and drive line parts. This is how the bilstein kit works, and interestingly enough, how the raptor struts are set up, they have 3 different spring mount locations . . .from the factory they come on the lowest ride height setting, i'm running on the middle setting to get a leveled stance.
But, when you use a leveling kit the following happens:
You have 6" of travel, 2" compression and 4" droop. Now all you do is shift the whole strut assembly down 1" to gain your 1" level (again, the geometry generates different results on our trucks, but this is just for simplicity). But, your compression travel is still only 2", and your droop is still 4". But, since you have shifted everything "down" 1", now you are technically drooping the suspension 1" further than the factory spec, this is what generates the issues with the UCA hitting the coil . . . and the extra stress on the upper ball joint which is trying to be ripped out of its socket as well as the CV's being flexed further than spec.
I ran a 2.5" leveling kit on my truck before I did the raptor conversion, I needed it to clear the new tires/rims that I got cause my old ones blew chunks in the snow and i was tired of sliding around all the time. I ran the leveling kit for about 2 months until i finished getting all the raptor parts together. with the leveling kit the ride sucked and my suspension bound and i hated it.
If I were not going to have done the raptor swap, I would have run the bilsteins.
If you don't want more lift than a leveling kit, and you never plan to go the route of a full aftermarket coil over kit to get the increased suspension travel, I would honestly save the money on the aftermarket UCA's and just pick up a set of the bilstein leveling struts, that will be cheaper, the truck will ride much better, and you will get the level w/o pushing the suspension outside of the factor design parameter which means your parts will last a lot longer.
Just my $.02, not trying to be a jerk or anything. The leveling spacers work great if you spend all of your time on the street, and in that instance they are cheaper, so a great option on the right truck. But if a guy is worried about the bind, then I feel there may be a better route to go, this is just what i've learned over the last 15 years of vehicle modification.
