
2011 plug and play remote start
 12-08-2011, 08:47 PM
#161
Member

Join Date: Oct 2011
Location: PA
Posts: 34
Likes: 0
Received 0 Likes
on
0 Posts
Optional Activation Methods-Single Press & HOld/Double Press
The 2-way remote start and vehicle security system comes pre-programmed to start the vehicle when the X button on the 2 way remote transmitter is pressed 2 times. The 2 way remote start may be programmed to activate by pressing and holding the X button on the 2 way remote transmitter by following these instructions.
1. Open the driver's door and enter the vehicle, close the driver's door.
2. Ensure the vehicle is in Park and the brake pedal is not depressed.
3. Turn the vehicle ignition to the ON position.
4. Press the X button on the 2 way transmitter 3 times within 5 seconds. The horn will chirp 1 time, indicating that the remote start system will now start with a "press and hold".
5. Turn the vehicle ignition to the OFF position to exit the programming mode.
6. Repeat steps 1-5 to return the vehicle to the factory setting.
----1 chirp= Press and Hold to start
----2 chirps=Double press to start
FYI.....the X in my instructions is the remote start button. I just don't have that little logo on my computer
It was easier typing it all out vs. going upstairs, scanning, etc etc.
 12-08-2011, 09:04 PM
#162
Member
Join Date: Oct 2011
Location: PA
Posts: 34
Likes: 0
Received 0 Likes
on
0 Posts
You just have to be nice and know what your talking about. I convinced them that it was cheaper to not bang me for turning it on versus the future business they would lose. I made it clear that I have zero hesitation in driving 15 miles to the next nearest dealership for any and all money that I may spend in the future. The sales guy I purchased the truck from was behind me as well.
It's not like I was asking them to change their fee for changing the oil or something that is routine.
It's not like I was asking them to change their fee for changing the oil or something that is routine.
12-08-2011, 09:16 PM
#163
Just Another Member


@169stang: Many thanks for the instructions!

 12-09-2011, 07:07 PM
#166
Junior Member
Join Date: Nov 2011
Location: Minnesota
Posts: 13
Likes: 0
Received 0 Likes
on
0 Posts
Here is a write up for how I installed my BT4Z-19G364-A. For those playing along at home, this is the remote start with the 2 way, separate key fob, but no additional alarm.
First thing I did was stick the antenna onto my windshield. The video in this thread recommends mounting it lower for better range, but there is no way I'm going to have that ugly thing hanging out in the middle of my windshield.
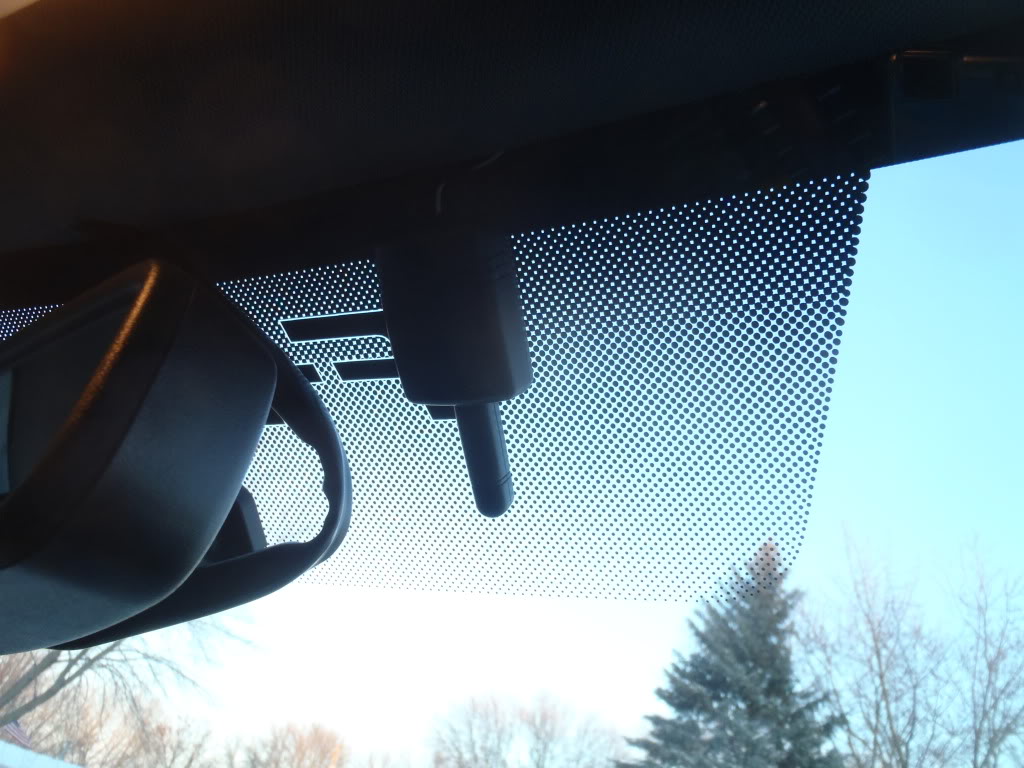
Next, I started running the antenna wire (which is the flat ribbon with 5 wires) up along my head liner. It is super easy to do, just pull down on it a little bit and the wire will slip right in.
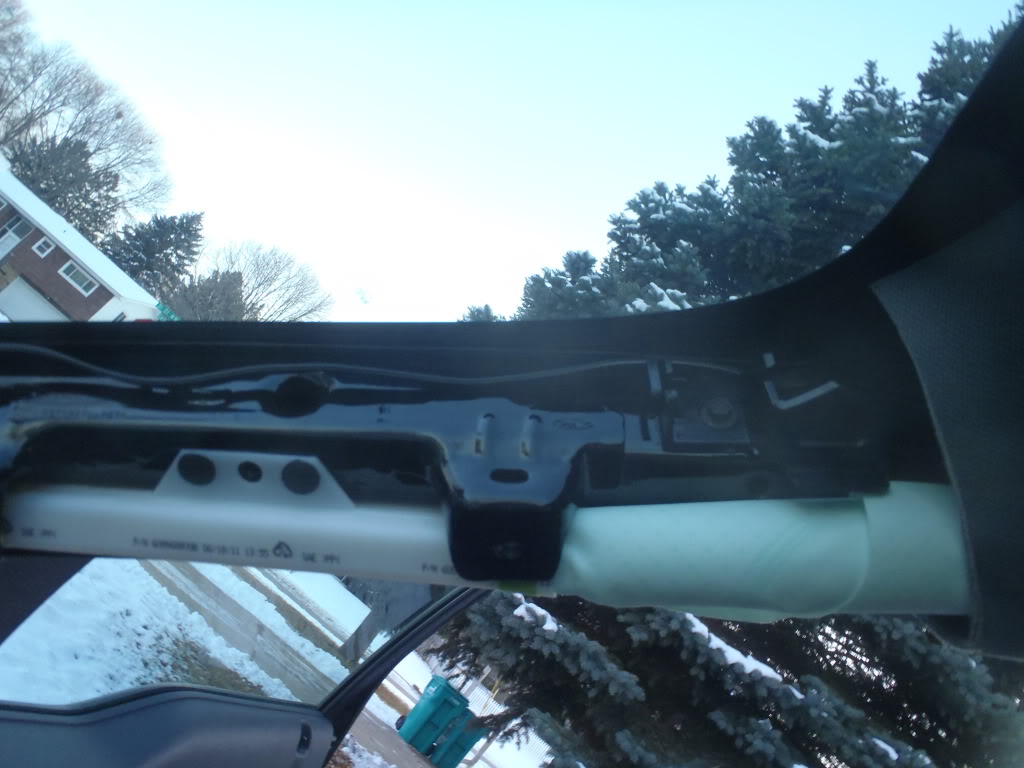
As mentioned previously, it is well worth your time to pull the trim off the A-piller and route the antenna cable down through it so that you don't interfere with proper airbag deployment. Pop the two little covers off of your "oh " handle and remove the bolts behind them. You'll need a 7mm socket or nut driver. Once they are out, give handle a tug up, and away from your dash.
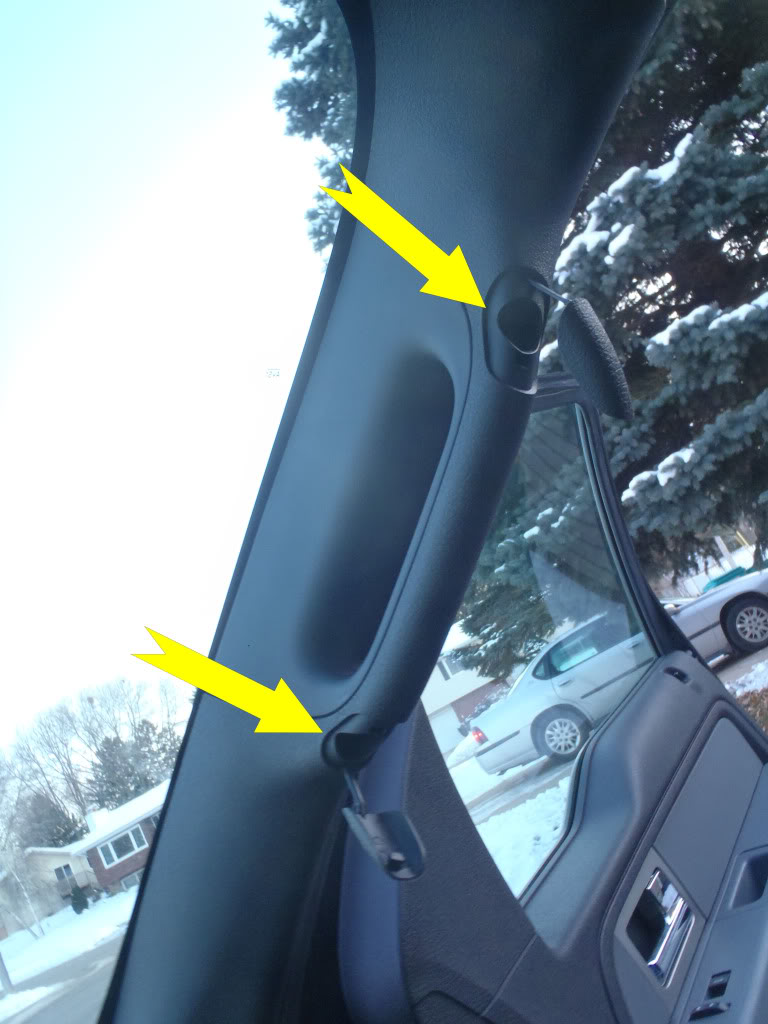
Route cable along the A-piller and down behind your glove box. I recommend not messing with, or really touching, that airbag at all.
First thing I did was stick the antenna onto my windshield. The video in this thread recommends mounting it lower for better range, but there is no way I'm going to have that ugly thing hanging out in the middle of my windshield.
Next, I started running the antenna wire (which is the flat ribbon with 5 wires) up along my head liner. It is super easy to do, just pull down on it a little bit and the wire will slip right in.
As mentioned previously, it is well worth your time to pull the trim off the A-piller and route the antenna cable down through it so that you don't interfere with proper airbag deployment. Pop the two little covers off of your "oh
" handle and remove the bolts behind them. You'll need a 7mm socket or nut driver. Once they are out, give handle a tug up, and away from your dash.Route cable along the A-piller and down behind your glove box. I recommend not messing with, or really touching, that airbag at all.
12-09-2011, 07:07 PM
#167
Junior Member
Join Date: Nov 2011
Location: Minnesota
Posts: 13
Likes: 0
Received 0 Likes
on
0 Posts
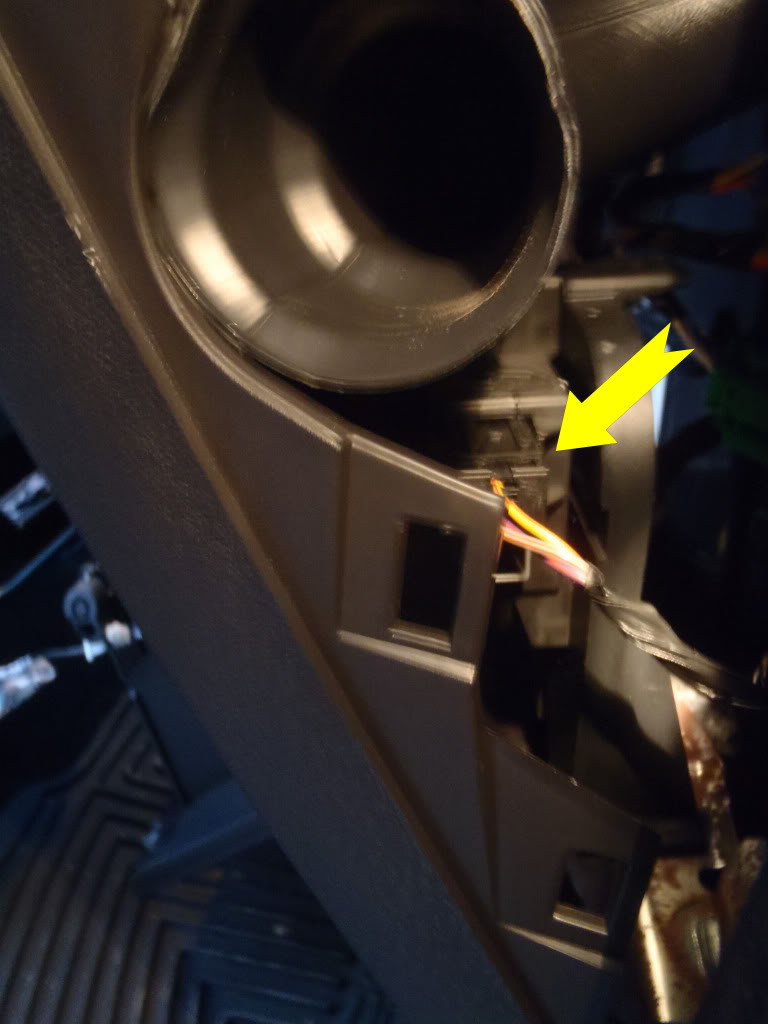
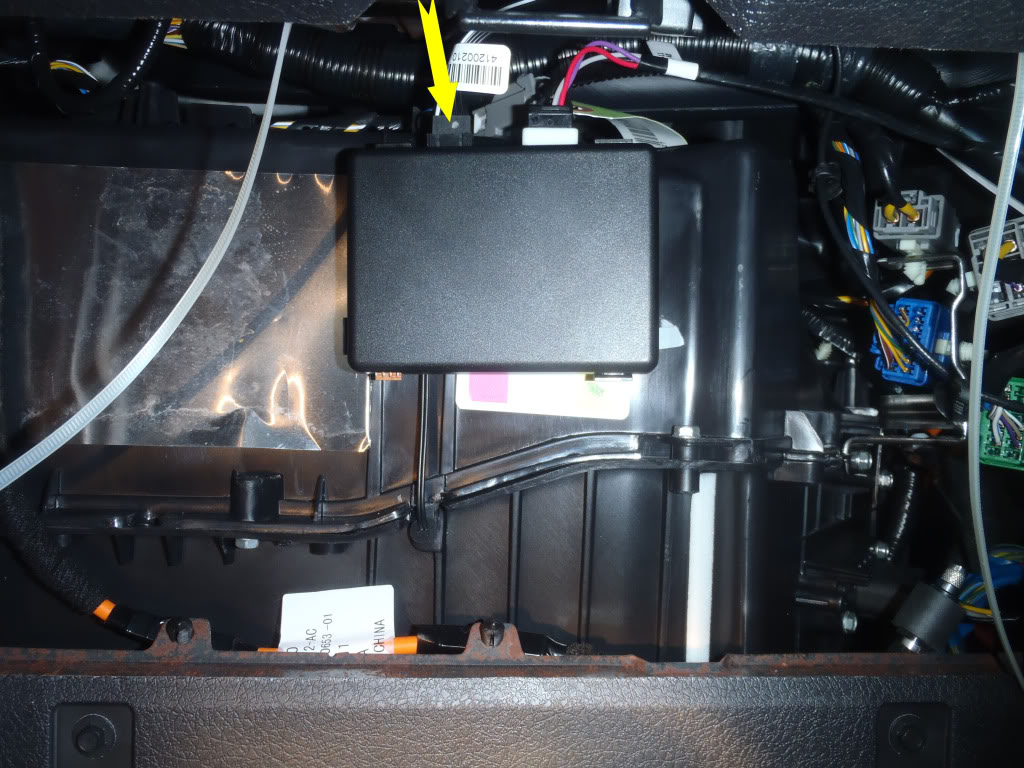
Pop the passenger side access cover off to get at the tire pressure monitoring system (TPMS) plug. When you first pop the cover off, it should look like this, and the arrow is pointing at the TPMS plug.
Unplug the TPMS plug. I have conveniently labeled the TPMS socket as "1" and the remote start socket as "2".
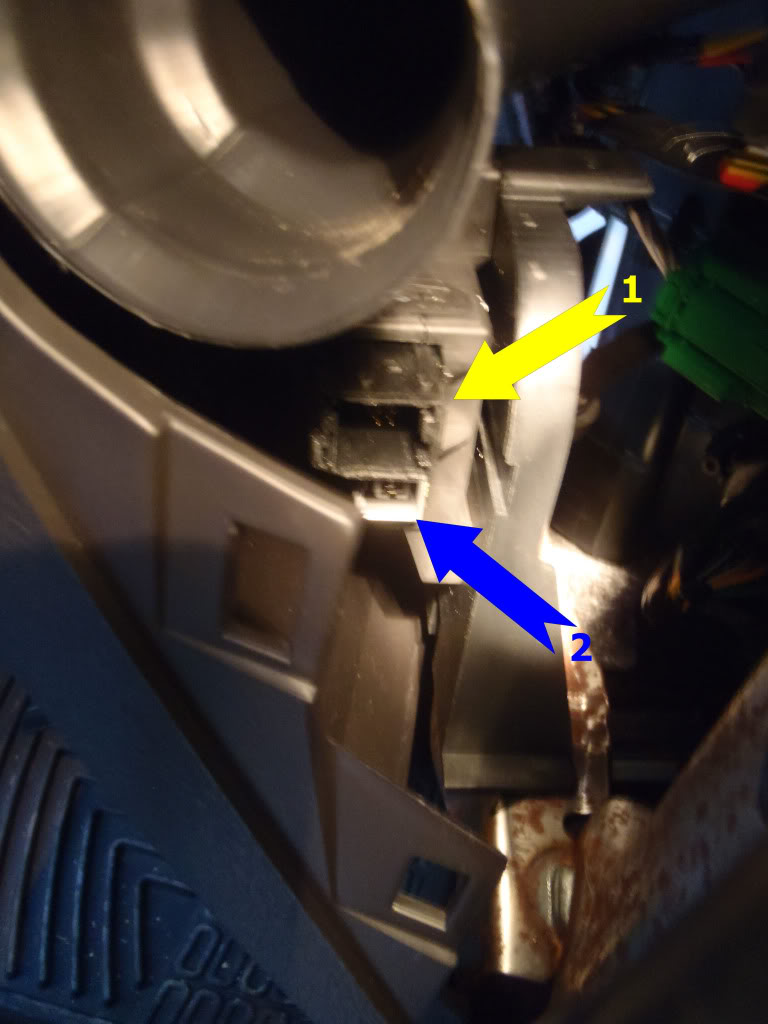
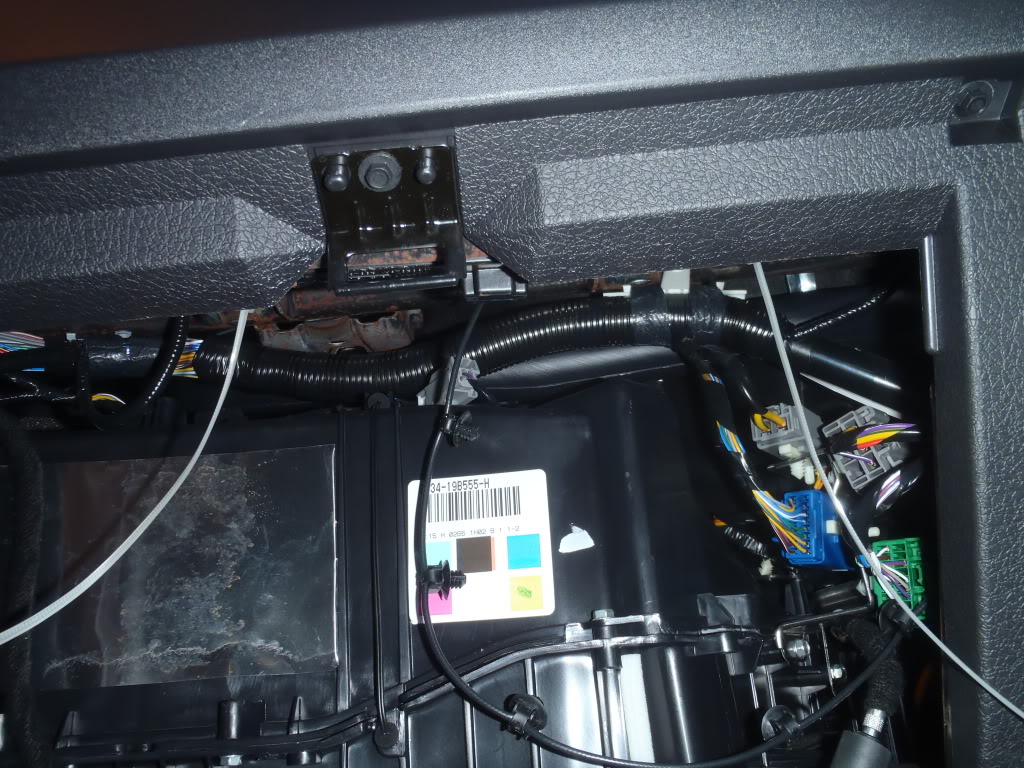
Next, get the rest of hardware installed. I started with the long rectangular box that mounts above the glove box. The wire with all of the little tie downs plugs into this box, and it is easier to plug it in before zip tying the box into place. Obviously I cut the ends off my zip ties after the photo was taken. The wire coming out of this box will need to get run over and get plugged into the remote start socket (labeled "2" in the above picture). I really have no idea why they gave us so many wire anchors, but I only ended up using one of them.
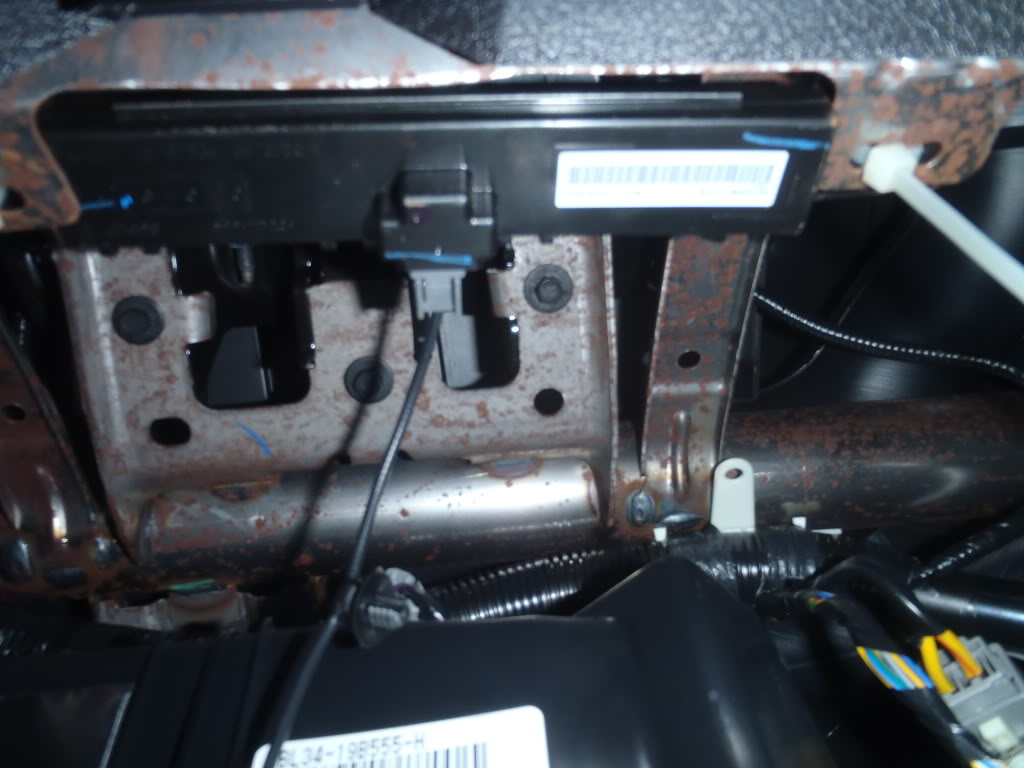
The last thing to mount is the square-ish box that looks like this: Pay attention to the labels again
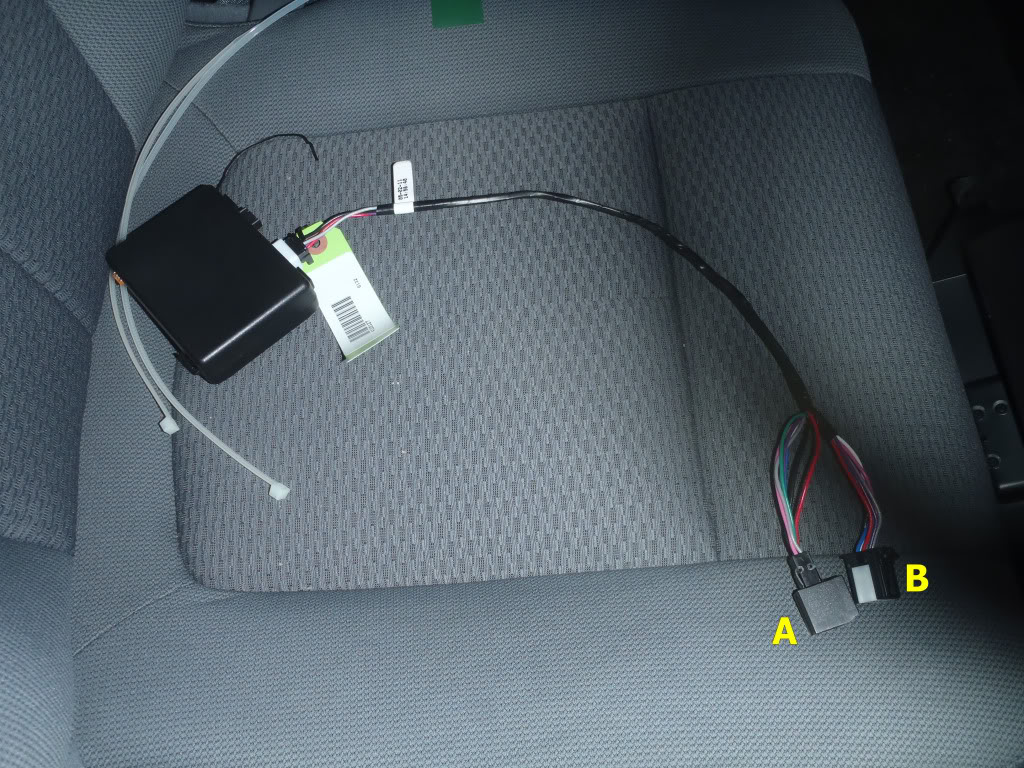
I simply used the supplied dual-lok to stick it to whatever is directly behind the glove box. Yes, there is clearance for it. Also, the yellow arrow is indicating where the cable from the antenna on your windshield needs to get plugged in.
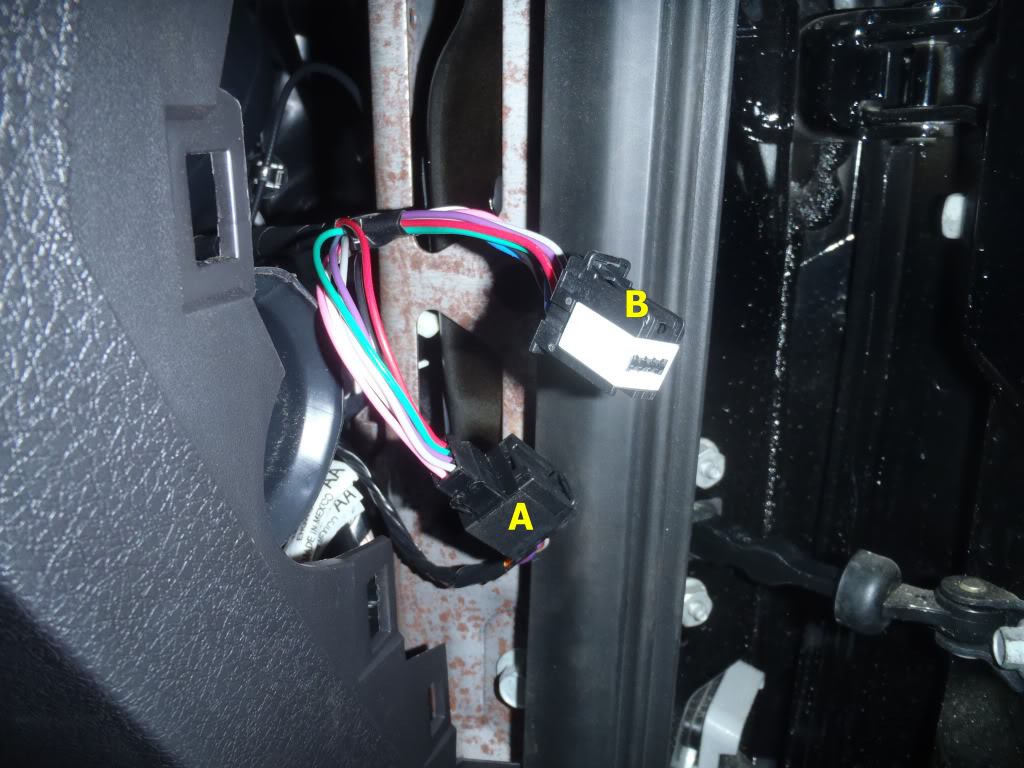
Take the cable with ends labeled "A" and "B", and route it over to the TPMS socket (labeled "1" somewhere up above). "A" is a female socket, and the original TPMS plug that you unhooked a while back gets plugged in there. "B" is a male plug and goes into the original TPMS socket "1". (not shown)
That's it. Bundle up and tie down all your wiring, button up your trim, and head on over to your dealership to get it activated. Hopefully your service guys won't be retarded like mine and say that "it is going to take too long to do tonight, so come back in the morning. "
Unplug the TPMS plug. I have conveniently labeled the TPMS socket as "1" and the remote start socket as "2".
Next, get the rest of hardware installed. I started with the long rectangular box that mounts above the glove box. The wire with all of the little tie downs plugs into this box, and it is easier to plug it in before zip tying the box into place. Obviously I cut the ends off my zip ties after the photo was taken. The wire coming out of this box will need to get run over and get plugged into the remote start socket (labeled "2" in the above picture). I really have no idea why they gave us so many wire anchors, but I only ended up using one of them.
The last thing to mount is the square-ish box that looks like this: Pay attention to the labels again
I simply used the supplied dual-lok to stick it to whatever is directly behind the glove box. Yes, there is clearance for it. Also, the yellow arrow is indicating where the cable from the antenna on your windshield needs to get plugged in.
Take the cable with ends labeled "A" and "B", and route it over to the TPMS socket (labeled "1" somewhere up above). "A" is a female socket, and the original TPMS plug that you unhooked a while back gets plugged in there. "B" is a male plug and goes into the original TPMS socket "1". (not shown)
That's it. Bundle up and tie down all your wiring, button up your trim, and head on over to your dealership to get it activated. Hopefully your service guys won't be retarded like mine and say that "it is going to take too long to do tonight, so come back in the morning. "
12-09-2011, 11:00 PM
#169
Member
Join Date: Oct 2011
Location: PA
Posts: 34
Likes: 0
Received 0 Likes
on
0 Posts
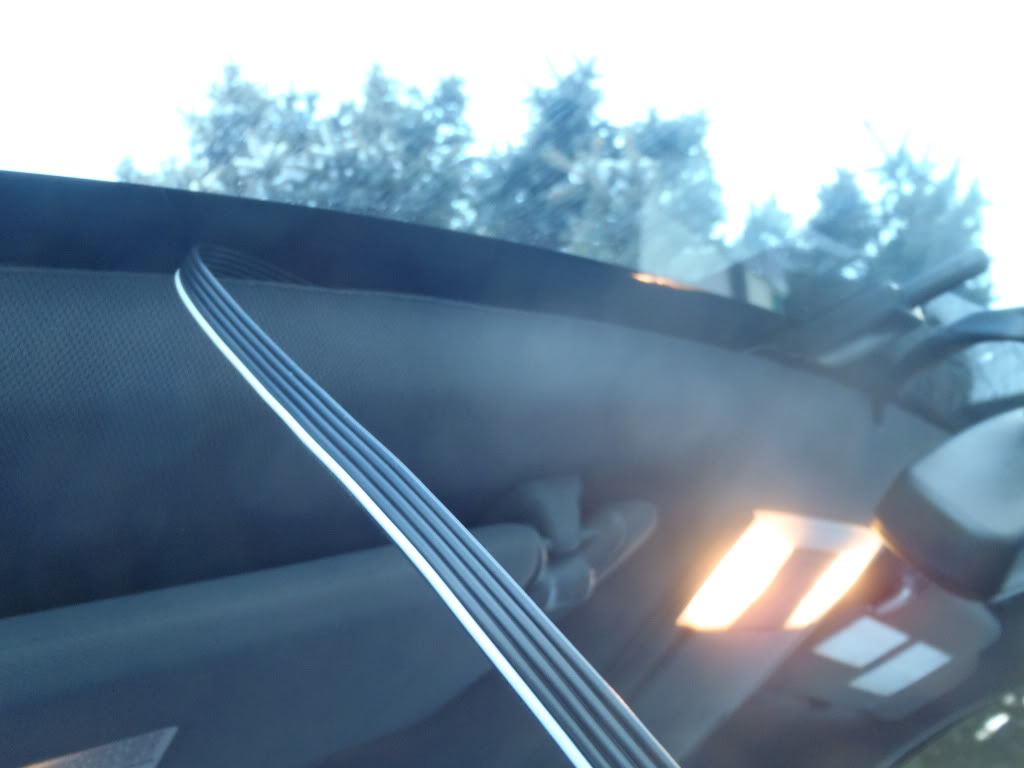
Instead of removing the a pillar, you can just slide the wire in the little gap at the top of the a pillar and run the wire down the channel behind the weather stripping that removes and replaces easily. Very simple, with no issue.
12-12-2011, 03:29 PM
#170
I bought the BC3Z-19G364-A kit with the two keys. I installed the 5 min kit. How long does it actually take to cut (2) keys and activate the remote start Through the computer? When you talk to them (Dealer) they make it sound like it is rocket science.... And want to charge me $200.00 +.
Last edited by BluefireTT; 12-12-2011 at 03:51 PM.