When you click on links to various merchants on this site and make a purchase, this can result in this site earning a commission. Affiliate programs and affiliations include, but are not limited to, the eBay Partner Network.
After deciding to take on this project and not having much luck finding answers I decided to jump in and take this on and do a simple write up for anyone wanting to do this mod. I had ordered a LED replacement that didn't fit at all and scratched the paint around the screw holes which ticked me off. so i decided to return it and get the raptor light.Ive taken allot from forums over the years. The amount of knowledge is overwhelming at times and extremely valuable. This is my fourth F-150 and figured I would make a contribution for anyone who had the questions I did previous to tackling this.
First off this is somewhat of a plug and play mod pre 2013 trucks with the exception of needing to run a fourth wire to activate the running light portion of the light. Ive read that many post 2013's have this fourth wire in the current plug however many have found it to be in-op or not have the wire at all. My truck did not have this fourth wire. While the connector will plug right in and function as it should you will need to run a separate wire to either a taillight,fuse panel with a tap or to the headlight switch (which is what I did) to activate the running lights. If anyone has some insight into why this works on some trucks and why it doesn't please post in the thread. There still doesn't seem to be a definitive answer to this
***This is simply a guide for installing a Raptor light and how I chose to do it to my own vehicle. I cannot guarantee or hold any responsibility for your own installation on your specific truck***
My truck is a 2014 XLT SuperCrew 3.7 2wd
Another benefit to this light is the improved gasket seal. Its much more beefier the the previous used gaskets from ford. So for those of you with leaking third brake lights I can see this as a big benefit.
The part number from ford is:AL3Z-13A613-G
I purchased mine on eBay from Quirk Ford for $112.00. Im sure you could locate a used one on a Raptor forum or even eBay for a cheaper price
First off start with opening your rear sliding window and removing your old brake light. Remove at least one if not both of the headliner retaining clips. I decided to go in through the rear window and push down around the tab. Trying from the inside of the truck with a interior tool could either damage the headliner or the tab.
Next remove the side access panel near the headlight switch and push out the headlight switch. Work around the switch and wiggle it. It will eventually pop right out. Disconnect the switch. On my truck I used the white/purple wire. Run a wire from the switch down along the sill plates and back up to the third brake light. I used loom to protect the wire. You could also find another switched source however i felt this would be the best way especially with the extremely low amp draw of the three LED's.
Splice into this wire with either a tap or ideally with some solder and shrink tubing. Tuck the wire back into the original factory loom and reconnect your headlight switch. Make sure your switch stays off to avoid grounding out the wire while you install the new light. Remember this is sort of a permanent mod so take your time and do it right the first time. You can't go wrong with a little solder,loom and shrink tubing. Splices can come loose as well as electrical tape.
From the bed of the truck reach through the rear window, above the headliner and locate the harness and plug for your existing brake light. Push out the tab to release the harness. This will give you much better access to unplug and plug in the raptor light.
On the new raptor light locate the black/white wire. This is the running light wire that you will need to connect to the wire you just ran from your switched power source. Cut the wire at some point between the connector and the light. Insert a quick connector for servicing reasons.
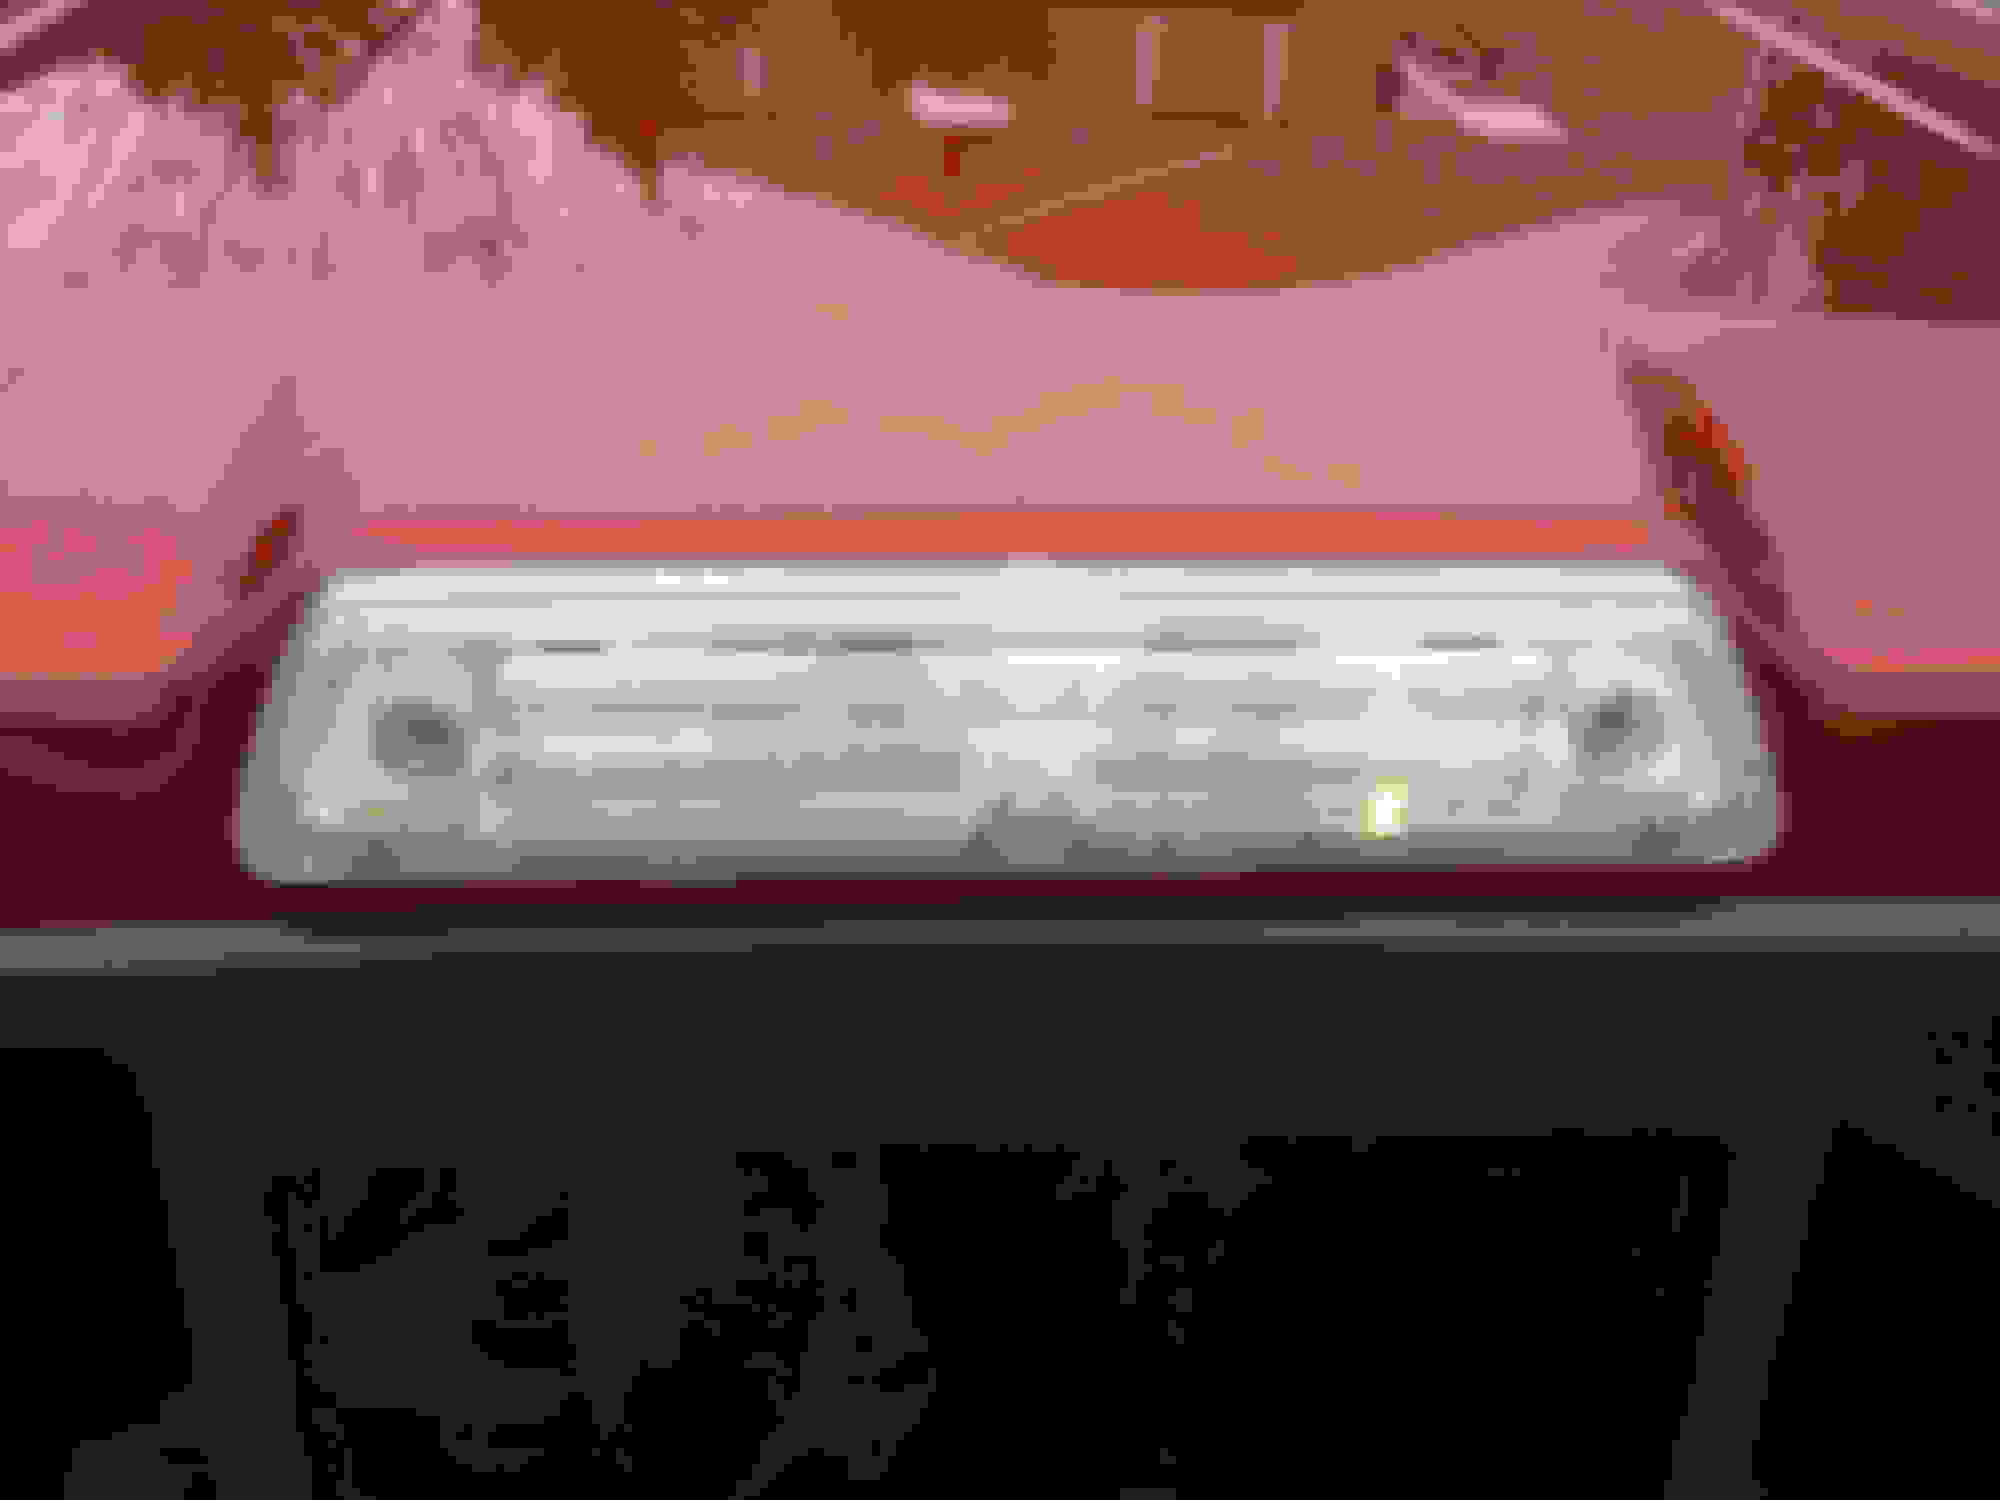
On the new switched 12 volt wire that you just ran, connect another quick connect and your ready to install your light. Plug in your factory connector and re-attatch the t clip to the body of the truck. Plug in your running light wire, and screw down the new light. BTW You can see the scratches around the screw holes.
This may be obvious but don't buy any of those full LED replacement third brake lights off of eBay. I had picked one from a seller that had 100% feedback and also went with the more expensive light. Was a complete disaster.
Last edited by rrenz; 01-03-2015 at 07:12 AM.
Reason: Updated pictures
This is so random. I have a March of 2013 XLT SCab and it was plug and play for the running lights. Same deal as my 13 FX4 which i expected it to have it. My XLT is a 4 wheel drive 302a truck with a 6.2... and no other options beyond the E locker. Far from loaded. I did the FX4 first as it has a rear slider snd it was a 10 minute affair. The XLT took more fumbling as it has a solid rear window.
From the research that I've done it is incredibly random. I haven't been able to determine why some have this extra wire and some don't. The only difference that i have noticed is that my truck is an XLT with the 3.7 and is 2wd. From what I've seen i haven't seen this done on any 2wd trucks or 3.7's for that matter.
rrenz...what happened to the roof of your truck. in your pic of the light mount opening it looks like you had a very hard time getting the old light off??
Better be worried about the roof rusting with that Screw driver gouge in the paint. You might want to put a little primer and touch up paint in there to seal it. Cool idea and good write up none the less.

 12-31-2014, 03:38 PM